6.2.0
Release date: 06-14-2024
Test Automation for NER models using LangTest framework, Pre-annotate Visual documents with Text-based Classification Models and Bulk clear prediction labels during annotation with Generative AI Lab - 6.2
The release of Generative AI Lab version 6.2 brings several new features aimed at enhancing user experience and improving platform efficiency.
The first notable feature is the integration of John Snow Labs LangTest framework. Test case generation, test execution, and model testing across various categories are now part of Generative AI Lab. This integration offers data augmentation and seamlessly fits into the project flow of Generative AI Lab, supporting numerous test types and effectively identifying and addressing model issues.
Additionally, users can now pre-annotate visual documents with text-based classification models, enabling the classification of image and PDF documents using over 1500 pre-trained models available in the Models Hub.
Lastly, users can “batch” clear predicted and manually annotated labels, providing greater flexibility and control over the annotation process.
Here are the highlights of this release:
Test Suite Management
A Test Suite represents a collection of tests designed to evaluate your trained model across different scenarios. LangTest is a comprehensive framework for assessing AI language models in the Generative AI Lab, focusing on dimensions such as robustness, representation, and fairness. The framework subjects the models to a series of tests to evaluate their performance in these areas. Through iterative training cycles, the models are continuously improved until they achieve satisfactory results in these tests. This iterative process ensures that the models are well-equipped to handle diverse scenarios and meet essential requirements for reliable and effective language processing.
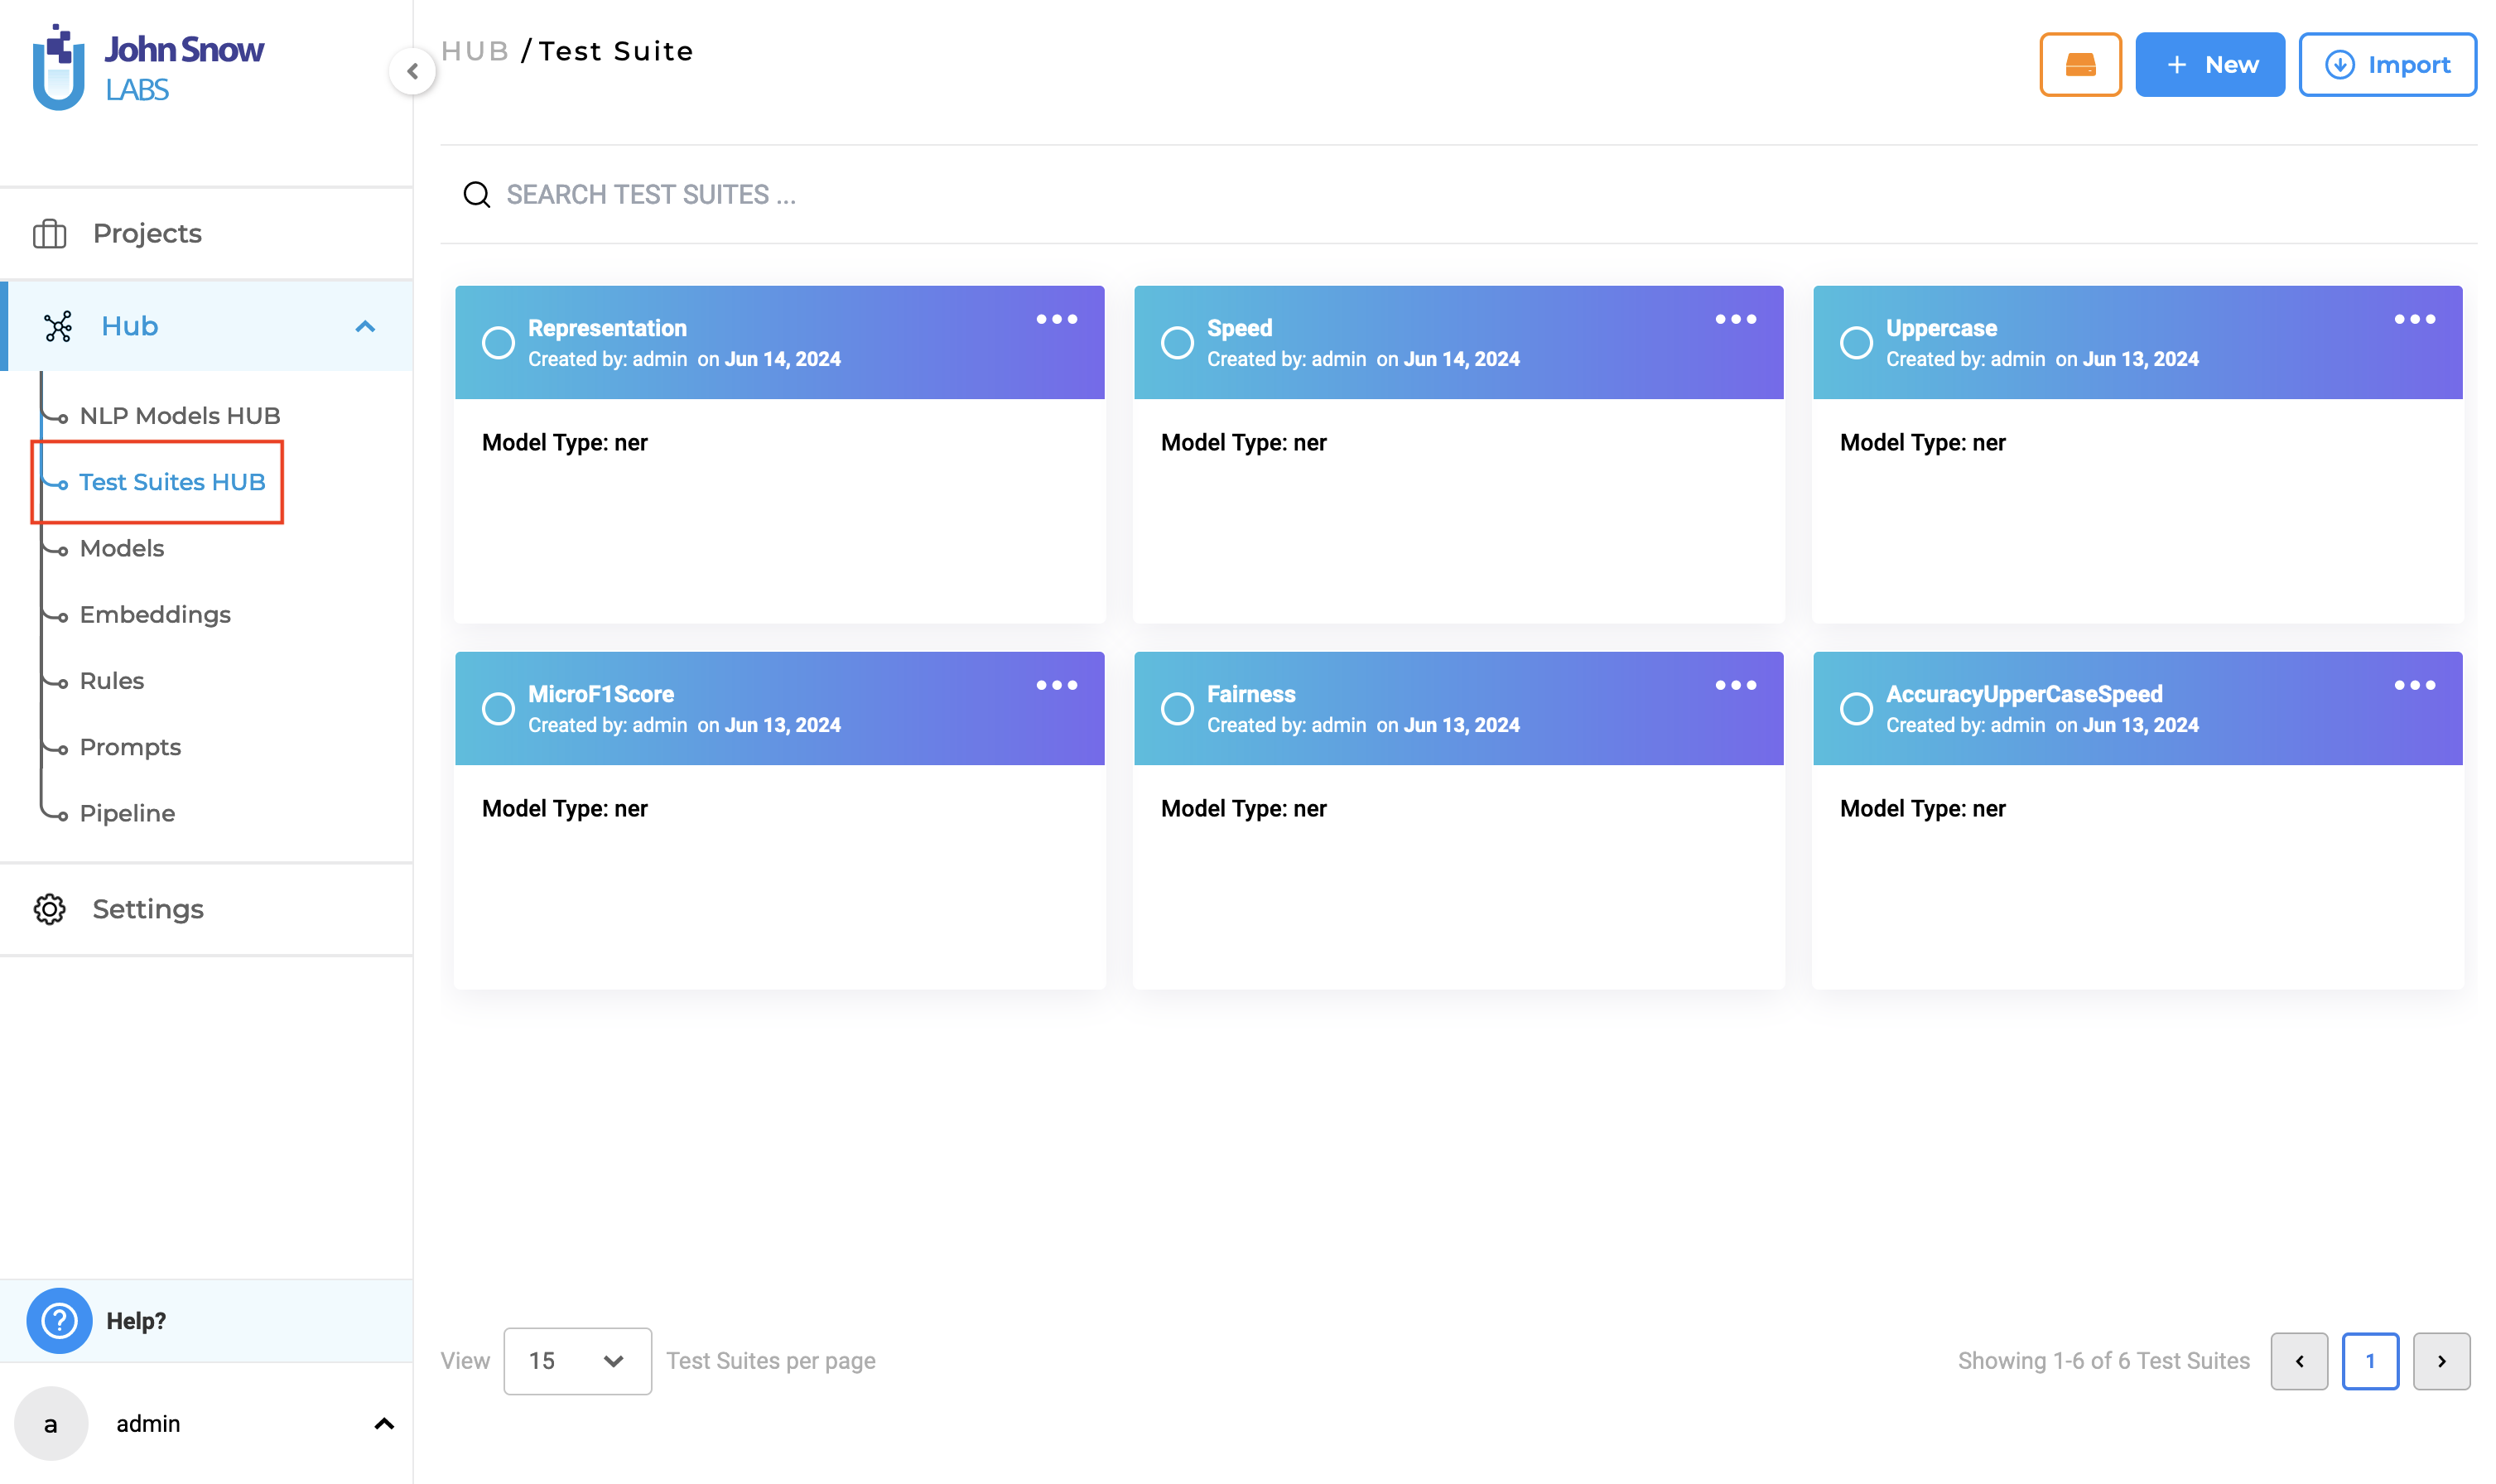
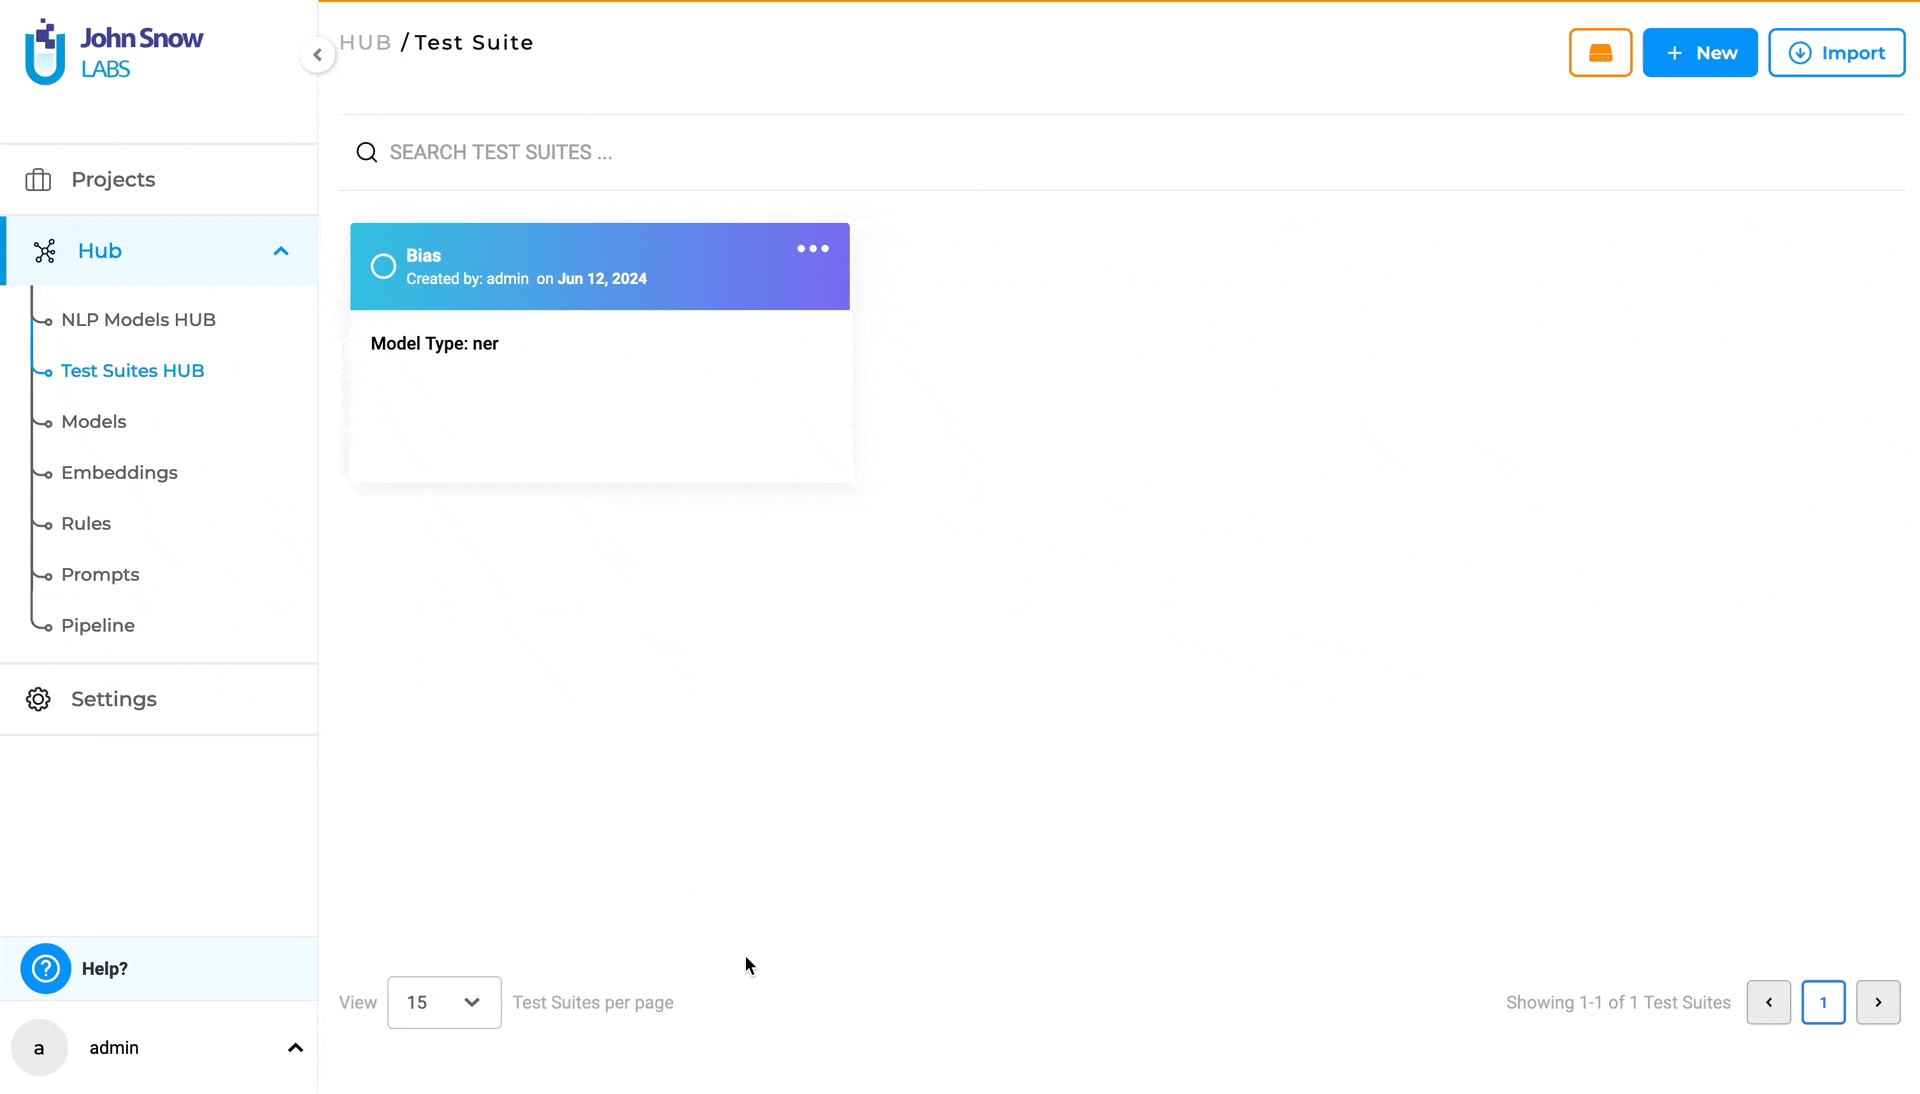
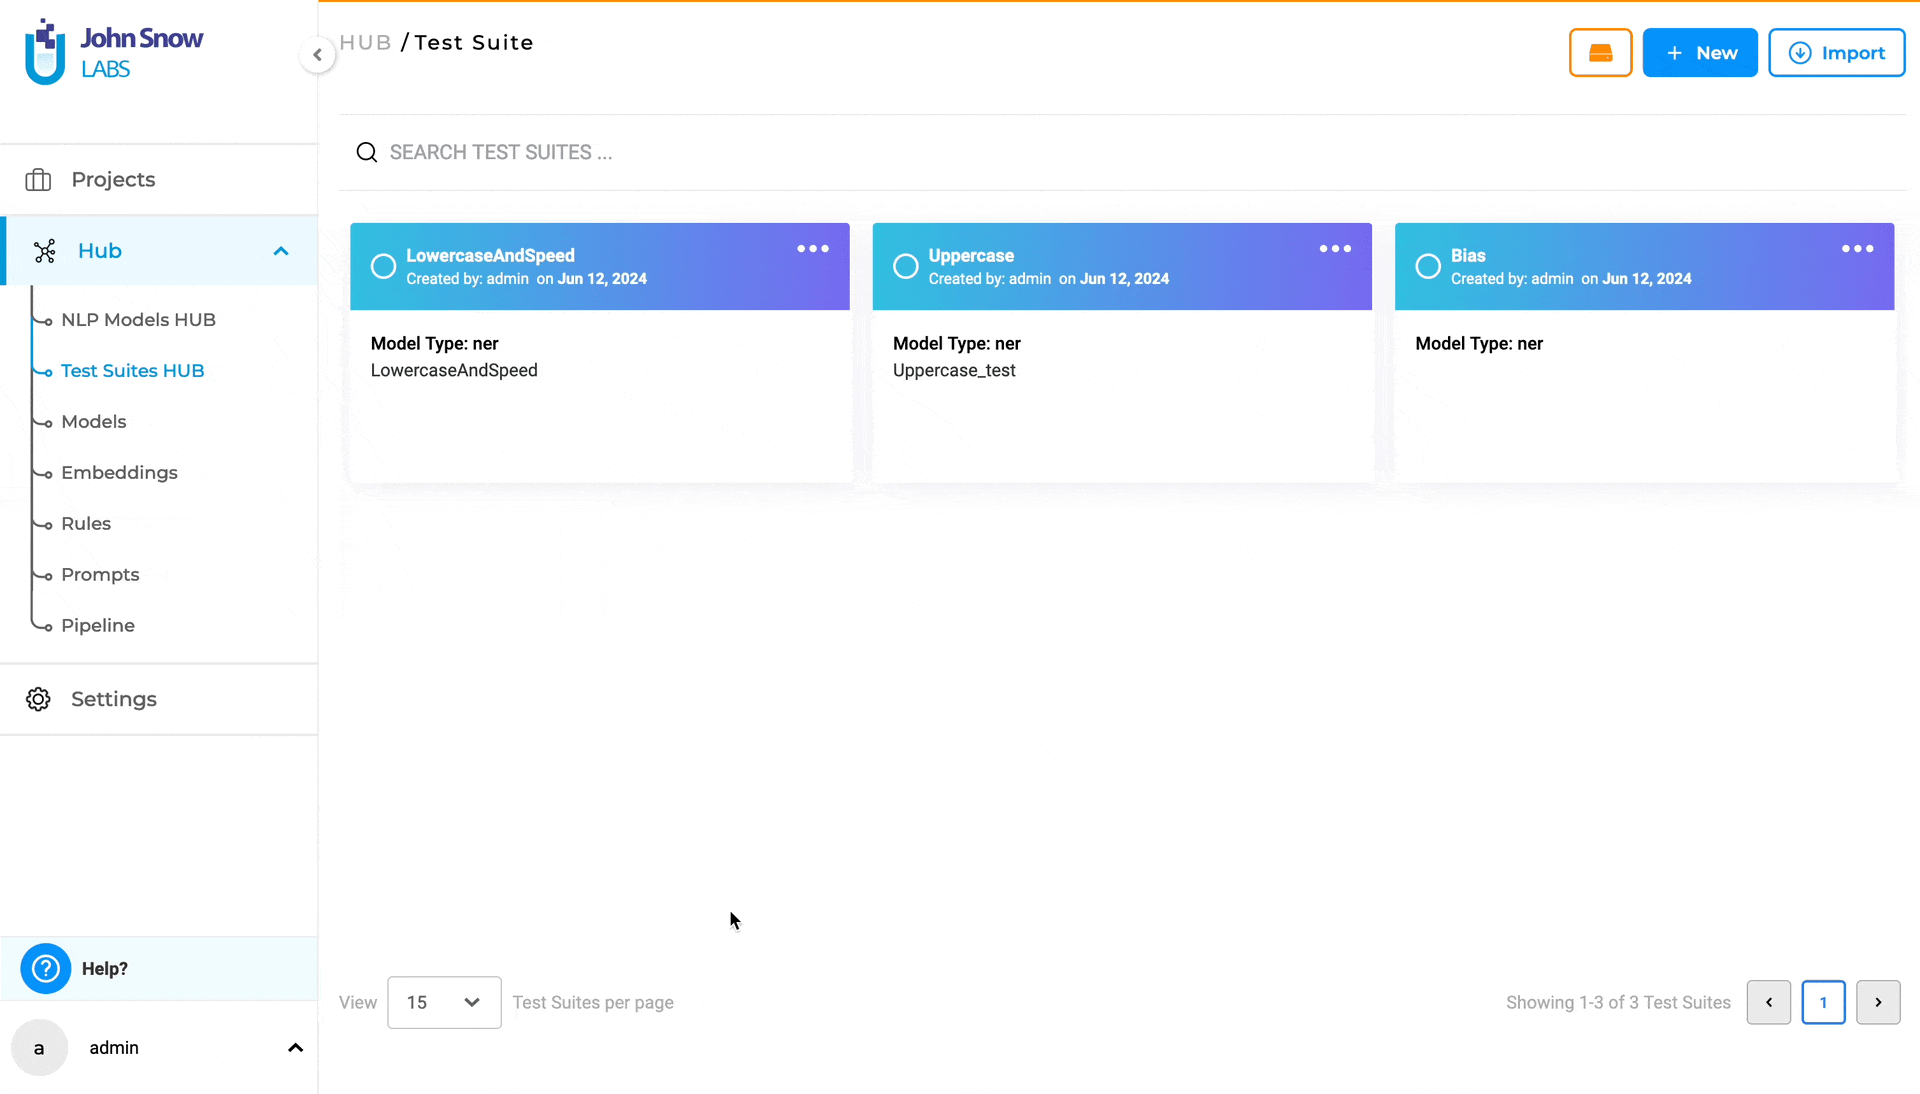
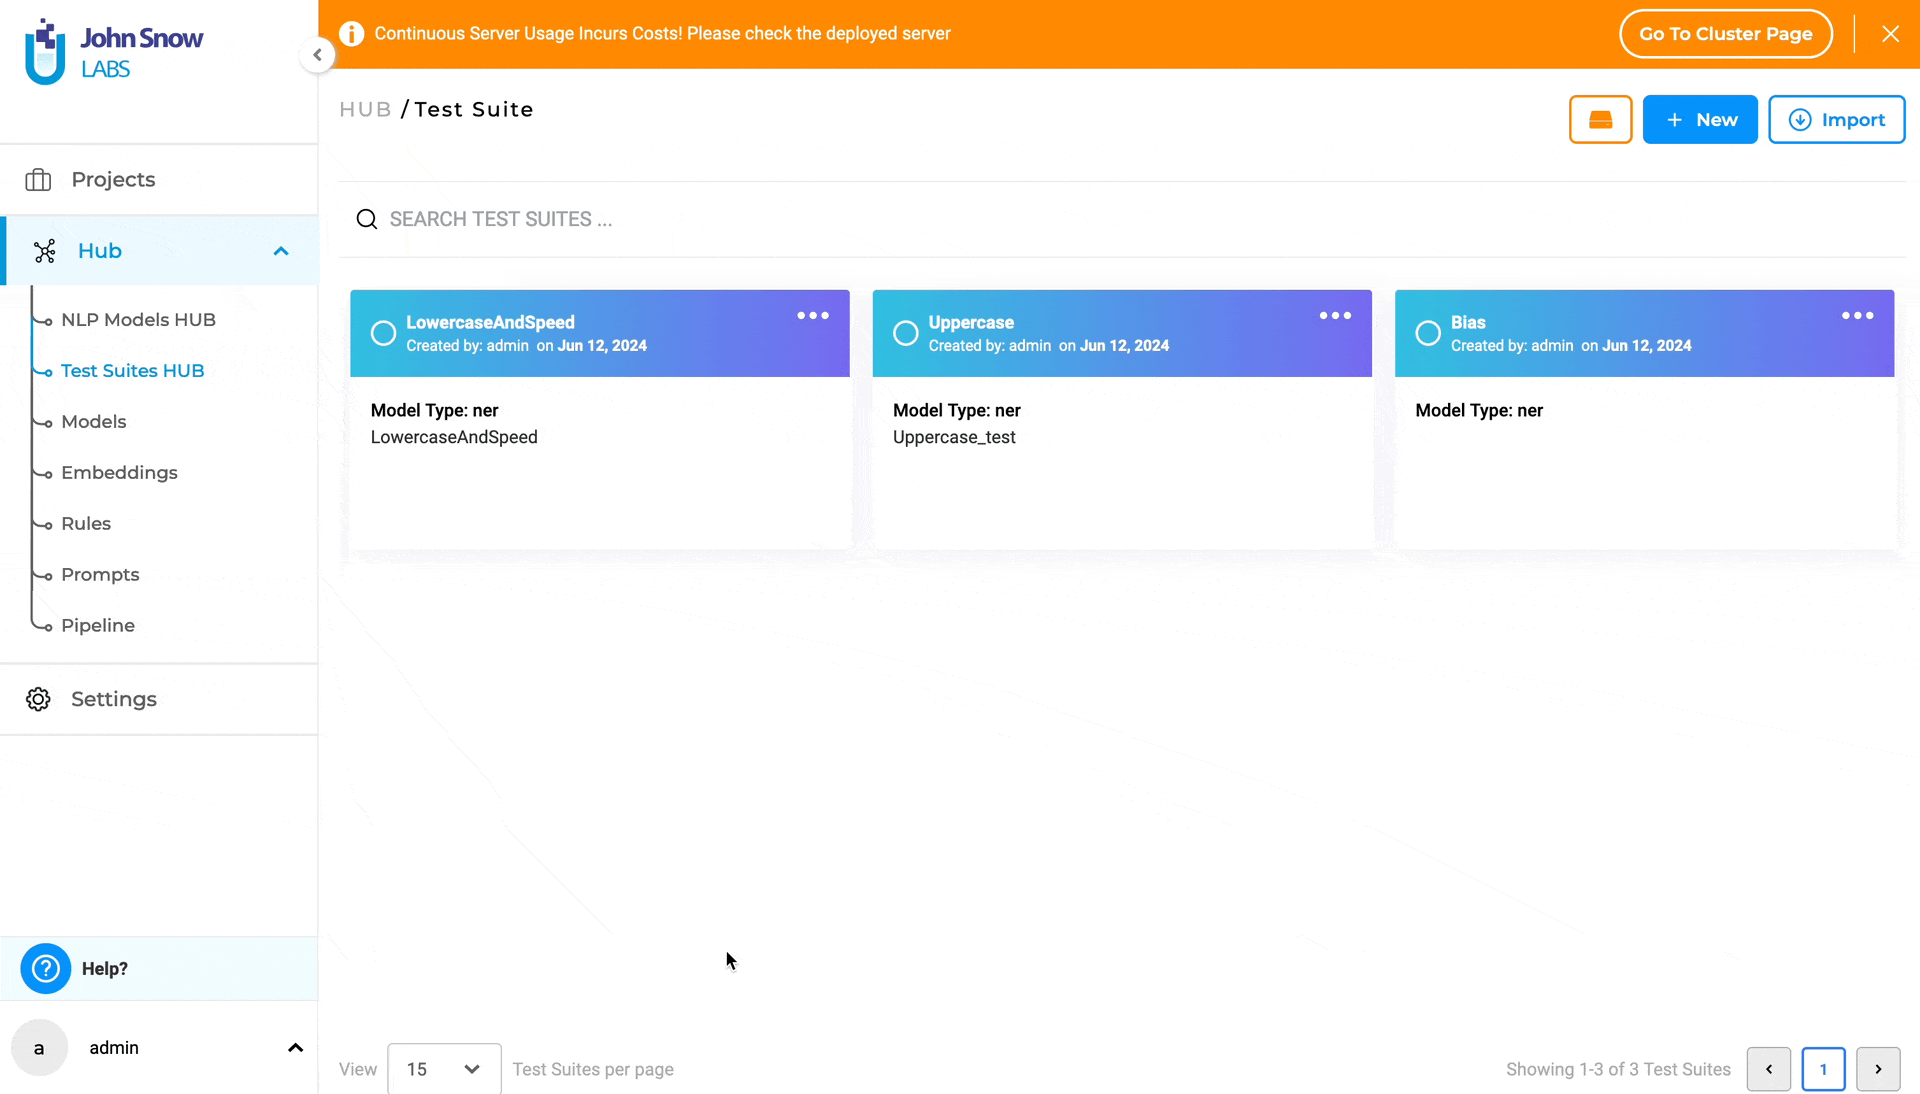
Test Suites HUB
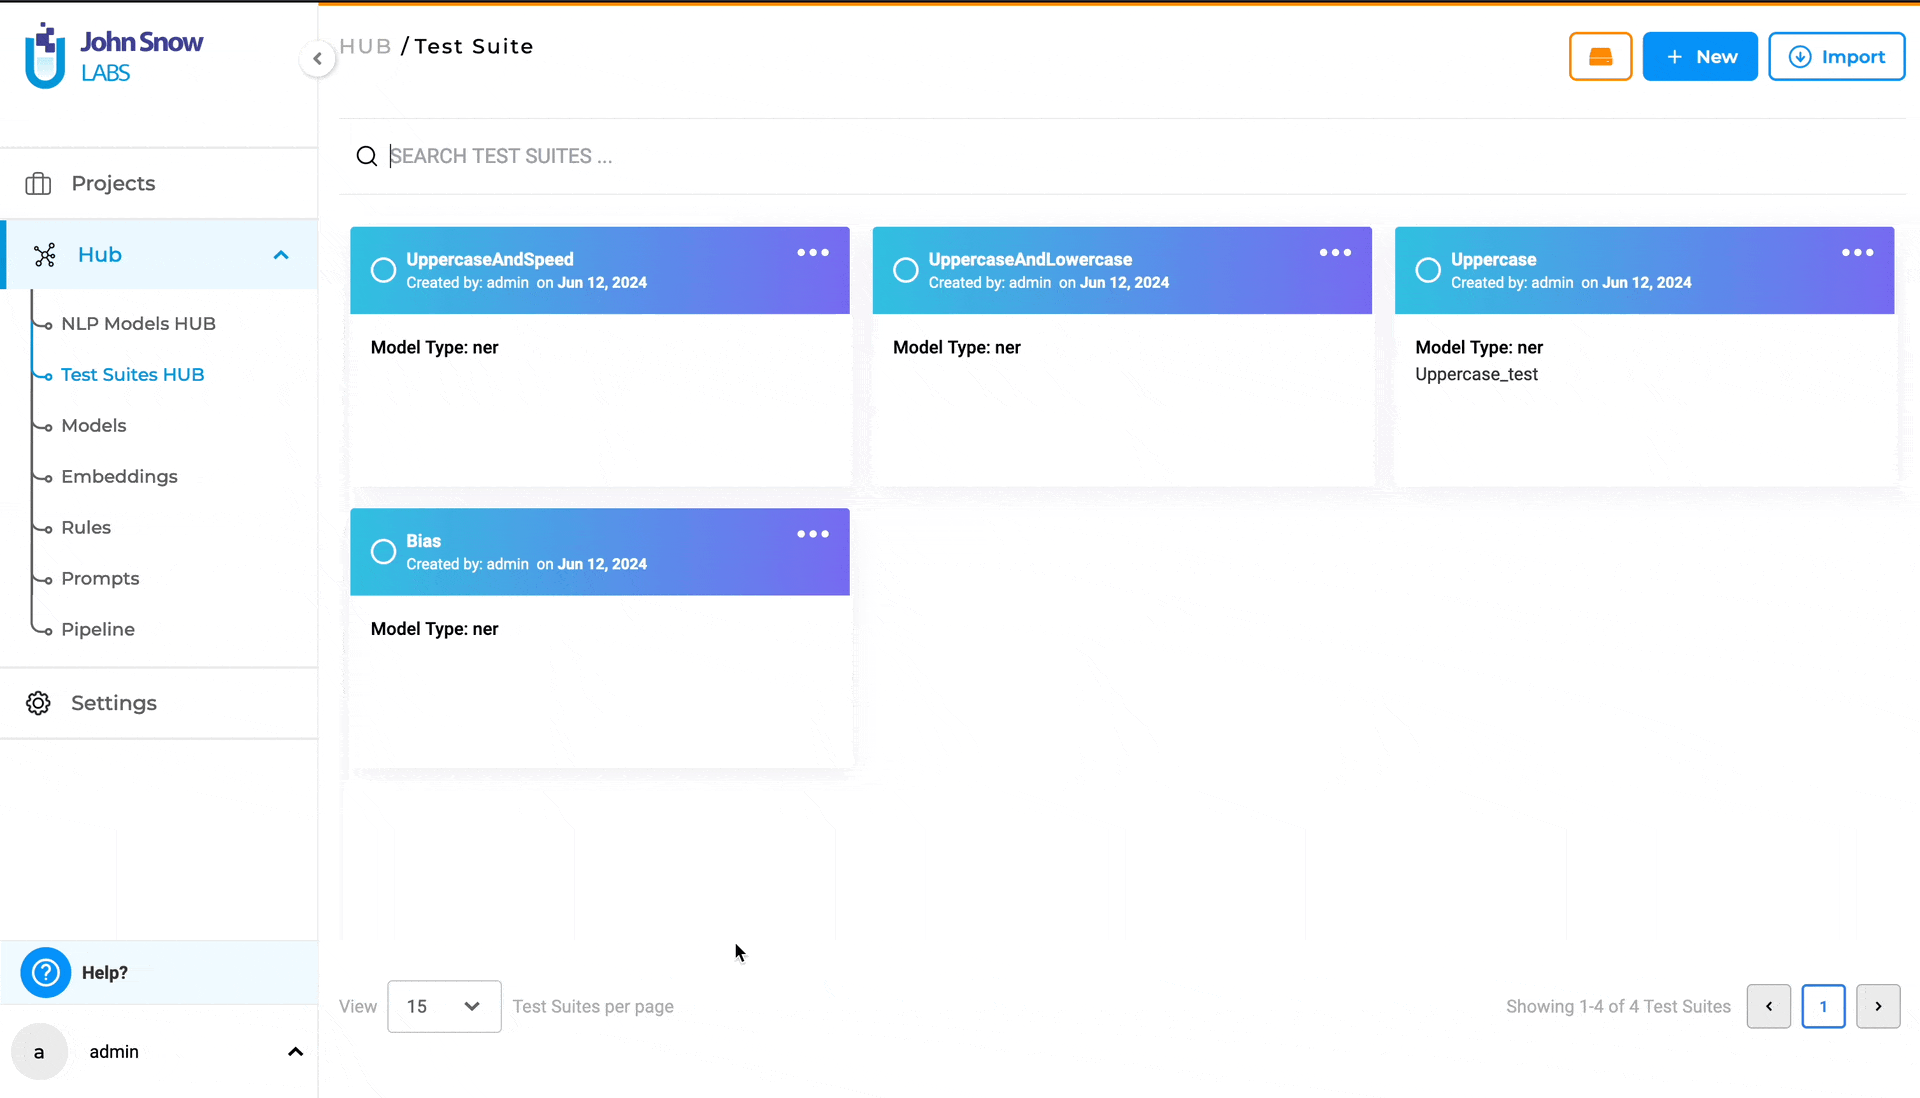
The new “Test Suites HUB” option under the Hub parent node, is the place where existing Test Suites are saved and managed. Clicking on Test Suites Hub takes the user to the “Test Suite” page, where all existing Test Suites he/she has access to are listed.
Create, Update, and Delete Test Suites
Managing a Test Suite is easy: a Test Suite can be created using the “Test” page under a parent project and can be fully managed in the “Test Suite” page within the “Test Suites HUB” option where users can create, update, and delete test suites.
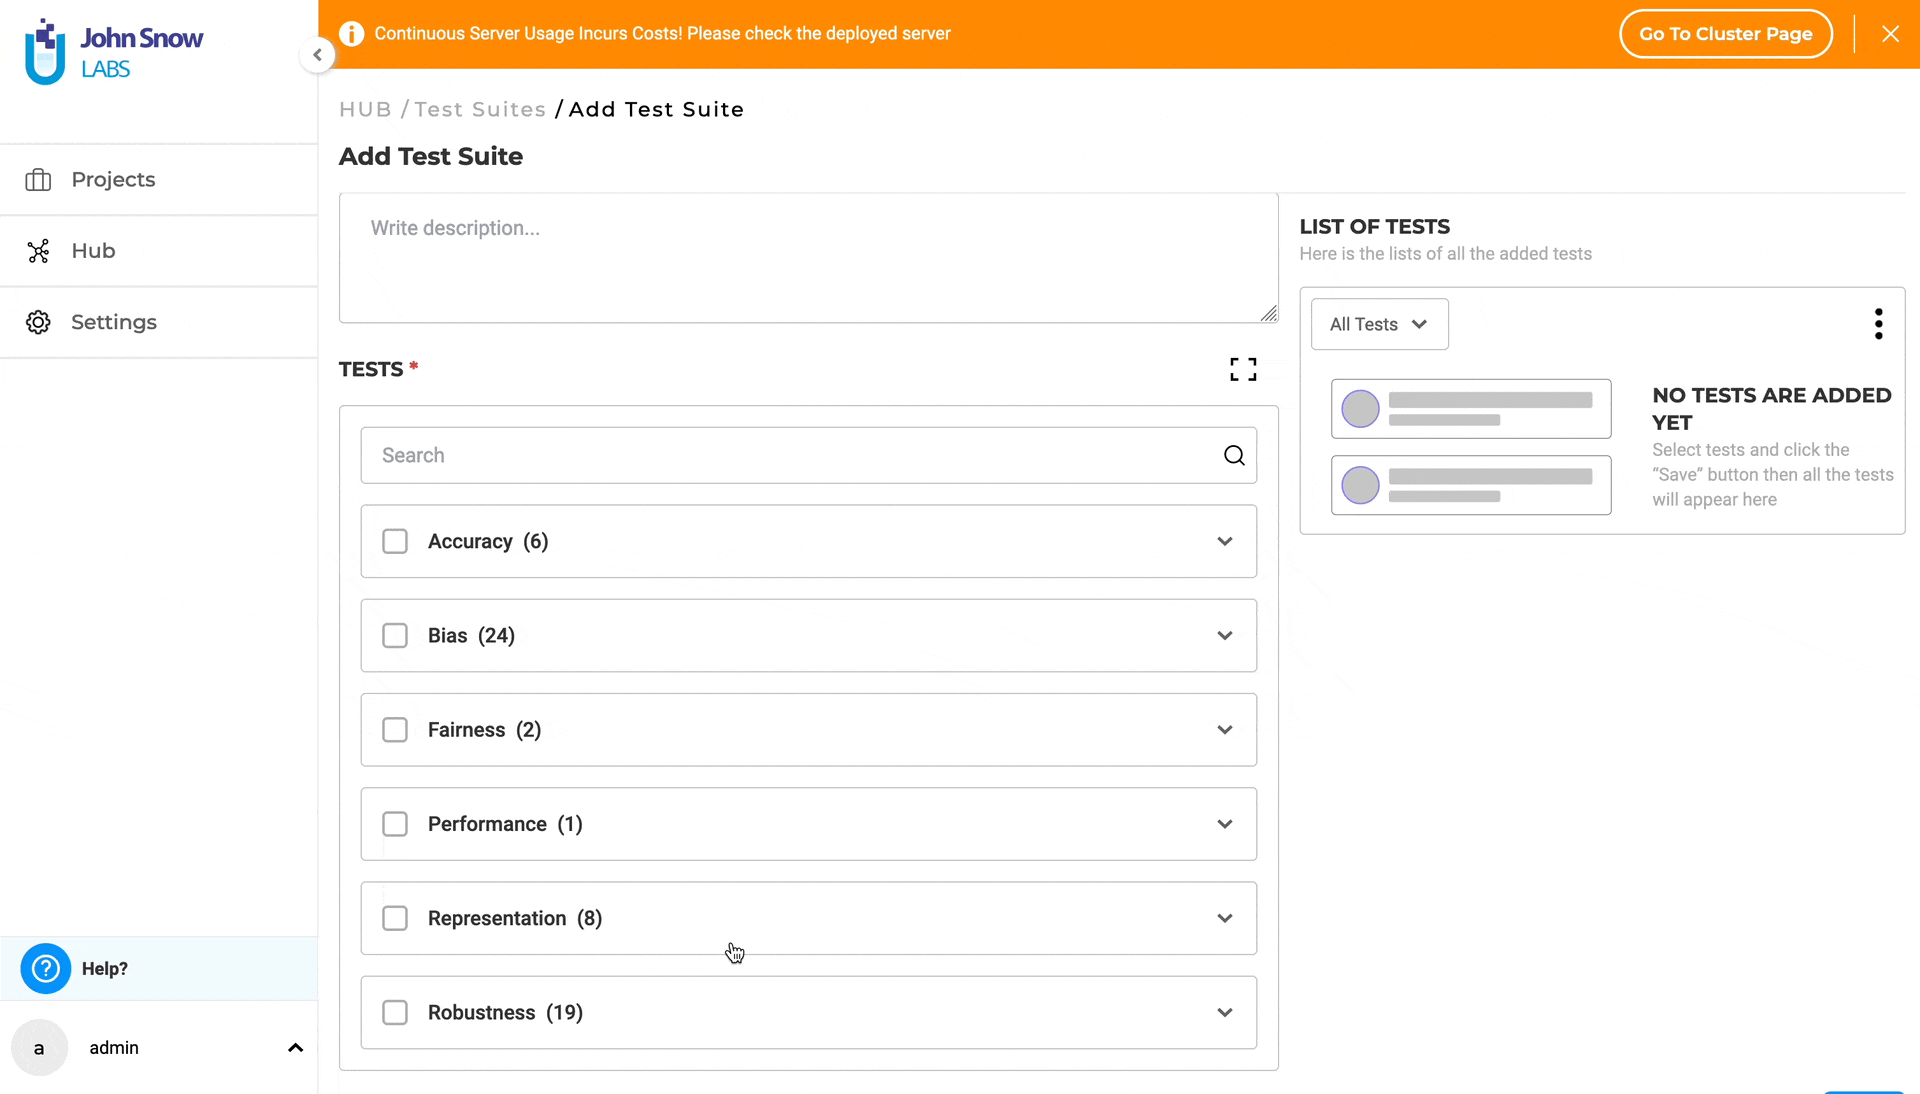
Test Suite Creation
Creating a new Test Suite from the “Test Suite” page is straightforward:
- In the Test Suite page, click on the “New” button to open the “Add Test Suite” form.
- Provide a name (mandatory) and a description (optional) for the test suite.
- Under “TESTS”, select the desired category and click on it to expand and view all available test types within that category. (Category samples - Robustness, Bias,etc.).
- Choose the desired test types by selecting the checkboxes for the relevant categories.
- Provide or modify the necessary details for each selected test type.
- Apply the steps above for any number of different categories you require to configure the test suite.
- Save your work, when configuration is complete by clicking on the “Save” button.
Note: The Model type is set to “NER” and cannot be changed, as Generative AI Lab supports only testing NER models in this version.
Supported Test Categories
The following are the currently supported categories for NER models within the Generative AI Lab application, available through the LangTest framework:
1. ACCURACY The goal of the Accuracy is to give users real, useful insights into how accurate the model is. It’s all about helping the user make smart choices on when and where to use the model in real-life situations. Accuracy tests evaluate the correctness of a model’s predictions. This category comprises six test types, three of which - “Min F1 Score”, “Min Precision Score” and “Min Recall Score” - require the user to provide model labels. The user can add labels in the “Add Model Labels” section, which becomes active immediately after selecting the corresponding checkbox for the test. Labels can be added or removed as shown below:
For more details about Accuracy tests, visit the LangTest Accuracy Documentation.
Note: Tests using custom labels require tasks with ground truth data.
2. BIAS Model bias tests aim to gauge how well a model aligns its predictions with actual outcomes. Detecting and mitigating model bias is essential to prevent negative consequences such as perpetuating stereotypes or discrimination. This testing explores the impact of replacing documents with different genders, ethnicities, religions, or countries on the model’s predictions compared to the original training set, helping identify and rectify potential biases LangTest framework provides support for more than 20 distinct test types for the Bias category.
For detailed information on Bias category, supported tests and samples, please refer to the LangTest Bias Documentation.
3. FAIRNESS Fairness testing is essential to evaluate a model’s performance without bias, particularly concerning specific groups. The goal is to ensure unbiased results across all groups, avoiding favoritism or discrimination. Various tests, including those focused on attributes like gender, contribute to this evaluation, promoting fairness and equality in model outcomes.
This category comprises two test types: “Max Gender F1 Score” and “Min Gender F1 Score”.
Further information on Fairness tests can be accessed through the LangTest Fairness Documentation.
4. PERFORMANCE Performance tests gauge the efficiency and speed of a language model’s predictions. This category consists of one test type: “speed” which evaluates the execution speed of the model based on tokens.
Further information on Performance test can be accessed through the LangTest Performance Documentation.
5. REPRESENTATION Representation testing assesses whether a dataset accurately represents a specific population. It aims to identify potential biases within the dataset that could impact the results of any analysis, ensuring that the data used for training and testing is representative and unbiased.
For additional details on Representation tests, please visit the LangTest Representation Documentation.
6. ROBUSTNESS Model robustness tests evaluate a model’s ability to maintain consistent performance when subjected to perturbations in the data it predicts. For tasks like Named Entity Recognition (NER), these tests assess how variations in input data, such as documents with typos or fully uppercased sentences, impact the model’s prediction performance. This provides insights into the model’s stability and reliability.
More information on Robustness tests is available in the LangTest Robustness Documentation.
Managing Test Suites
To edit an existing Test Suite, navigate to the “Test Suites” page and follow these steps:
- Click on the three dots at the top-right corner of the test suite card to display the three options available: “Export”, “Edit”, and “Delete”.
- Selecting “Edit” takes you to the “Edit Test Suite” page.
- Modify the description as necessary.
- Under “LIST OF TESTS”, view all previously configured test categories and test types. Use the filter functionality to faster lookup the test category you need to edit. Selecting a test category will display its associated test types and corresponding pre-configured values. Clicking on the three dots next to a test type will present two options: “Edit” and “Delete”. Choosing “Delete” will deselect the test type, while selecting “Edit” will redirect you to the corresponding test type under TESTS, where you can modify the test type values. You can directly edit each test type within the TESTS section of the test suite.
- Click the “Save” button to apply the changes.
Note: Name and Model Type of a test suite cannot be modified.
Full-screen Mode and Search To boost productivity, you can create or edit a test suite using full-screen mode and the search functionality to quickly locate specific tests within the “TESTS” section.

Test Suite Deletion
To delete a test suite from the “Test Suite” page, follow these steps:
- Locate the test suite you wish to delete and click on the three dots next to it. This will reveal three options: “Export”, “Edit”, and “Delete”.
- Select the “Delete” option.
- A pop-up box will be shown. Click the “Yes” option.
- The test suite will be deleted, and a deletion message will confirm the action.
Note: a test suite used within at least one project in your enterprise cannot be deleted.
Importing and Exporting Test Suites
Users can export and import test suites using the “Test Suites HUB”. To export a test suite from the “Test Suite” page, follow these simple steps:
- Click on the ellipsis symbol located next to the test suite you wish to export. This will present three options: “Export”, “Edit”, and “Delete”.
- Click on the “Export”.
- Upon selecting “Export”, the test suite will be saved as **
.json**, and a confirmation message indicating successful export will appear.
Users can import a test suite into the “Test Suites HUB” by following these few steps:
- Navigate to the “Test Suite” page and click on the “Import” button to open the “Import Test Suite” page.
- Either drag and drop the test suite file into the designated area or click to import the test suite file from your local file system.
- Upon successful import, a confirmation message will be displayed.
- You can then view the imported test suite on the “Test Suite” page.
Searching for a specific Test Suite
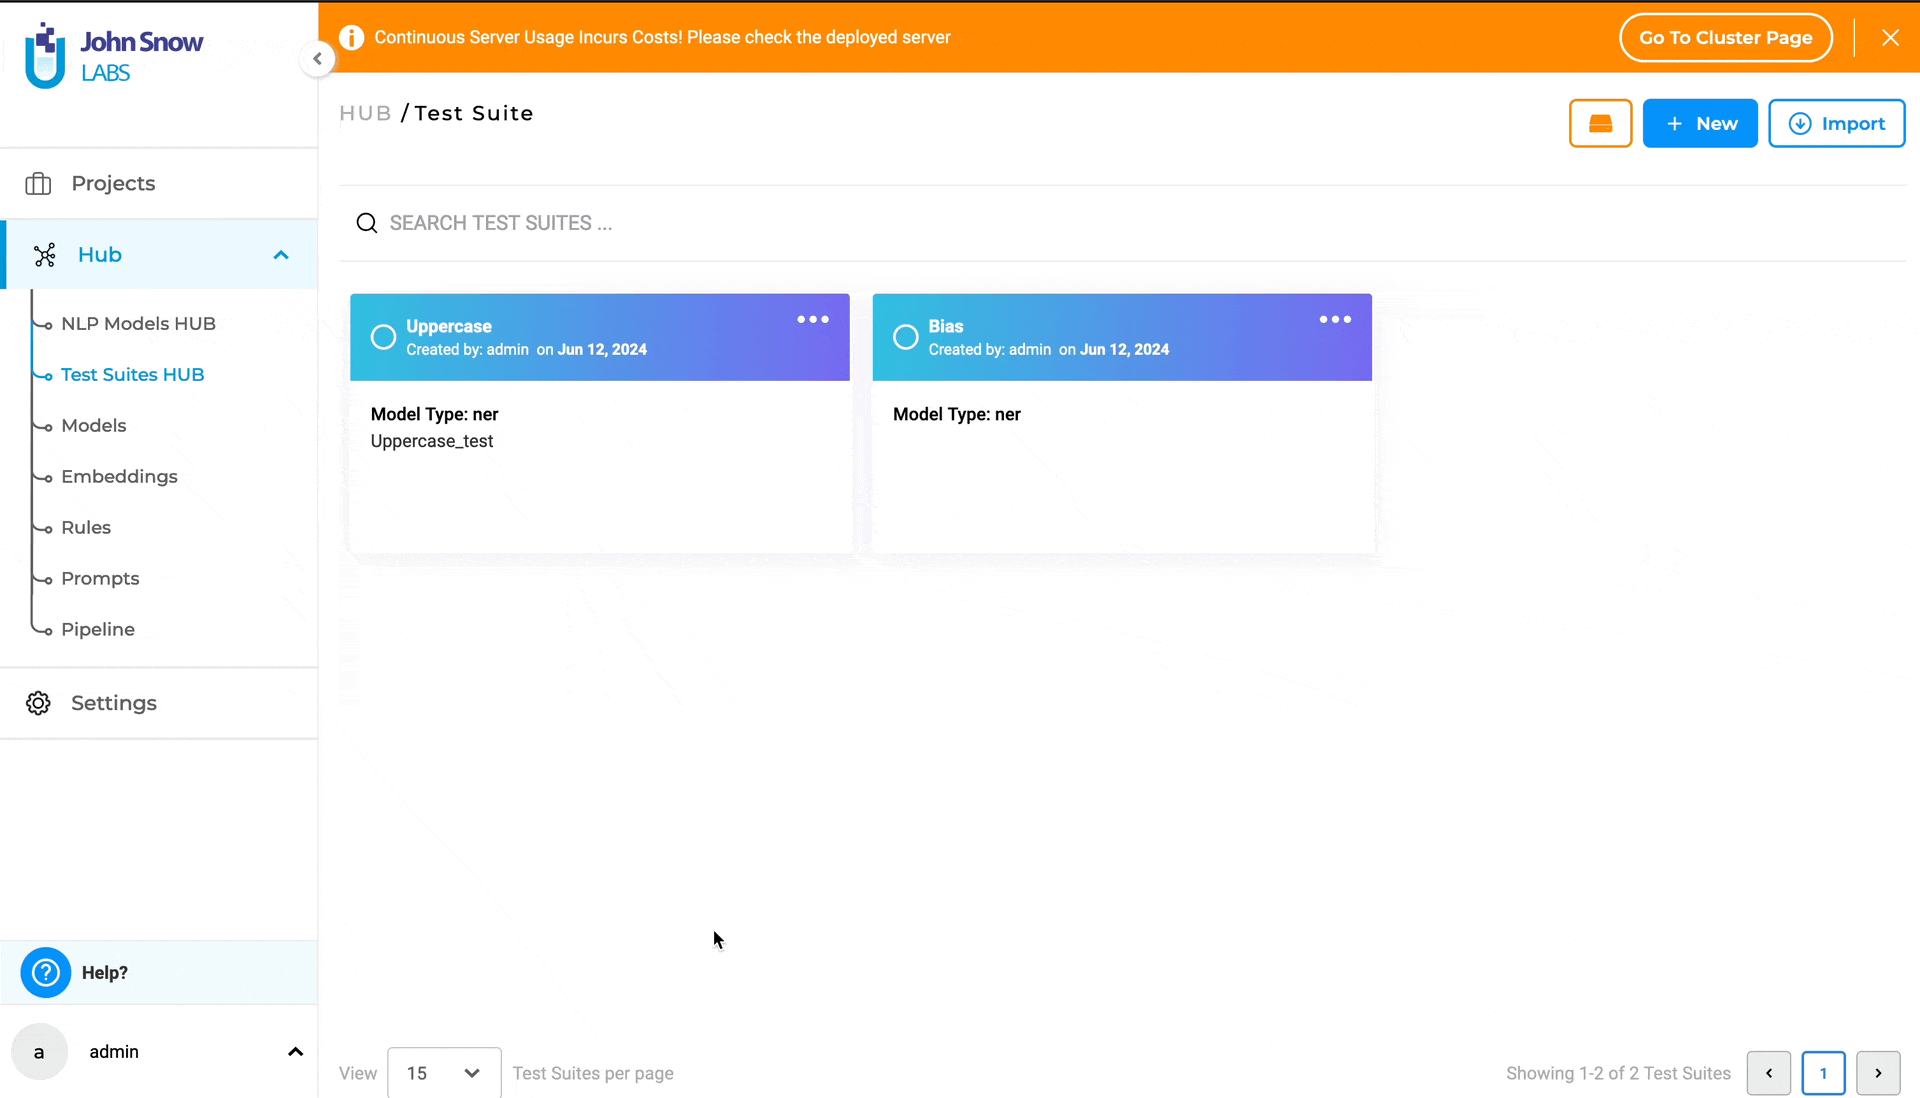
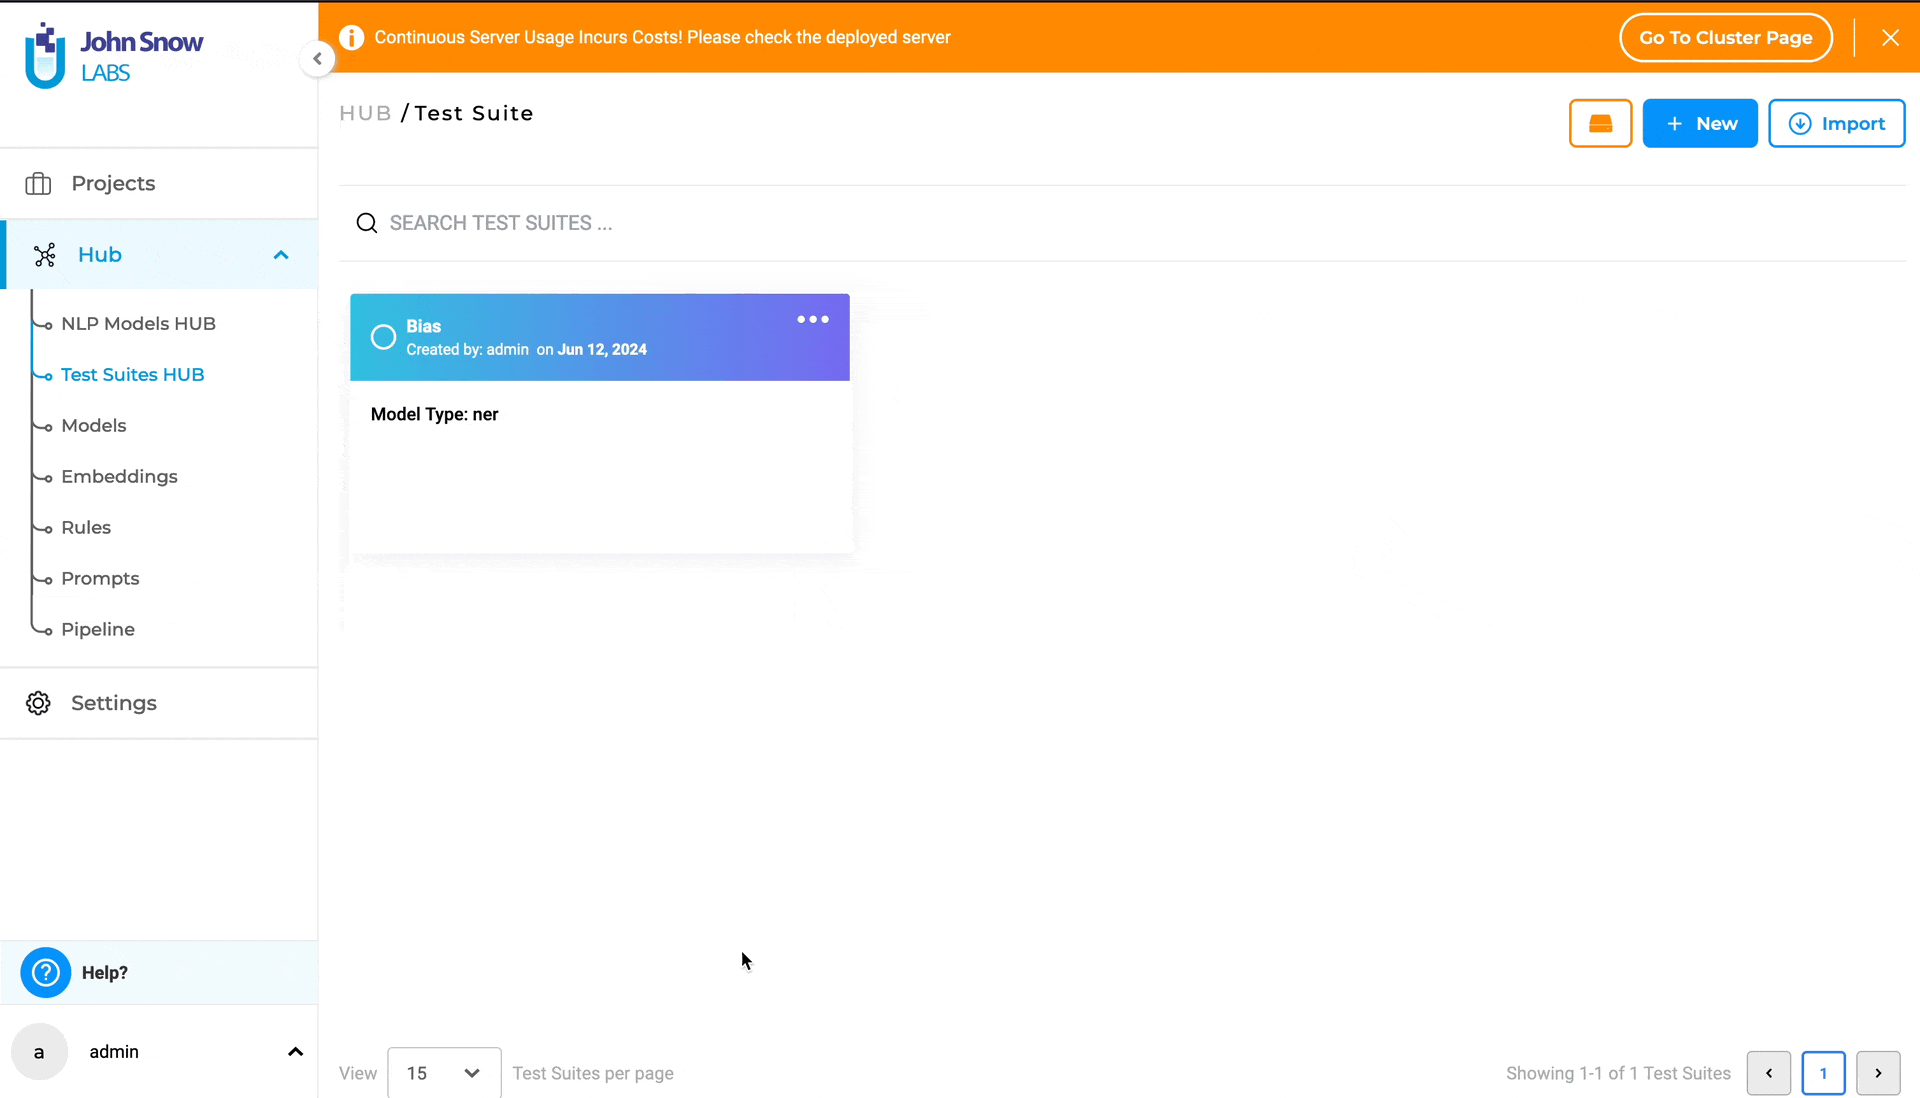
Use the search feature on the “Test Suite” page, the “SEARCH TEST SUITES …“ search bar to find the desired Test Suite, by matching it’s name.
New “Test” page under Project Menu
A new entry, “Test” has been added under the project menu in the left navigation bar for NER projects. Clicking on the “Test” node in the left navigation bar will take the user to the “Test” page, where they can manage tests and execute model testing.
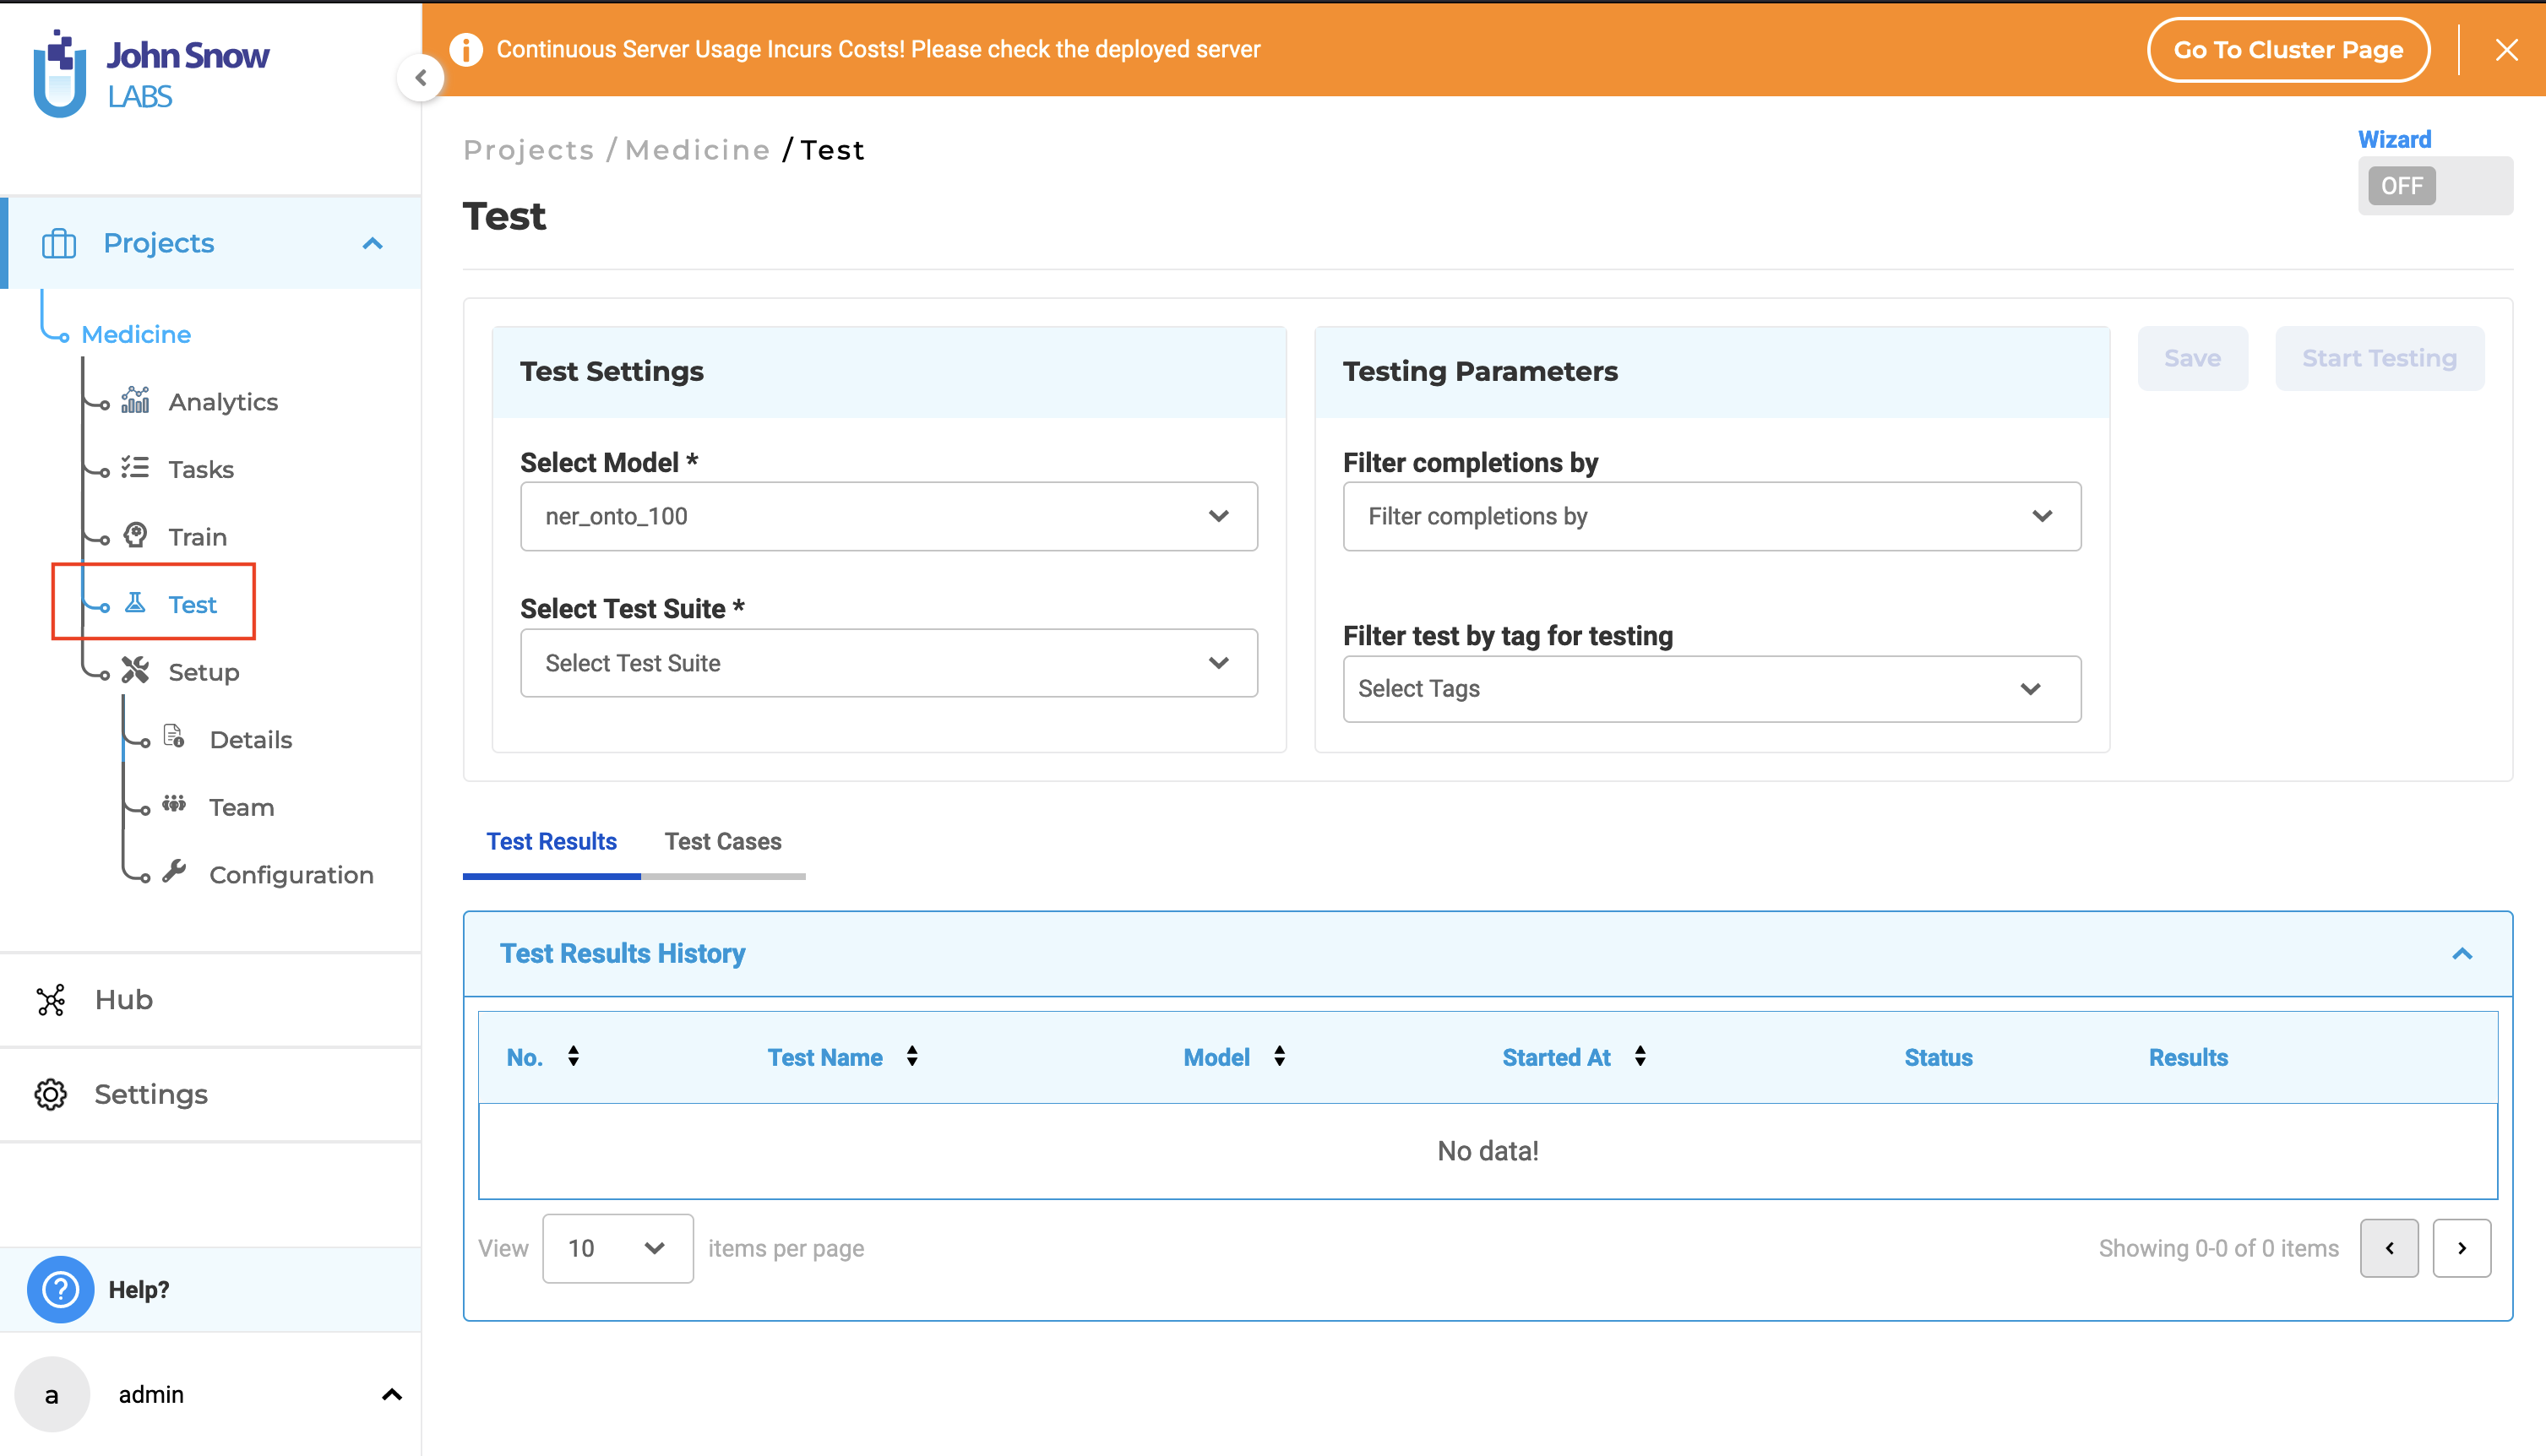
On this page, project managers can configure tests settings and corresponding parameters, create and edit test cases, start and stop model testing, review test logs, and review, download, or delete test results.
Note: The functionality available on the Test page is exclusively available to users with project manager roles.
Test - setup and configuration**
Navigating to the “Test” page under a specific project, allows the user to specify what tests will be used to assess the quality of the project’s model.
There are two mandatory sections that need to be filled:
1. Select Model: Select the NER model pretrained/trained that is used to predict annotations for the tasks/documents in the current project. The user can choose a NER model from the dropdown. All available models configured within the project are listed in this dropdown menu for selection.
2. Select Test Suite: The test suite comprises a collection of tests designed to evaluate your trained model in various scenarios.
The user can choose an existing test suite from the dropdown menu or create a new one by clicking on “+ Create New Test Suite” within the dropdown menu.
Note: The option to create a new test suite is available only to supervisor and admin users with the manager role.
There are two configuration options available in the “Test Parameters” section; they are optional:
1. Filter completions by:
This option enables users to narrow down their analysis by selecting tasks based on their completion status. The available options are:
- Clear “Filter completions by”: Removes selected completion filters.
- Submitted completions: Select only tasks with submitted completions for analysis.
- Reviewed completions: Select only tasks with reviewed completions for analysis.
2. Filter test by tag:
This functionality enables users to refine their analysis by selecting only project tasks associated with specific tags. By default, the dropdown includes all default tags such as “Validated”, “Test”, “Corrections Needed”, and “Train”, as well as any custom tags created within the project.
Users can select tags to focus the model testing execution on the specific tagged tasks; if no tags are selected, all tasks will be considered for analysis.
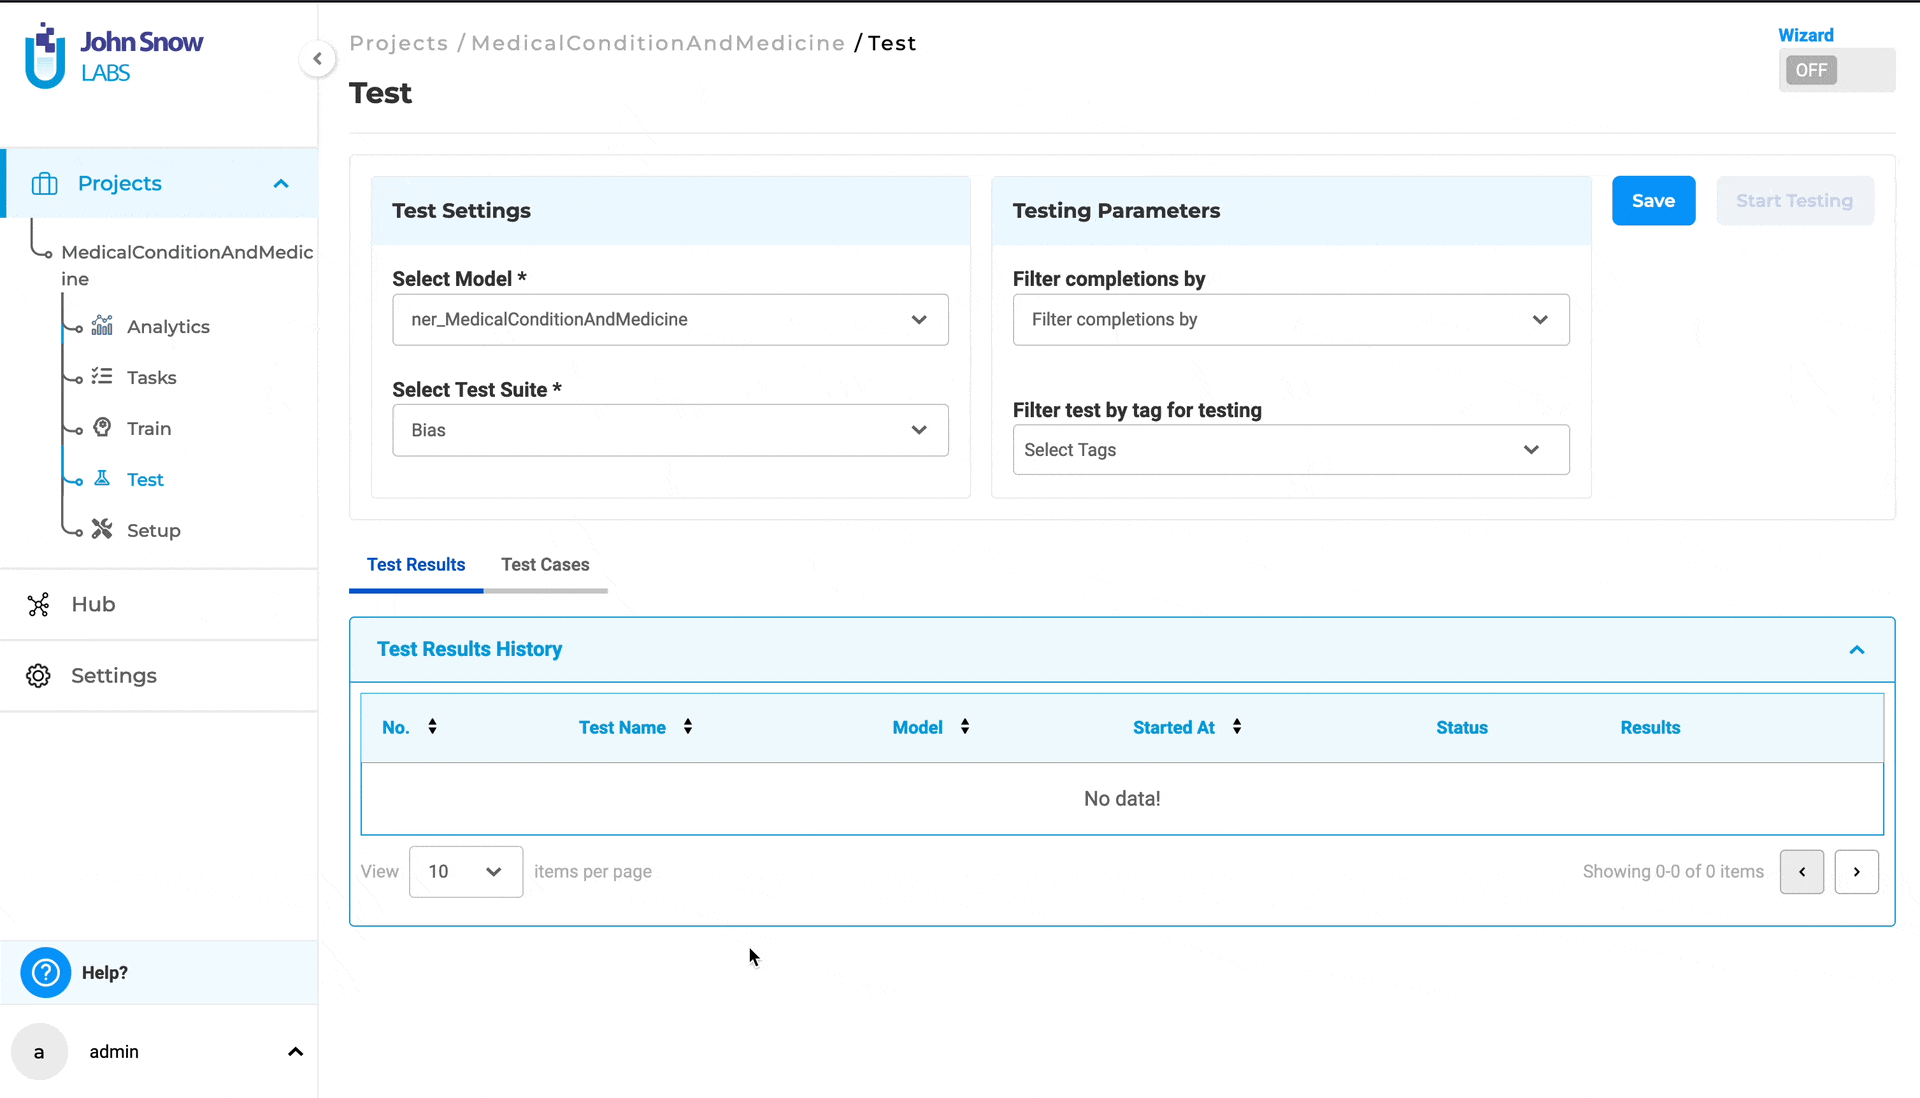
Users have two methods to select Test Settings and Test Parameters:
1. Direct Selection Method (Without Wizard Mode):
- Go to the “Test” page.
- In the Test Settings section, choose a model from the “Select Model” dropdown.
- Within the Testing Parameters section, pick completions from the “Filter completions by” dropdown.
- Also within Testing Parameters, select tags from the “Filter test by tag for testing” dropdown.
- Click the “Save” button to confirm your selections and save the configuration.

2. Wizard Mode (Guided Setup):
- Click the “Wizard” button to initiate Wizard mode. This will reveal the “Test Setting” tab, offering detailed information about Model Selection and Test Suite.
- From the “Select Model” dropdown, choose a model.
- Select a test suite from the dropdown or create a new one by clicking on ”+ Create New Test Suite”.
- Click “Next” to proceed to the “Test Parameters” tab, where you’ll see detailed information about “Filter completions by” and “Tags”.
- Within the “Filter completions by” dropdown, select the appropriate option.
- Choose one or more tags, or none, from the “Filter test by tag for testing” dropdown.
- Click “Next” to save the Test Settings and Parameters.

To modify the Test Settings and Parameters, simply click on the “Edit” icon.

Generating Test Cases
After saving the Test Settings and Parameters, the following options become available: “Generate Test Cases”, “Start Testing”, and “Edit”. Users must generate test cases and conduct testing independently.
Clicking on “Generate Test Cases” will produce test cases based on the saved Test Settings and Parameters. The generated test cases will appear under the “Test Cases” tab.
Note: Only Bias and Robustness test cases can be edited and updated; other test cases are not editable.
Modifying Test Settings or Parameters and generating new test cases will discard any existing ones. If no relevant tasks or data are available, no test cases will be generated.
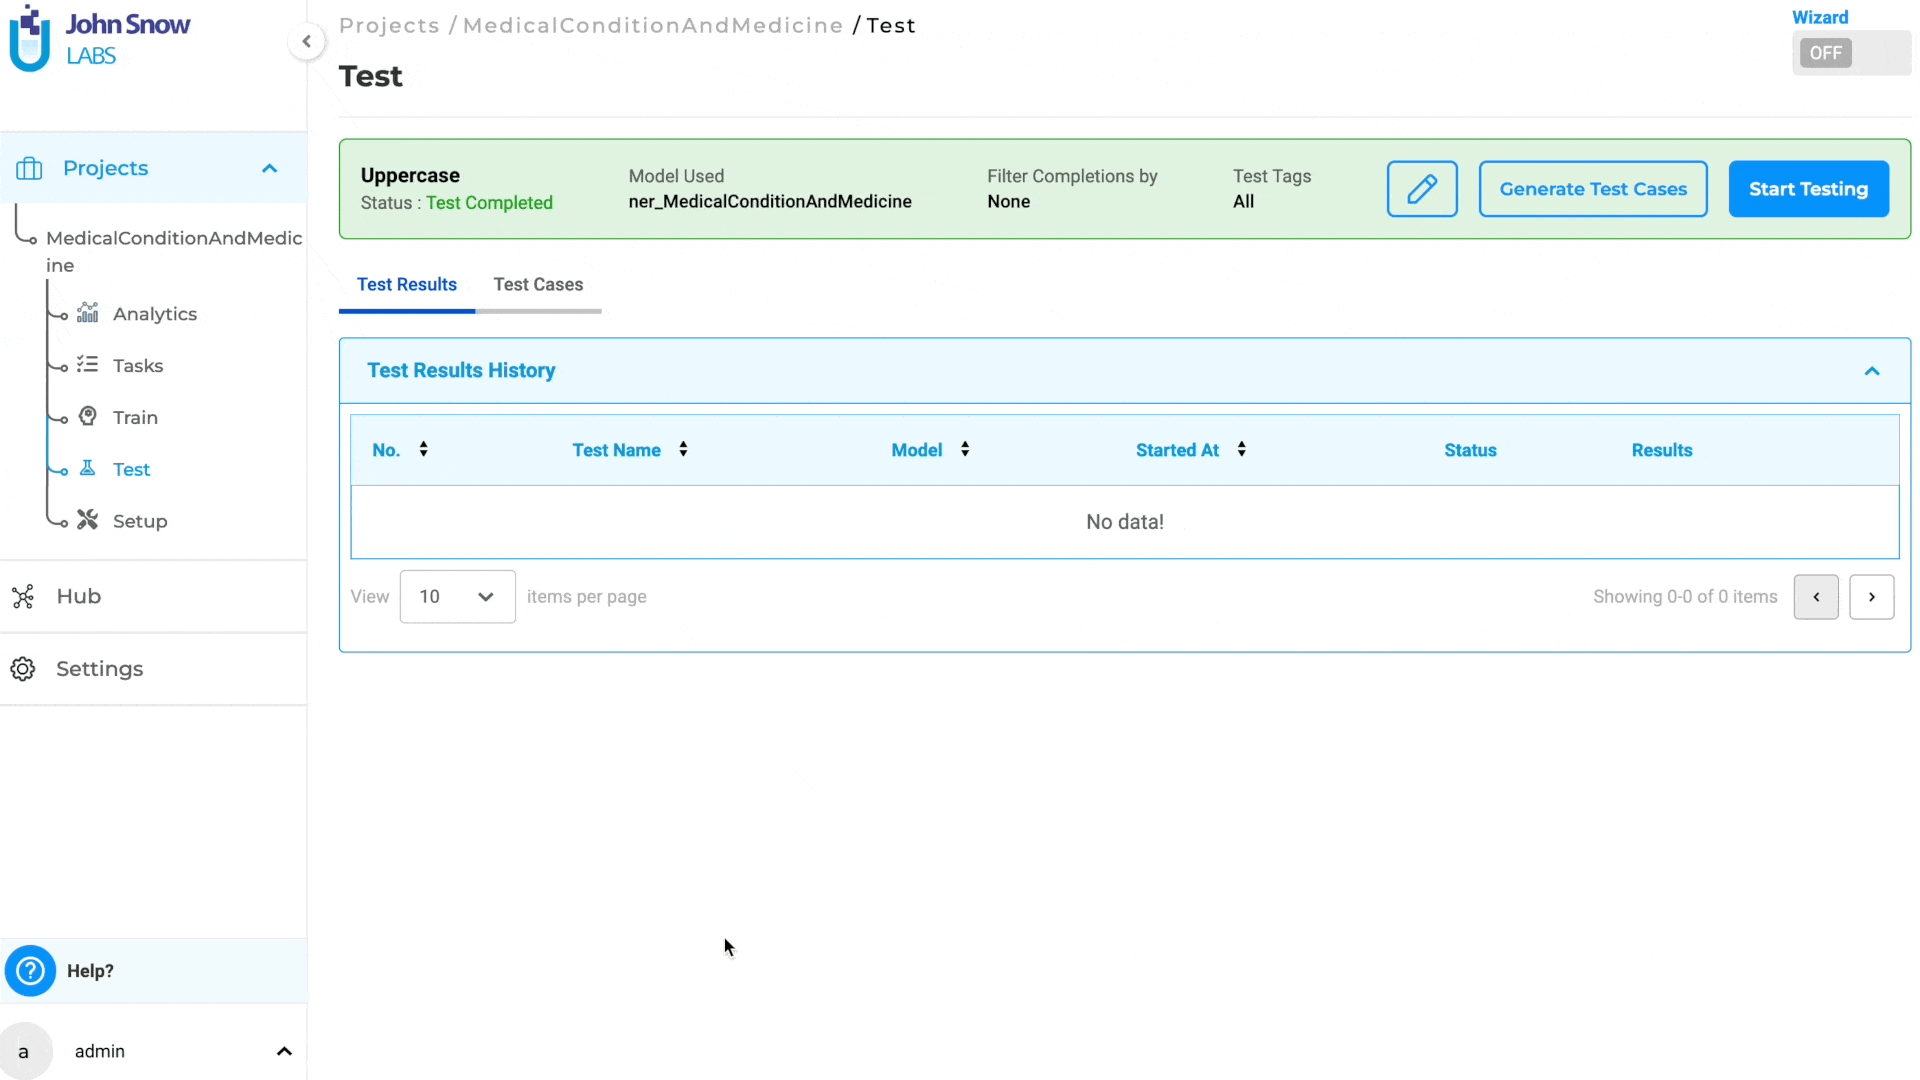
Start Model Testing
When “Start Testing” is clicked, model testing commences based on the generated test cases and the configured test settings. To view the test logs, click on “Show Logs”. The testing process can be halted by clicking on “Stop Testing”. If no test cases have been generated, the “Start Testing” option will be disabled, preventing the user from initiating testing.
If any changes are made to the Test Settings that differ from those used to generate the test cases, clicking on “Start Testing” will trigger a pop-up notification informing the user of the configuration change. The user must either ensure that the Test Settings and Parameters match those used for test case generation or create new test cases based on the updated configuration to proceed with model testing.
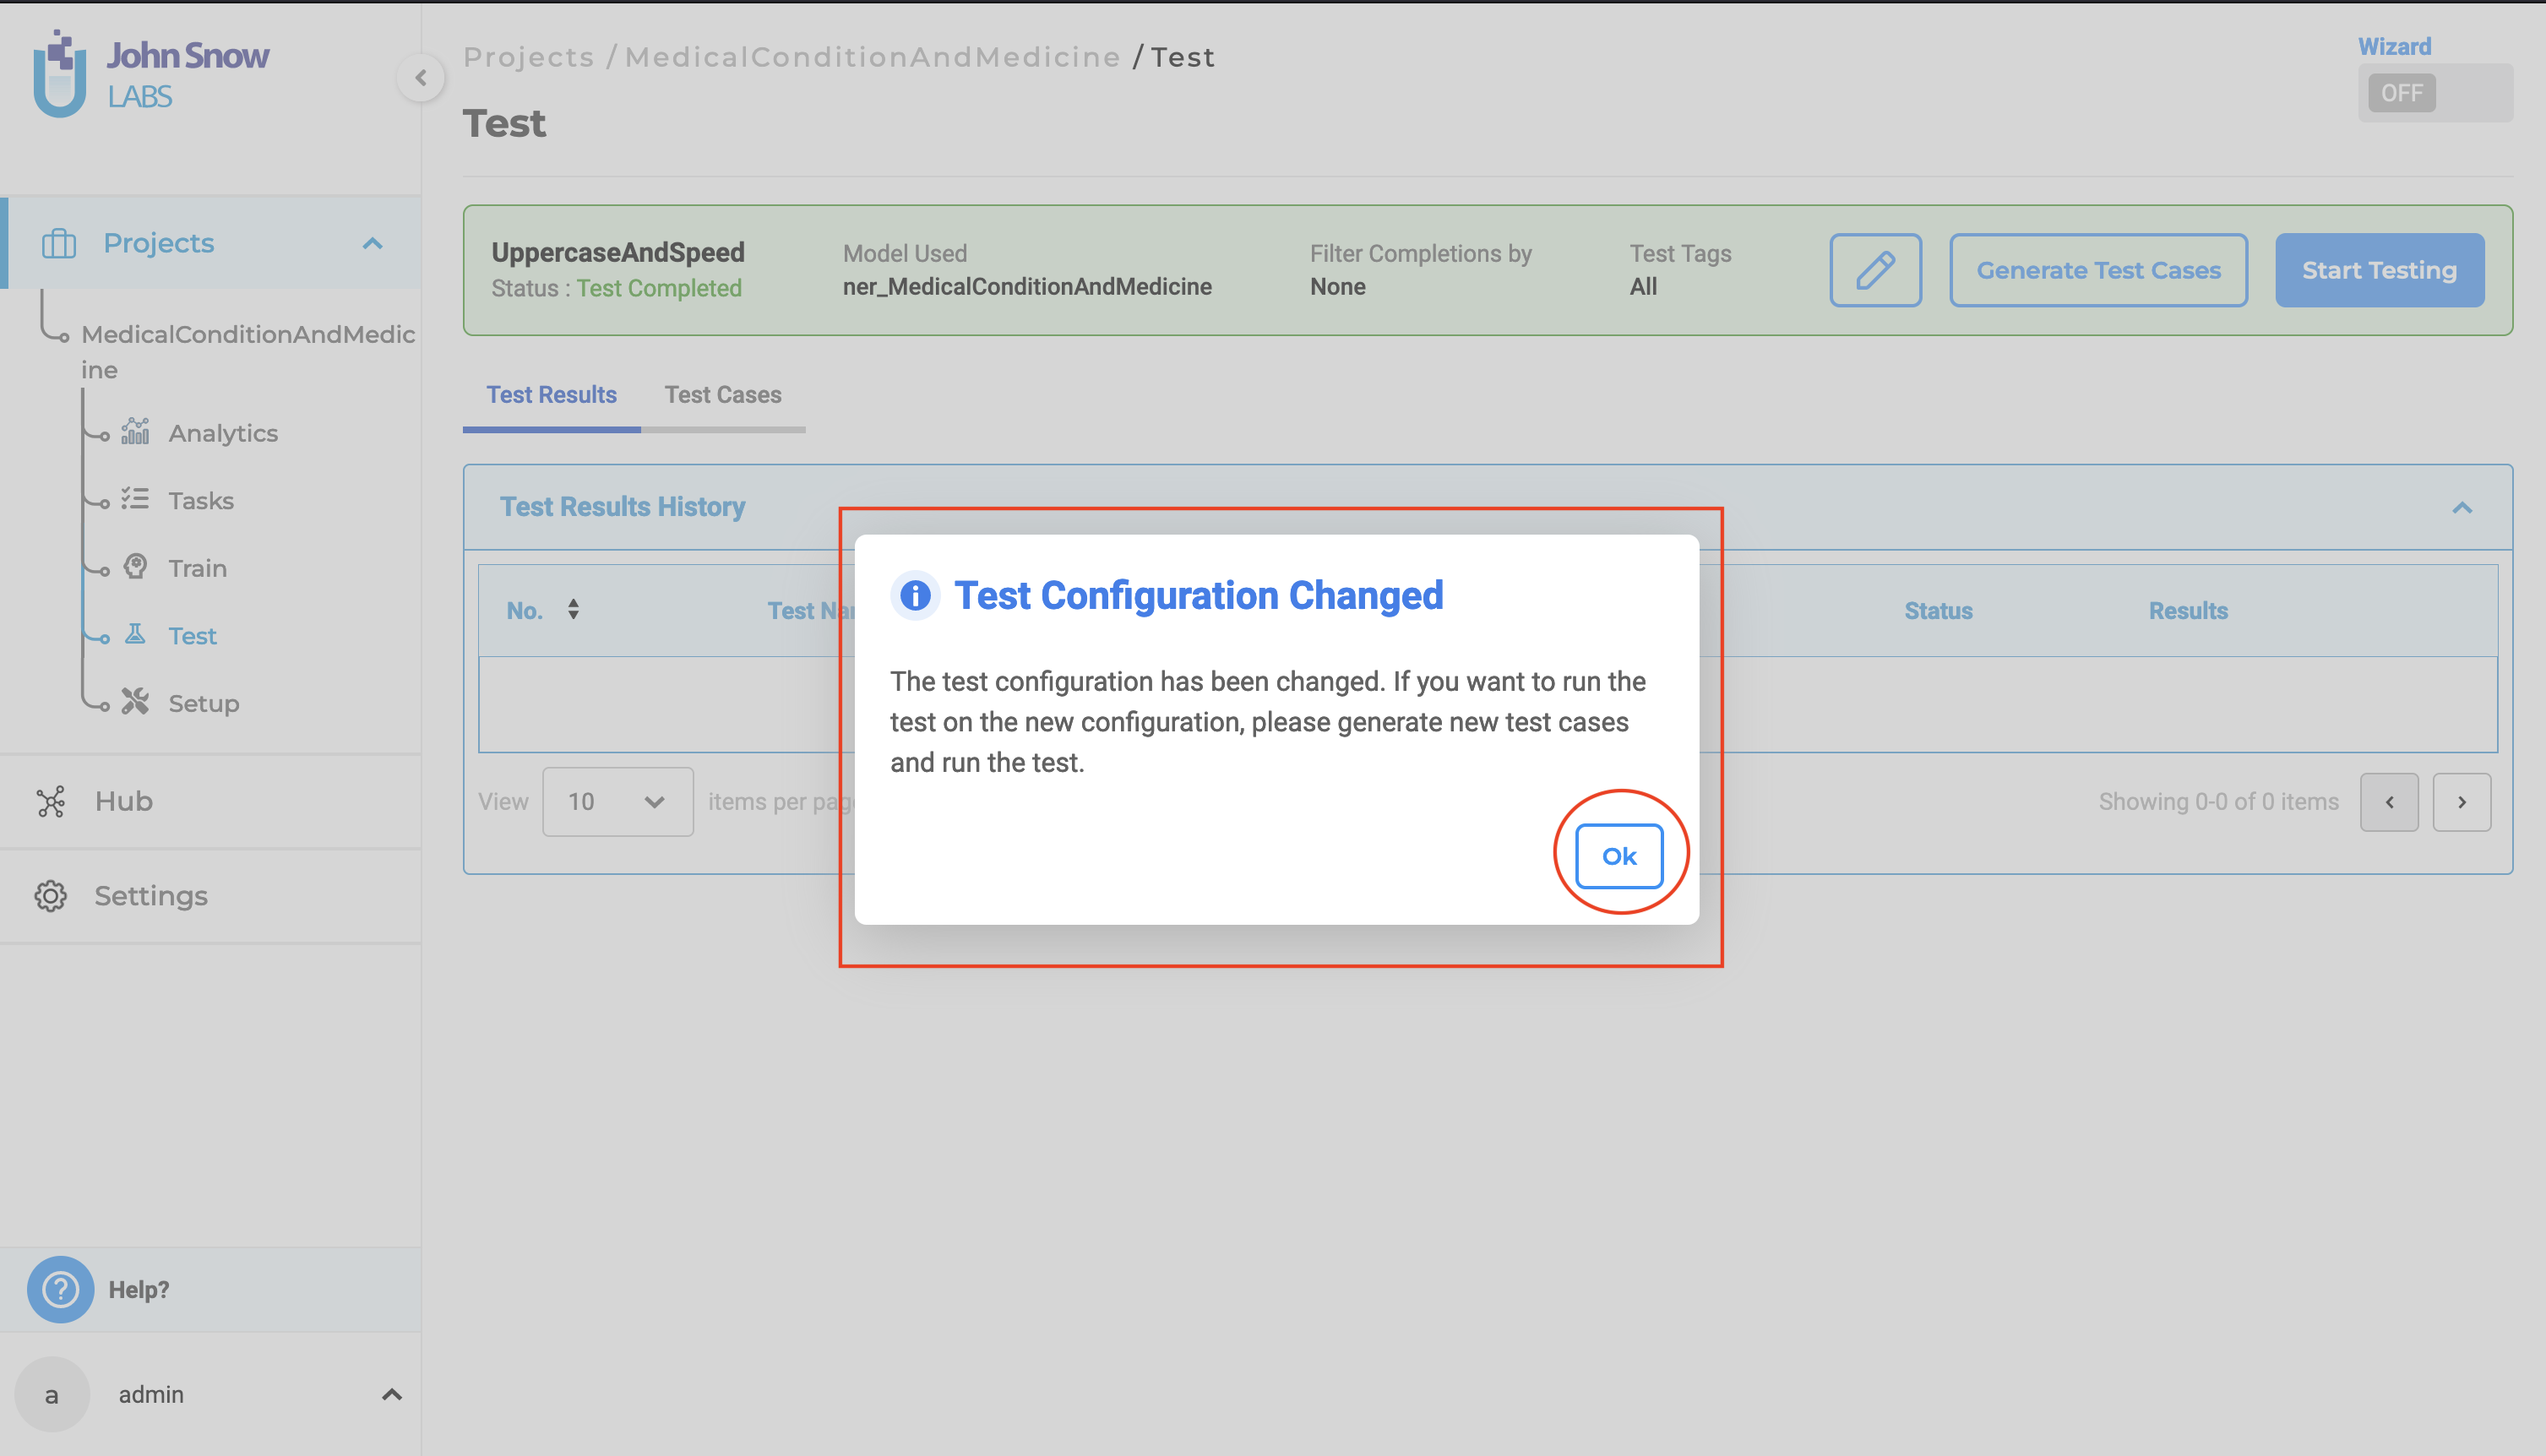
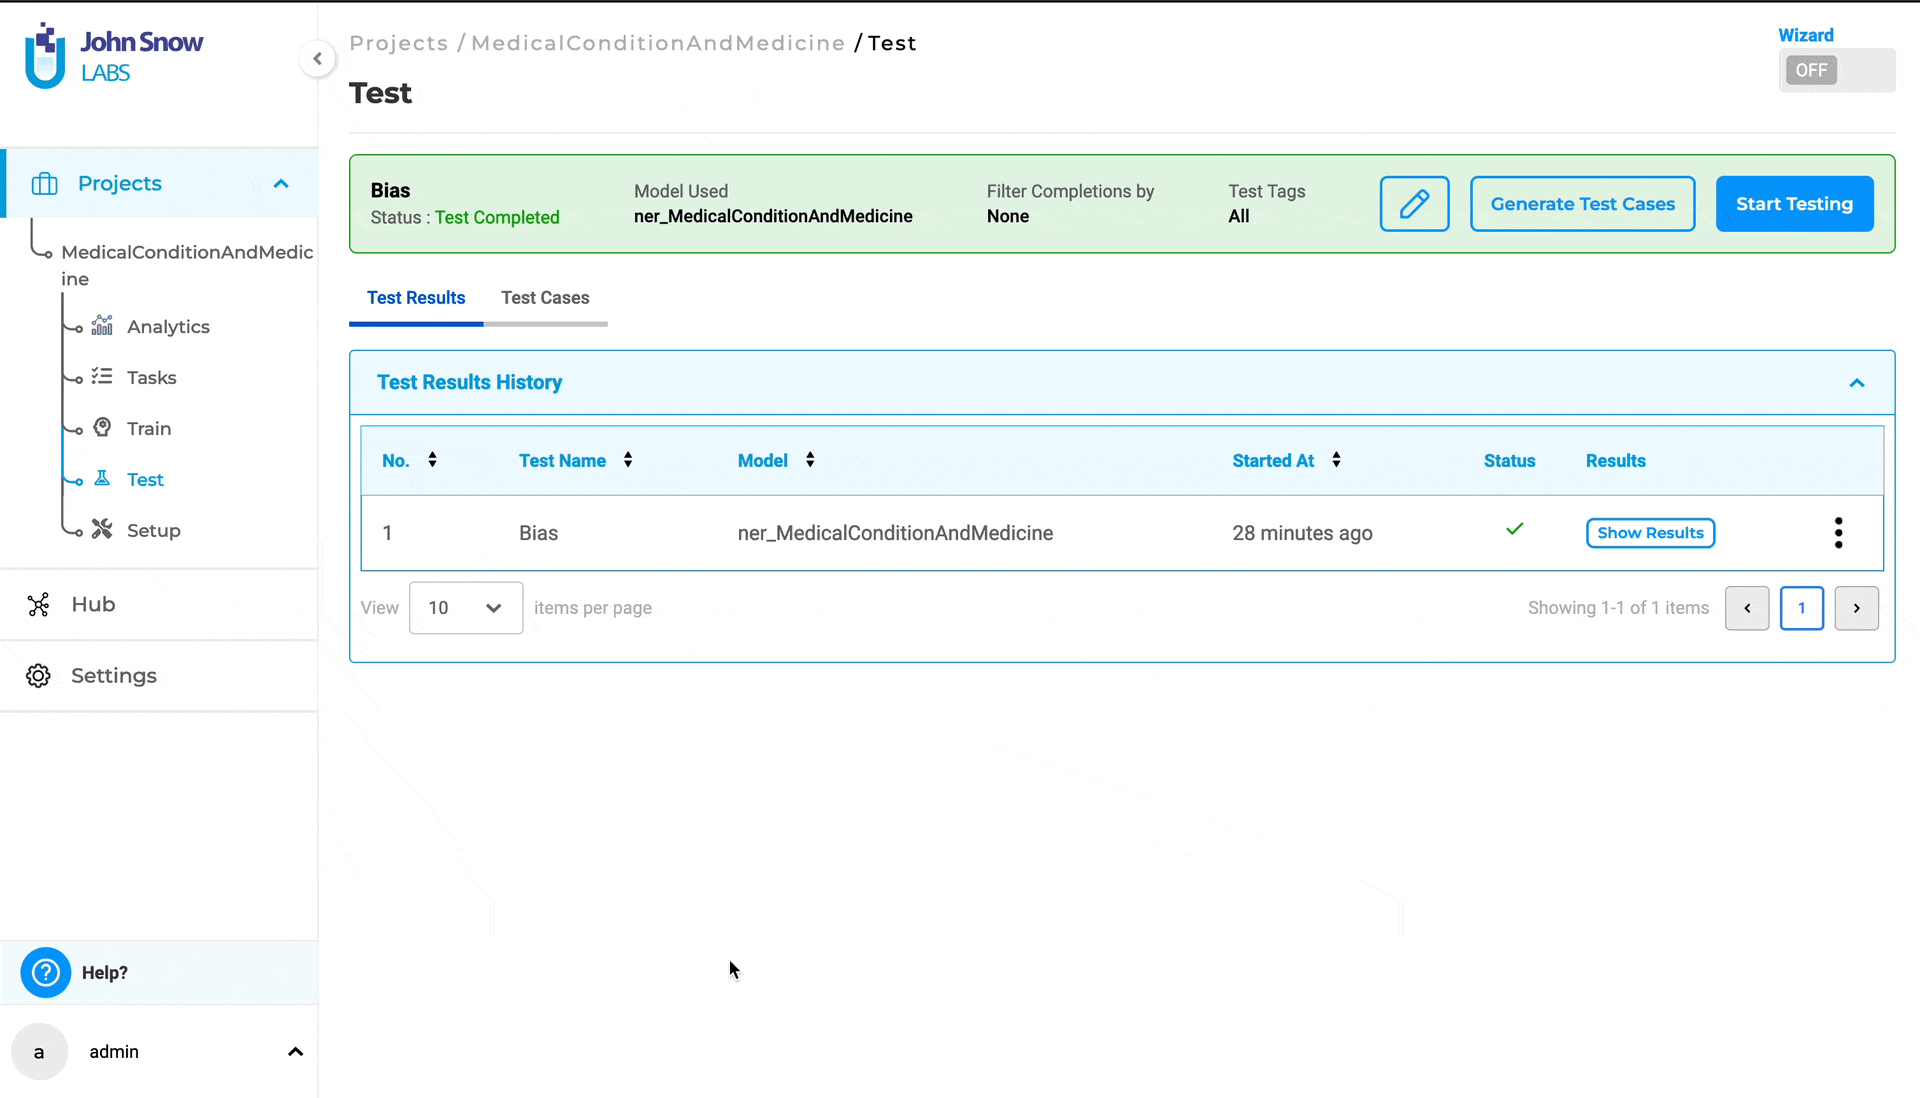
View and Delete Test Results
Once the execution of model testing is complete, users can access the test results via the “Test Results History” section in the “Test Results” tab.
Under this tab, the application displays all the “test runs” and corresponding results, for every test previously conducted for the project.
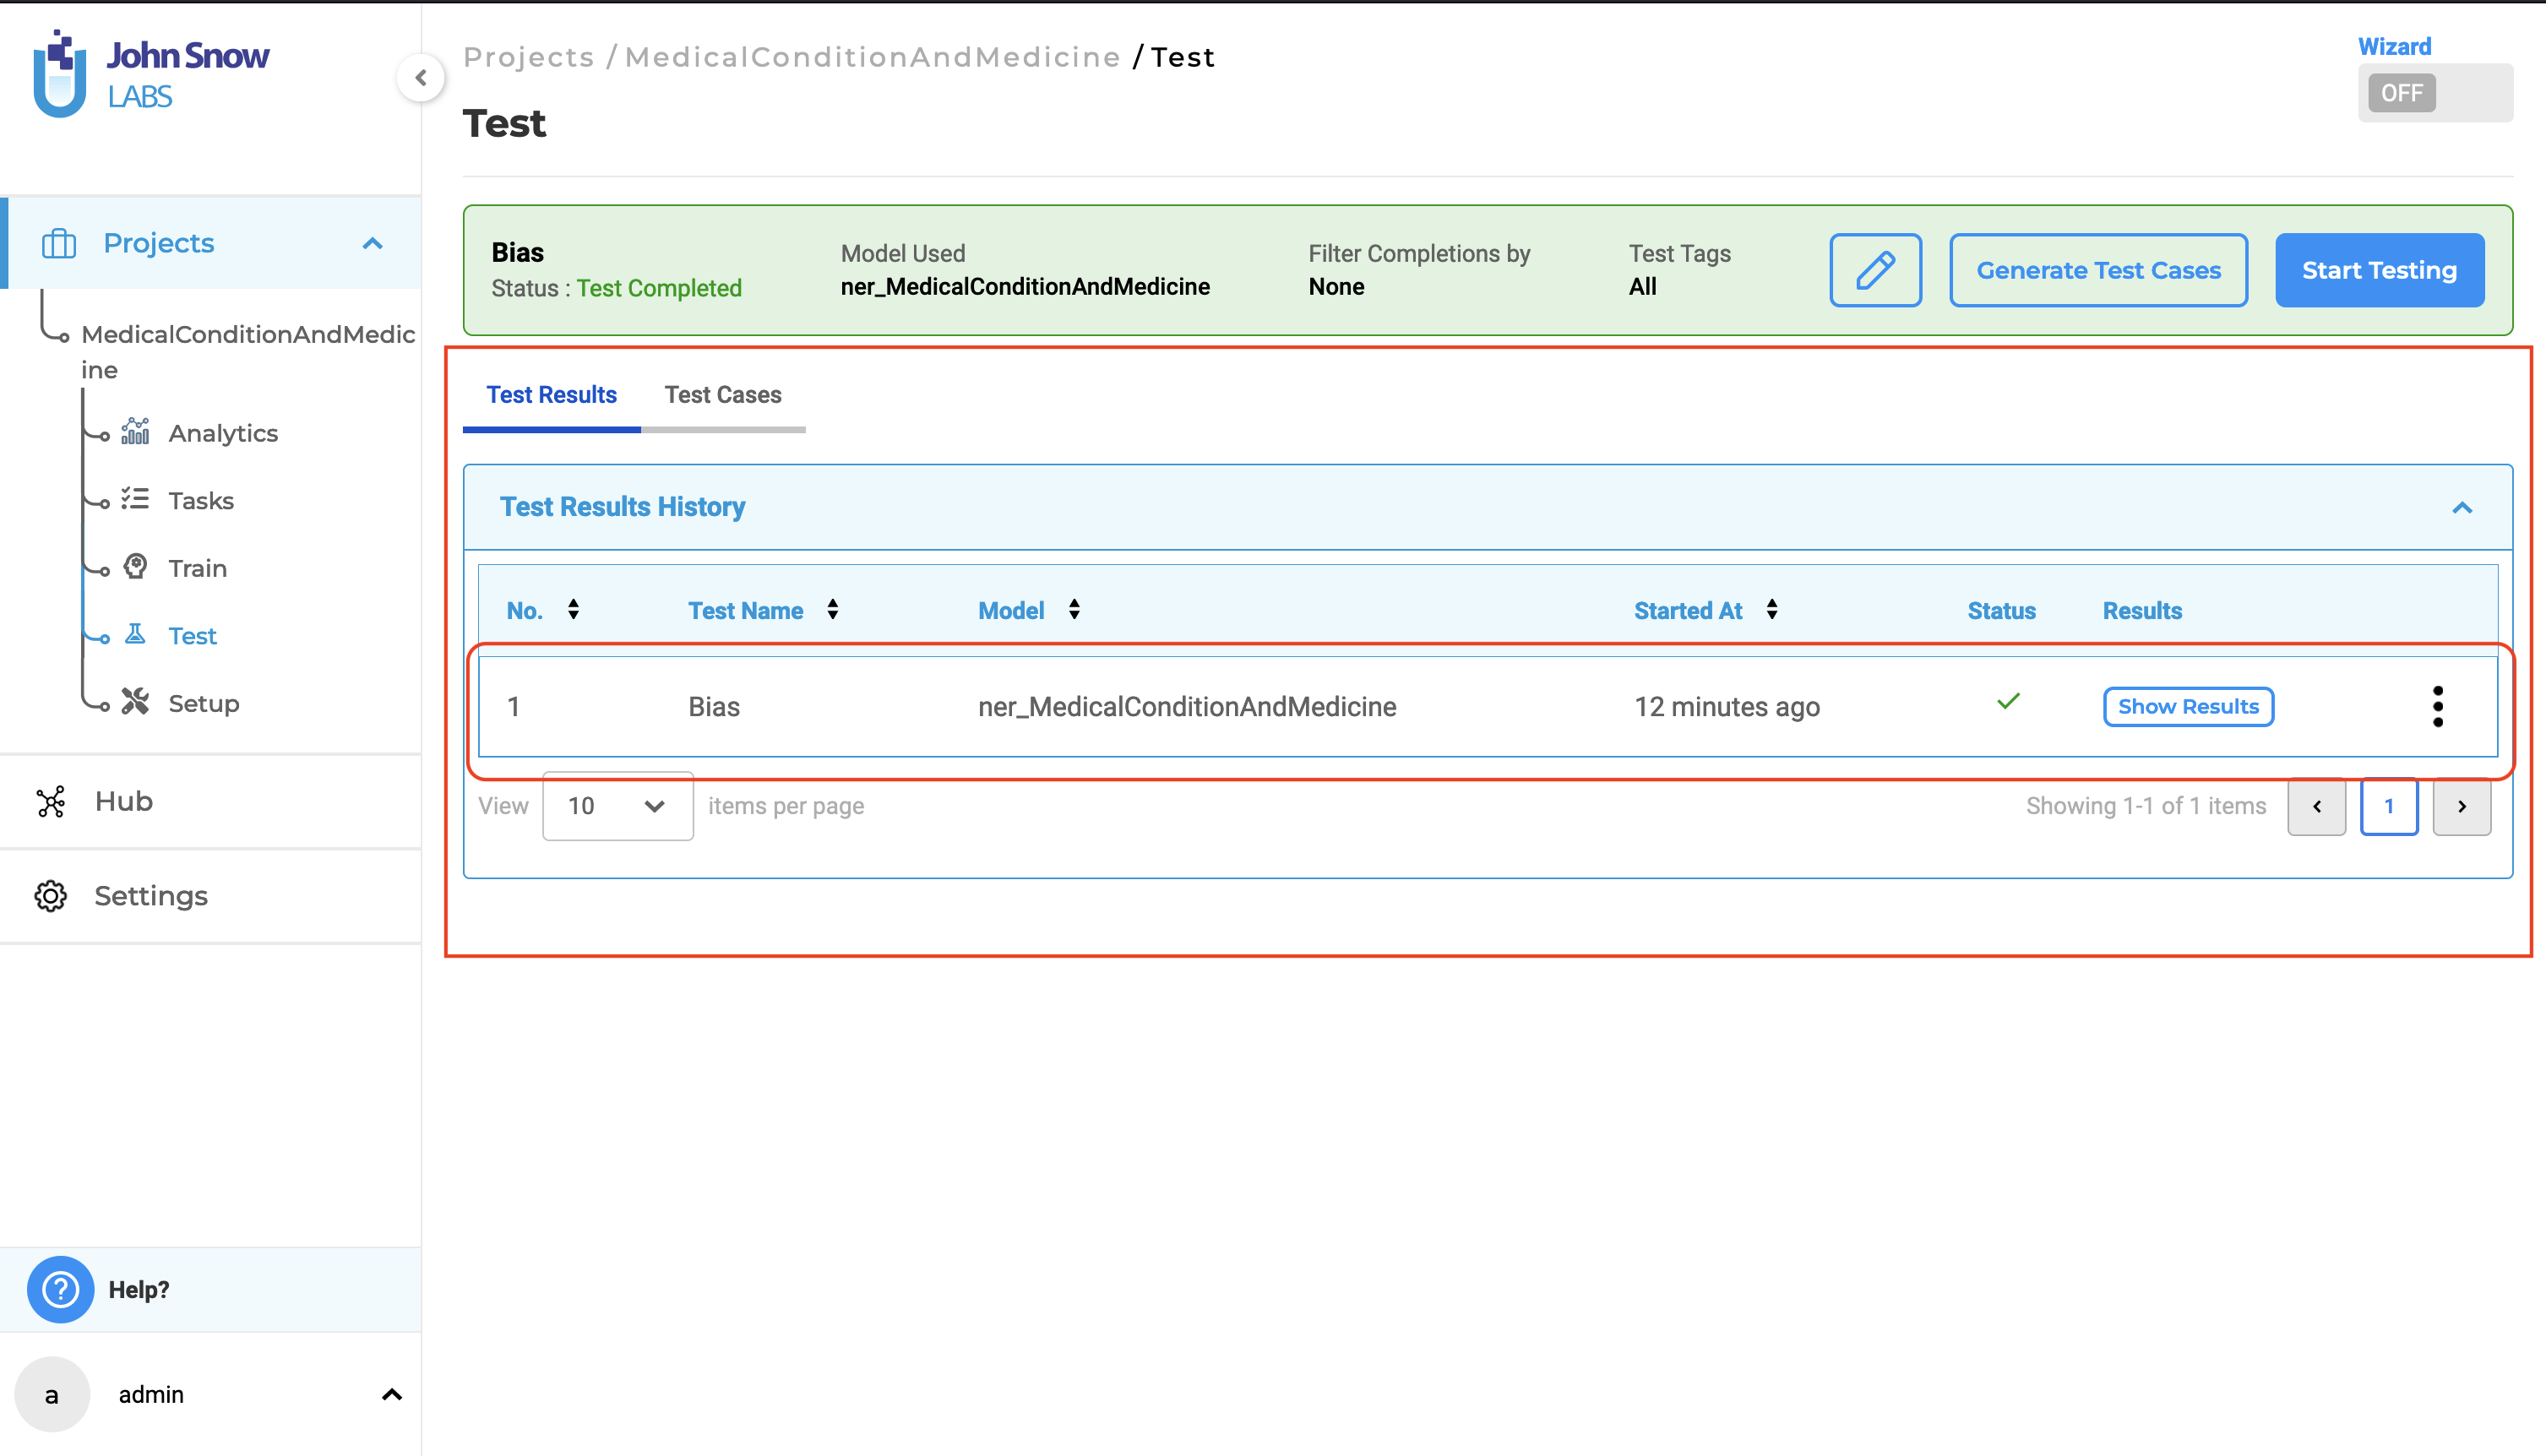
Clicking on “Show Results” will display the results for the selected test execution run. The test results consist of two reports:
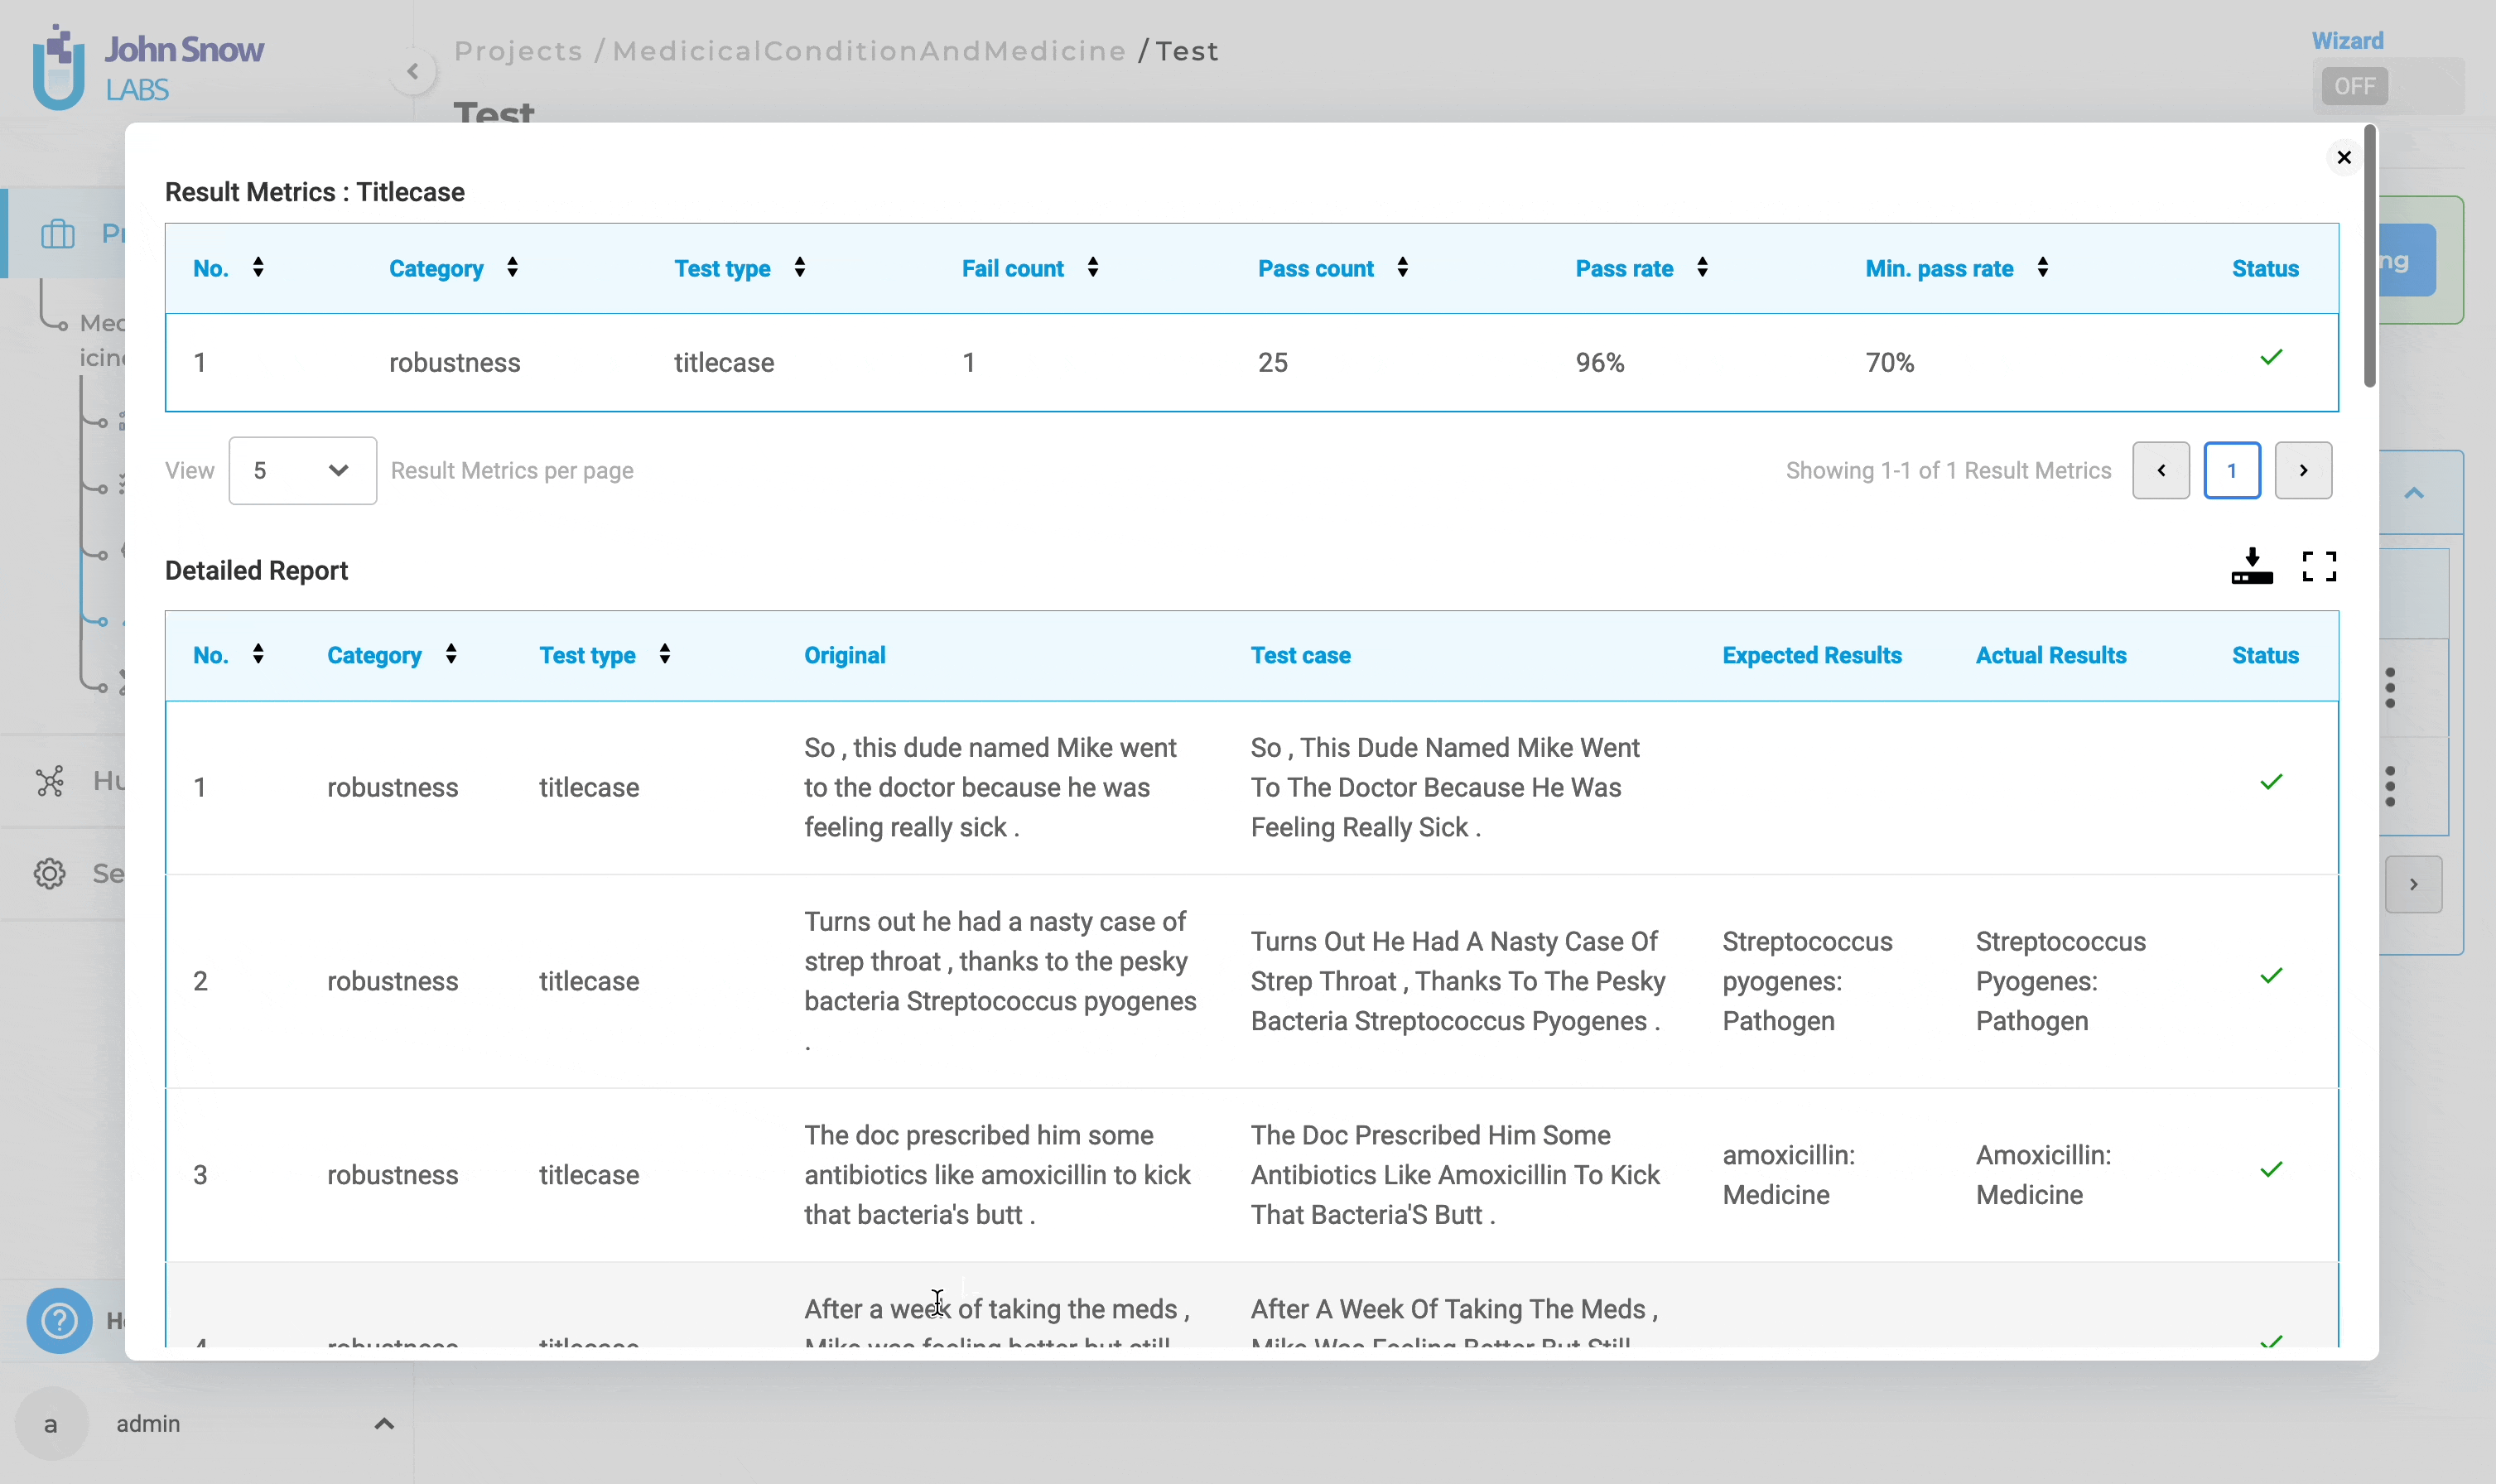
1. Result Metrics:
This section of the results provides a summary of all tests performed, including their status. It includes details such as “Number”, “Category”, “Test Type”, “Fail Count”, “Pass Count”, “Pass Rate”, “Minimum Pass Rate” and “Status”.
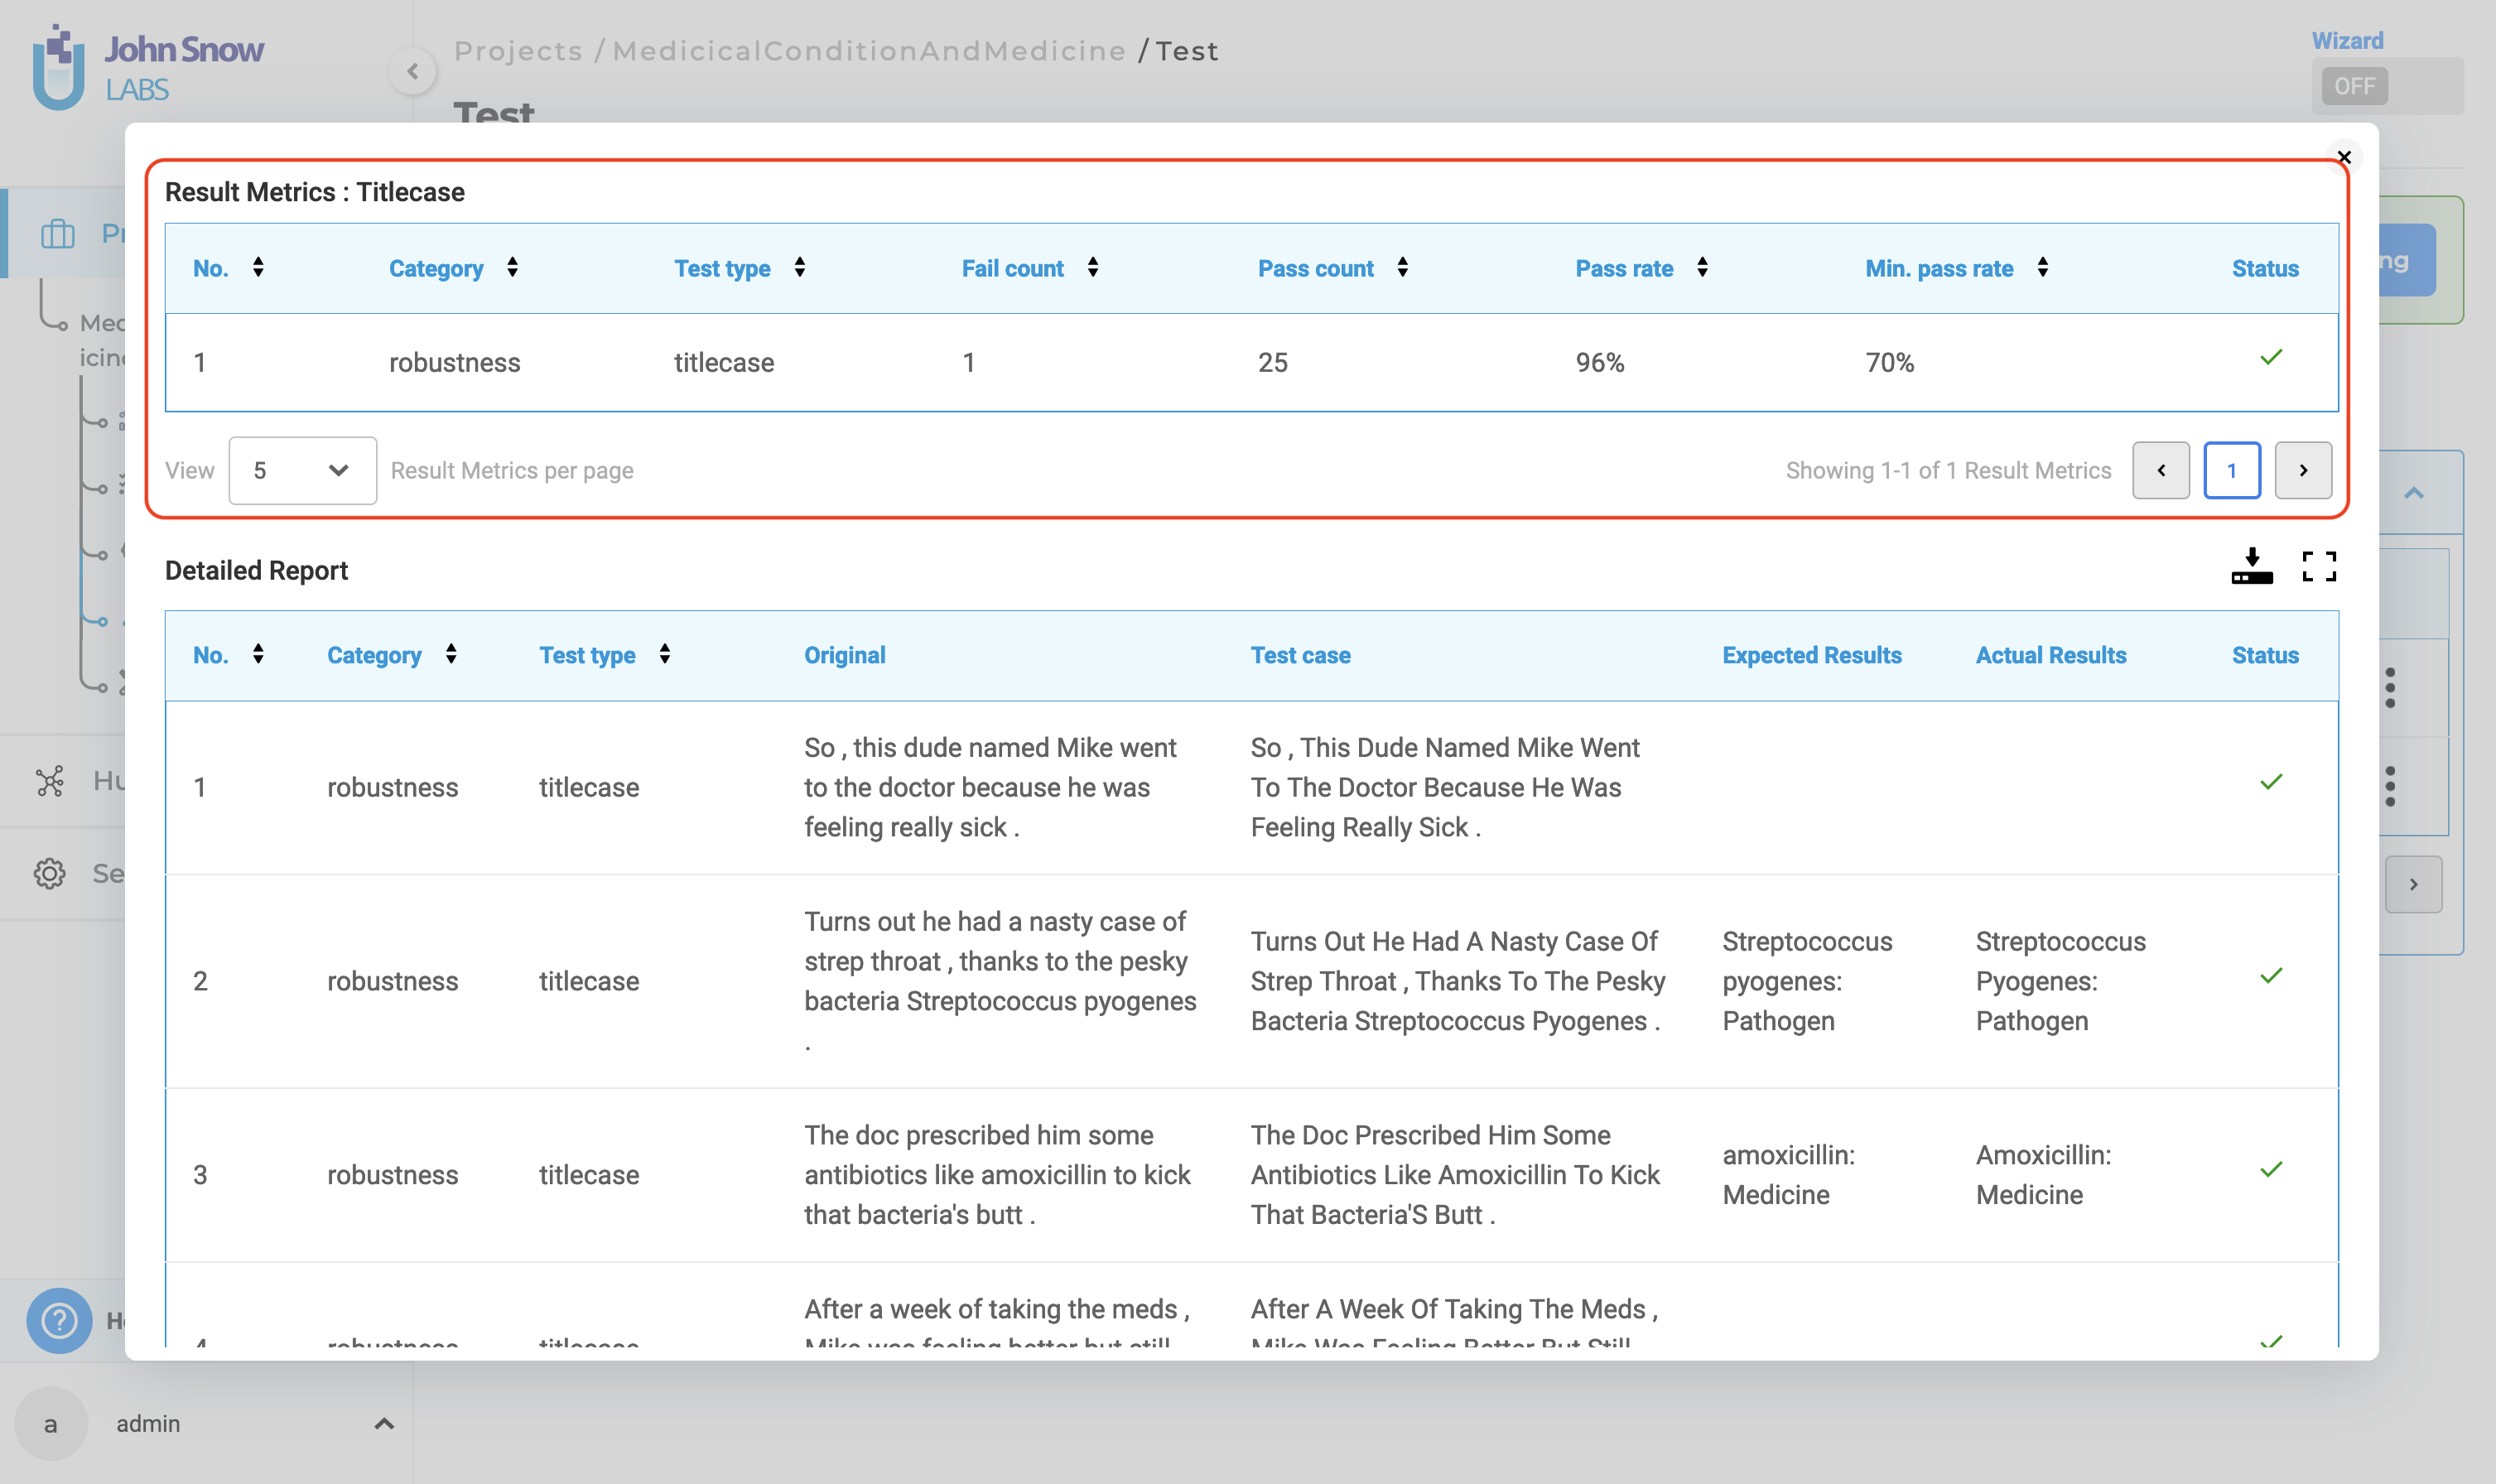
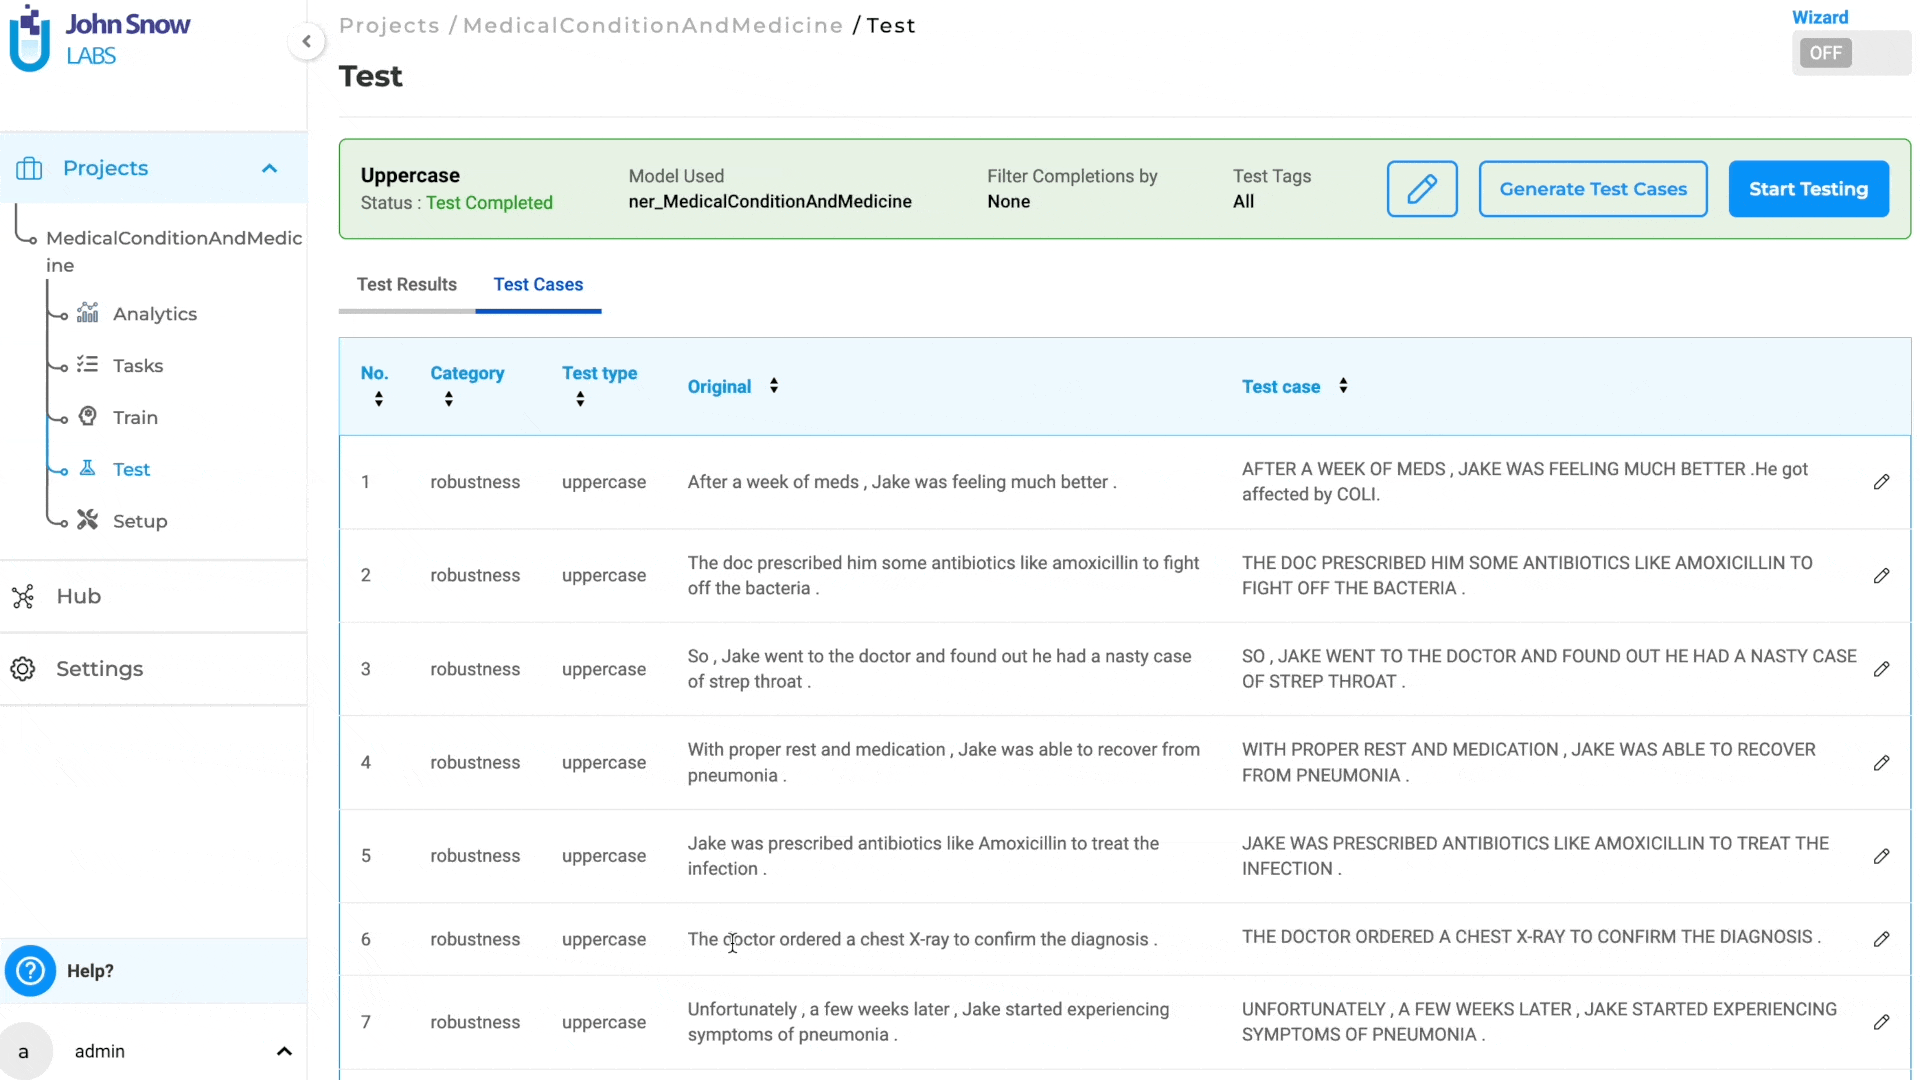
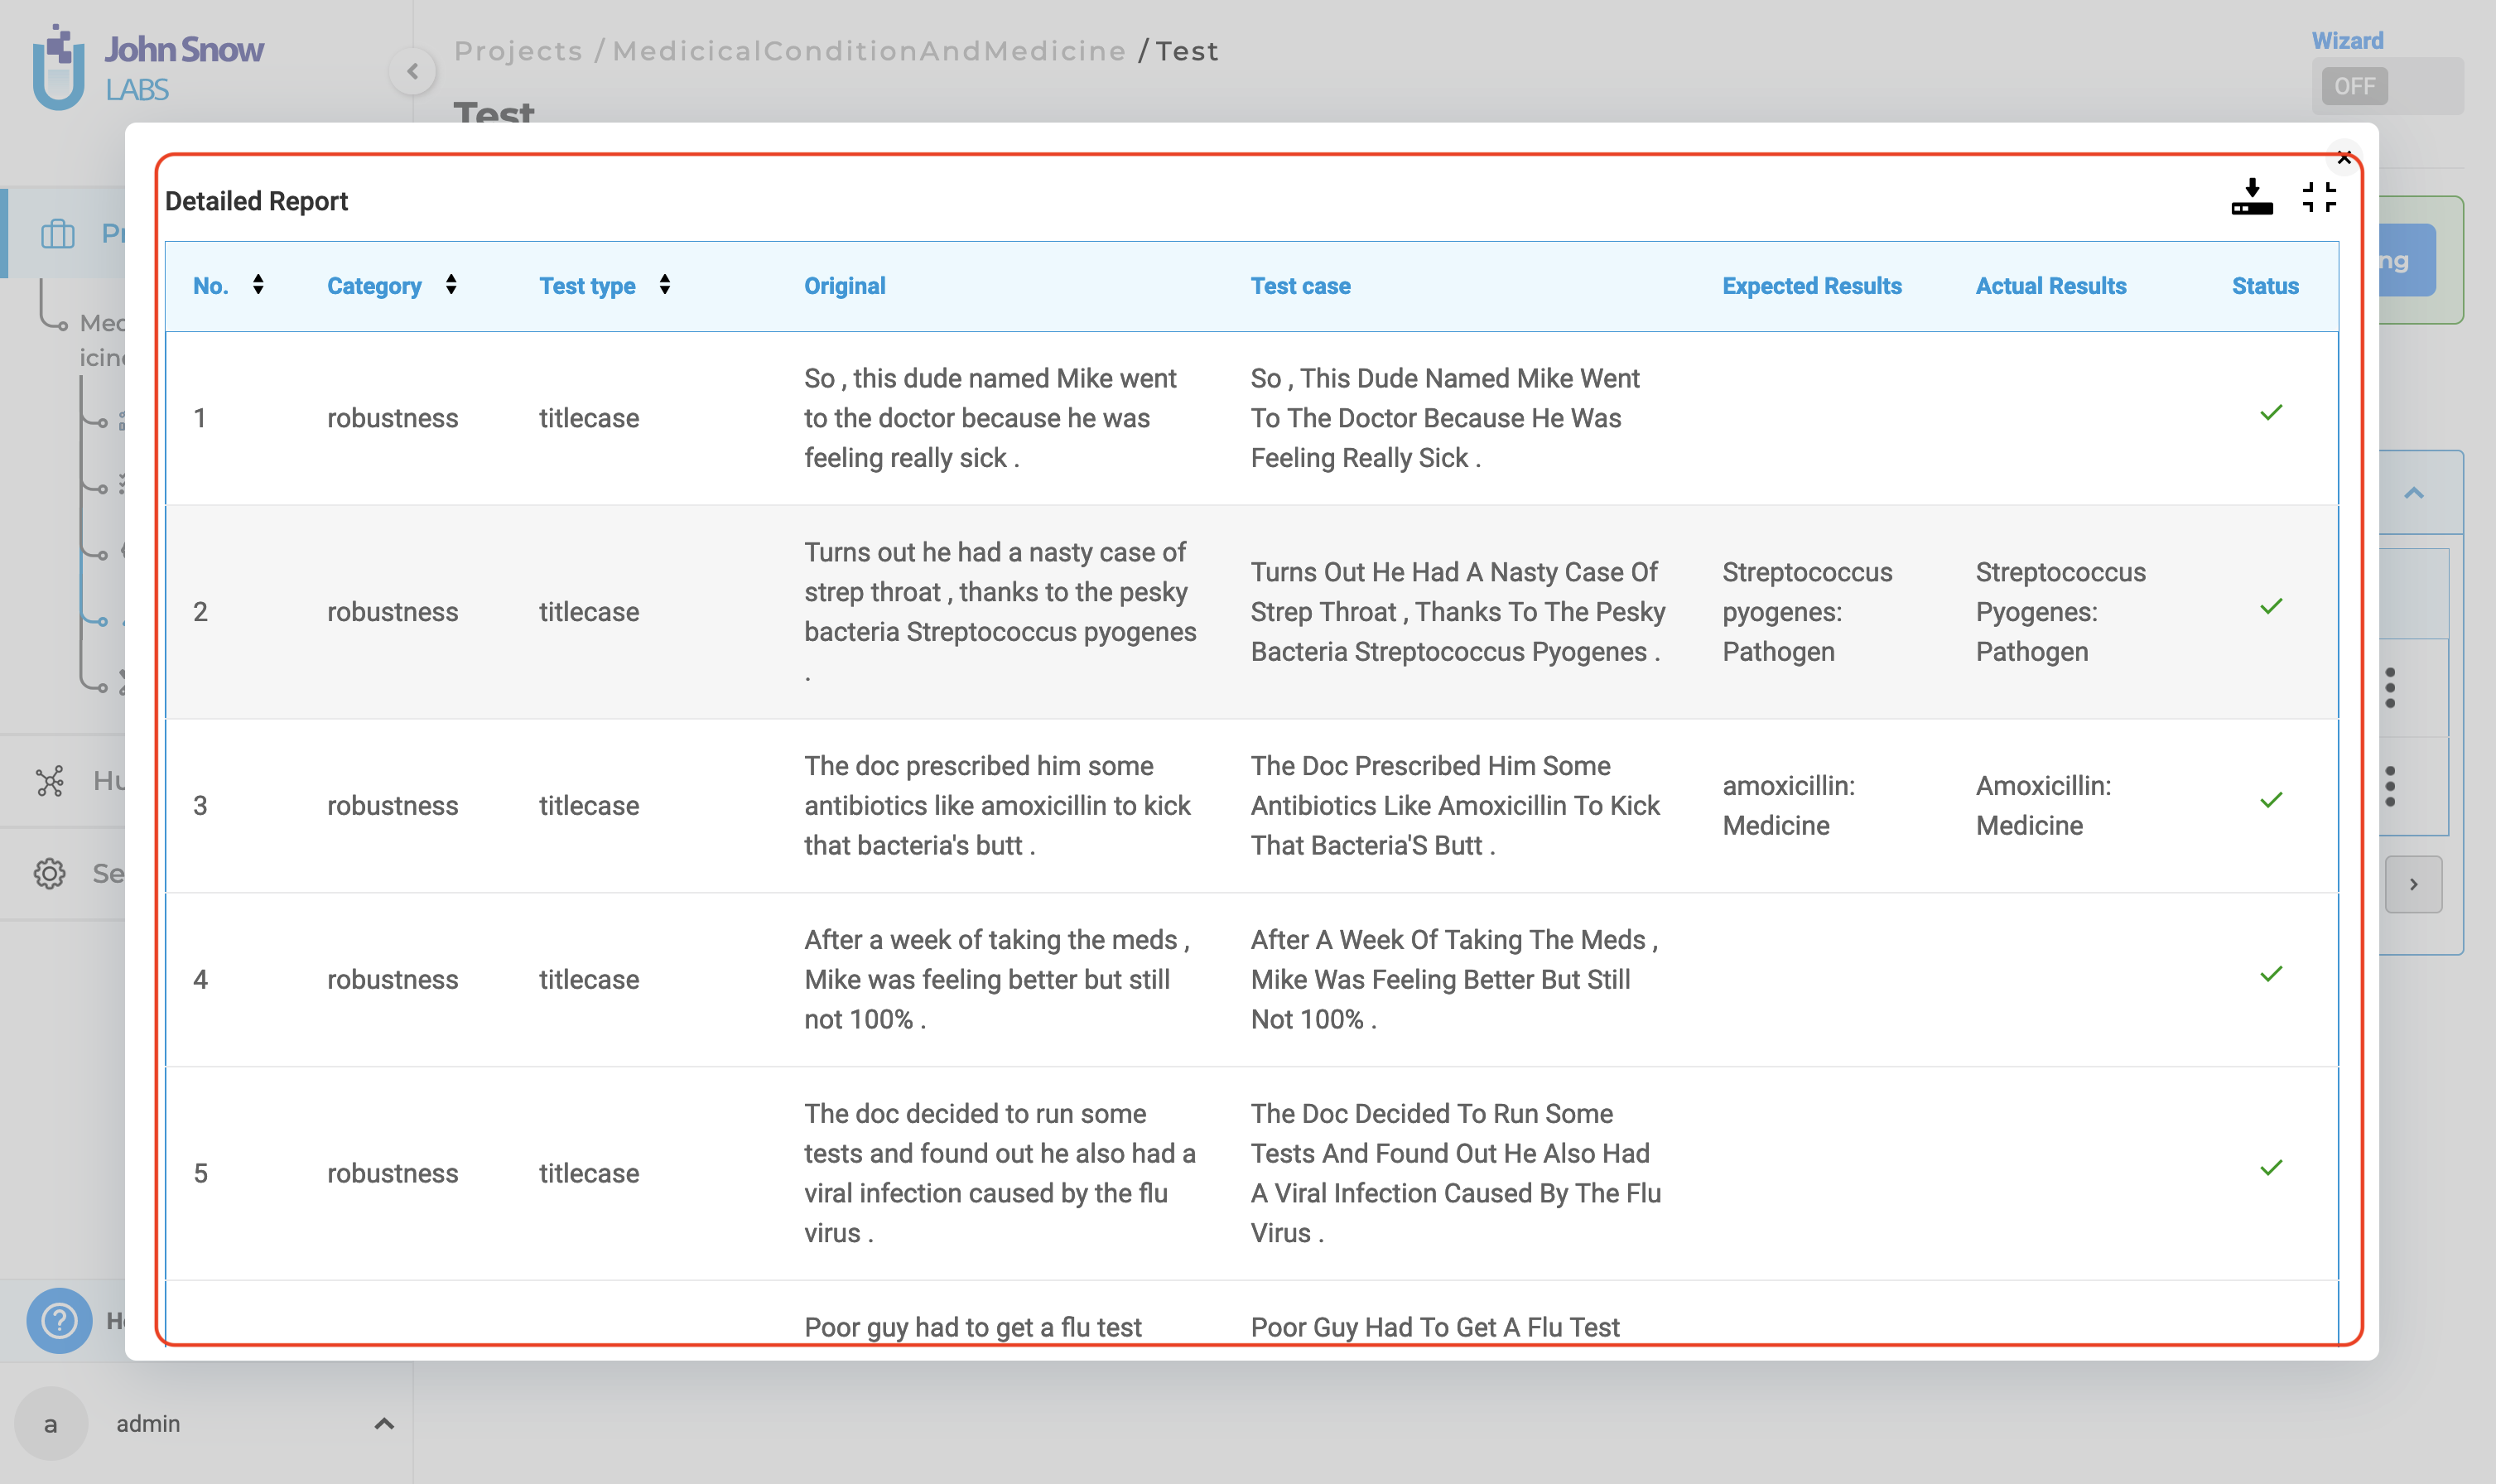
2. Detailed Report:
The detailed report contains information about each test case within the selected tests. It includes “Number”, “Category”, “Test Type”, “Original”,“Test Case”, “Expected Results”, “Actual Results” and “Status”.
In this context, “Expected Results” refer to the prediction output by the testing model on the “Original” data, while “Actual Results” indicate the prediction output by the testing model on the “Test Case” data generated. A test is considered passed if the “Expected Results” match the “Actual Results”; otherwise, it is deemed failed.
Users have the option to simultaneously download both reports in CSV format by selecting the download button.
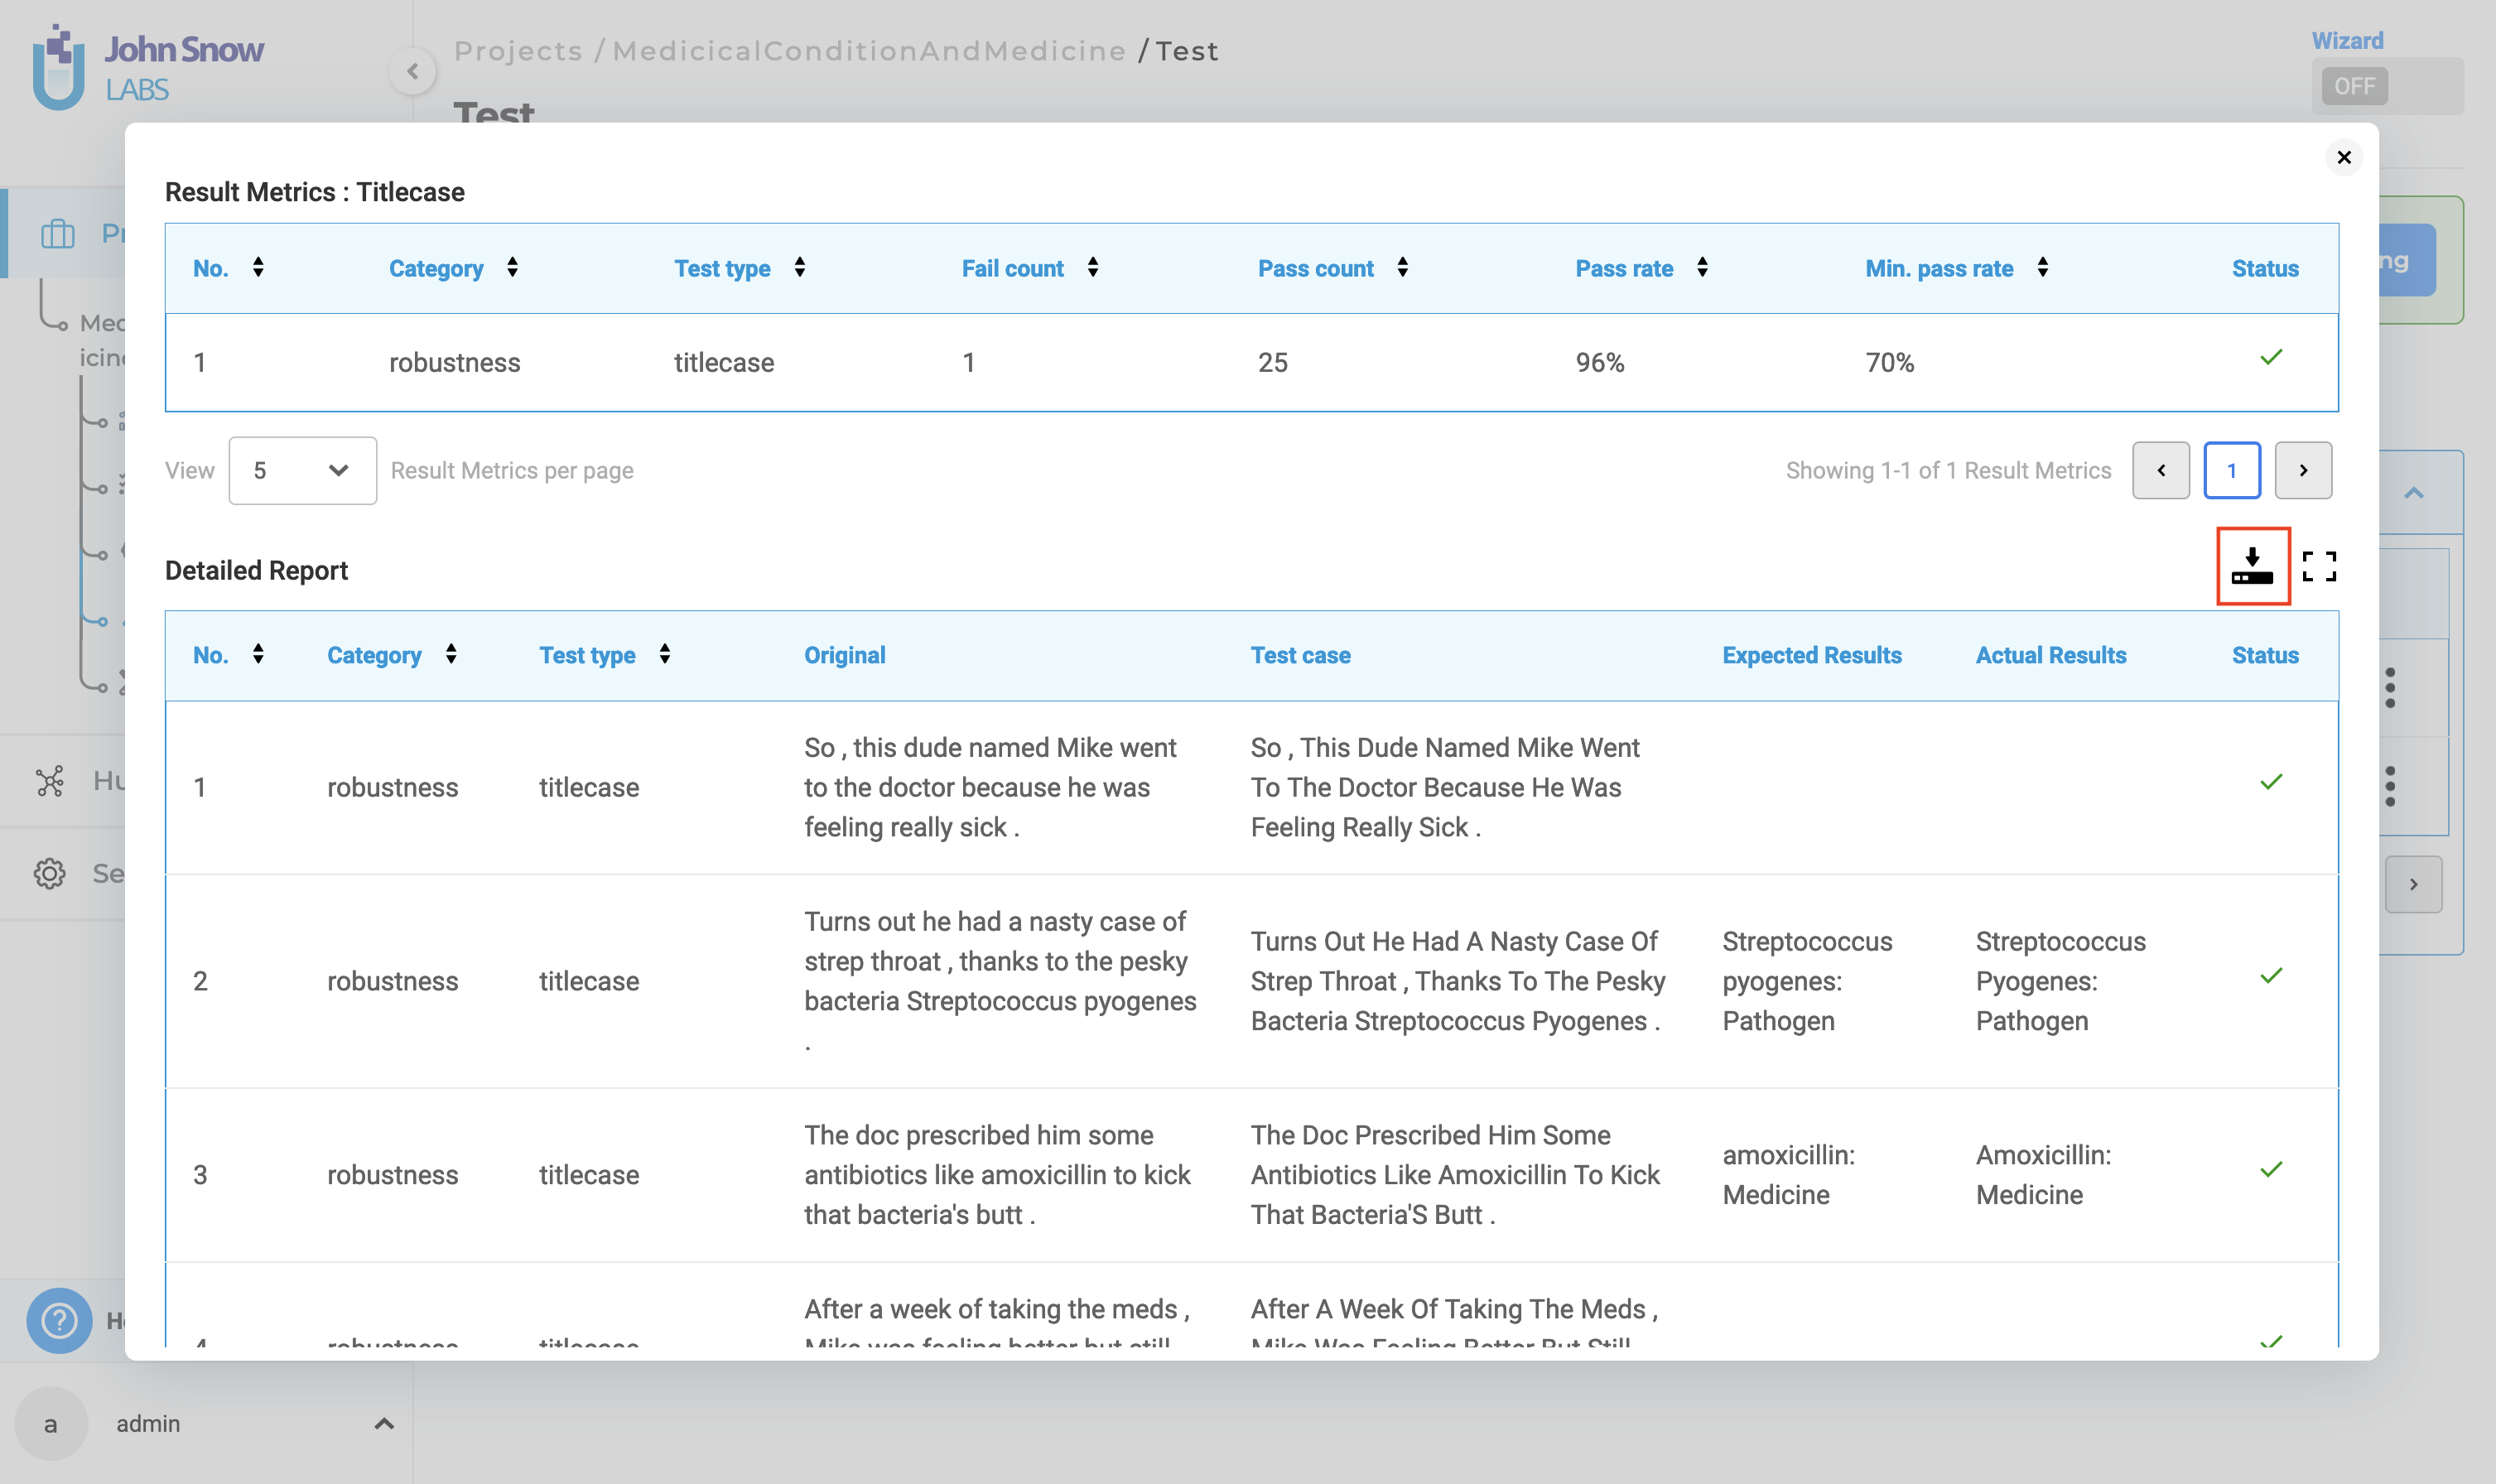
For a detailed report, users can enter full-screen mode by clicking the full-screen button.
Furthermore, users can delete test results from the “Test Results History” by selecting the three dots followed by the “Delete” button.
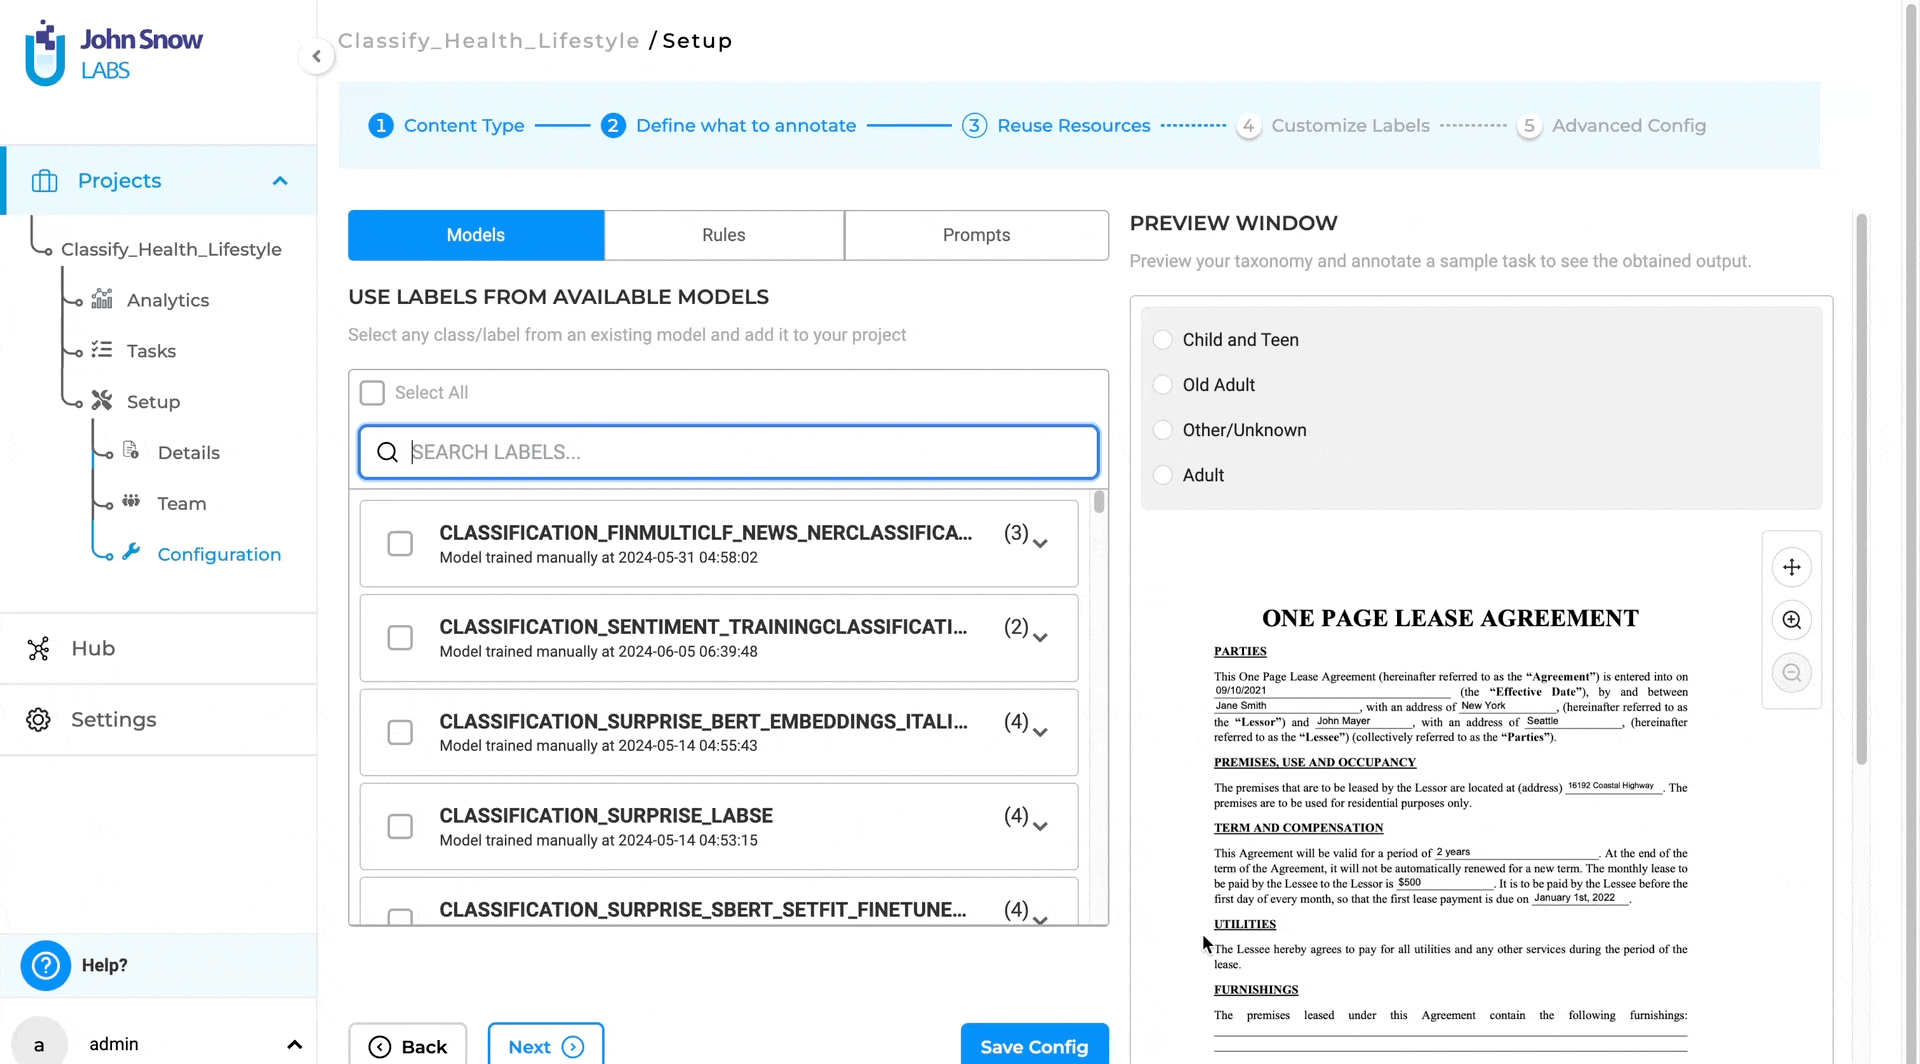
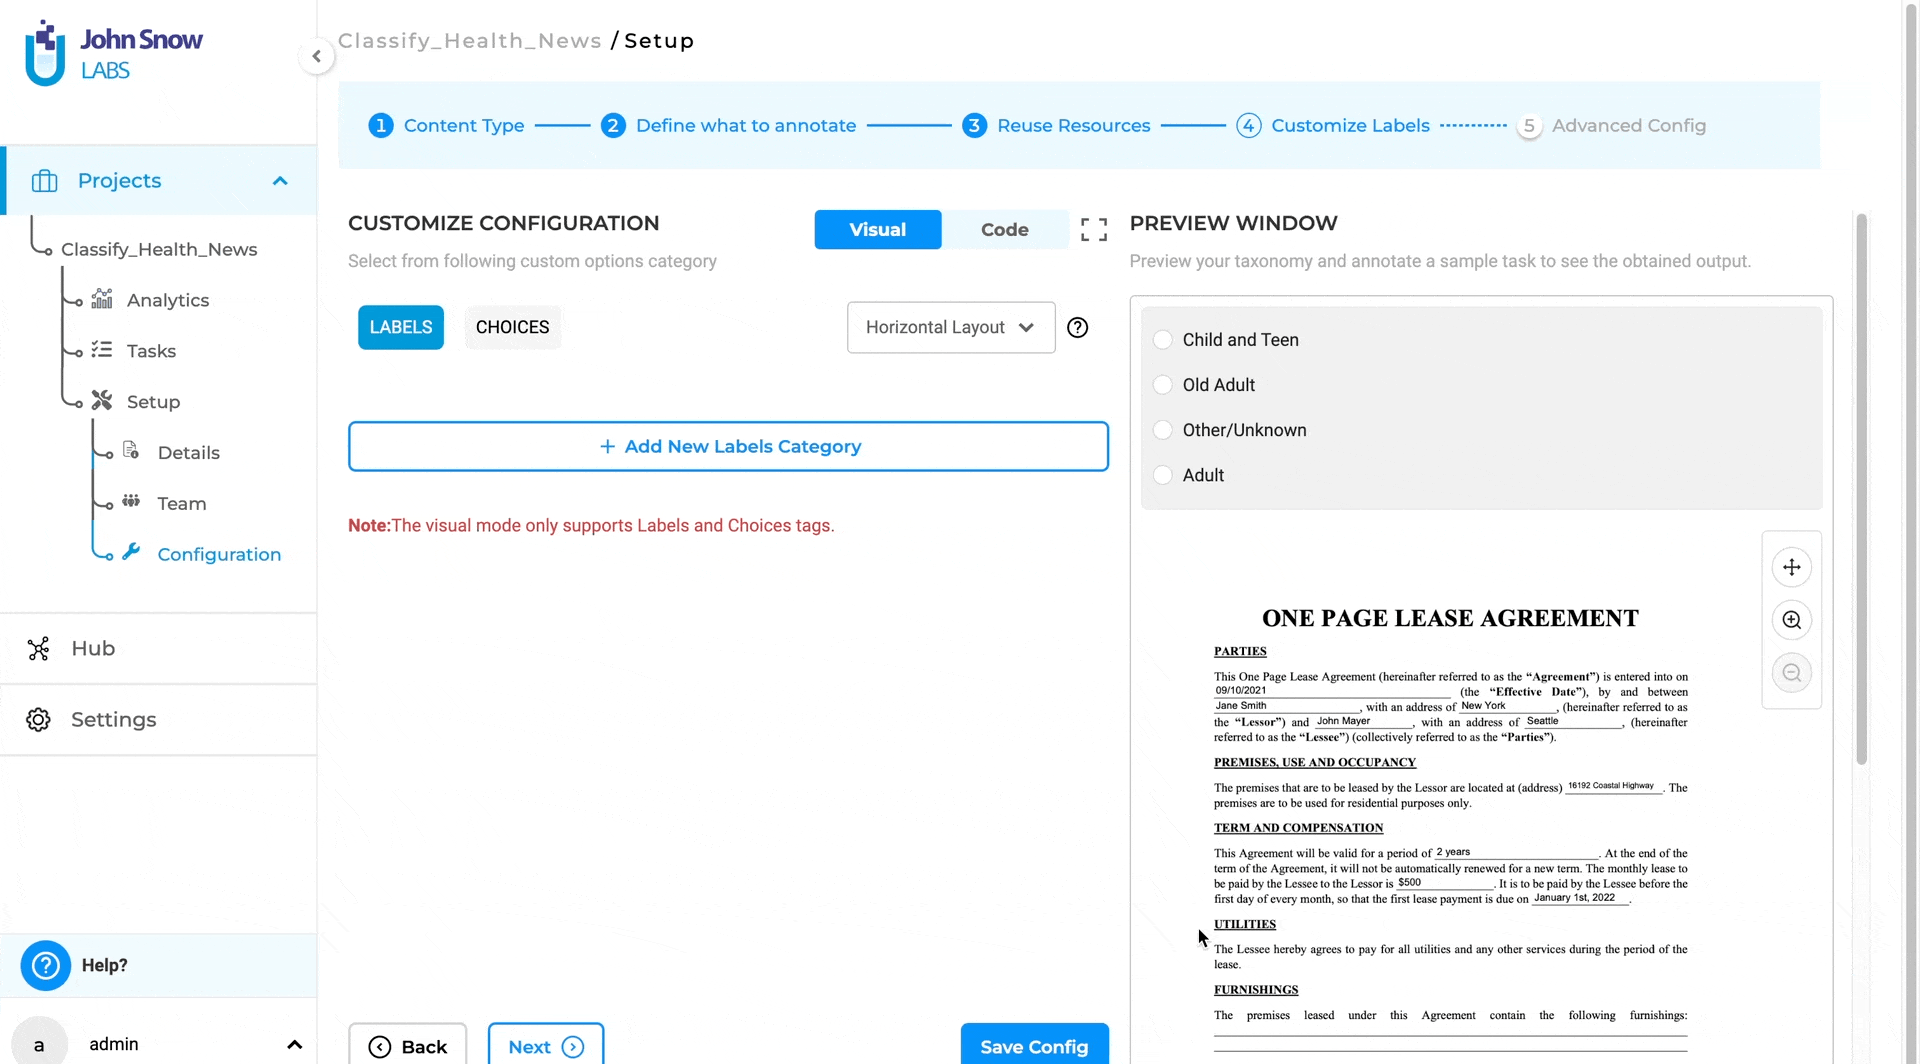
Use Text-based classification model for Visual NER Project
We are excited to introduce the capability of using text-based classification models for visual tasks. Users can now classify images and PDF documents with over 1500 pre-trained models available in the Models Hub. Additionally, manual classification is supported, allowing users to classify documents themselves. This update enables document classification in its original form, preserving the integrity of PDFs without converting them to plain text.
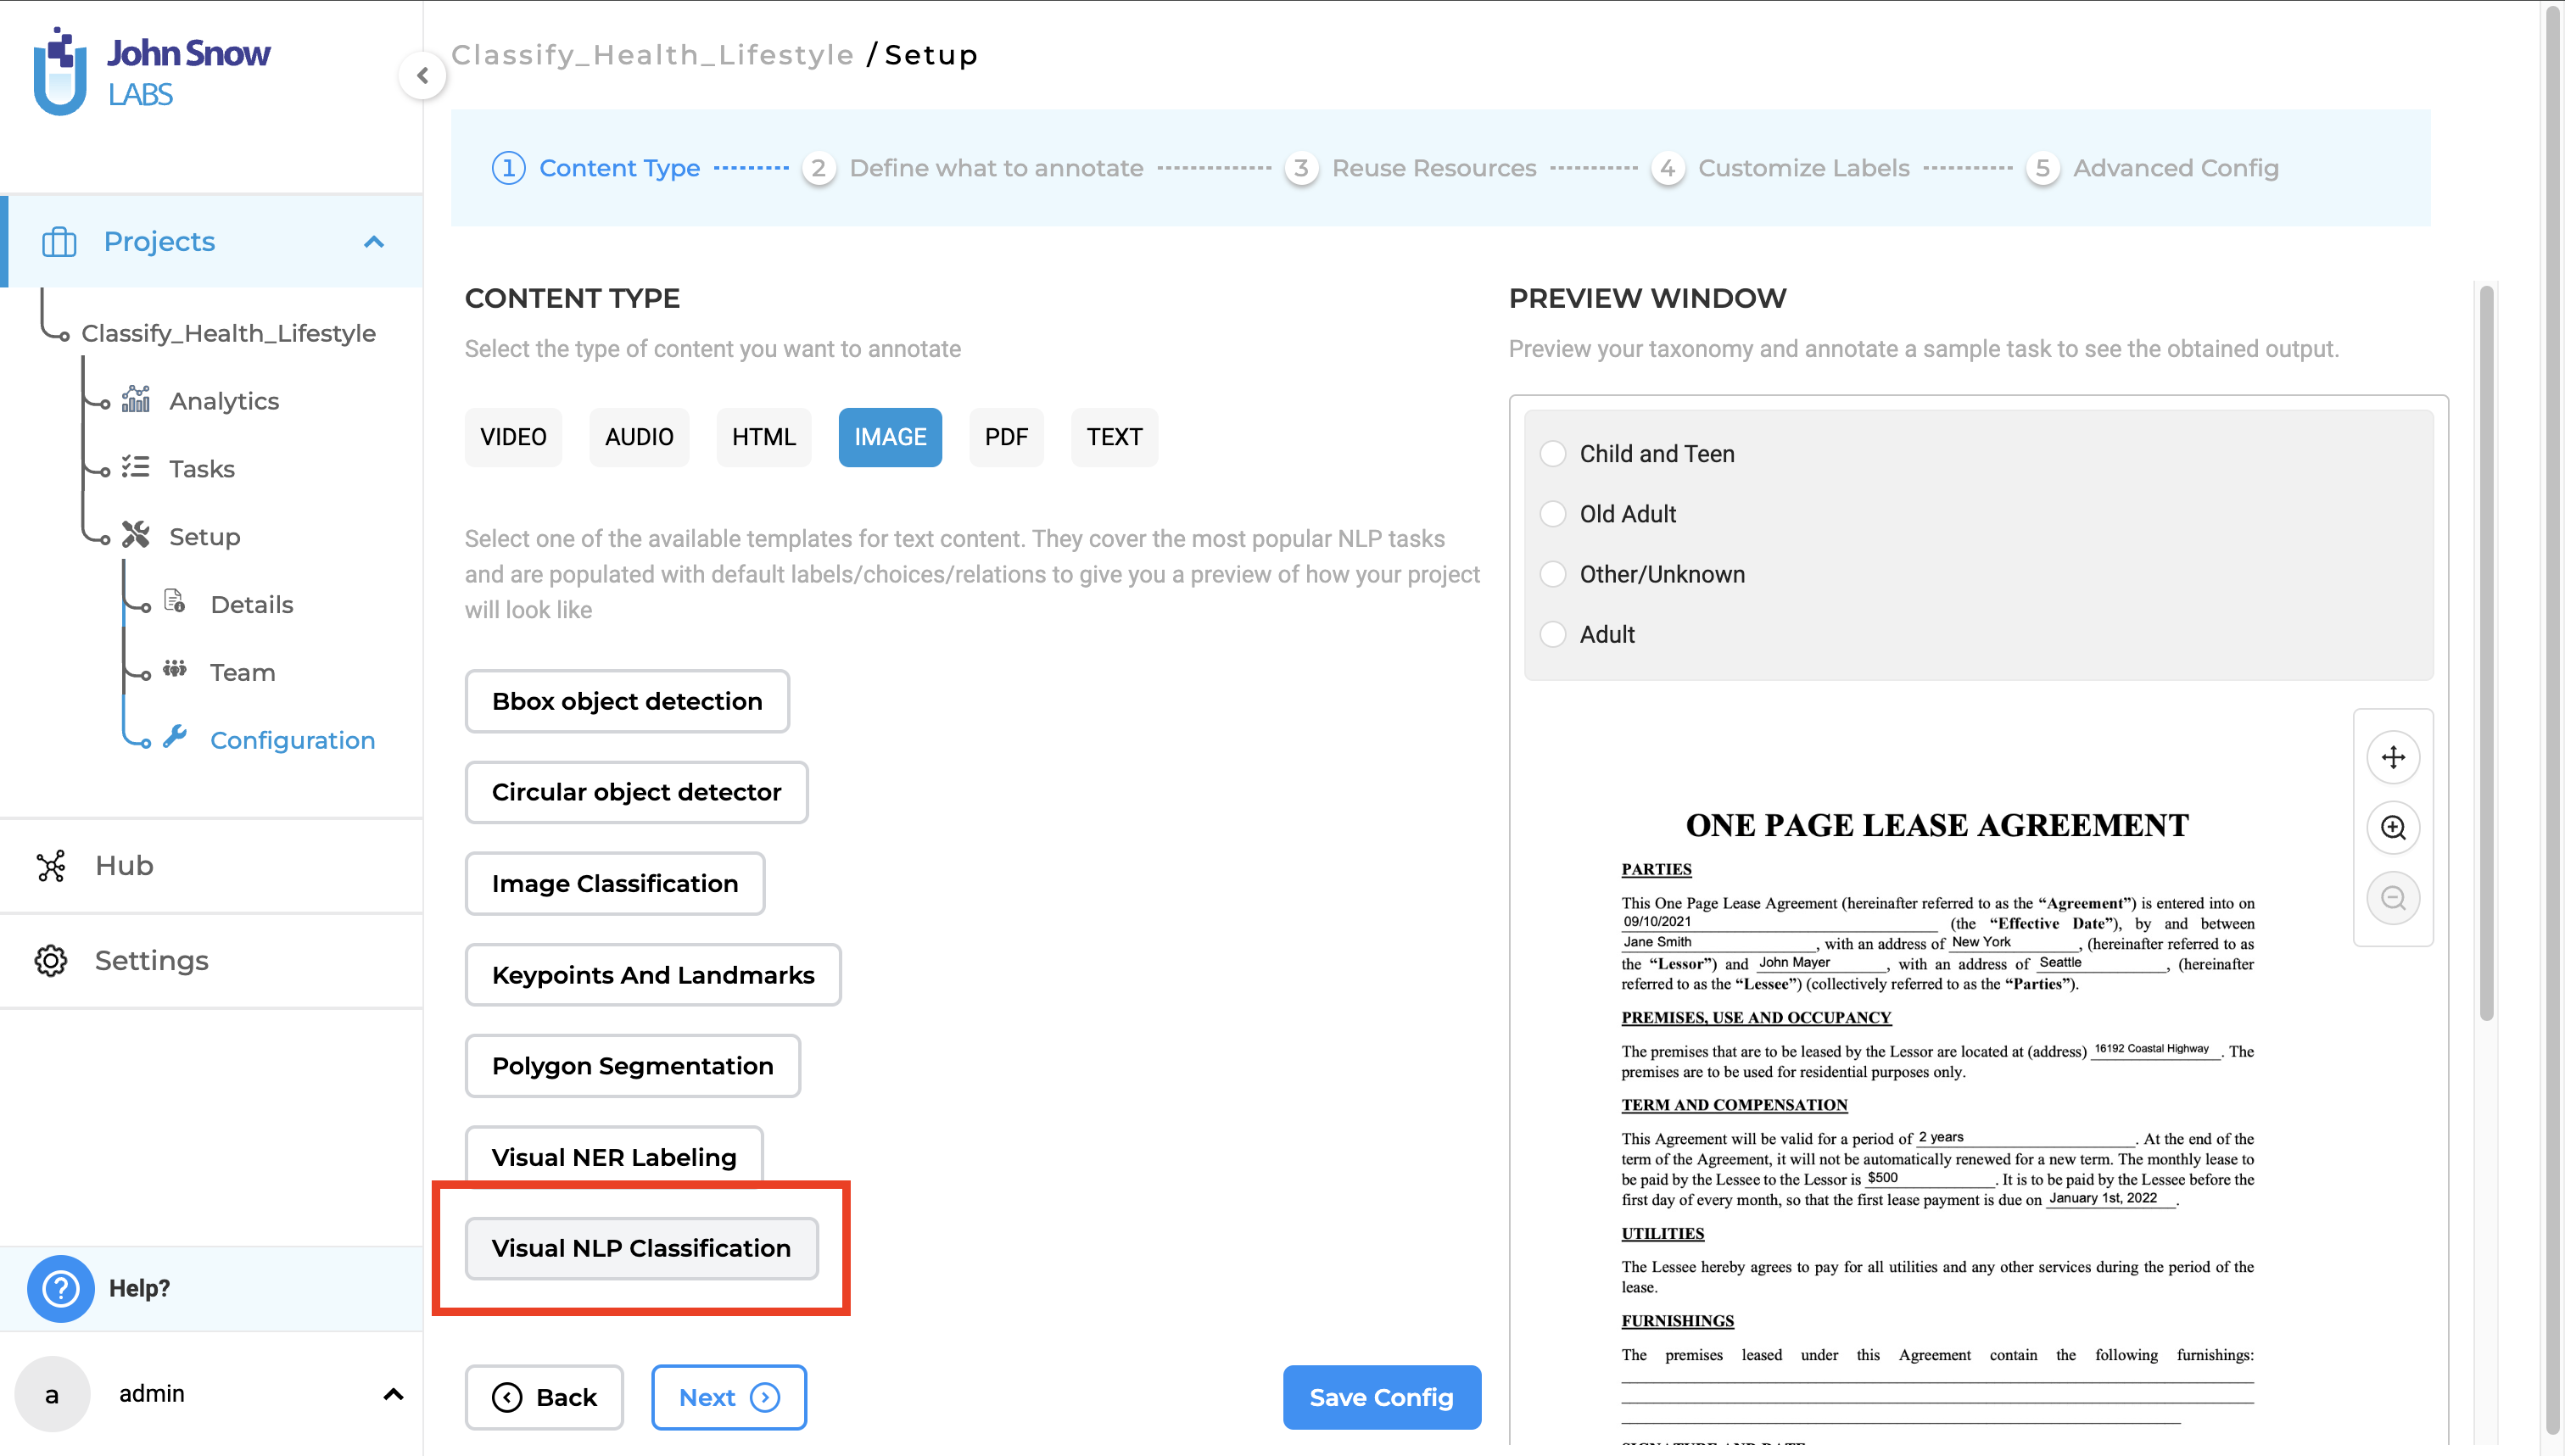
New Project Type- Visual NLP Classification:
A new project type called “Visual NLP Classification” has been added.
Configuring a Visual Classification project is easy:
- Go to the “Content Type” page.
- Select the “Image” tab.
- Choose “Visual NLP Classification” as the project type.
Visual Classification with Generative AI Lab 6.2
With version 6.2, users can classify both images and PDFs using their original form. This means working with the complete/original document, preserving its layout and content, rather than just classifying extracted text. Classification is easy, and the workflow and user interface are consistent with previous implementations:
- Pre-annotation using Classification Models:
- After selecting the project type, go to the “Reuse Resource” page.
- Choose a classification model from the available pre-trained models.
- Save the configuration.
- Import OCR Documents
- Once the tasks are imported, click on the pre-annotate button to classify tasks based on classification models.
- Manual Classification:
- After selecting the project type, go to the “Customize Labels” page.
- Click on the Choices tab and Add/Remove choices for classification
- Click on “Code” view and change the choice property in Choice tag to multiple to enable multiple classification.
- Save the configuration.
- Import OCR Documents
- Open the tasks and classify them manually.
Sort tasks by file name on the labeling page
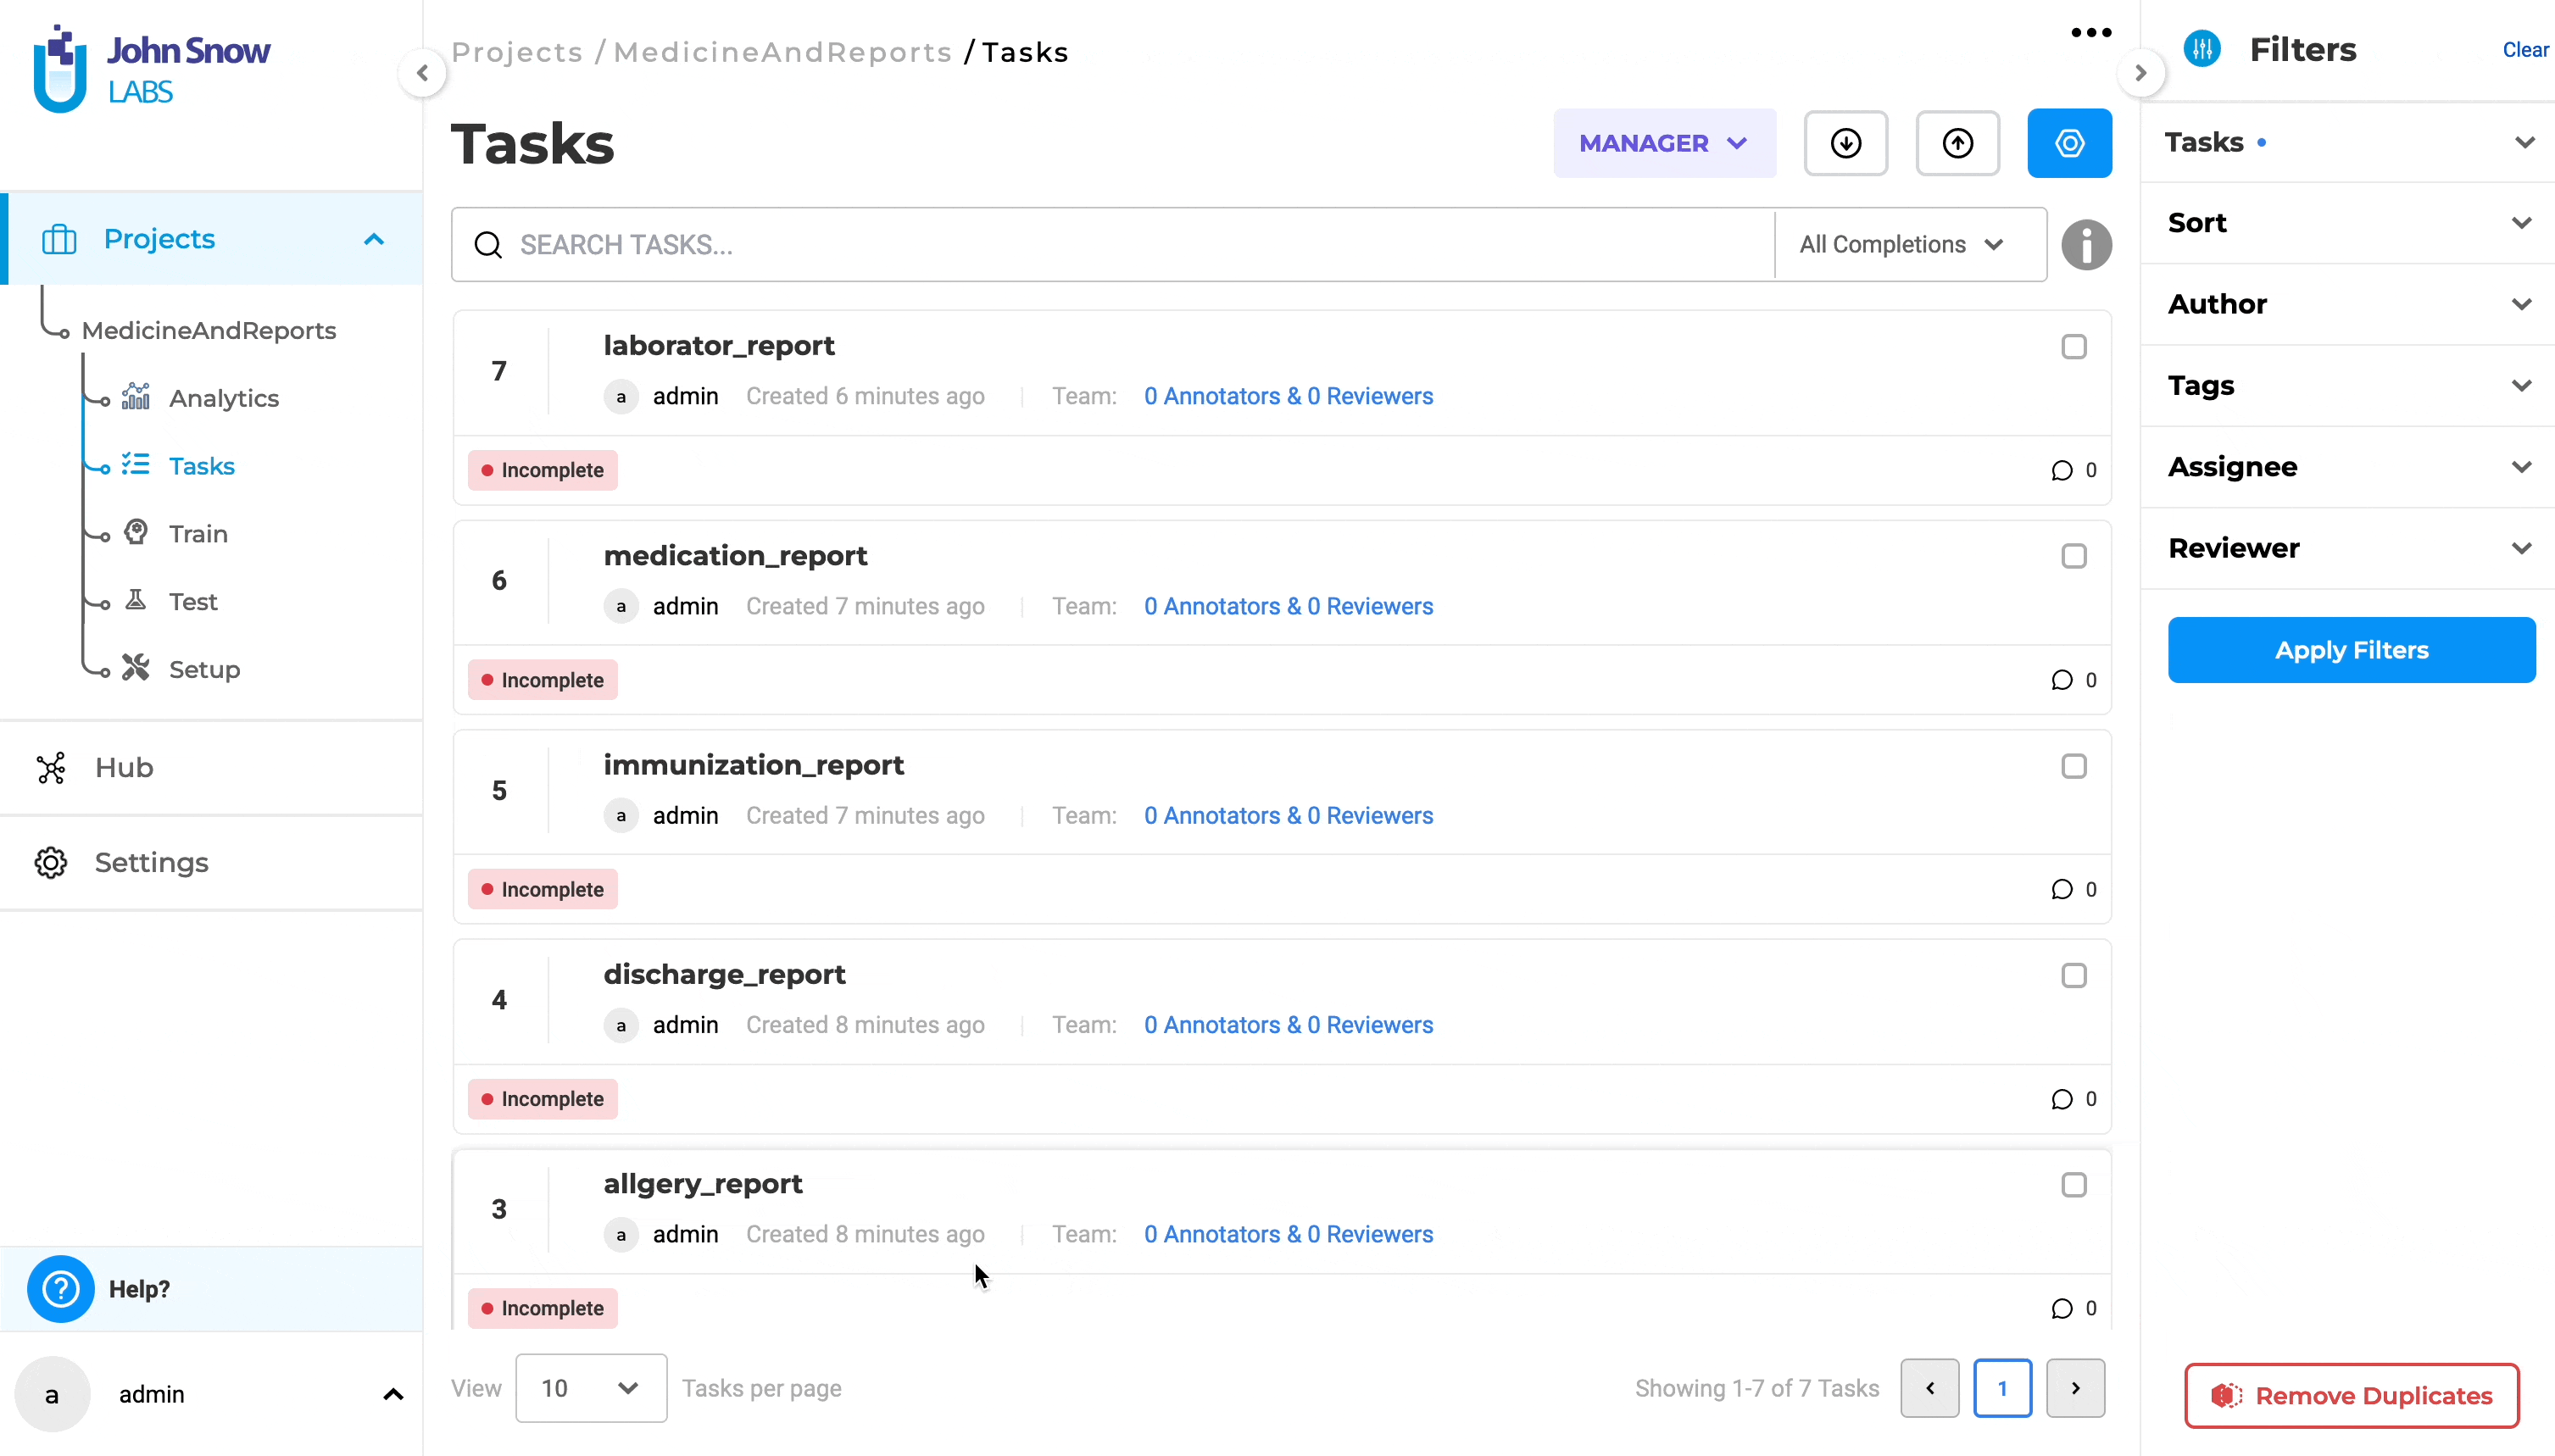
In previous versions of Generative AI Lab, sorting tasks could be done only by using the creation time, with two options: “Newest” and “Oldest”. With this version, there is a new option to sort tasks by using the “original name of the file”. Choosing “Sort” will offer two options: “By Date” and “By Title”.
Sorting using the original name of the file is done when selecting the option “By Title”. Sorting can be done either “By Date” or “By Title” at a time.
The sorting direction is visually indicated by an up arrow within a circle, indicating the default sorting in ascending order for both options. Changing the sort order is done by clicking on the up/down arrow. After selecting the sorting type and order, the user must click “Apply Filter” to see the sorting results.
In previous versions of the application a prefix “Task{No}” was added to each task title during import step. This behavior has been modified. No prefix will be added to imported tasks, except for tasks without a title, which will use “Task{No}” as the title.
Additionally, to improve sorting by original name, tasks imported from an archive will no longer include the full path as part of the title. Only the file name will be used for title, without the “Task{No}” prefix or file path.
Improvements
Restrict uploaded file types throughout the application
Version 6.2 of Generative AI Lab introduces a significant enhancement for improving the application’s security and robustness by restricting the types of files that can be uploaded or imported. This change ensures that only supported and safe file types are processed, providing a more secure and efficient user experience, maintaining the platform’s integrity and reliability while enhancing its security.
Users can confidently upload and import files, knowing that the system will enforce these important security measures.
** Key features and benefits:**
- File Type Validation:
- The application now checks the type of files being uploaded or imported.
- Only supported file types are allowed, and any unsupported file types are automatically restricted.
- Enhanced Security Measures:
- Increased application security by preventing the upload or import of potentially harmful files reducing the risk of introducing malicious files into the system.
- Attempts to bypass these restrictions by changing file extensions are now detected and logged.
- File Name Length:
- The application checks the length of the file name to ensure it meets specified requirements before import or upload.
-
Improved User Experience: Immediate feedback is provided when attempting to upload an unsupported file type, preventing potential errors and confusion during the project configuration workflow.
- Robust Monitoring: Attempts to circumvent file type restrictions by changing file extensions are detected and logged, providing an additional layer of security and oversight.
There should be a way to “batch” clear predicted labels in a Section after pre-annotation
Version 6.2 of Generative AI Lab introduces a tool to allow annotators to remove large sections of pre-annotated labels in bulk instead of removing them individually.
Key Features of This Improvement:
- Selective Label Clearing:
- Shift + Drag: press and hold the Shift key, while dragging, to select the specific area where all labels will be cleared.
- click the Delete button to remove the selected labels.
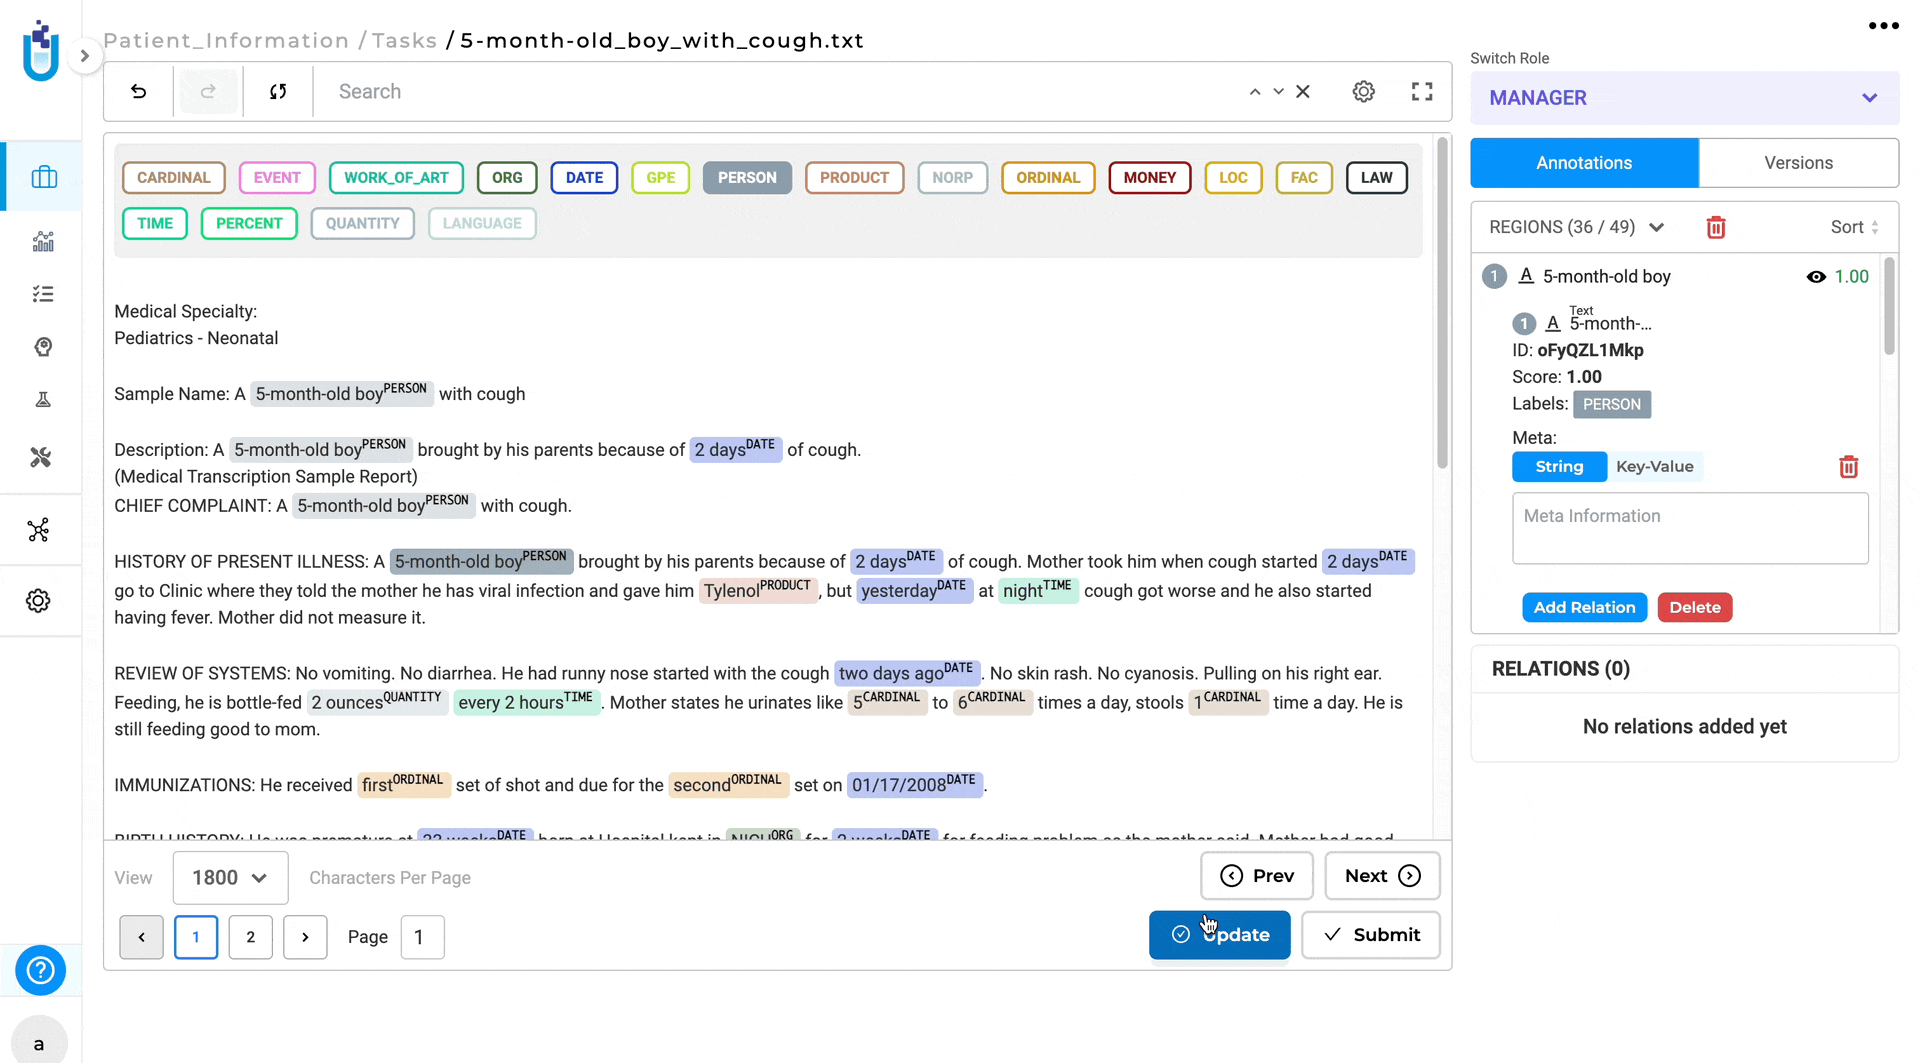
- Clear All Labels:
- Annotation Tab: clear all labels from the labeling page by clicking on the Delete icon located under the Annotation tab next to Regions.
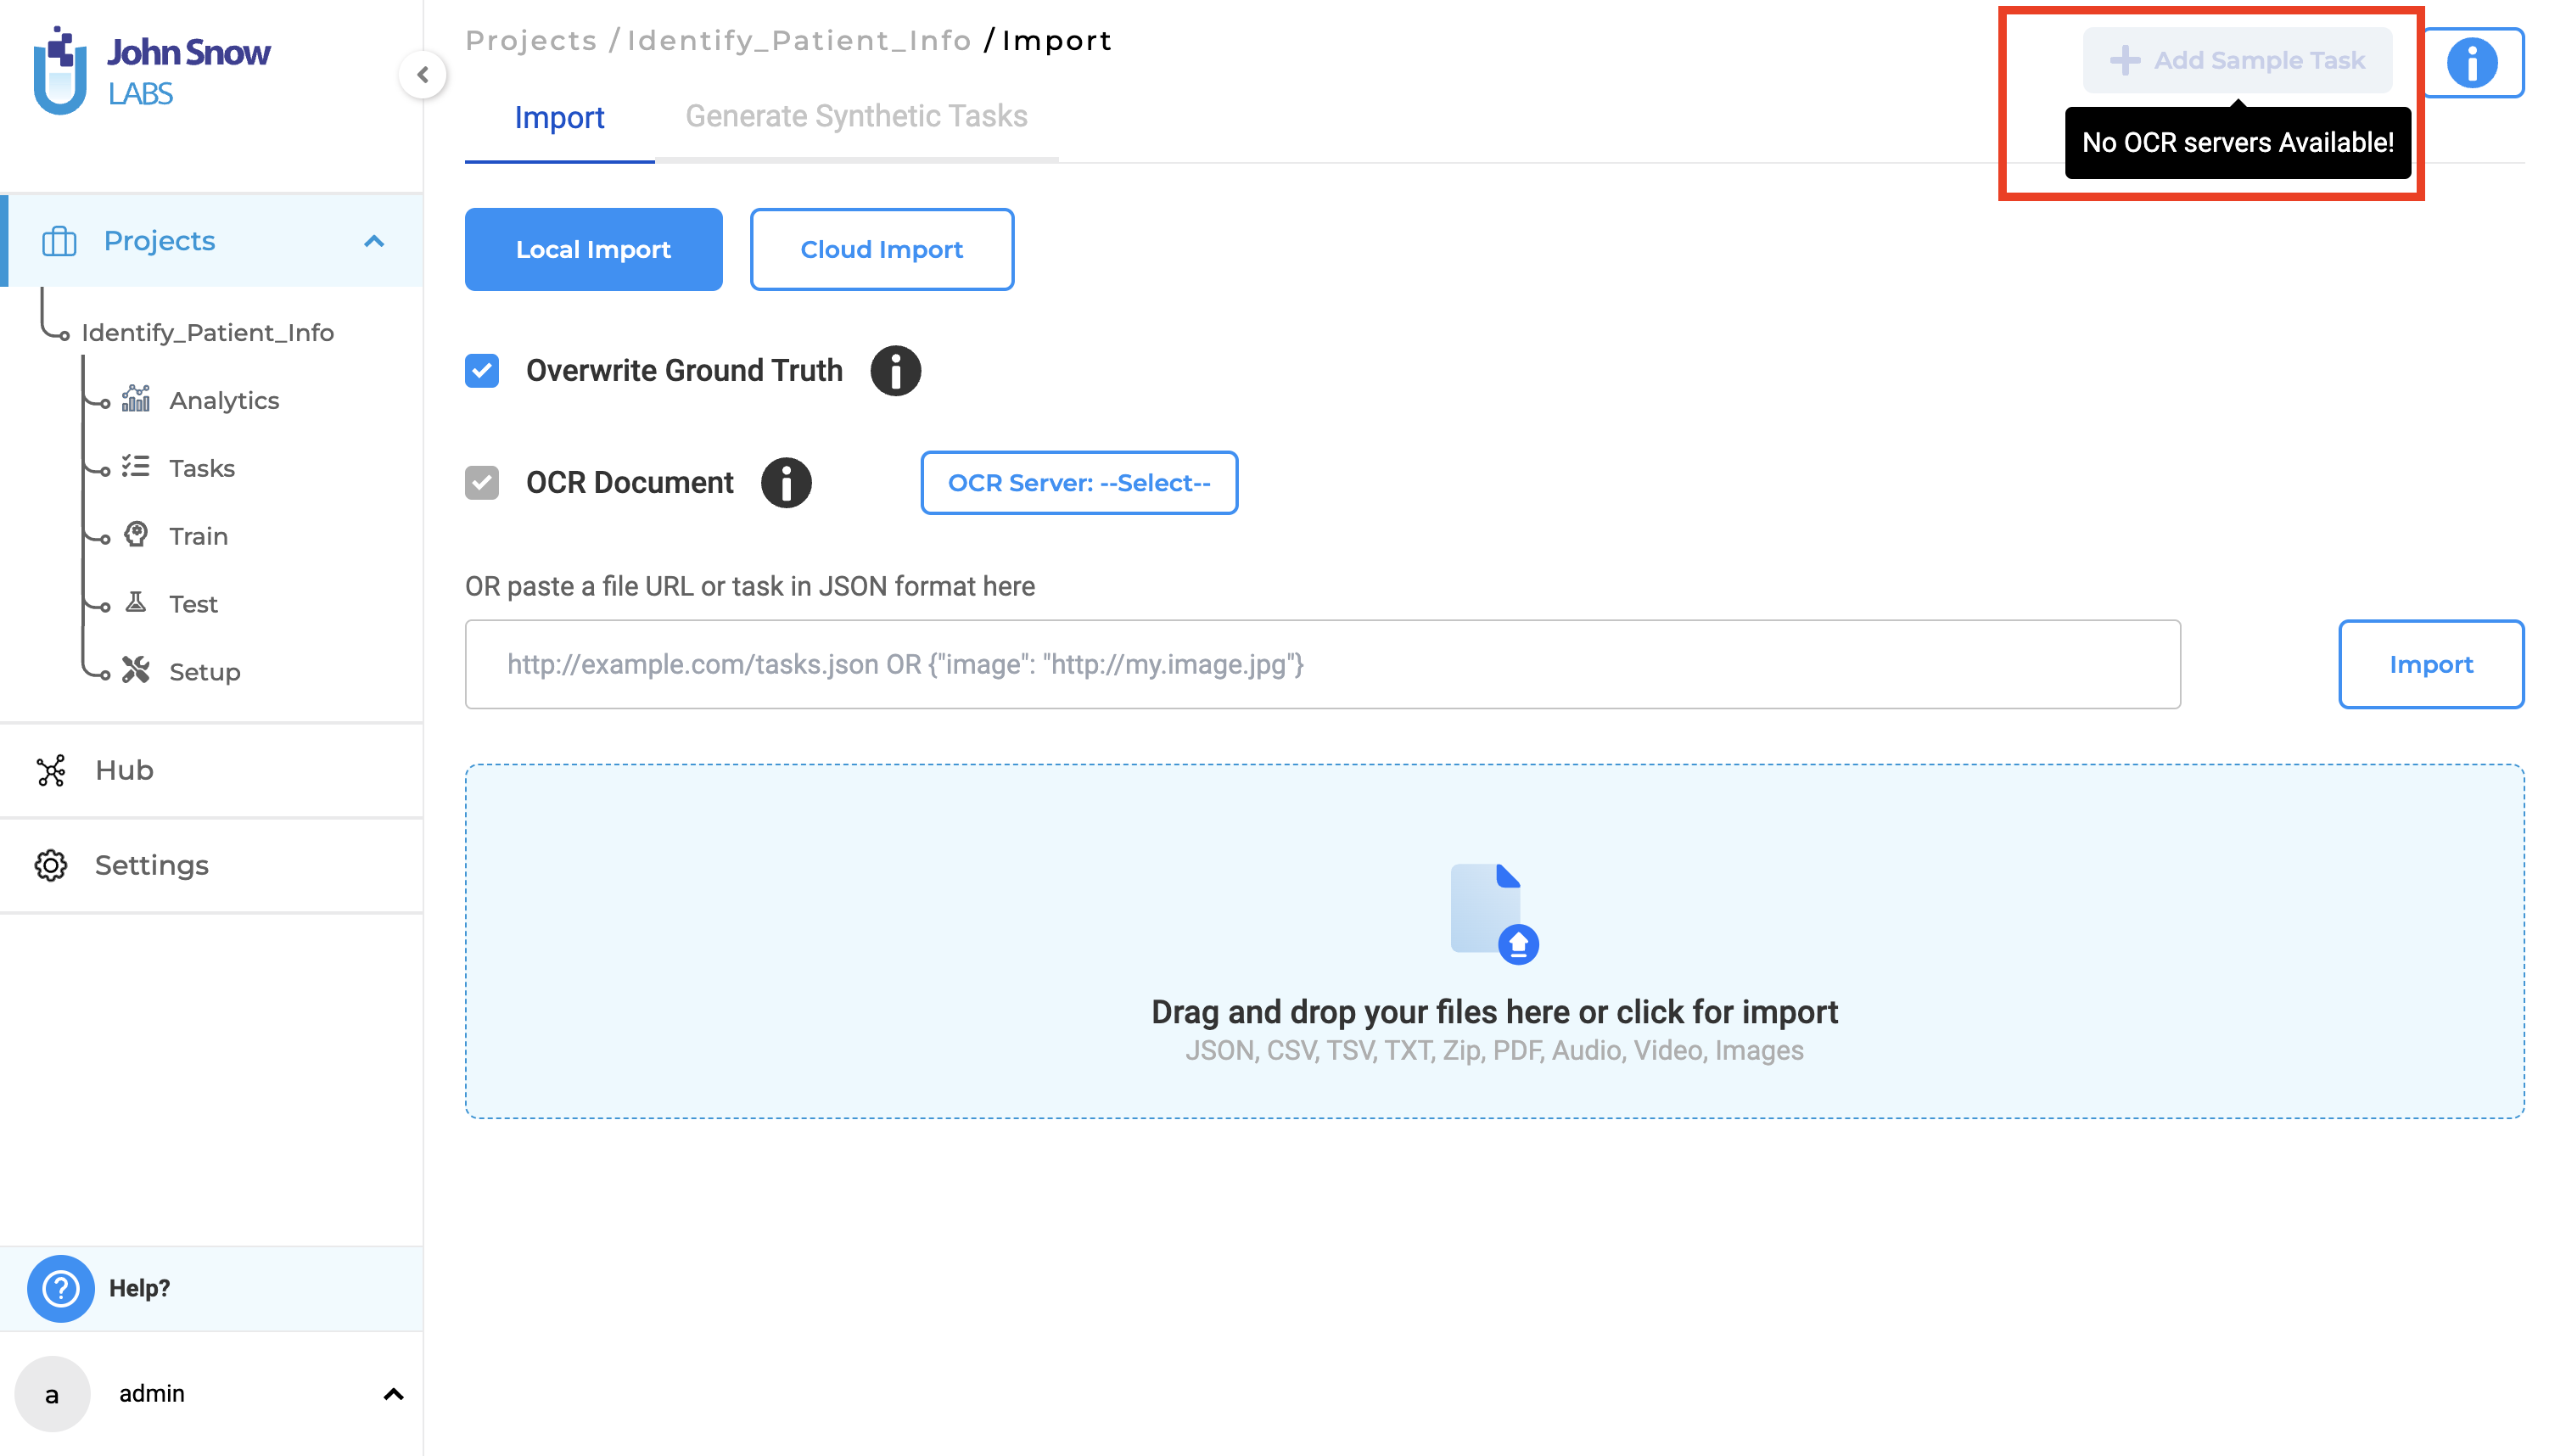
Disable “Import Sample Task” along with information when active OCR server, is not available
In previous versions of Generative AI Lab, the Add Sample Task button was always enabled, allowing users to attempt importing sample tasks for all project types, including Visual NER projects. However, if the OCR server was not deployed and active, users encountered issues where the sample tasks could not be imported, leading to confusion as no error message or indication was provided.
With version 6.2 the button is disabled if an active OCR server is not available preventing any confusion during the sample task import process and providing clear feedback regarding the availability of the OCR server before attempting to import sample tasks.
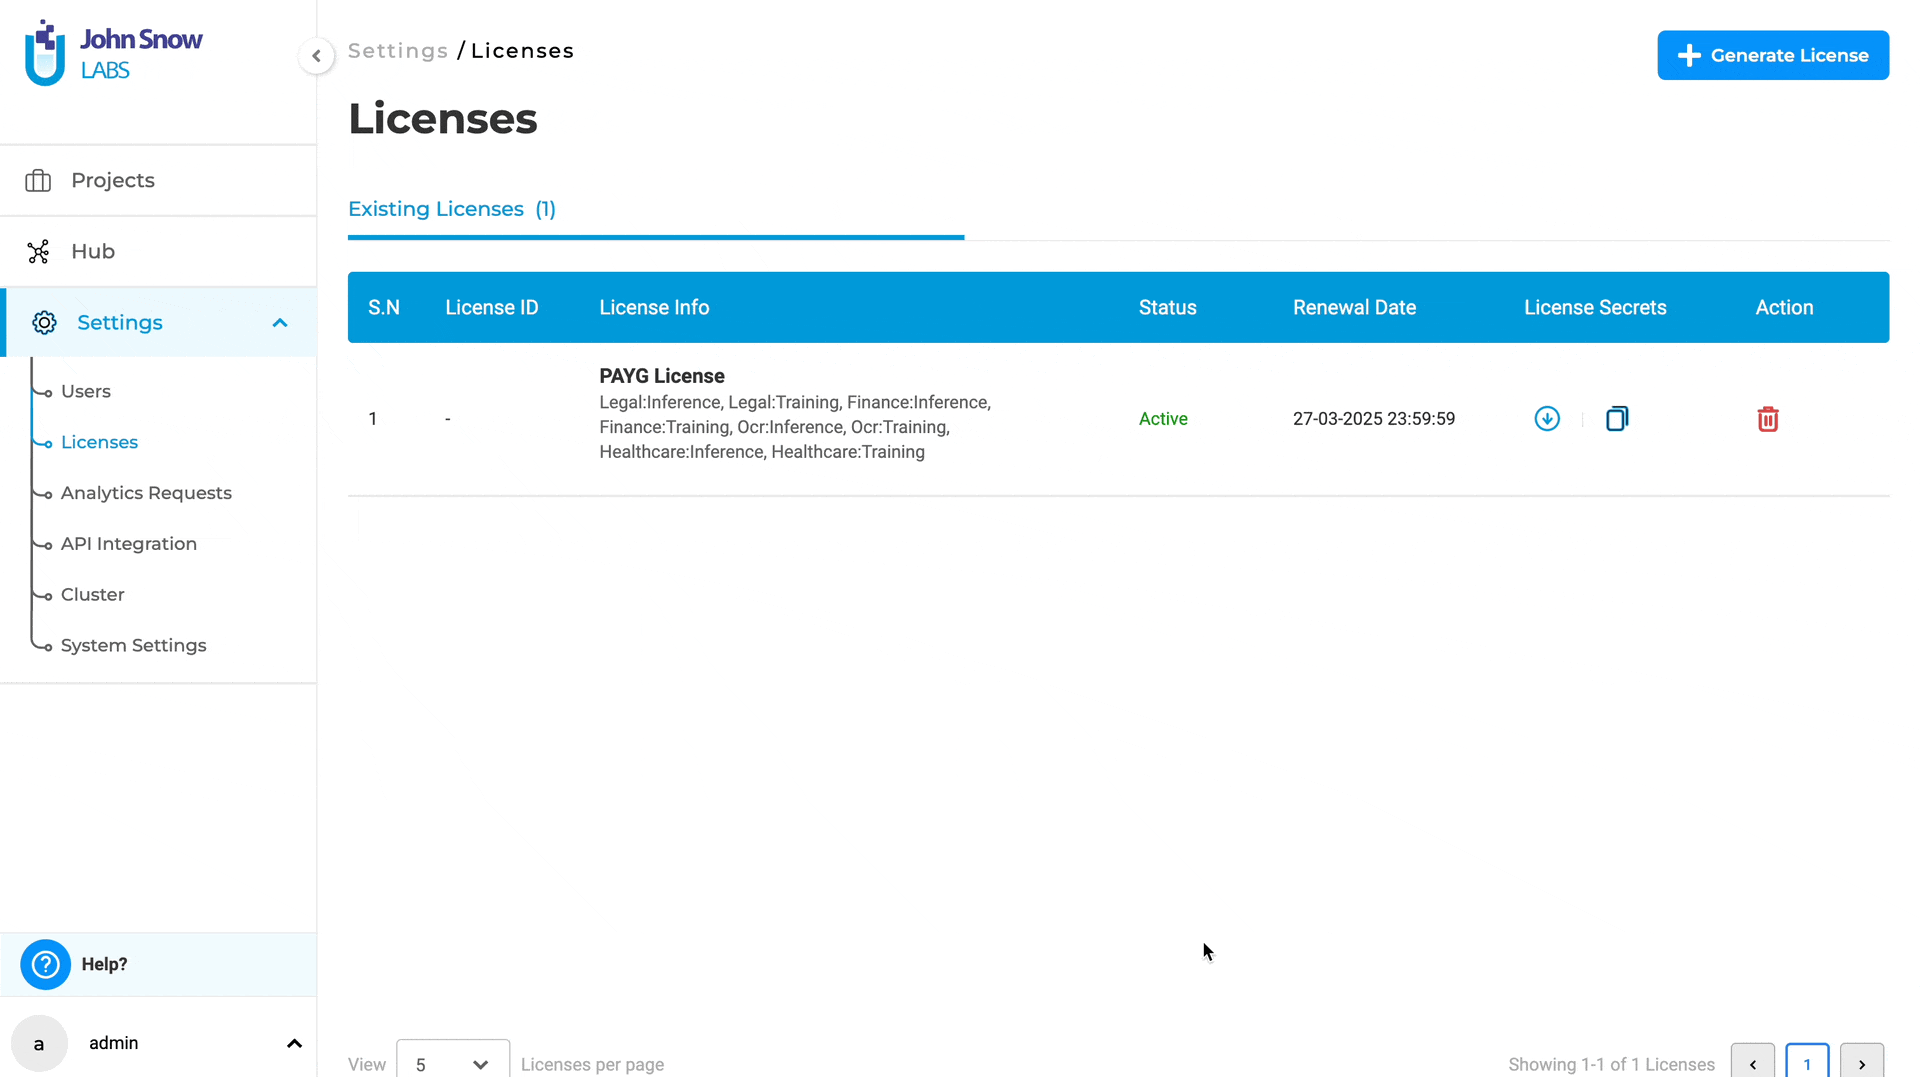
Bring your own License for AMI instances
The previous version of Generative AI Lab only supported PayG (Pay-As-You-Go) licenses, preventing users from uploading or switching to existing Airgap or Floating licenses.
With version 6.2, managing licenses for AMI (Amazon Machine Image) instances provides increased flexibility and control over the licensing options by supporting multiple License Types:
Features:
- Delete Autogenerated PayG License: Users can now delete the autogenerated PayG license in AMI instances.
- Upload Existing Licenses: Users can upload their existing Airgap, Floating, or a different PayG license, providing greater flexibility and accommodating various licensing needs.
Managing your licenses is simple and can be done in just a few steps:
- Delete Autogenerated PayG License:
- Navigate to the License page in your AMI instance.
- Select the autogenerated PayG license and delete it.
- Upload a New License:
- Click the option to upload a new license.
- Choose your preferred license type (Airgap, Floating, or PayG) and complete the upload process.
Bug Fixes
- Prompts with spaces in their names caused errors when added to the project configuration:
Previously, adding a prompt with spaces in its name resulted in an error in the project configuration. To address this, a new improvement prevents users from creating prompts with spaces. However, if users attempt to use existing prompts that contain spaces, an error will still be displayed.
- Assigning roles to user fails
Previously, when using the API (or in some cases, the UI) to assign roles to users for an existing project, the roles were not consistently assigned and were saved randomly, despite specifying all three roles: annotator, reviewer, and manager. This issue has been resolved. Now, when users are added to a project with all roles via either the API or UI, the assigned roles are consistently saved.
- Side navigation highlights “Settings” when a model is deployed in Playground
Previously, the side navigation highlighted ‘Settings’ when a model was deployed in the Playground. Now, deploying a model in the Playground no longer highlights ‘Settings’ in the side navigation. Additionally, there will be no changes in the selected option in the side navigation when a model, rule, or prompt is deployed in the Playground.
- Wrong error message is seen on HUB page when valid license is not present
Previously, the HUB page displayed an incorrect error message, ‘Missing or invalid AWS keys. Click here to import license,’ when a valid license was not present. The message has now been updated to ‘Missing or invalid Spark NLP license. Click here to import license.’
- Adding Sample Task in Visual NER project does not redirect the user to Task Page
Previously, when a sample task was added, the user remained on the import page instead of being automatically navigated to the Task page, which could be confusing. Now, the user is given the option to either ‘Explore Tasks’ to navigate to the Task page or ‘Close’ to stay on the import page.
- Annotators can see permission-denied buttons in UI
Previously, features that the annotator did not have access to were visible to them. This issue has been resolved, and UI components that annotators don’t have access to are no longer visible. Additionally, the ‘Show Meta in Region’ option is now available in task settings only if the admin or project manager enabled meta during project configuration. When meta is enabled during project configuration, the option to show or hide meta is available in the settings within the labeling page.
- Application Crashes When Annotating Large Texts Exceeding 5000 or more Characters per Page
When manually annotating a large number of tokens on the labeling page, the application would crash, especially when the annotated text exceeded 5000 characters per page. This issue prevented users from completing their annotations, causing workflow interruptions and potential data loss. This problem has now been resolved. Although pages with many labels may take some time to load, the labeling page no longer crashes.
Versions
- 8.2.1
- 8.2.0
- 8.1.3
- 8.1.2
- 8.1.1
- 8.1.0
- 8.0.1
- 8.0.0
- 7.8.2
- 7.8.1
- 7.8
- 7.7
- 7.6.0
- 7.5.1
- 7.5.0
- 7.4.0
- 7.3.1
- 7.3.0
- 7.2.2
- 7.2.1
- 7.2.0
- 7.1.0
- 7.0.1
- 7.0.0
- 6.11.3
- 6.11.2
- 6.11.1
- 6.11.0
- 6.10.1
- 6.10.0
- 6.9.1
- 6.9.0
- 6.8.1
- 6.8.0
- 6.7.2
- 6.7.0
- 6.6.0
- 6.5.1
- 6.5.0
- 6.4.1
- 6.4.0
- 6.3.2
- 6.3.0
- 6.2.1
- 6.2.0
- 6.1.2
- 6.1.1
- 6.1.0
- 6.0.2
- 6.0.0
- 5.9.3
- 5.9.2
- 5.9.1
- 5.9.0
- 5.8.1
- 5.8.0
- 5.7.1
- 5.7.0
- 5.6.2
- 5.6.1
- 5.6.0
- 5.5.3
- 5.5.2
- 5.5.1
- 5.5.0
- 5.4.1
- 5.3.2
- 5.2.3
- 5.2.2
- 5.1.1
- 5.1.0