Test Suite Management
A Test Suite represents a collection of tests designed to evaluate your trained model across different scenarios. LangTest is a comprehensive framework for assessing AI language models in the Generative AI Lab, focusing on dimensions such as robustness, representation, and fairness. The framework subjects the models to a series of tests to evaluate their performance in these areas. Through iterative training cycles, the models are continuously improved until they achieve satisfactory results in these tests. This iterative process ensures that the models are well-equipped to handle diverse scenarios and meet essential requirements for reliable and effective language processing.
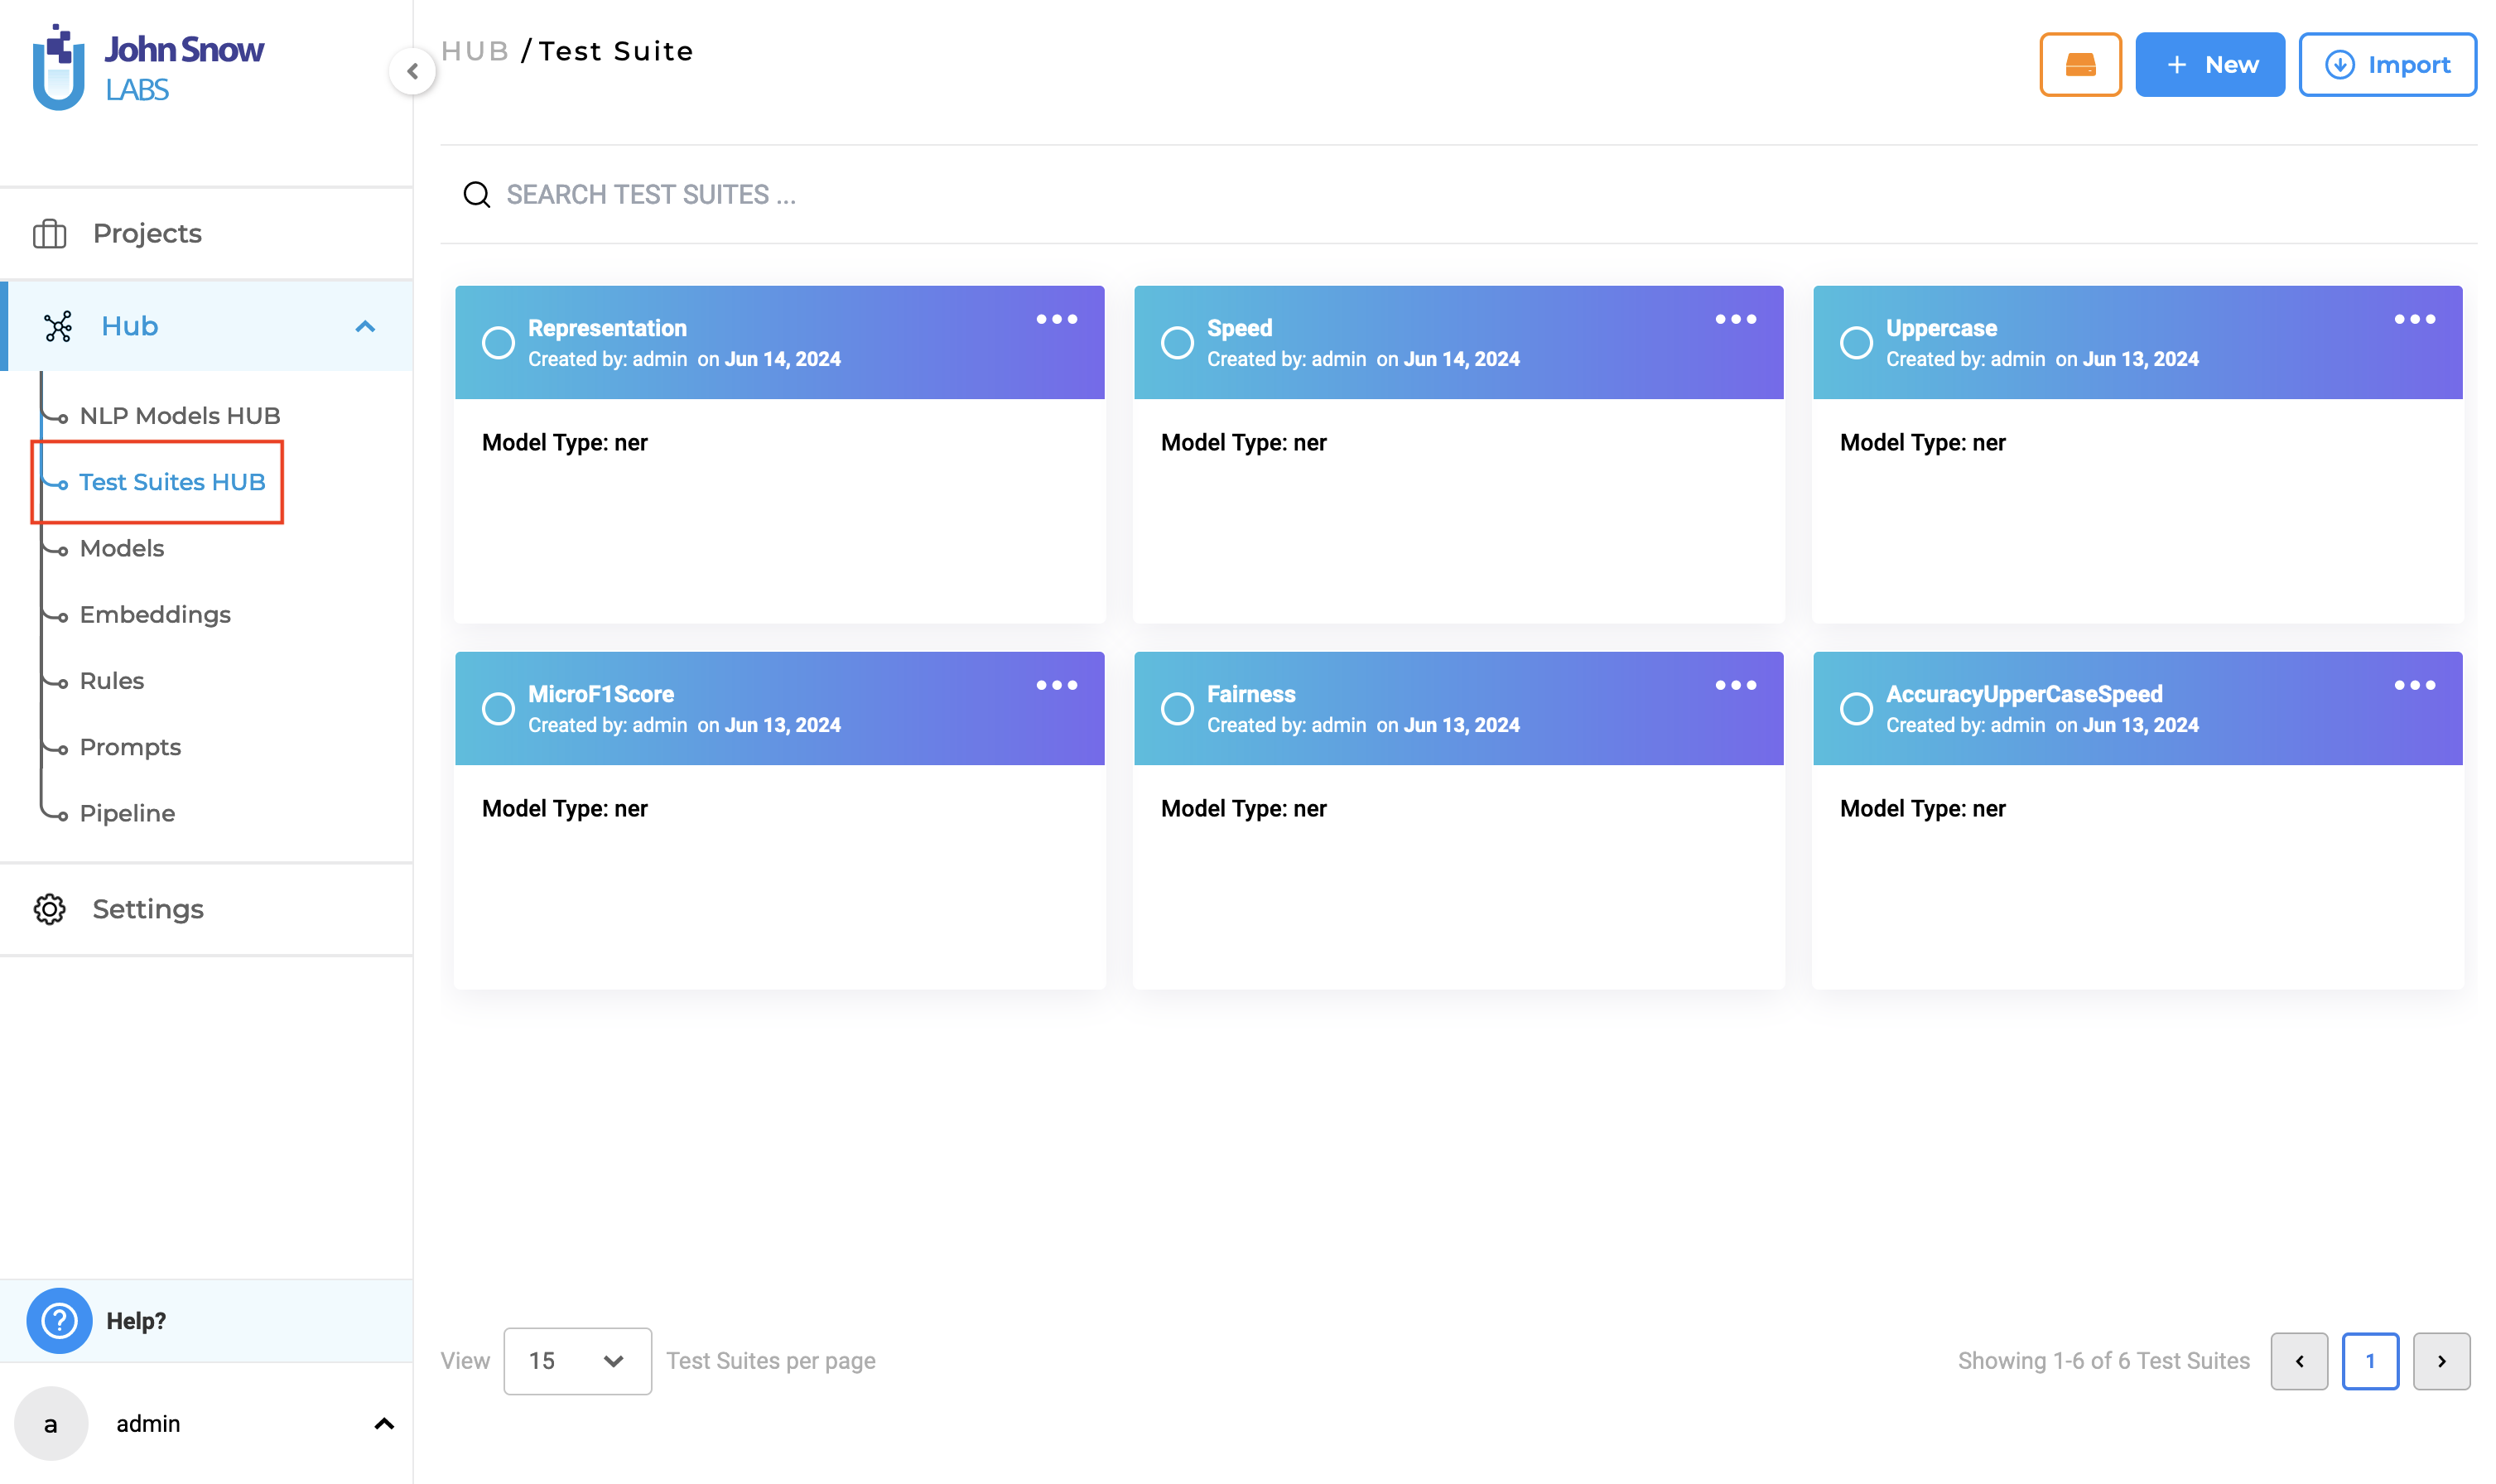
Test Suites HUB
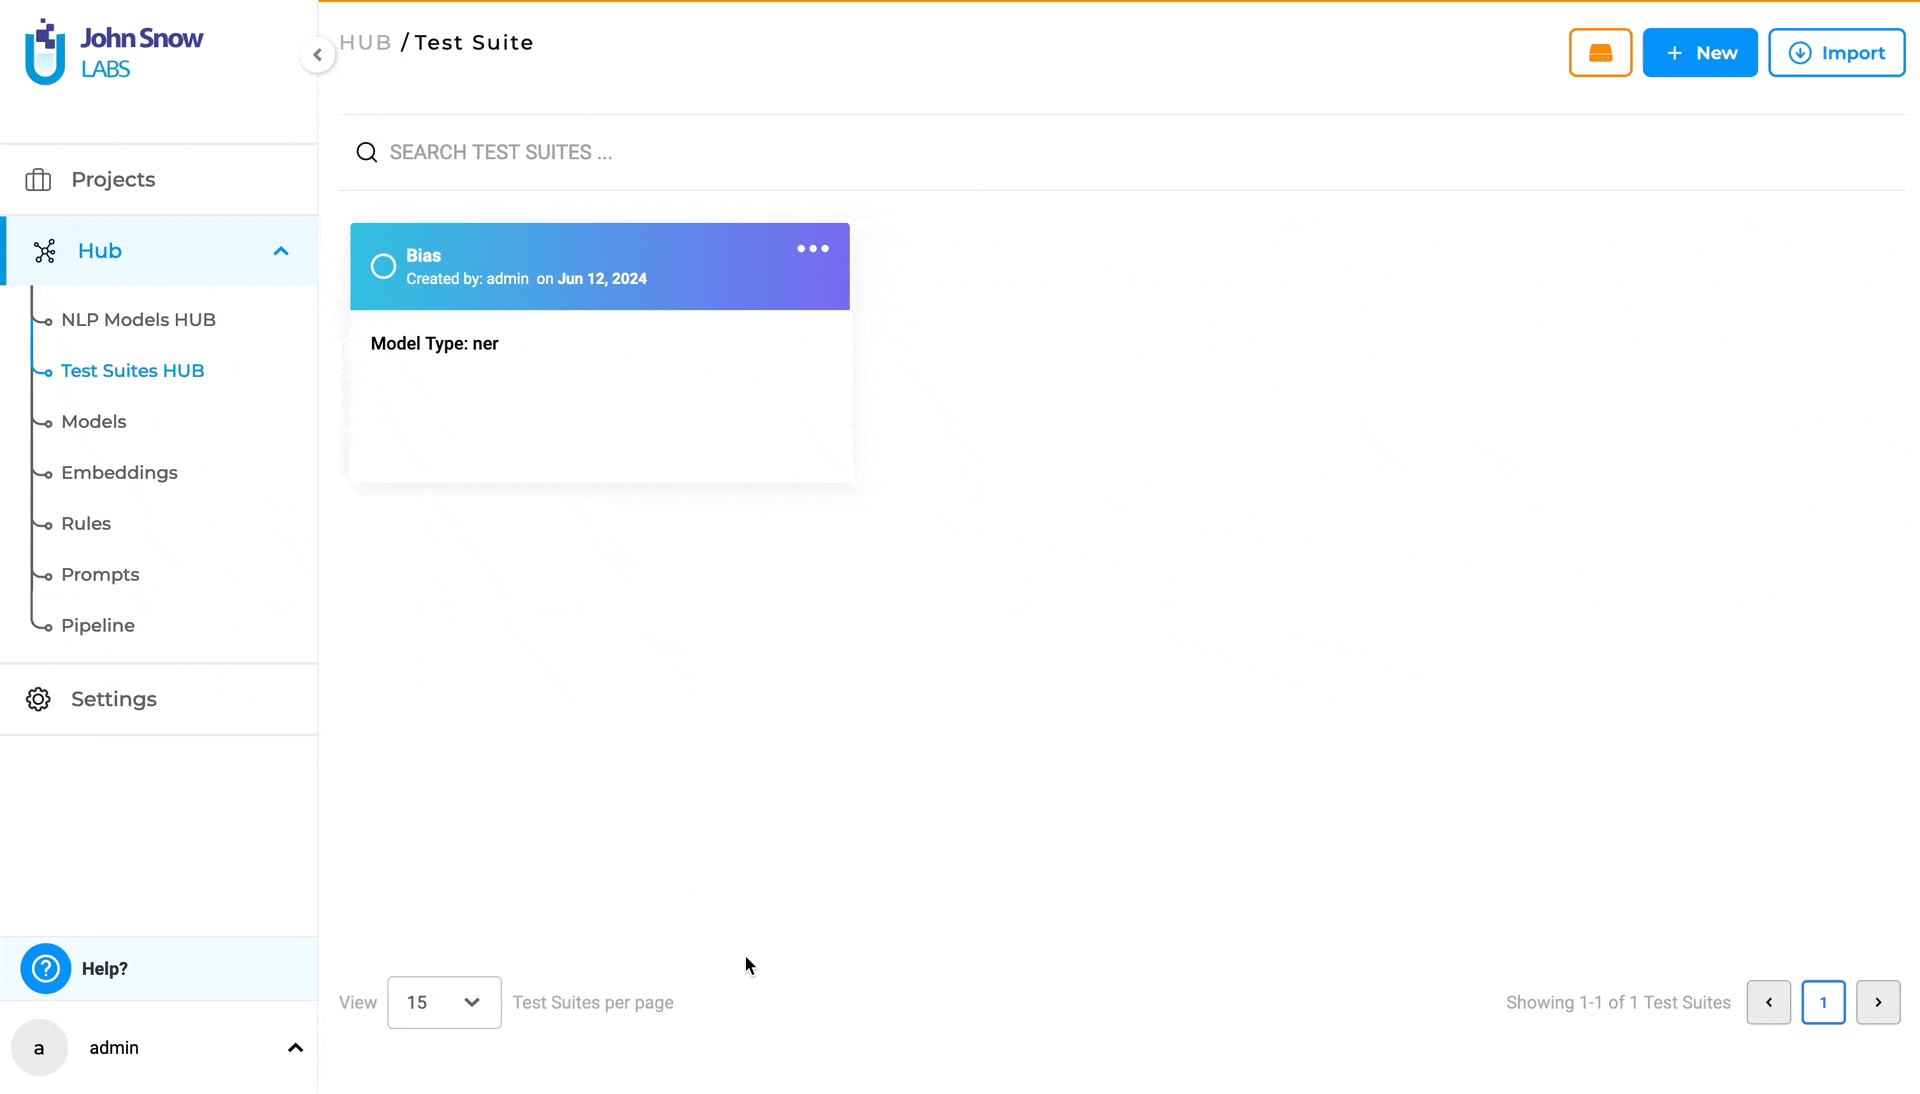
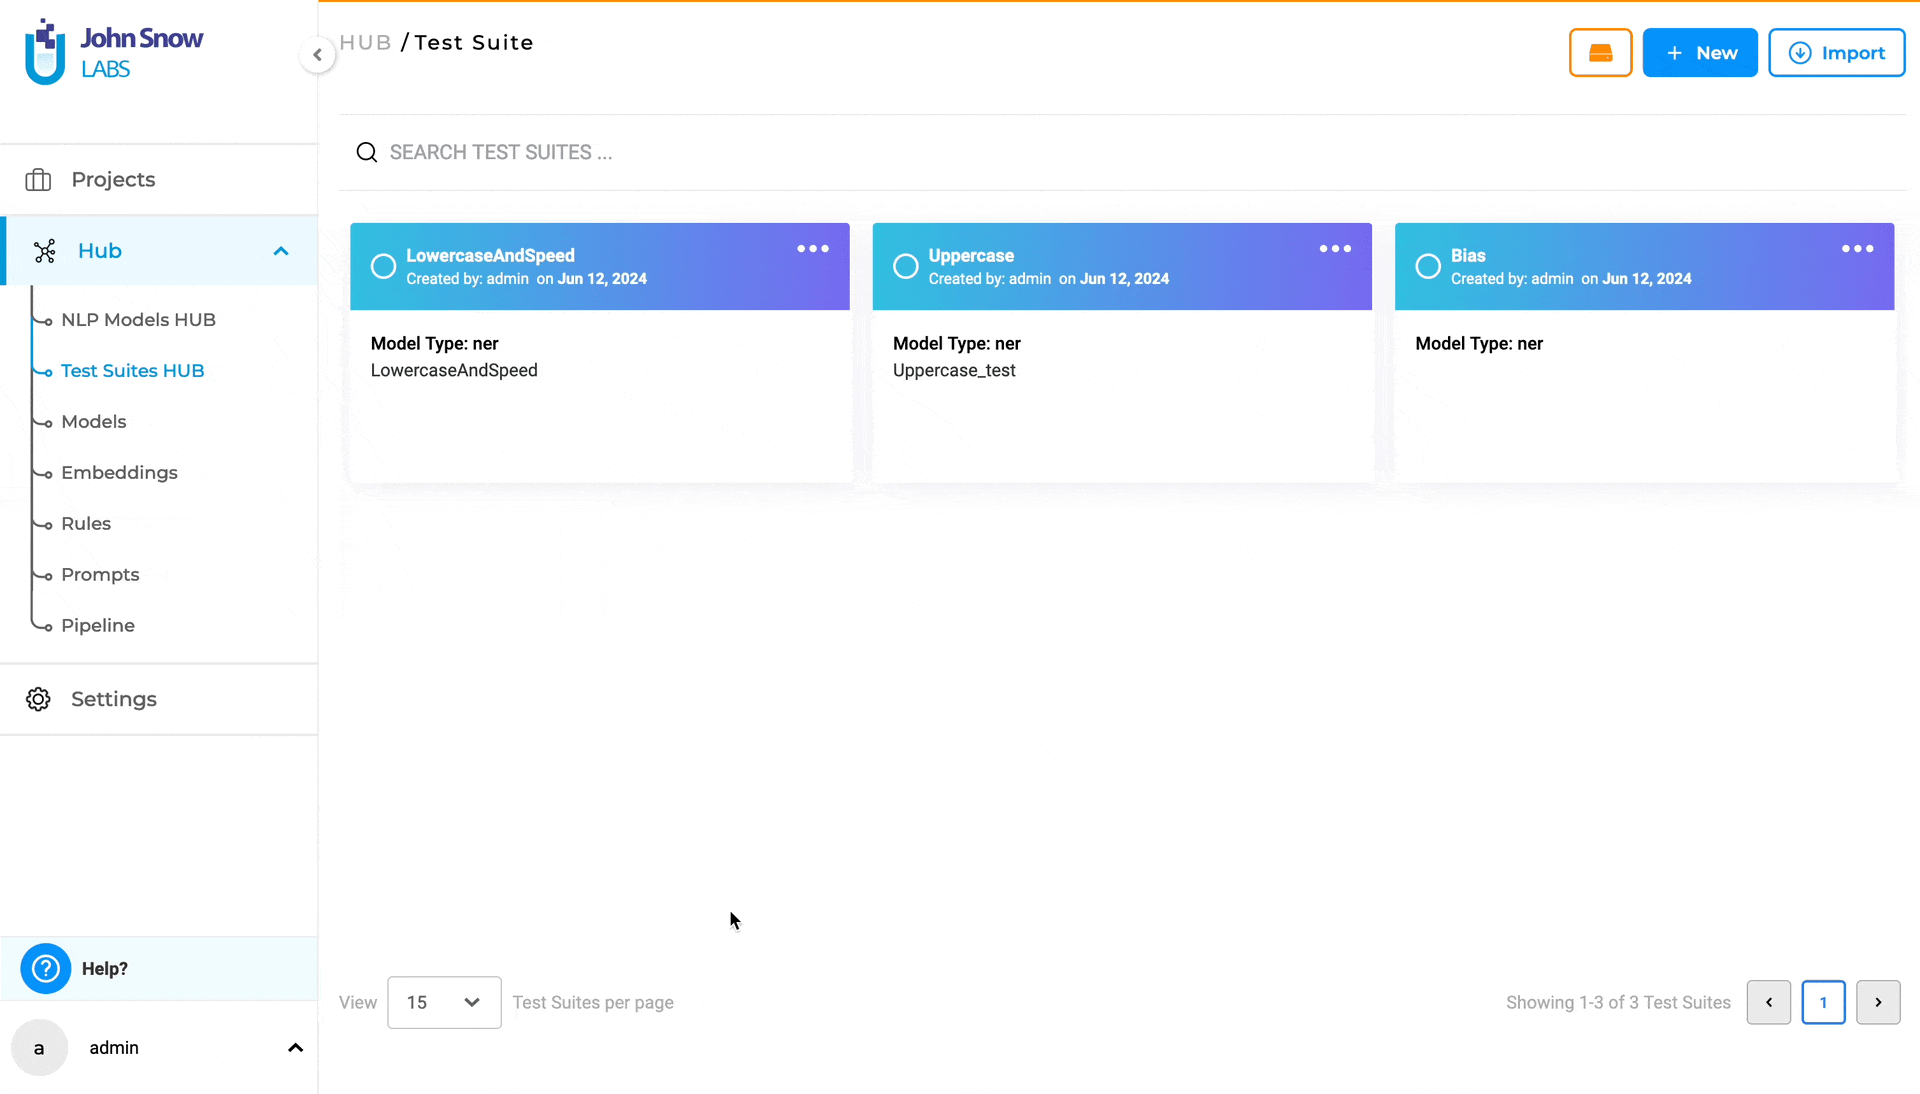
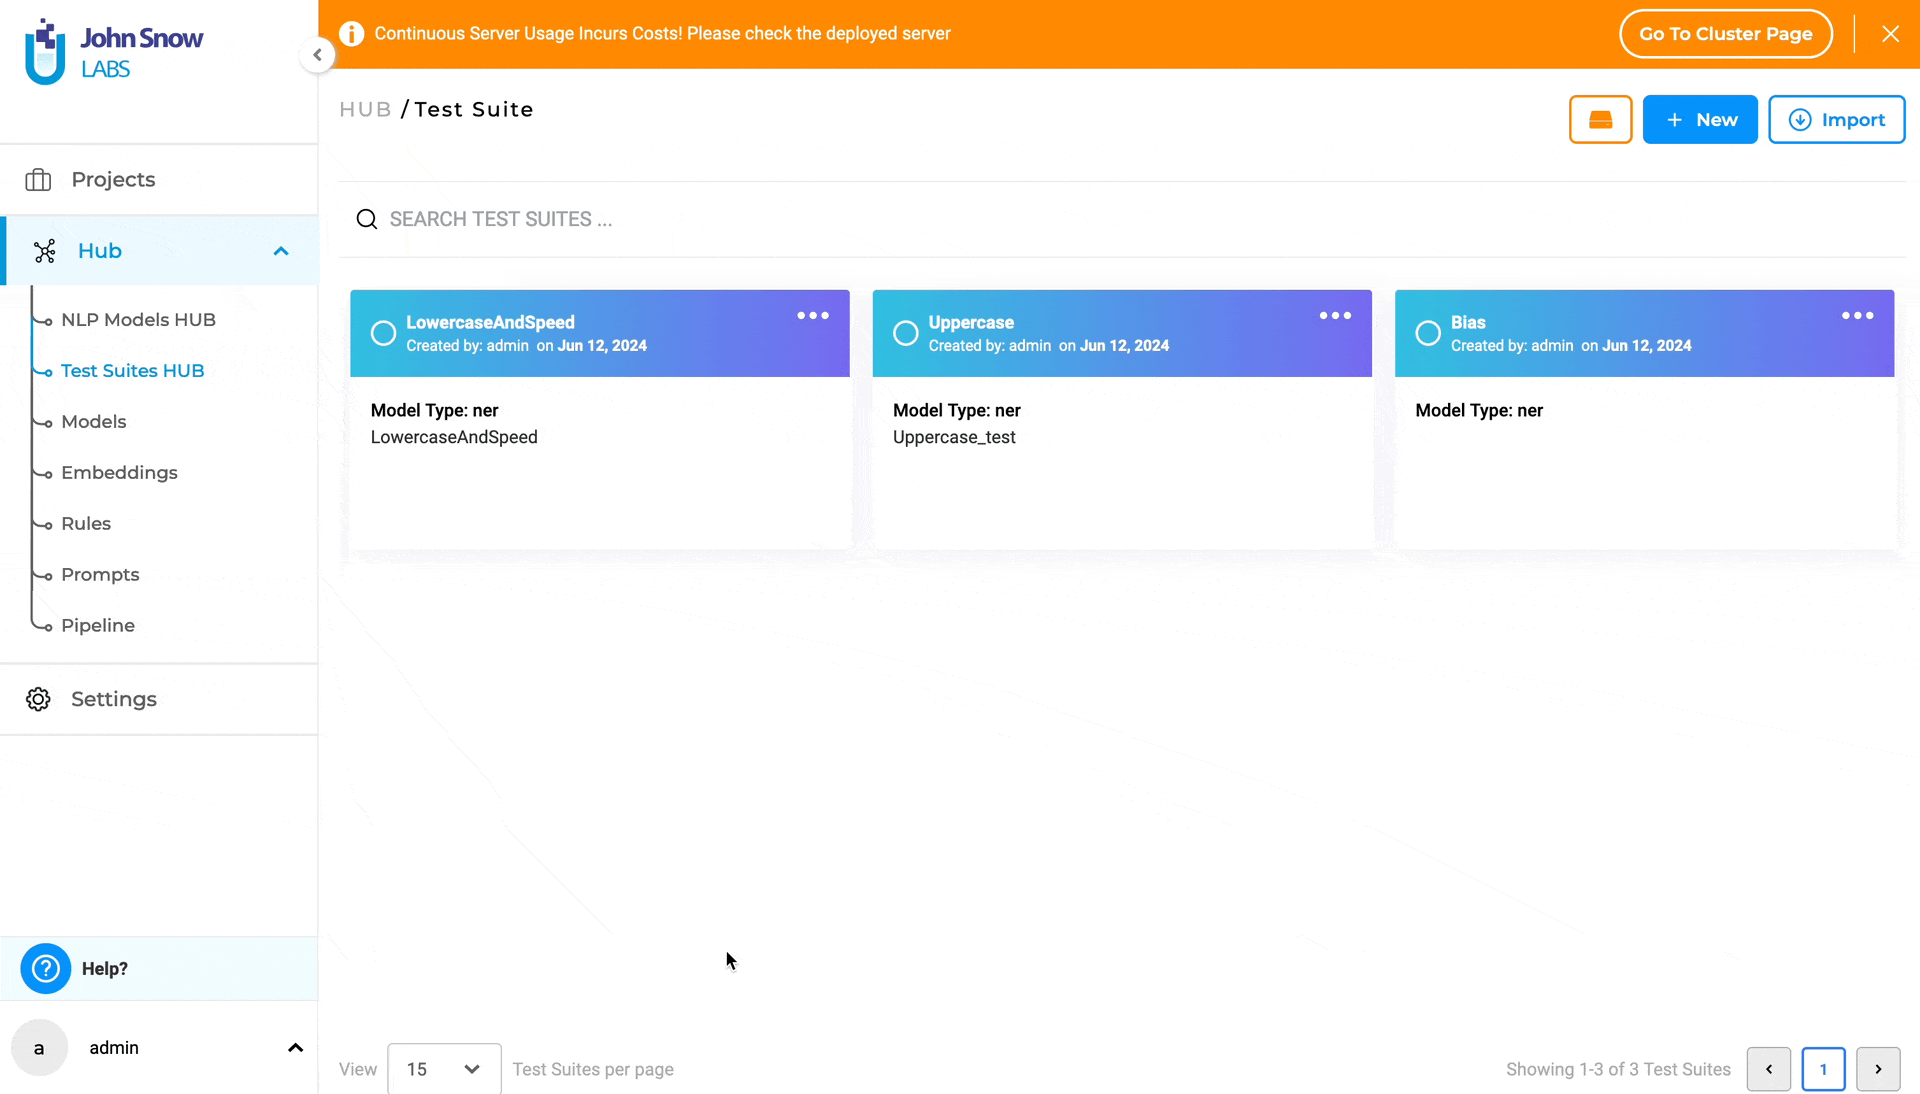
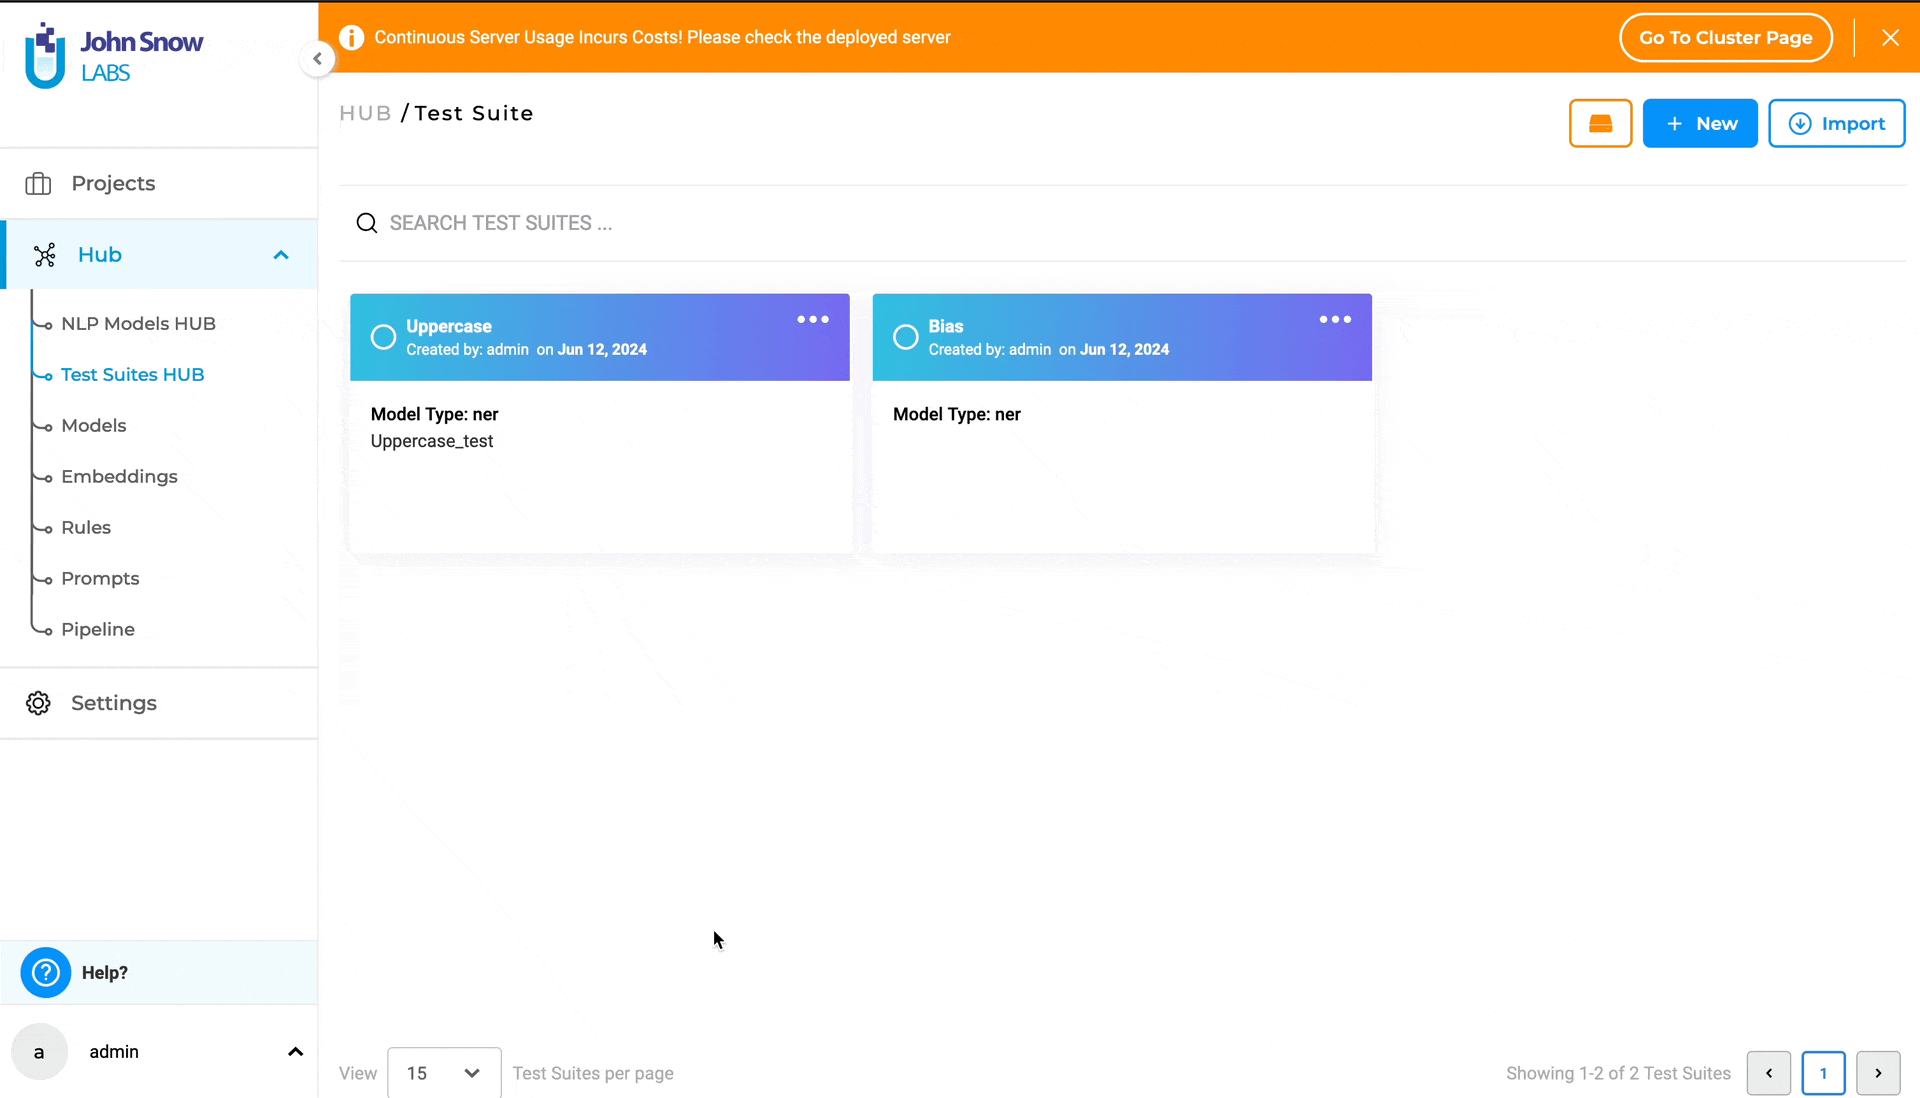
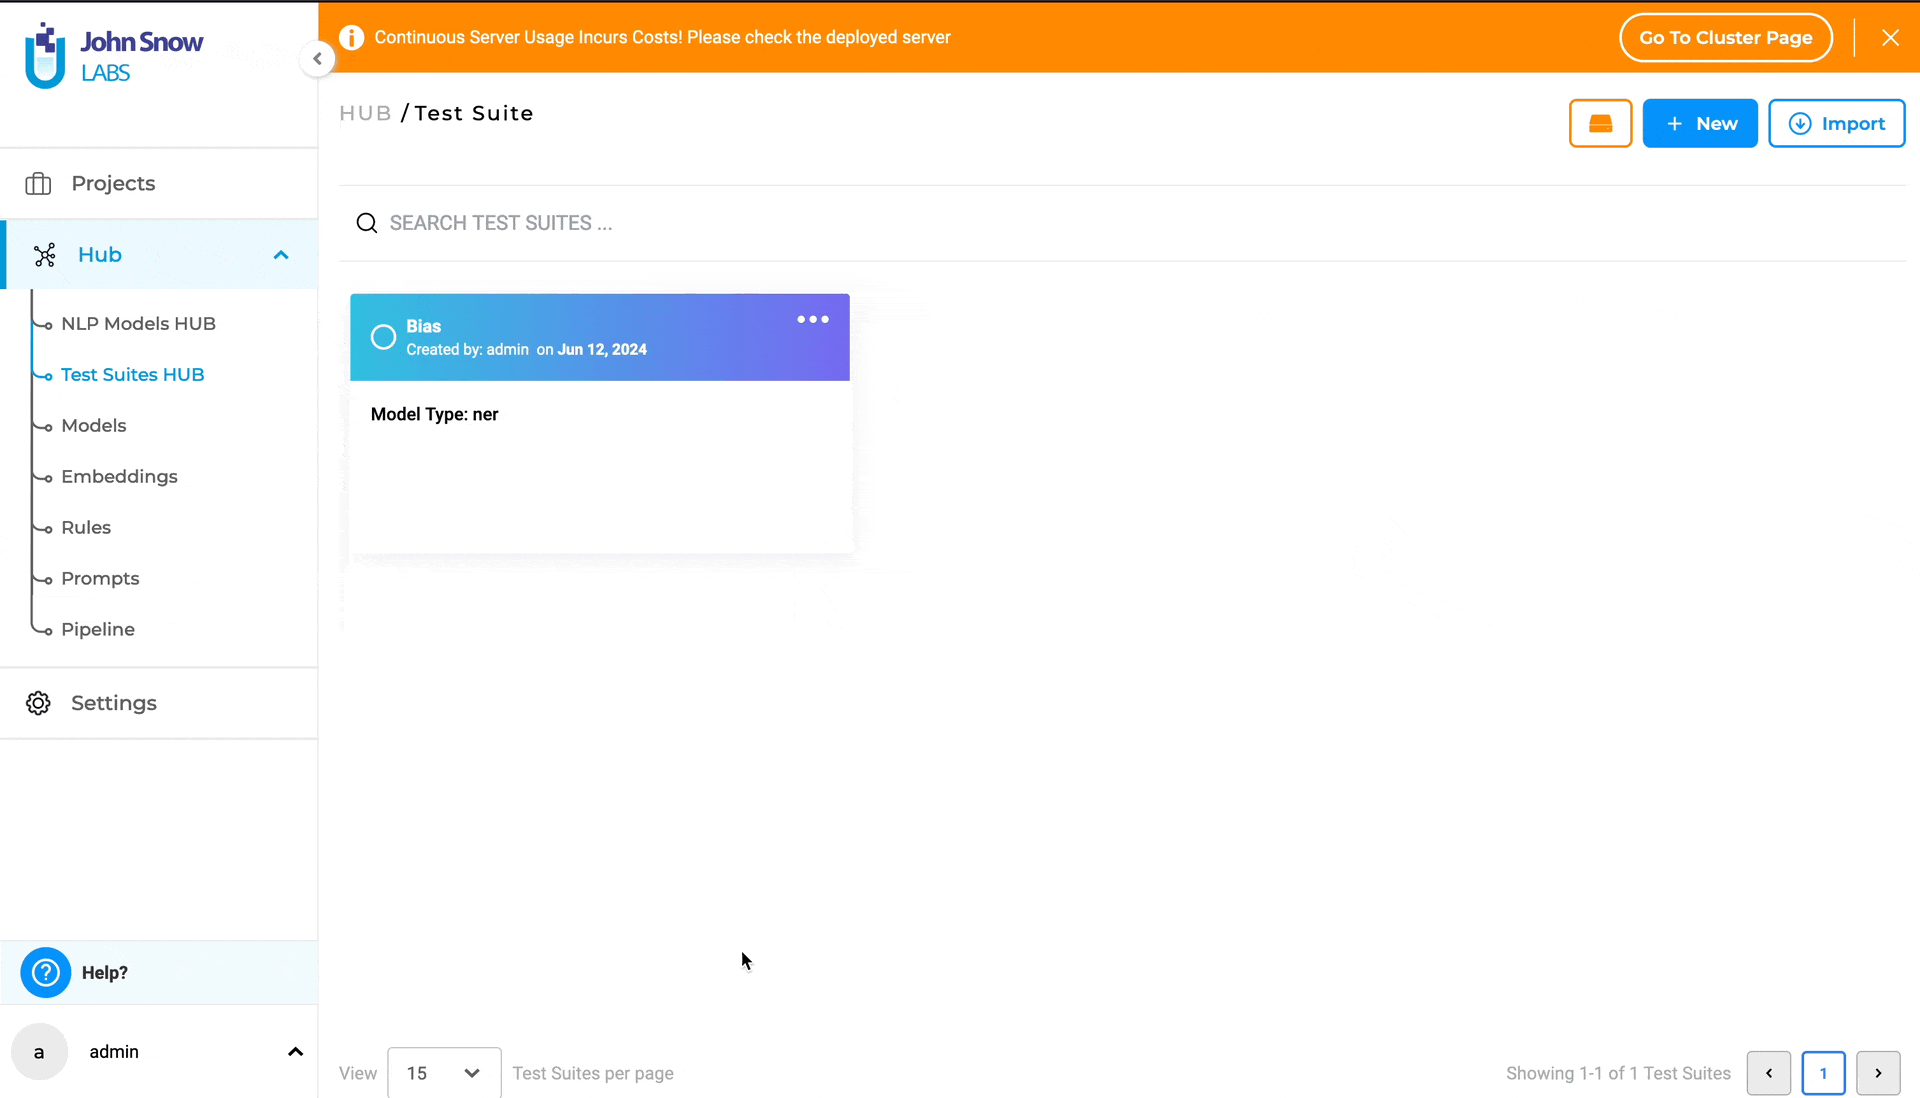
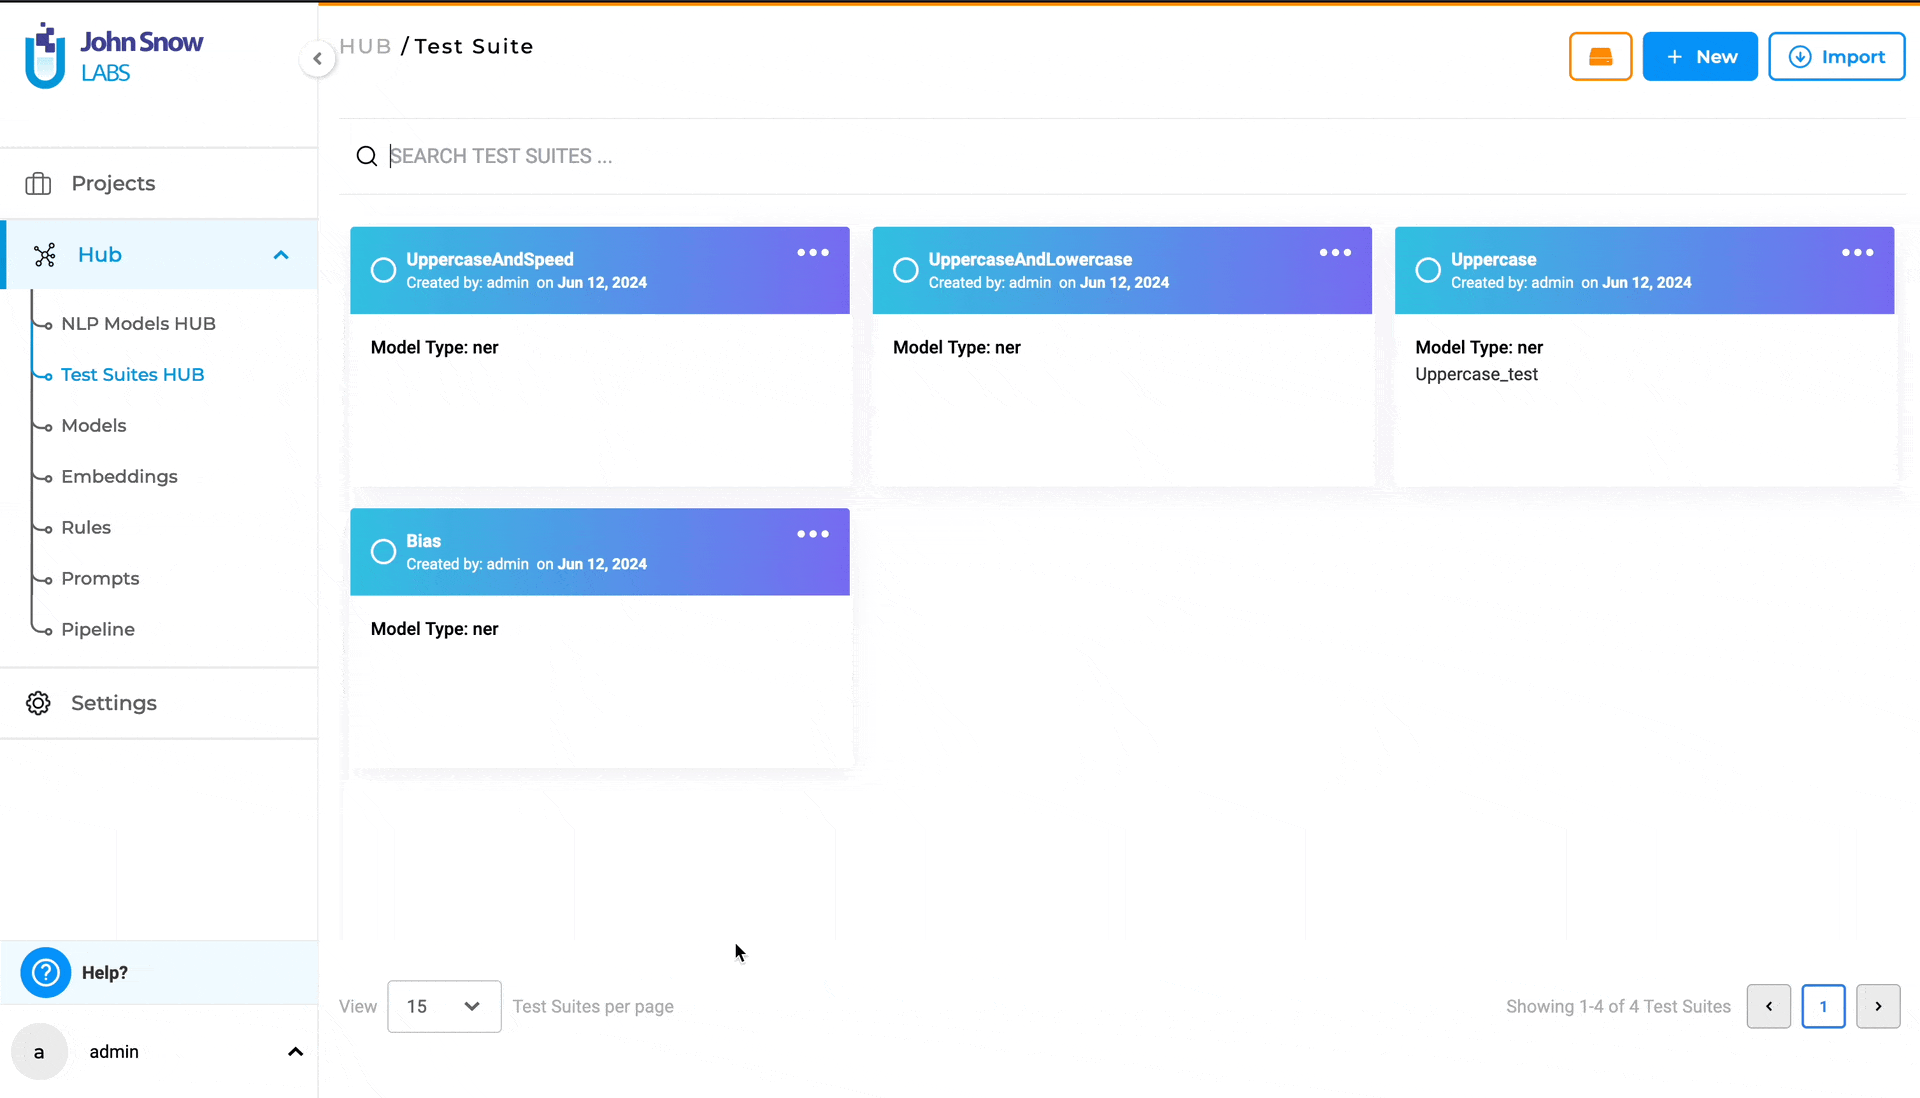
The Test Suites HUB (under the Hub parent node) is where existing Test Suites are saved and managed. Clicking it opens the Test Suite page, which lists all test suites you can access.
Create, Update, and Delete Test Suites
Managing a Test Suite is easy: a Test Suite can be created using the “Test” page under a parent project and can be fully managed in the “Test Suite” page within the “Test Suites HUB” option where users can create, update, and delete test suites.
Test Suite Creation
Creating a new Test Suite from the “Test Suite” page is straightforward:
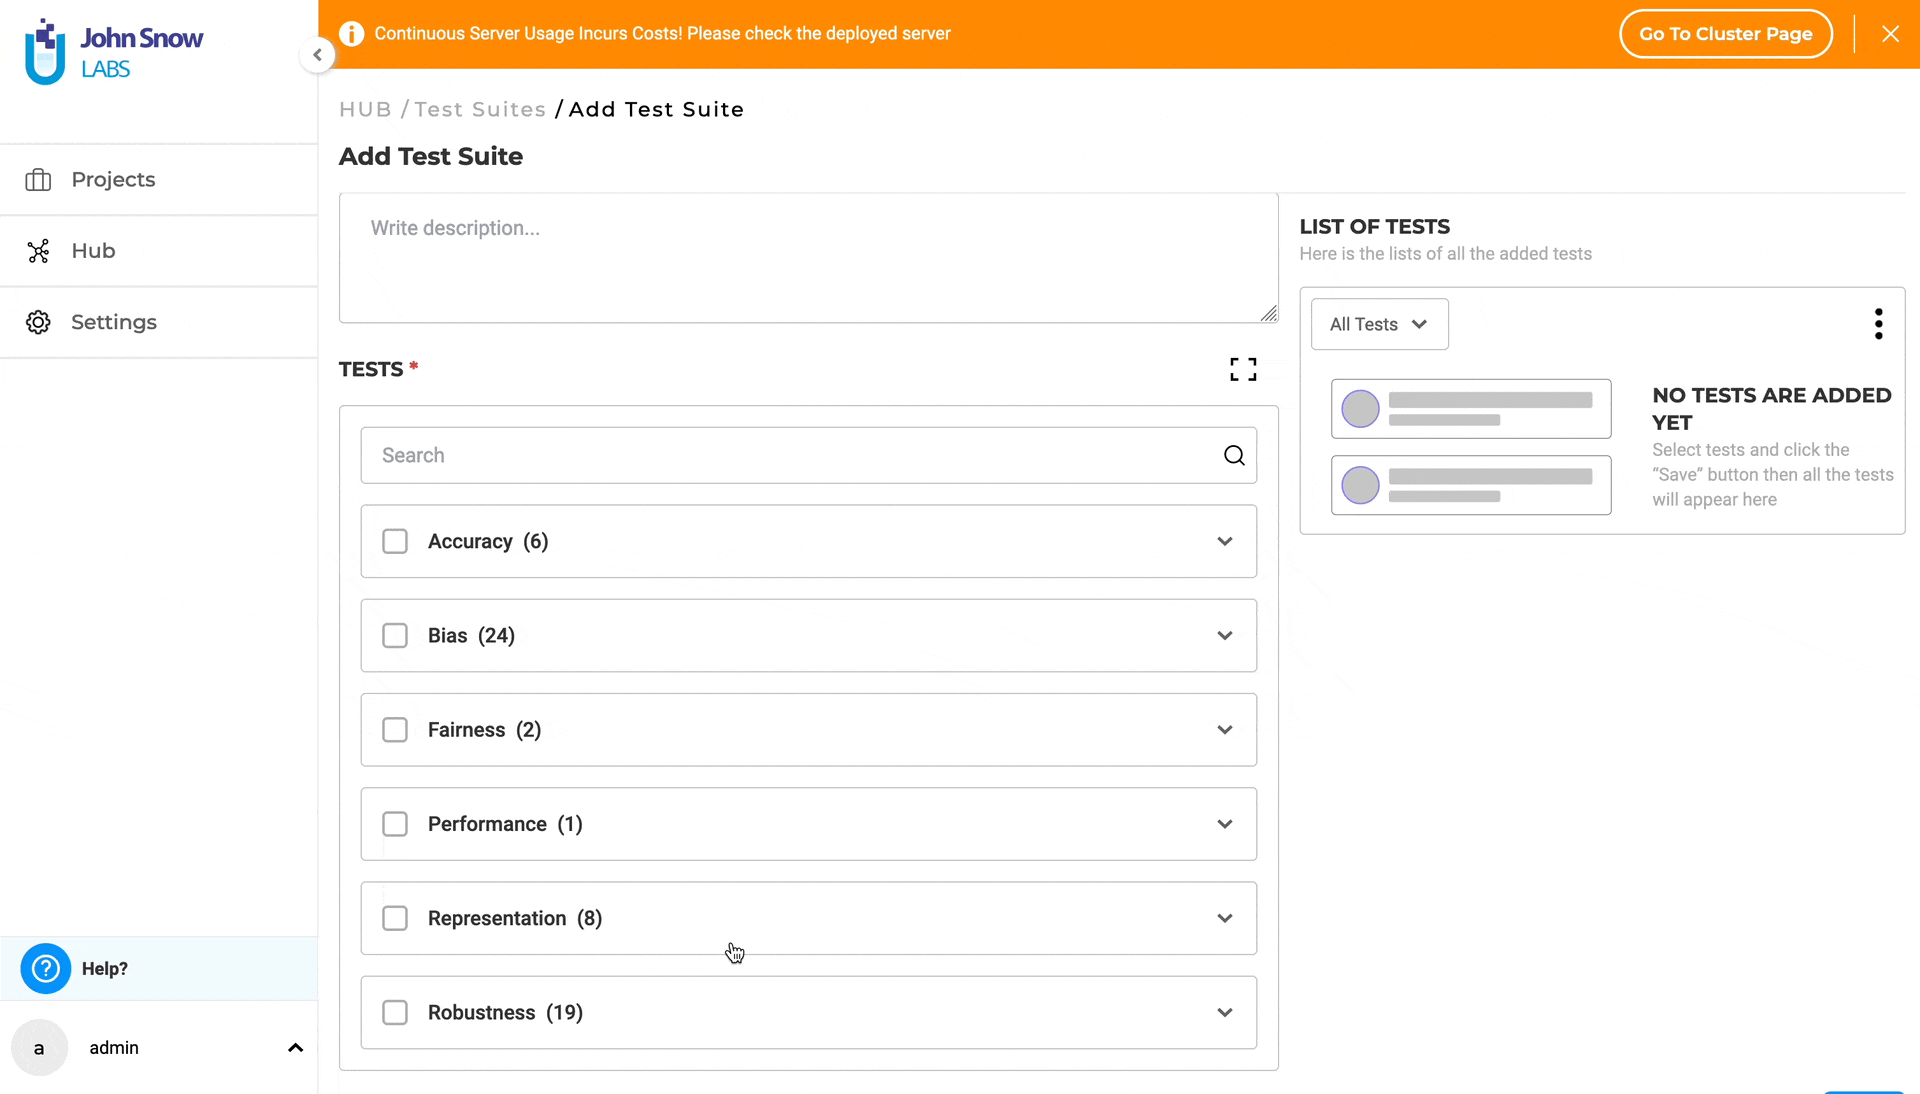
- In the Test Suite page, click on the “New” button to open the “Add Test Suite” form.
- Provide a name (mandatory) and a description (optional) for the test suite.
- Under “TESTS”, select the desired category and click on it to expand and view all available test types within that category. (Category samples - Robustness, Bias,etc.).
- Choose the desired test types by selecting the checkboxes for the relevant categories.
- Provide or modify the necessary details for each selected test type.
- Apply the steps above for any number of different categories you require to configure the test suite.
- Save your work, when configuration is complete by clicking on the “Save” button.
Note: LangTest supports both NER and Classification models. Choose the appropriate Model Type when creating a test suite.
Supported Test Categories
The following are the currently supported categories for NER models within the Generative AI Lab application, available through the LangTest framework:
1. ACCURACY The goal of the Accuracy is to give users real, useful insights into how accurate the model is. It’s all about helping the user make smart choices on when and where to use the model in real-life situations. Accuracy tests evaluate the correctness of a model’s predictions. This category comprises six test types, three of which - “Min F1 Score”, “Min Precision Score” and “Min Recall Score” - require the user to provide model labels. The user can add labels in the “Add Model Labels” section, which becomes active immediately after selecting the corresponding checkbox for the test. Labels can be added or removed as shown below:
For more details about Accuracy tests, visit the LangTest Accuracy Documentation.
Note: Tests using custom labels require tasks with ground truth data.
2. BIAS Model bias tests aim to gauge how well a model aligns its predictions with actual outcomes. Detecting and mitigating model bias is essential to prevent negative consequences such as perpetuating stereotypes or discrimination. This testing explores the impact of replacing documents with different genders, ethnicities, religions, or countries on the model’s predictions compared to the original training set, helping identify and rectify potential biases LangTest framework provides support for more than 20 distinct test types for the Bias category.
For detailed information on Bias category, supported tests and samples, please refer to the LangTest Bias Documentation.
3. FAIRNESS Fairness testing is essential to evaluate a model’s performance without bias, particularly concerning specific groups. The goal is to ensure unbiased results across all groups, avoiding favoritism or discrimination. Various tests, including those focused on attributes like gender, contribute to this evaluation, promoting fairness and equality in model outcomes.
This category comprises two test types: “Max Gender F1 Score” and “Min Gender F1 Score”.
Further information on Fairness tests can be accessed through the LangTest Fairness Documentation.
4. PERFORMANCE Performance tests gauge the efficiency and speed of a language model’s predictions. This category consists of one test type: “speed” which evaluates the execution speed of the model based on tokens.
Further information on Performance test can be accessed through the LangTest Performance Documentation.
5. REPRESENTATION Representation testing assesses whether a dataset accurately represents a specific population. It aims to identify potential biases within the dataset that could impact the results of any analysis, ensuring that the data used for training and testing is representative and unbiased.
For additional details on Representation tests, please visit the LangTest Representation Documentation.
6. ROBUSTNESS Model robustness tests evaluate a model’s ability to maintain consistent performance when subjected to perturbations in the data it predicts. For tasks like Named Entity Recognition (NER), these tests assess how variations in input data, such as documents with typos or fully uppercased sentences, impact the model’s prediction performance. This provides insights into the model’s stability and reliability.
More information on Robustness tests is available in the LangTest Robustness Documentation.
Managing Test Suites
To edit an existing Test Suite, navigate to the “Test Suites” page and follow these steps:
- Click on the three dots at the top-right corner of the test suite card to display the three options available: “Export”, “Edit”, and “Delete”.
- Selecting “Edit” takes you to the “Edit Test Suite” page.
- Modify the description as necessary.
- Under “LIST OF TESTS”, view all previously configured test categories and test types. Use the filter functionality to faster lookup the test category you need to edit. Selecting a test category will display its associated test types and corresponding pre-configured values. Clicking on the three dots next to a test type will present two options: “Edit” and “Delete”. Choosing “Delete” will deselect the test type, while selecting “Edit” will redirect you to the corresponding test type under TESTS, where you can modify the test type values. You can directly edit each test type within the TESTS section of the test suite.
- Click the “Save” button to apply the changes.
Note: Name and Model Type of a test suite cannot be modified.
Full-screen Mode and Search To boost productivity, you can create or edit a test suite using full-screen mode and the search functionality to quickly locate specific tests within the “TESTS” section.

Test Suite Deletion
To delete a test suite from the “Test Suite” page, follow these steps:
- Locate the test suite you wish to delete and click on the three dots next to it. This will reveal three options: “Export”, “Edit”, and “Delete”.
- Select the “Delete” option.
- A pop-up box will be shown. Click the “Yes” option.
- The test suite will be deleted, and a deletion message will confirm the action.
Note: a test suite used within at least one project in your enterprise cannot be deleted.
Importing and Exporting Test Suites
Users can export and import test suites using the “Test Suites HUB”. To export a test suite from the “Test Suite” page, follow these simple steps:
- Click on the ellipsis symbol located next to the test suite you wish to export. This will present three options: “Export”, “Edit”, and “Delete”.
- Click on the “Export”.
- Upon selecting “Export”, the test suite will be saved as **
.json**, and a confirmation message indicating successful export will appear.
Users can import a test suite into the “Test Suites HUB” by following these few steps:
- Navigate to the “Test Suite” page and click on the “Import” button to open the “Import Test Suite” page.
- Either drag and drop the test suite file into the designated area or click to import the test suite file from your local file system.
- Upon successful import, a confirmation message will be displayed.
- You can then view the imported test suite on the “Test Suite” page.
Searching for a specific Test Suite
Use the search feature on the “Test Suite” page, the “SEARCH TEST SUITES …“ search bar to find the desired Test Suite, by matching it’s name.
The Test Page under Project Menu
The Test entry in the project’s left navigation opens the Test page, where managers configure tests, create/edit test cases, start/stop testing, review logs, and review/download/delete results.
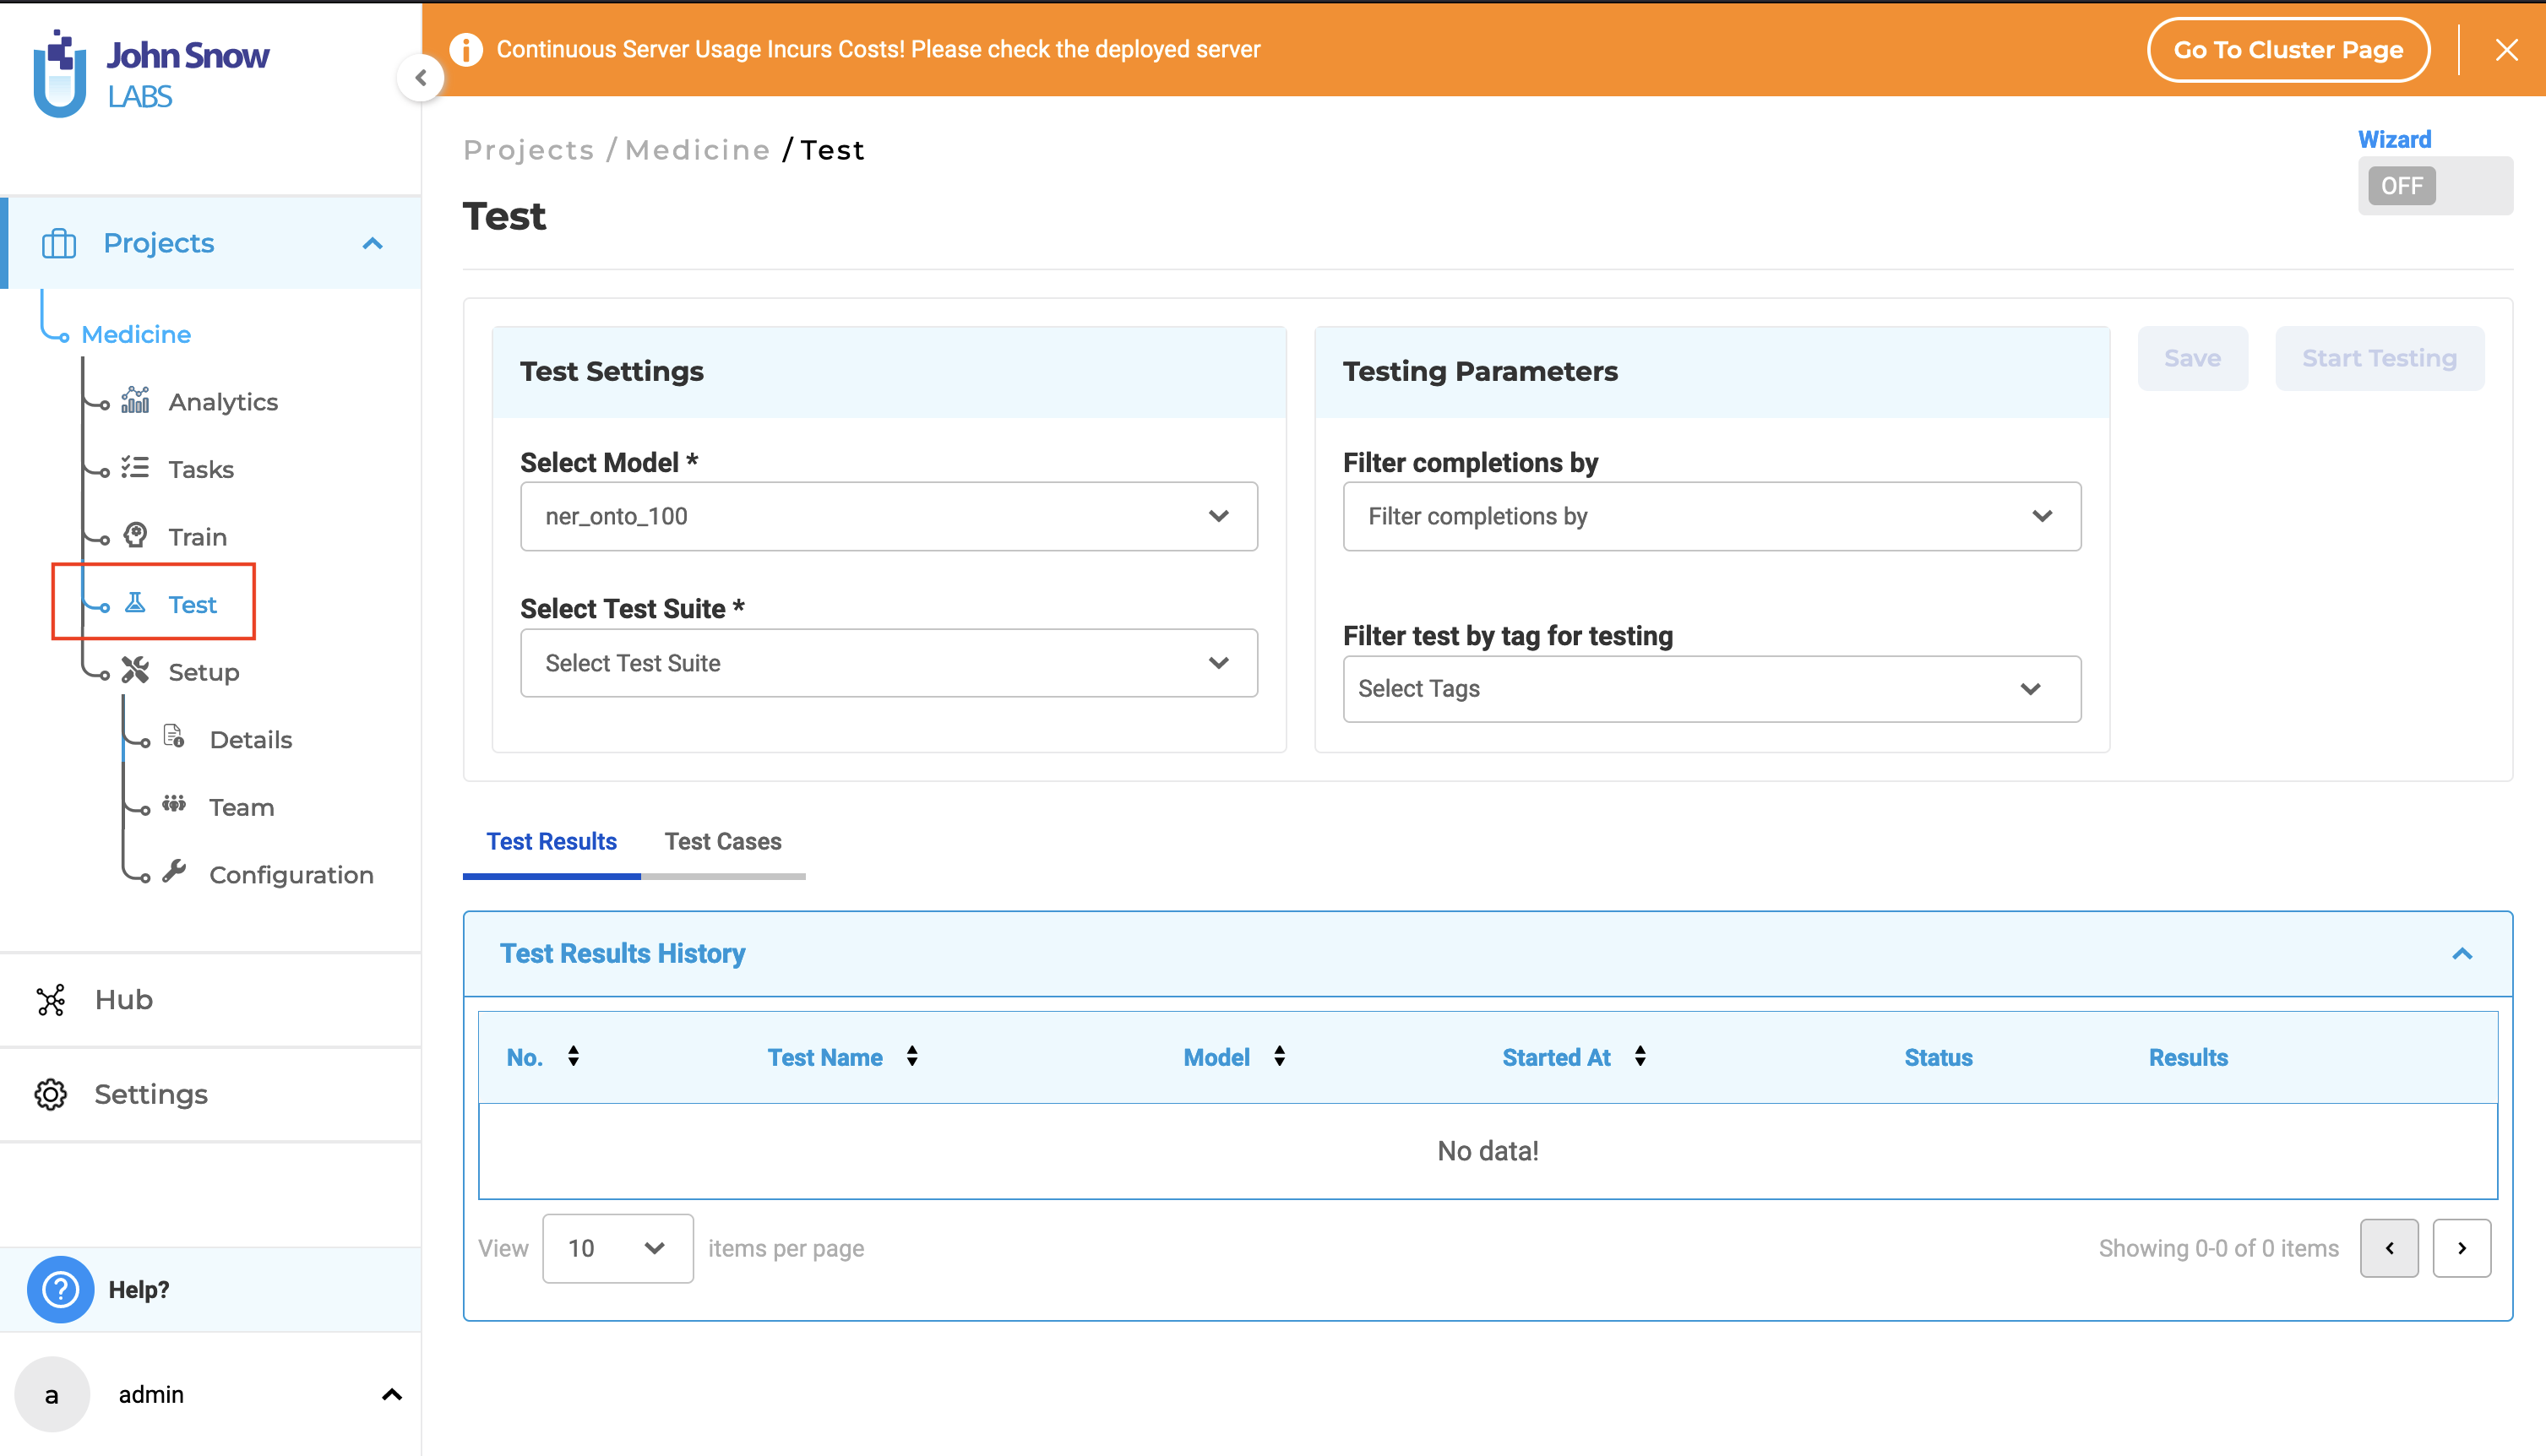
On this page, project managers can configure tests settings and corresponding parameters, create and edit test cases, start and stop model testing, review test logs, and review, download, or delete test results.
Note: The functionality available on the Test page is exclusively available to users with project manager roles.
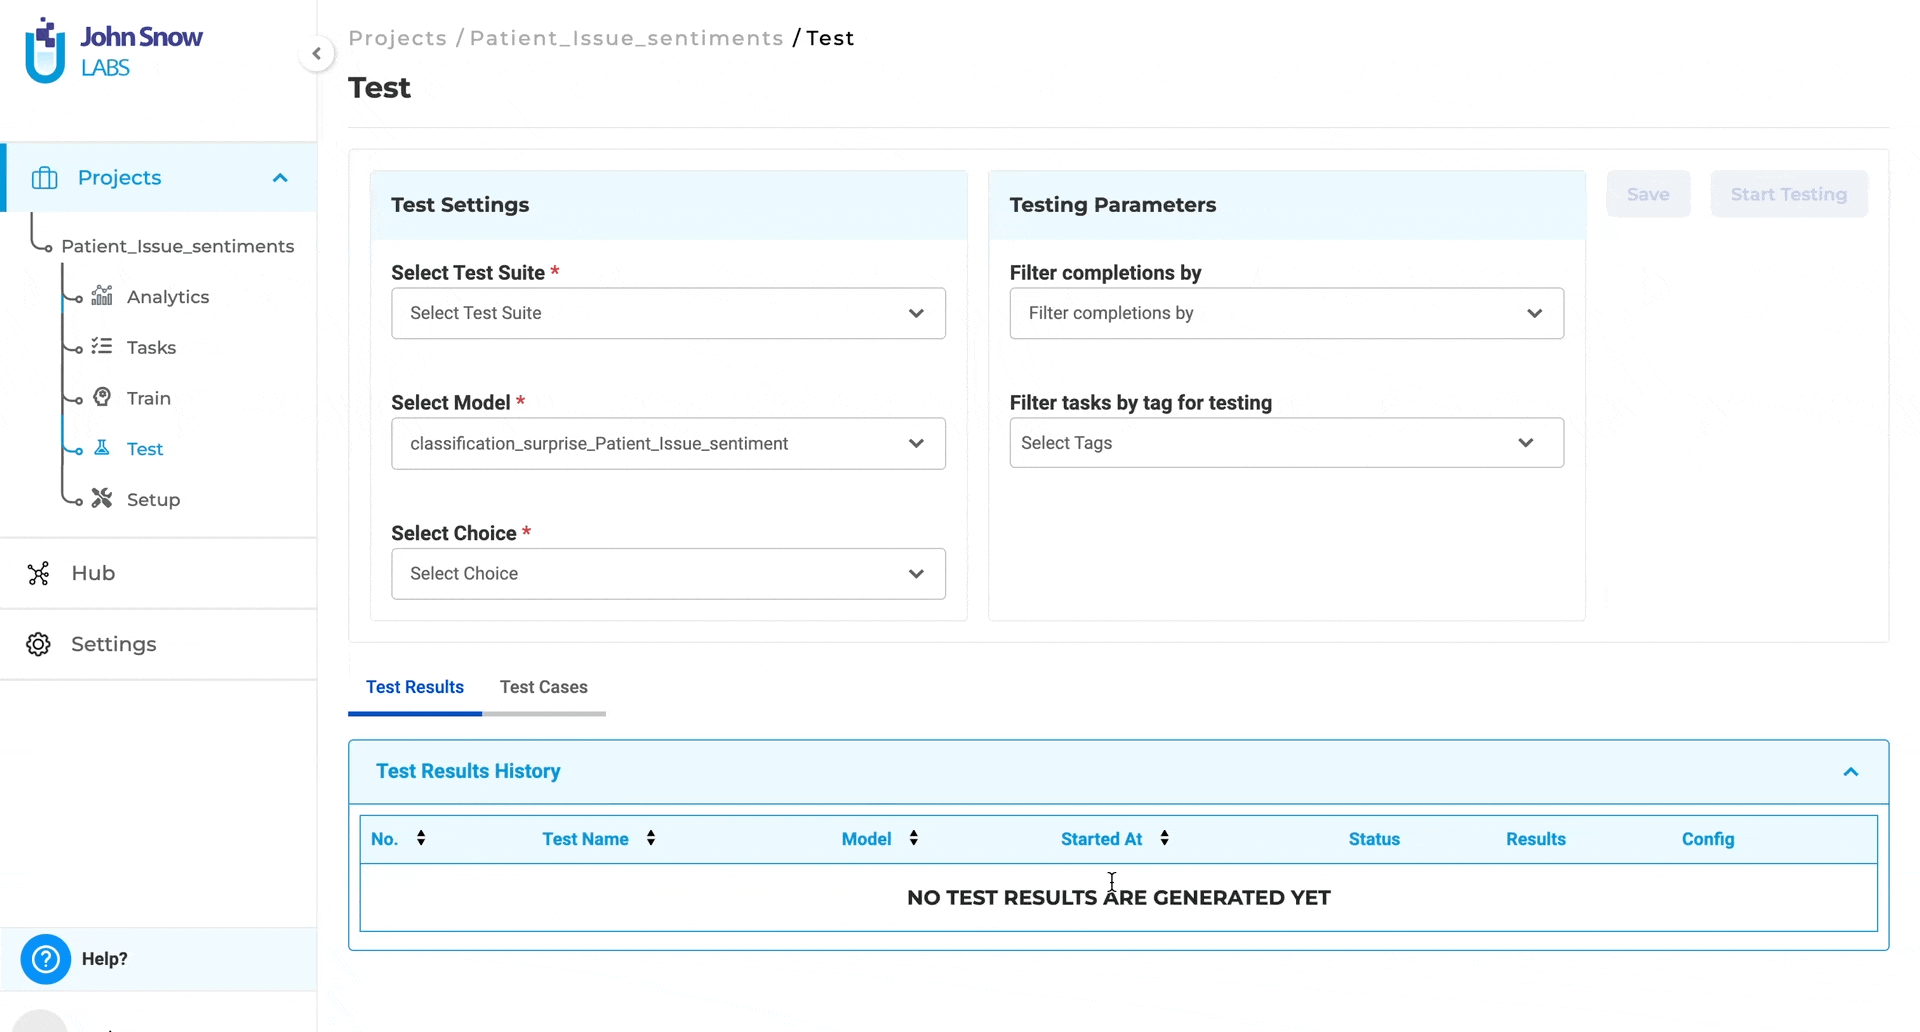
Test - setup and configuration**
Navigating to the “Test” page under a specific project, allows the user to specify what tests will be used to assess the quality of the project’s model.
There are two mandatory sections that need to be filled:
1. Select Model: Select the NER model pretrained/trained that is used to predict annotations for the tasks/documents in the current project. The user can choose a NER model from the dropdown. All available models configured within the project are listed in this dropdown menu for selection.
2. Select Test Suite: The test suite comprises a collection of tests designed to evaluate your trained model in various scenarios.
The user can choose an existing test suite from the dropdown menu or create a new one by clicking on “+ Create New Test Suite” within the dropdown menu.
Note: The option to create a new test suite is available only to supervisor and admin users with the manager role.
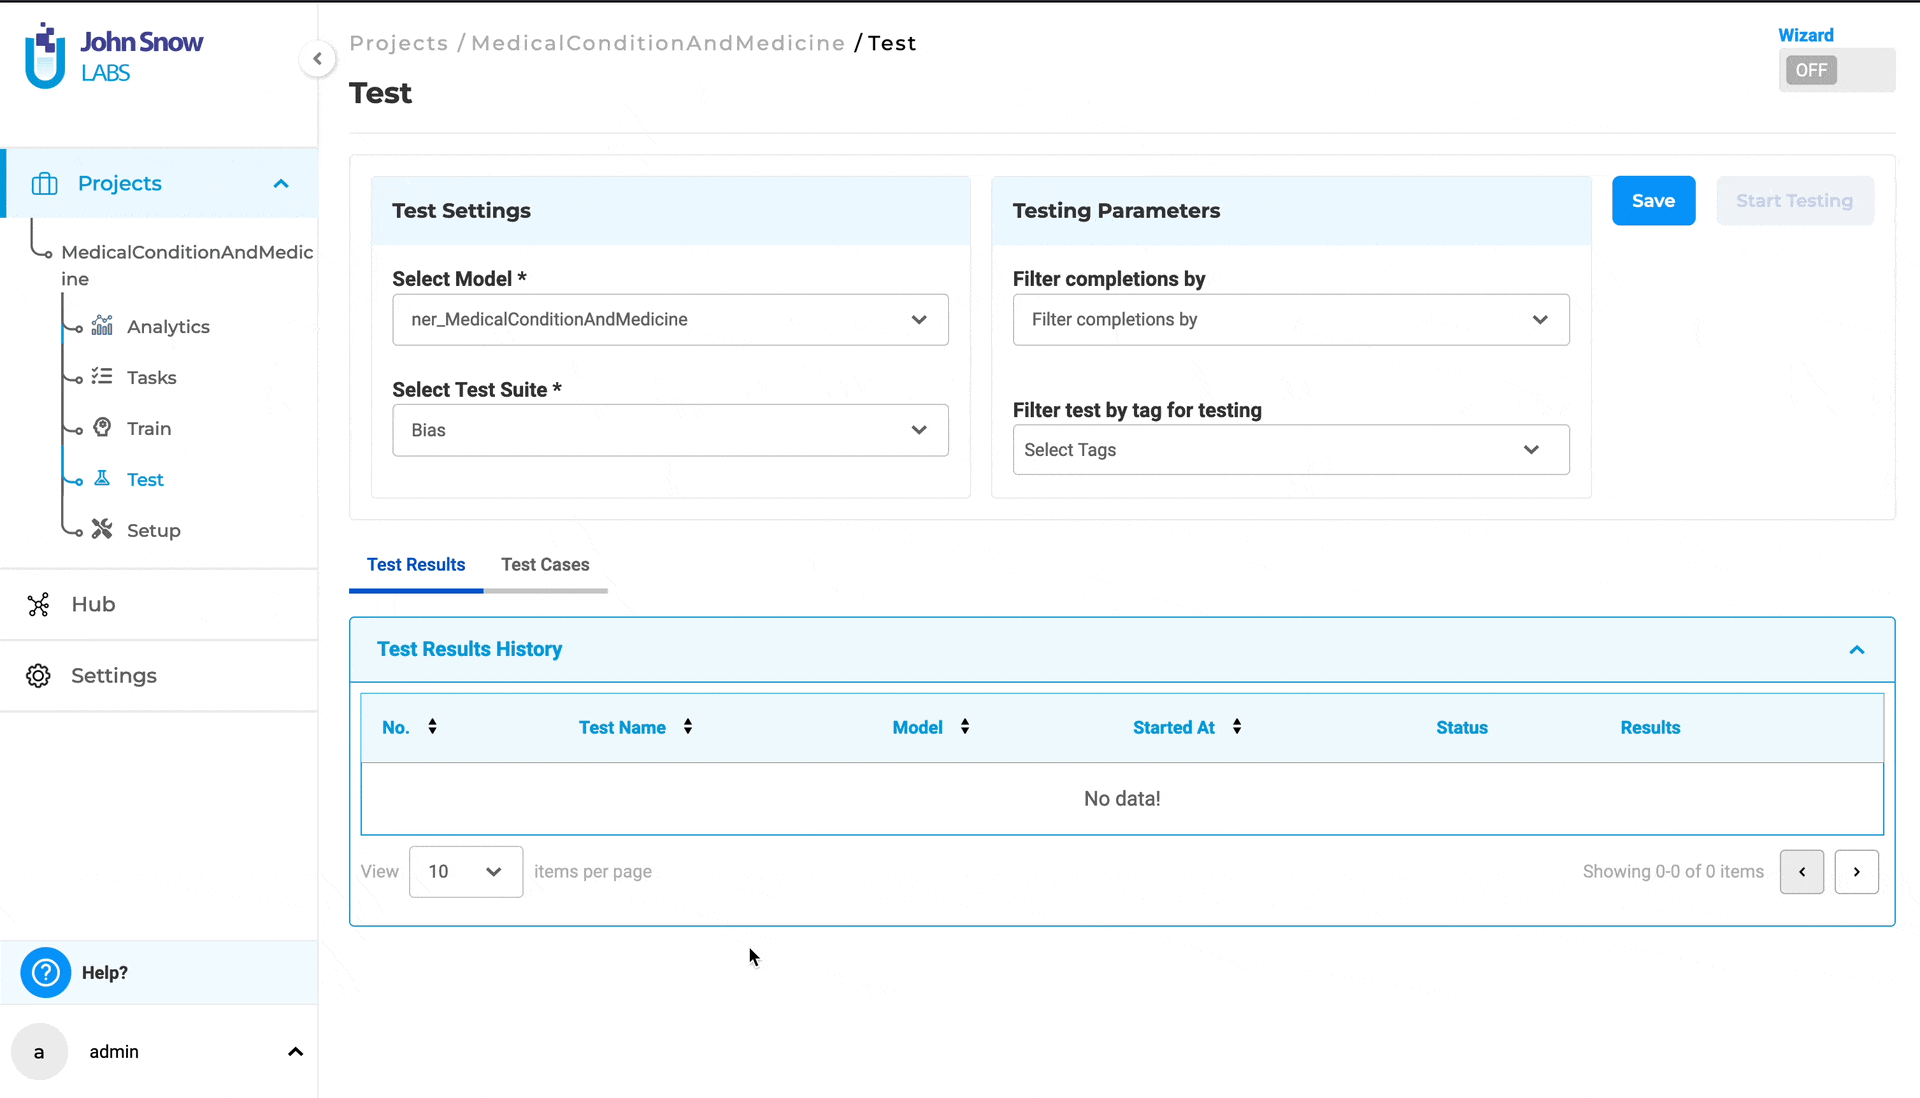
There are two configuration options available in the “Test Parameters” section; they are optional:
1. Filter completions by:
This option enables users to narrow down their analysis by selecting tasks based on their completion status. The available options are:
- Clear “Filter completions by”: Removes selected completion filters.
- Submitted completions: Select only tasks with submitted completions for analysis.
- Reviewed completions: Select only tasks with reviewed completions for analysis.
2. Filter test by tag:
This functionality enables users to refine their analysis by selecting only project tasks associated with specific tags. By default, the dropdown includes all default tags such as “Validated”, “Test”, “Corrections Needed”, and “Train”, as well as any custom tags created within the project.
Users can select tags to focus the model testing execution on the specific tagged tasks; if no tags are selected, all tasks will be considered for analysis.
Users have two methods to select Test Settings and Test Parameters:
1. Direct Selection Method (Without Wizard Mode):
- Go to the “Test” page.
- In the Test Settings section, choose a model from the “Select Model” dropdown.
- Within the Testing Parameters section, pick completions from the “Filter completions by” dropdown.
- Also within Testing Parameters, select tags from the “Filter test by tag for testing” dropdown.
- Click the “Save” button to confirm your selections and save the configuration.

2. Wizard Mode (Guided Setup):
- Click the “Wizard” button to initiate Wizard mode. This will reveal the “Test Setting” tab, offering detailed information about Model Selection and Test Suite.
- From the “Select Model” dropdown, choose a model.
- Select a test suite from the dropdown or create a new one by clicking on ”+ Create New Test Suite”.
- Click “Next” to proceed to the “Test Parameters” tab, where you’ll see detailed information about “Filter completions by” and “Tags”.
- Within the “Filter completions by” dropdown, select the appropriate option.
- Choose one or more tags, or none, from the “Filter test by tag for testing” dropdown.
- Click “Next” to save the Test Settings and Parameters.

To modify the Test Settings and Parameters, simply click on the “Edit” icon.

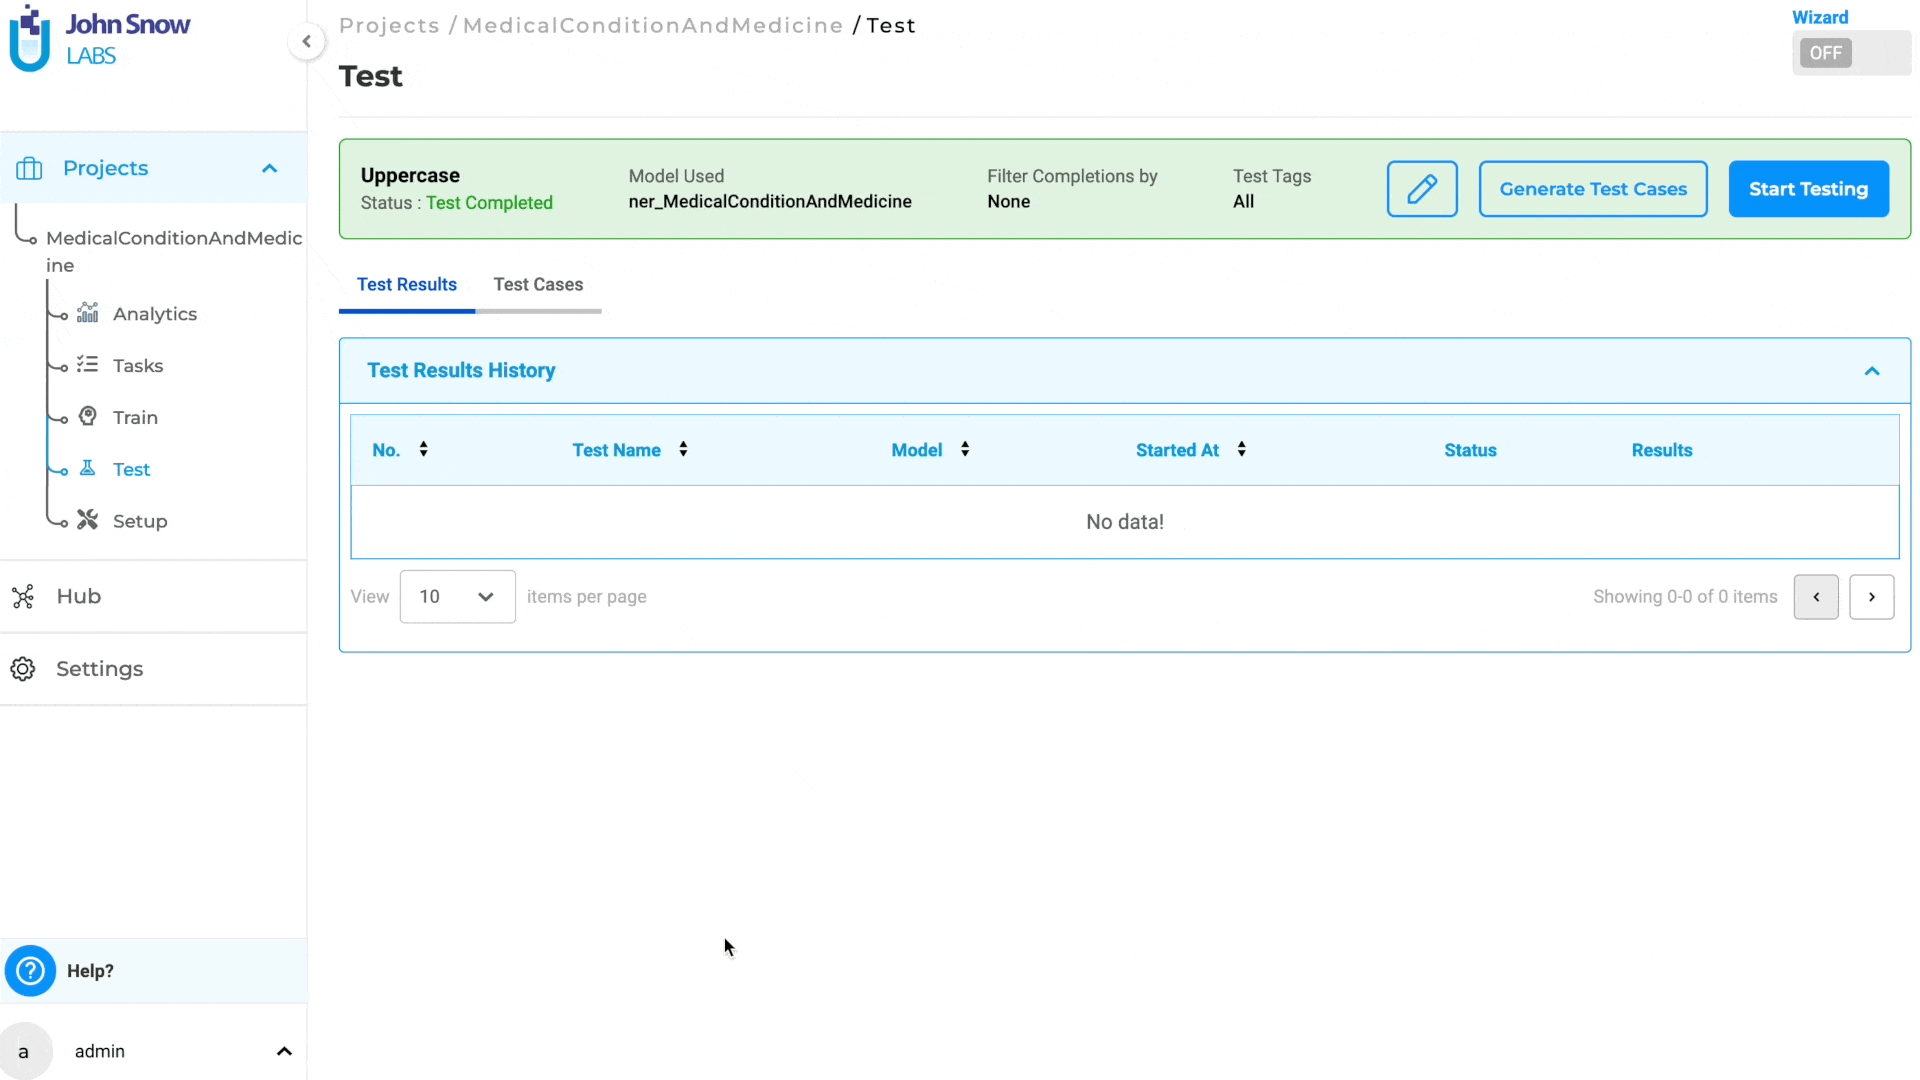
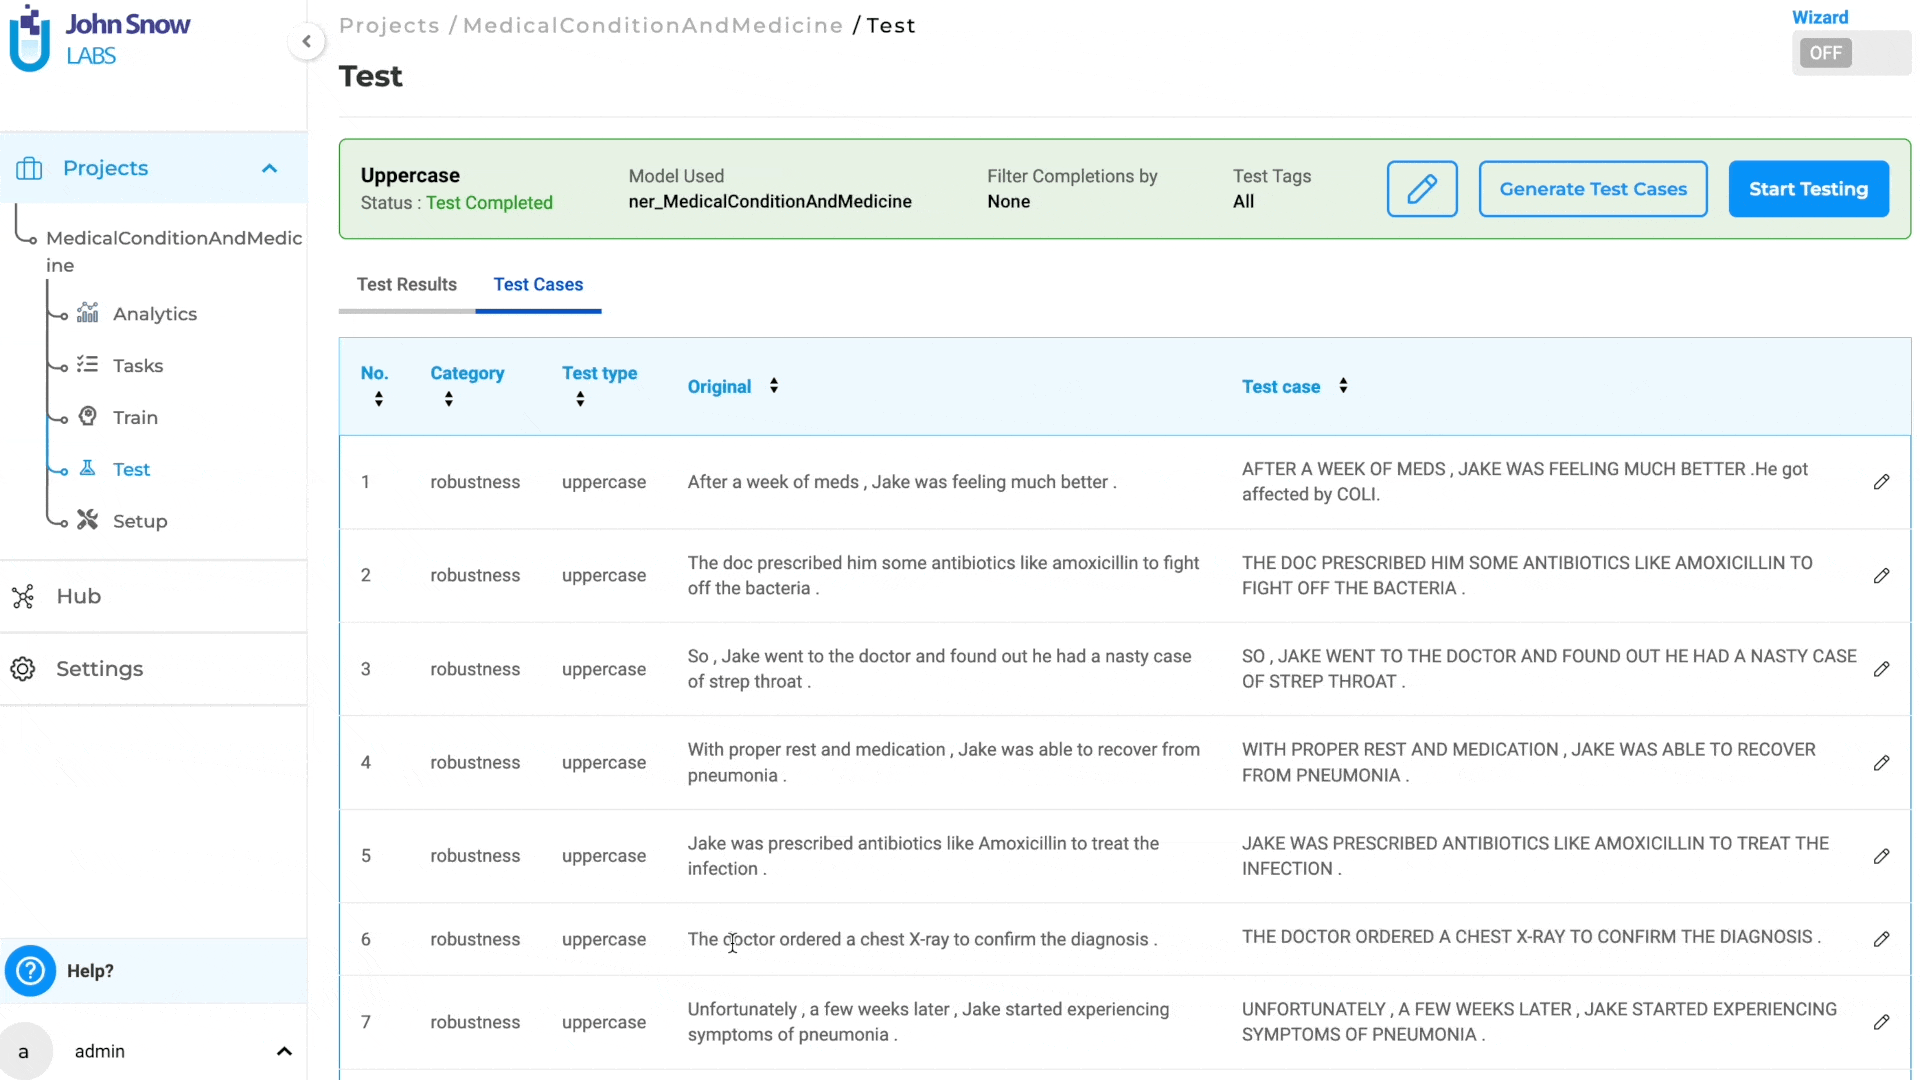
Generating Test Cases
After saving the Test Settings and Parameters, the following options become available: “Generate Test Cases”, “Start Testing”, and “Edit”. Users must generate test cases and conduct testing independently.
Clicking on “Generate Test Cases” will produce test cases based on the saved Test Settings and Parameters. The generated test cases will appear under the “Test Cases” tab.
Note: Only Bias and Robustness test cases can be edited and updated; other test cases are not editable.
Modifying Test Settings or Parameters and generating new test cases will discard any existing ones. If no relevant tasks or data are available, no test cases will be generated.
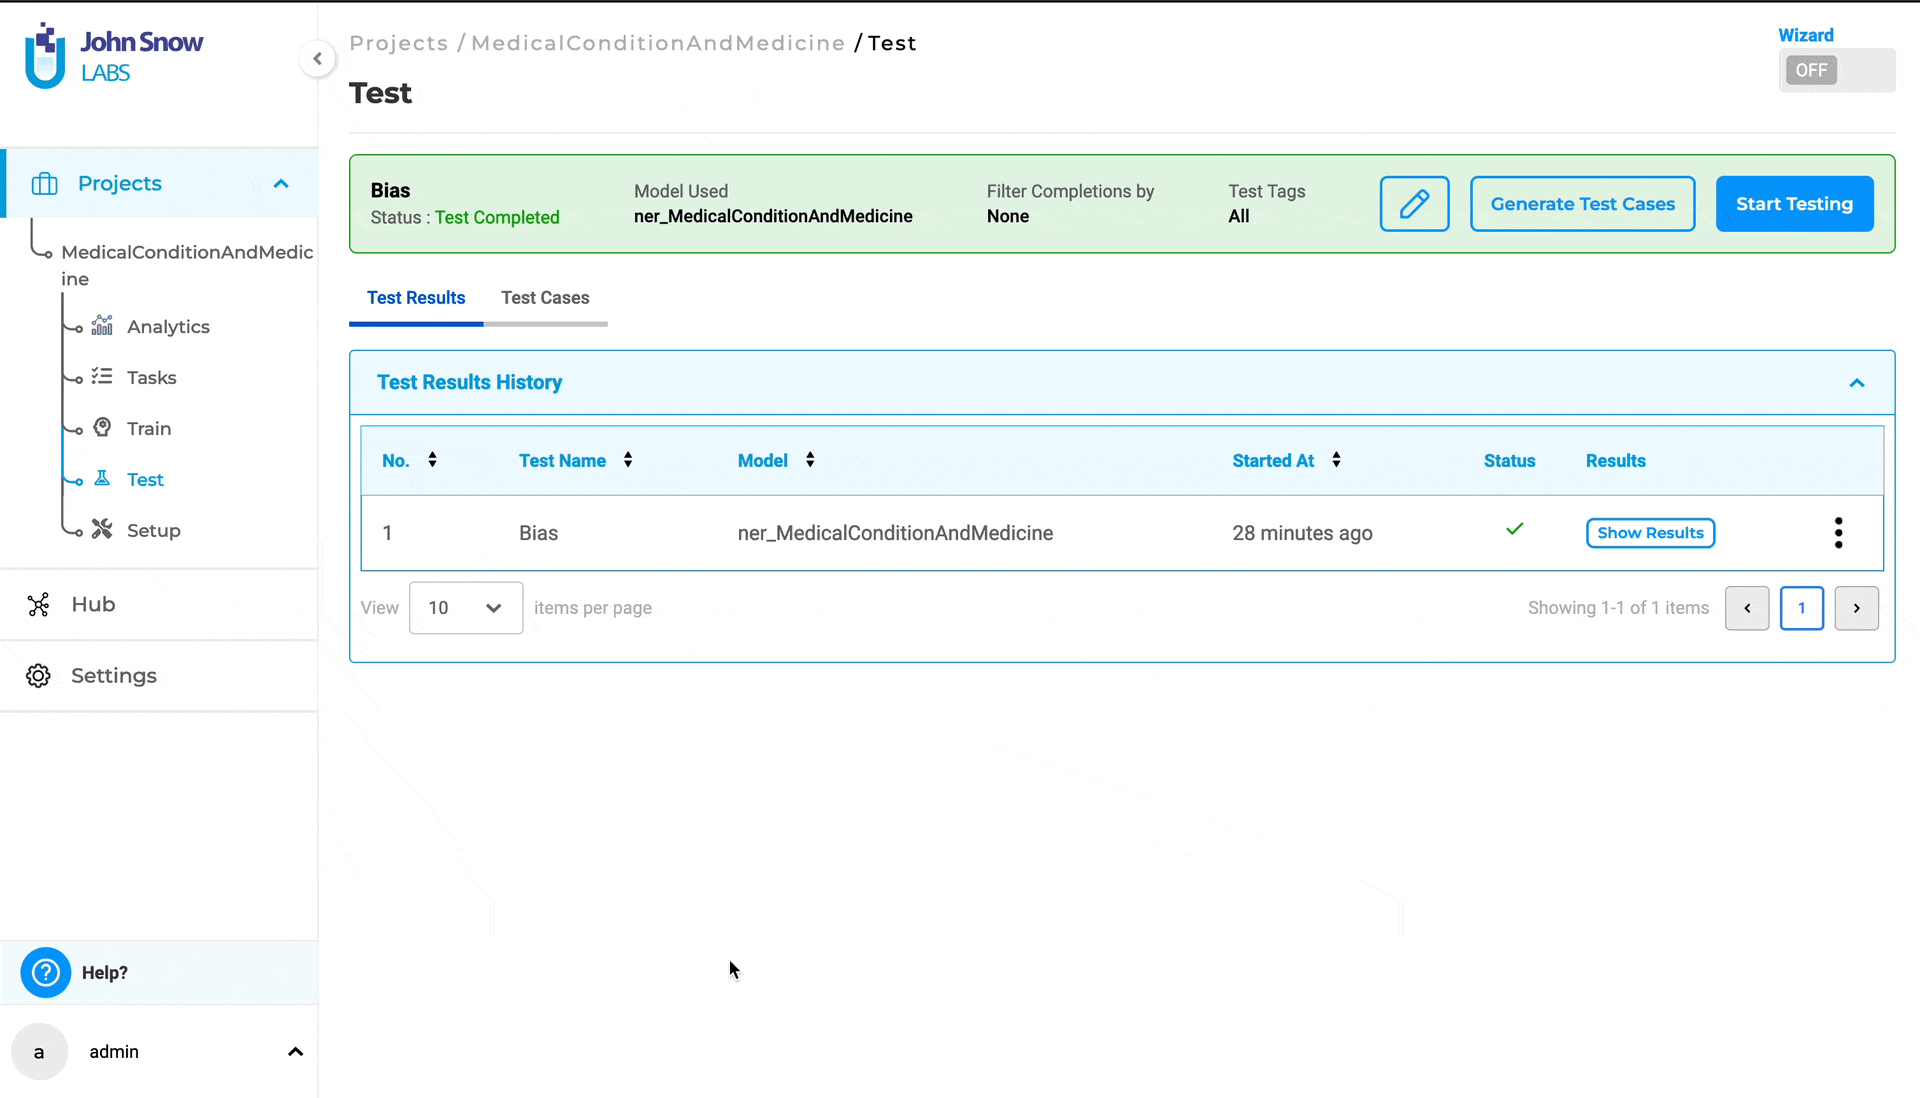
Start Model Testing
When “Start Testing” is clicked, model testing commences based on the generated test cases and the configured test settings. To view the test logs, click on “Show Logs”. The testing process can be halted by clicking on “Stop Testing”. If no test cases have been generated, the “Start Testing” option will be disabled, preventing the user from initiating testing.
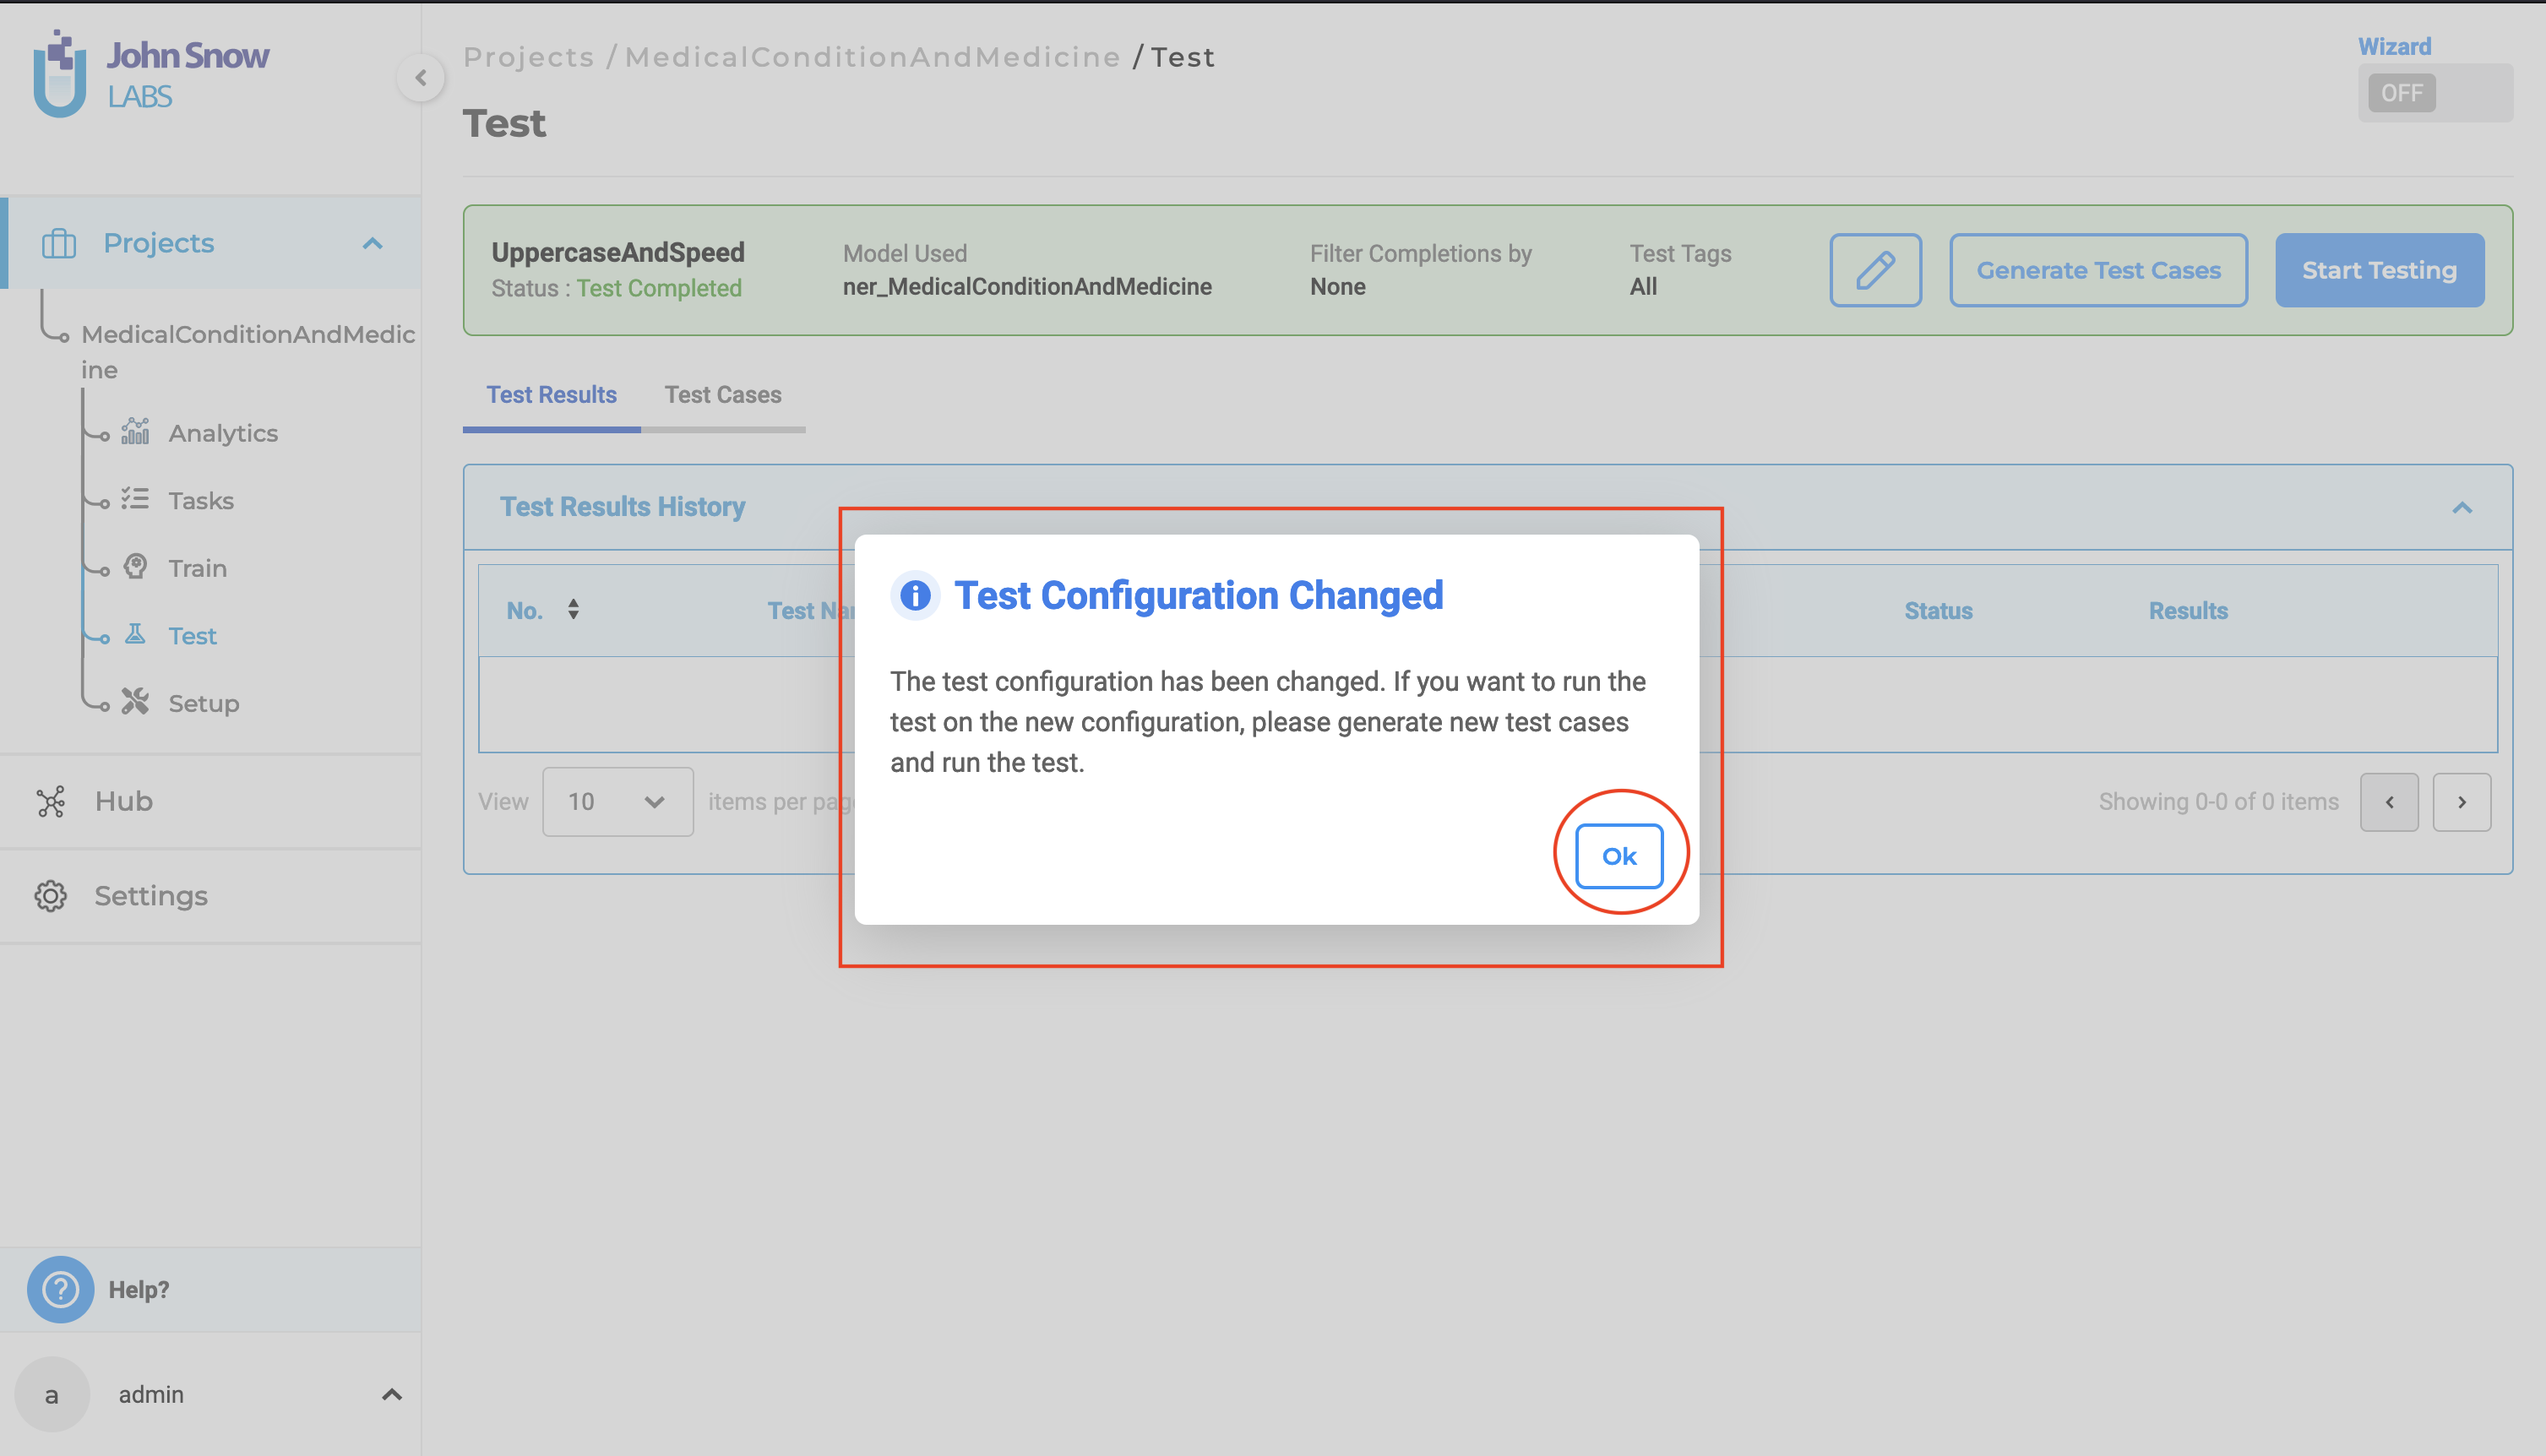
If any changes are made to the Test Settings that differ from those used to generate the test cases, clicking on “Start Testing” will trigger a pop-up notification informing the user of the configuration change. The user must either ensure that the Test Settings and Parameters match those used for test case generation or create new test cases based on the updated configuration to proceed with model testing.
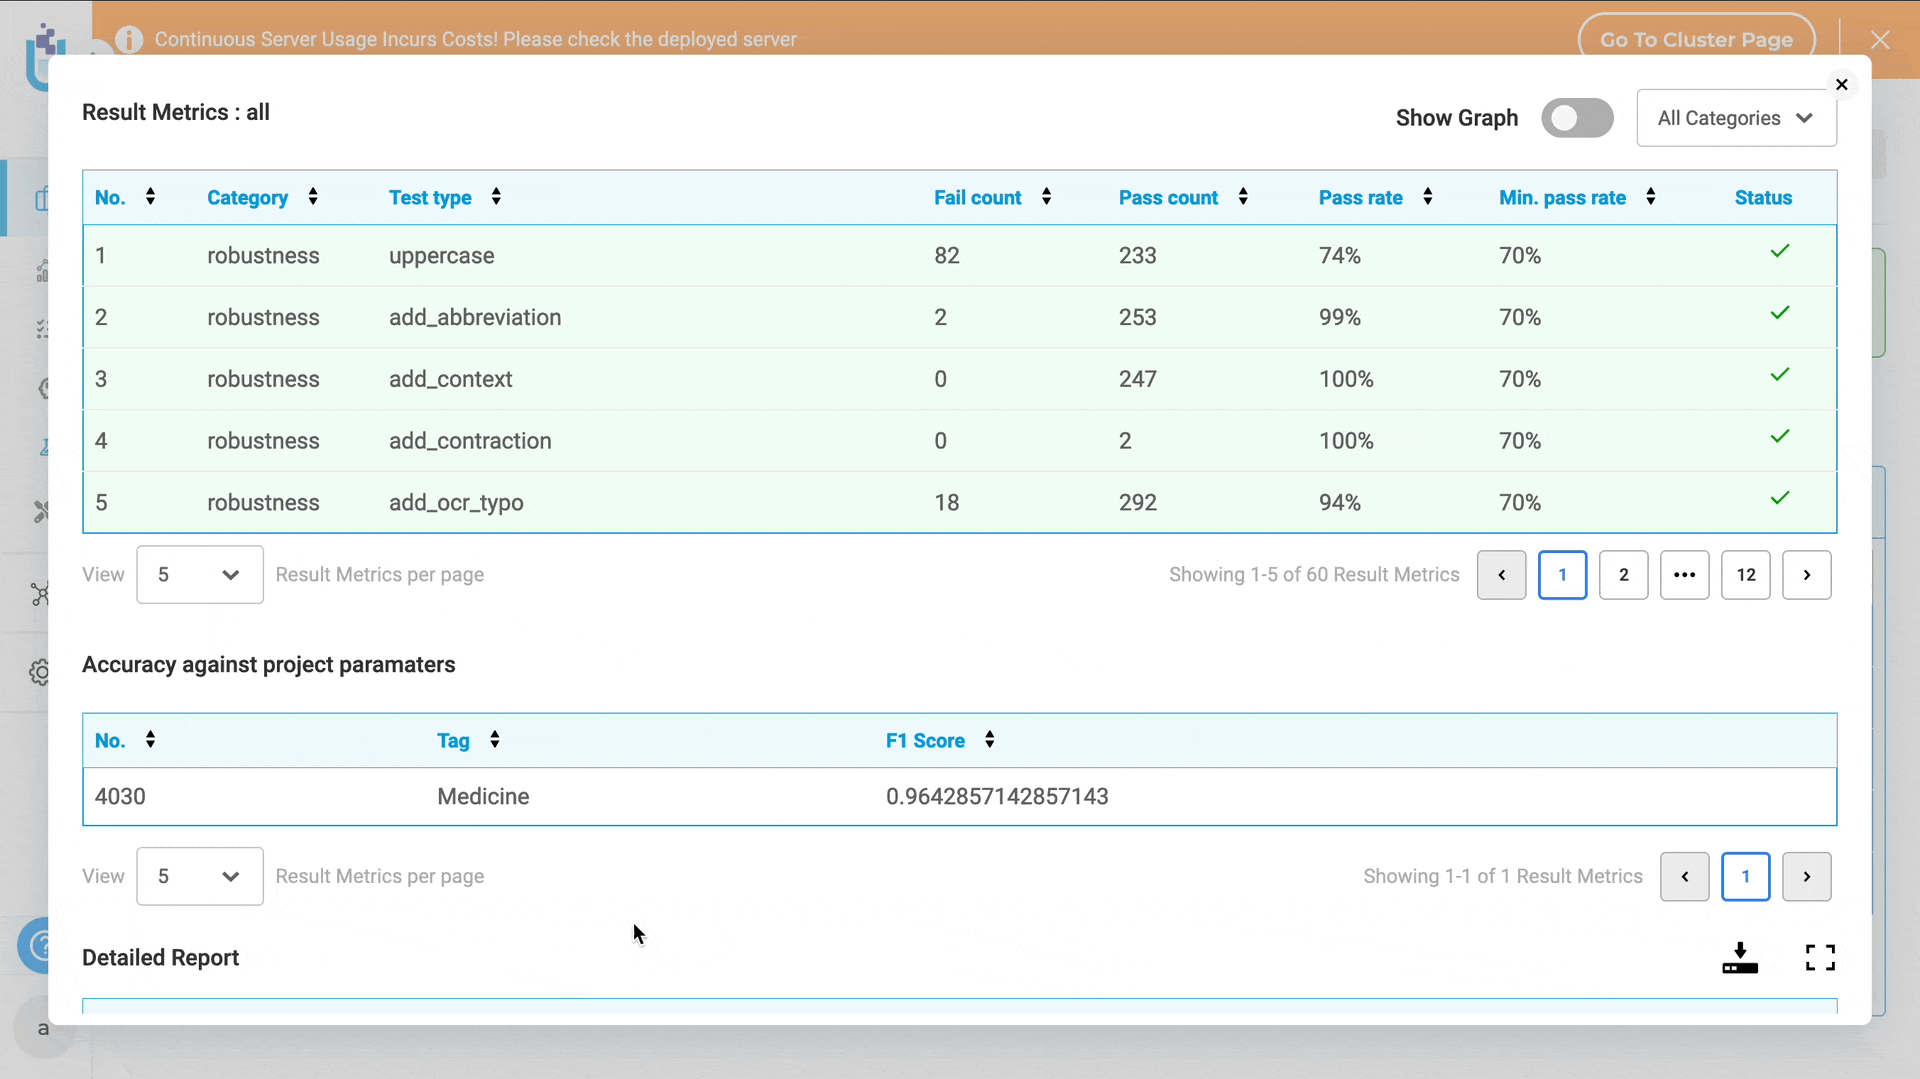
View and Delete Test Results
Once the execution of model testing is complete, users can access the test results via the “Test Results History” section in the “Test Results” tab.
Under this tab, the application displays all the “test runs” and corresponding results, for every test previously conducted for the project.
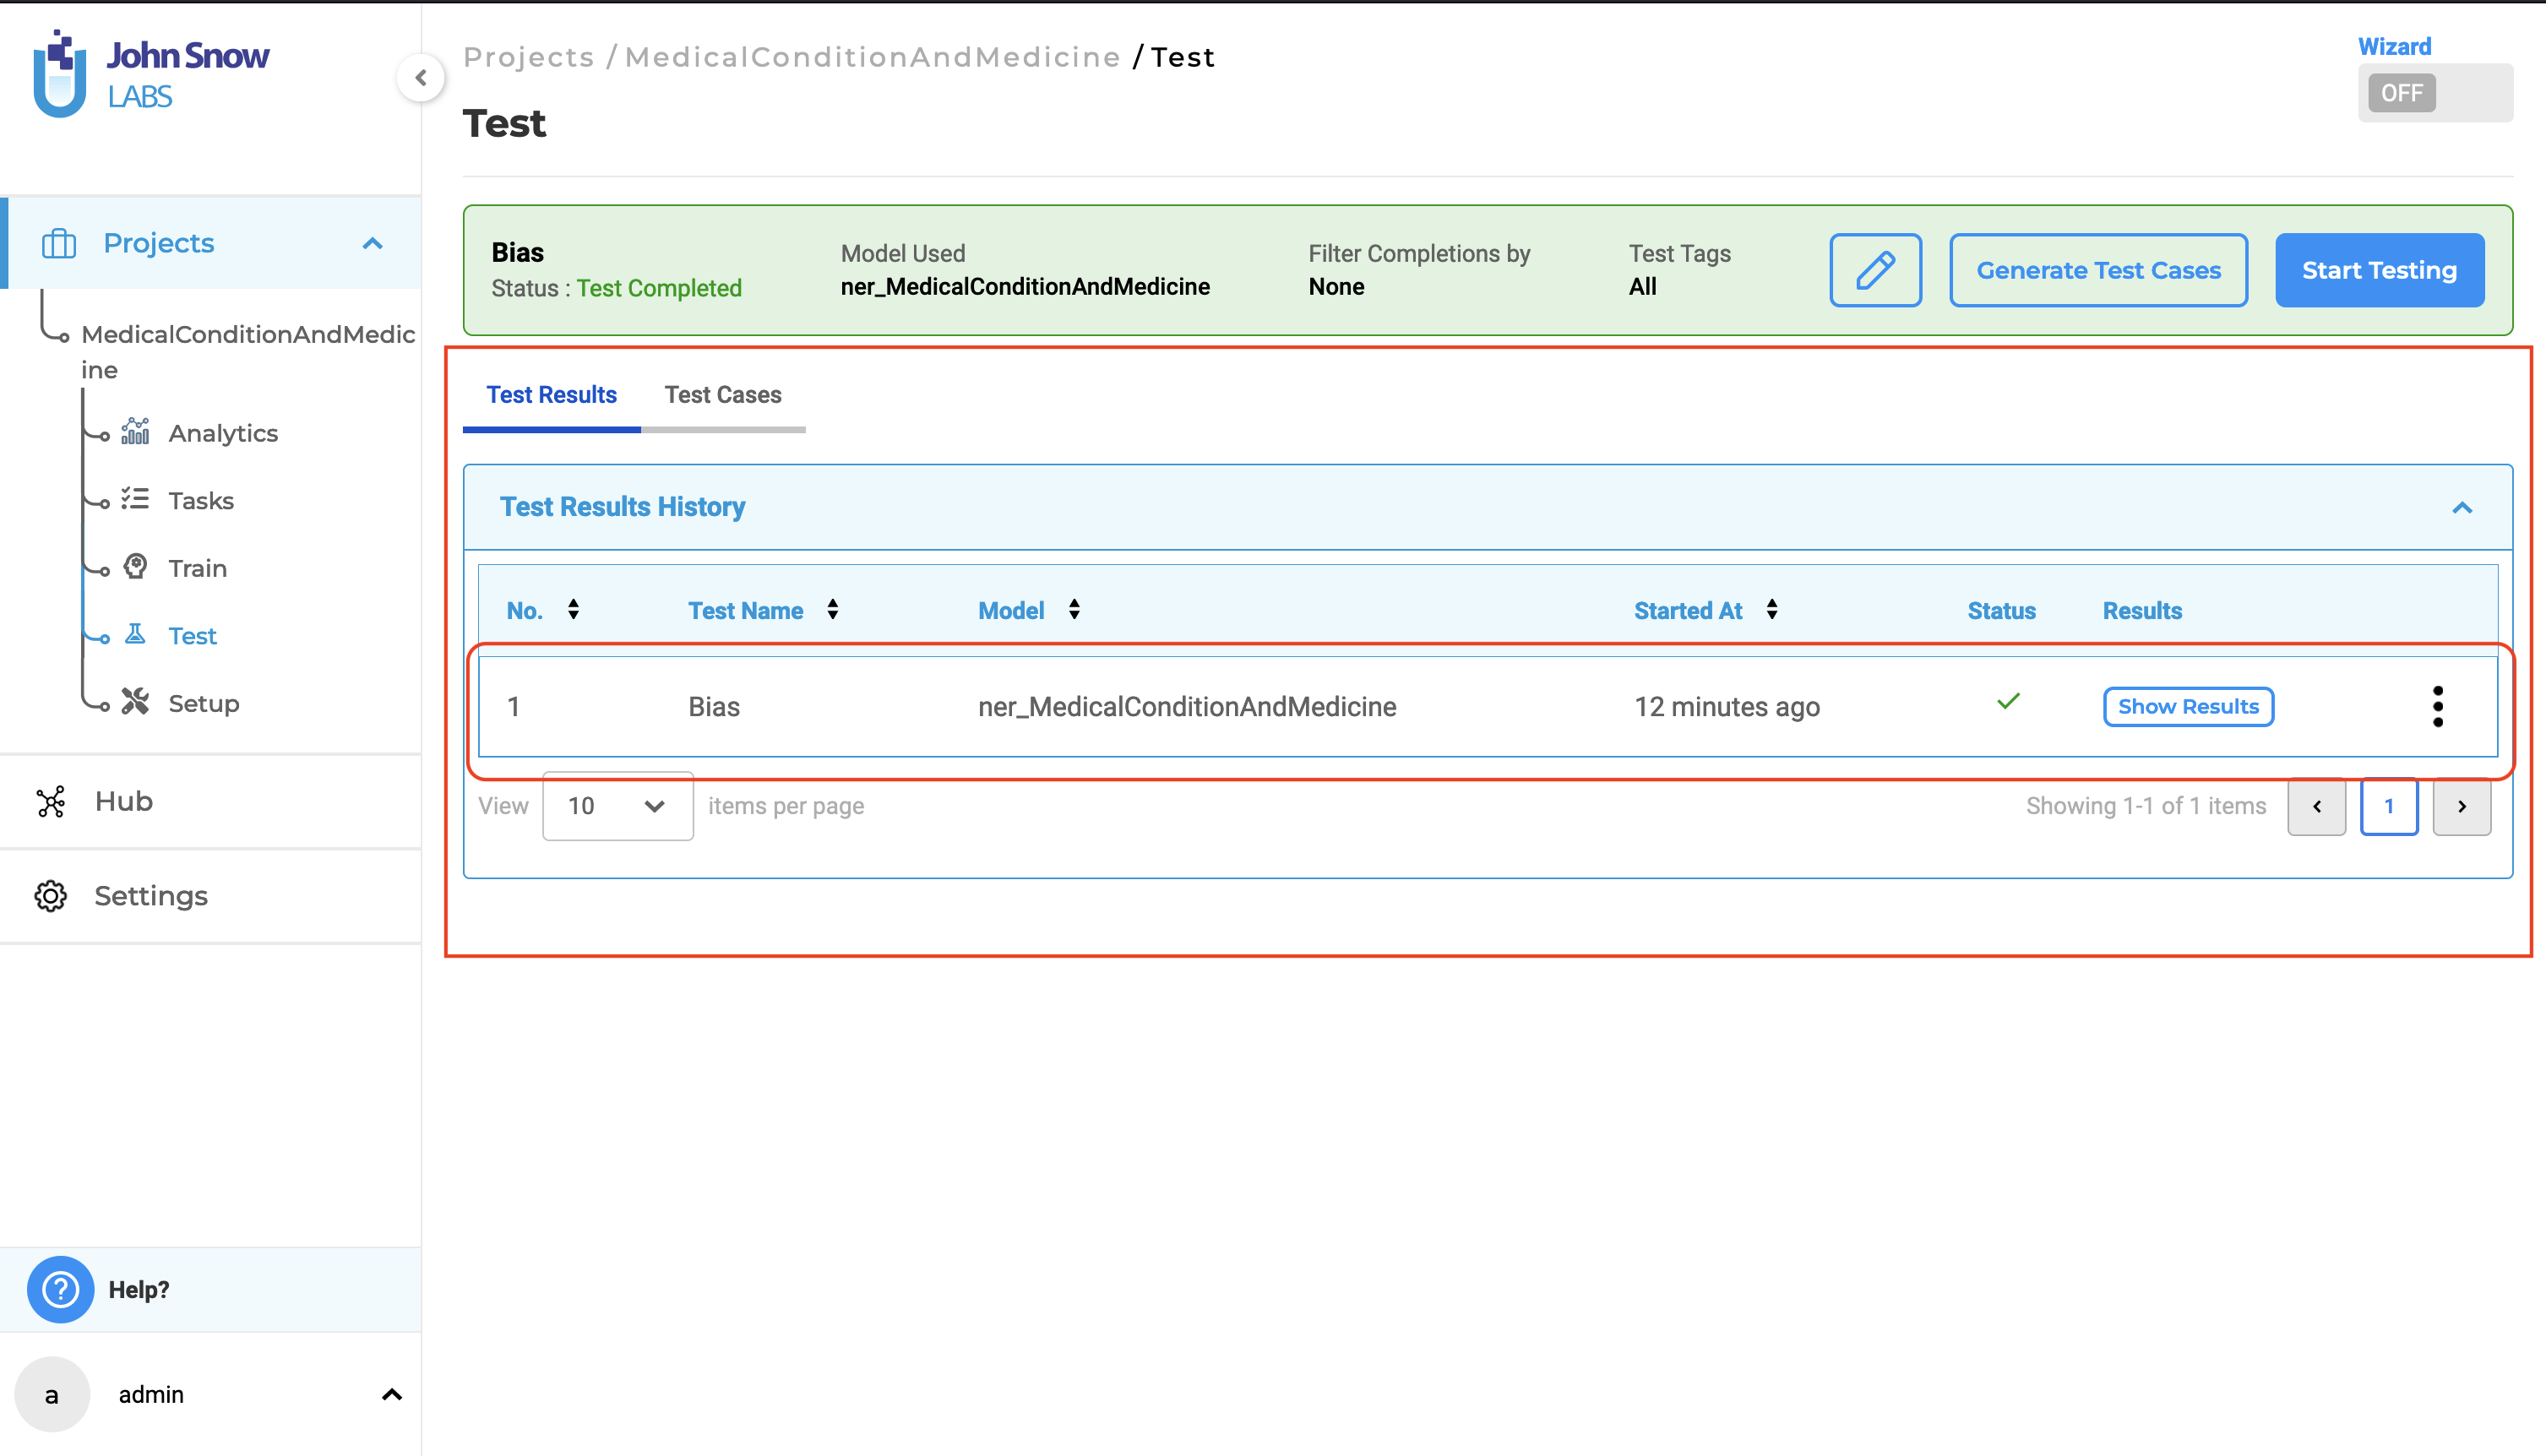
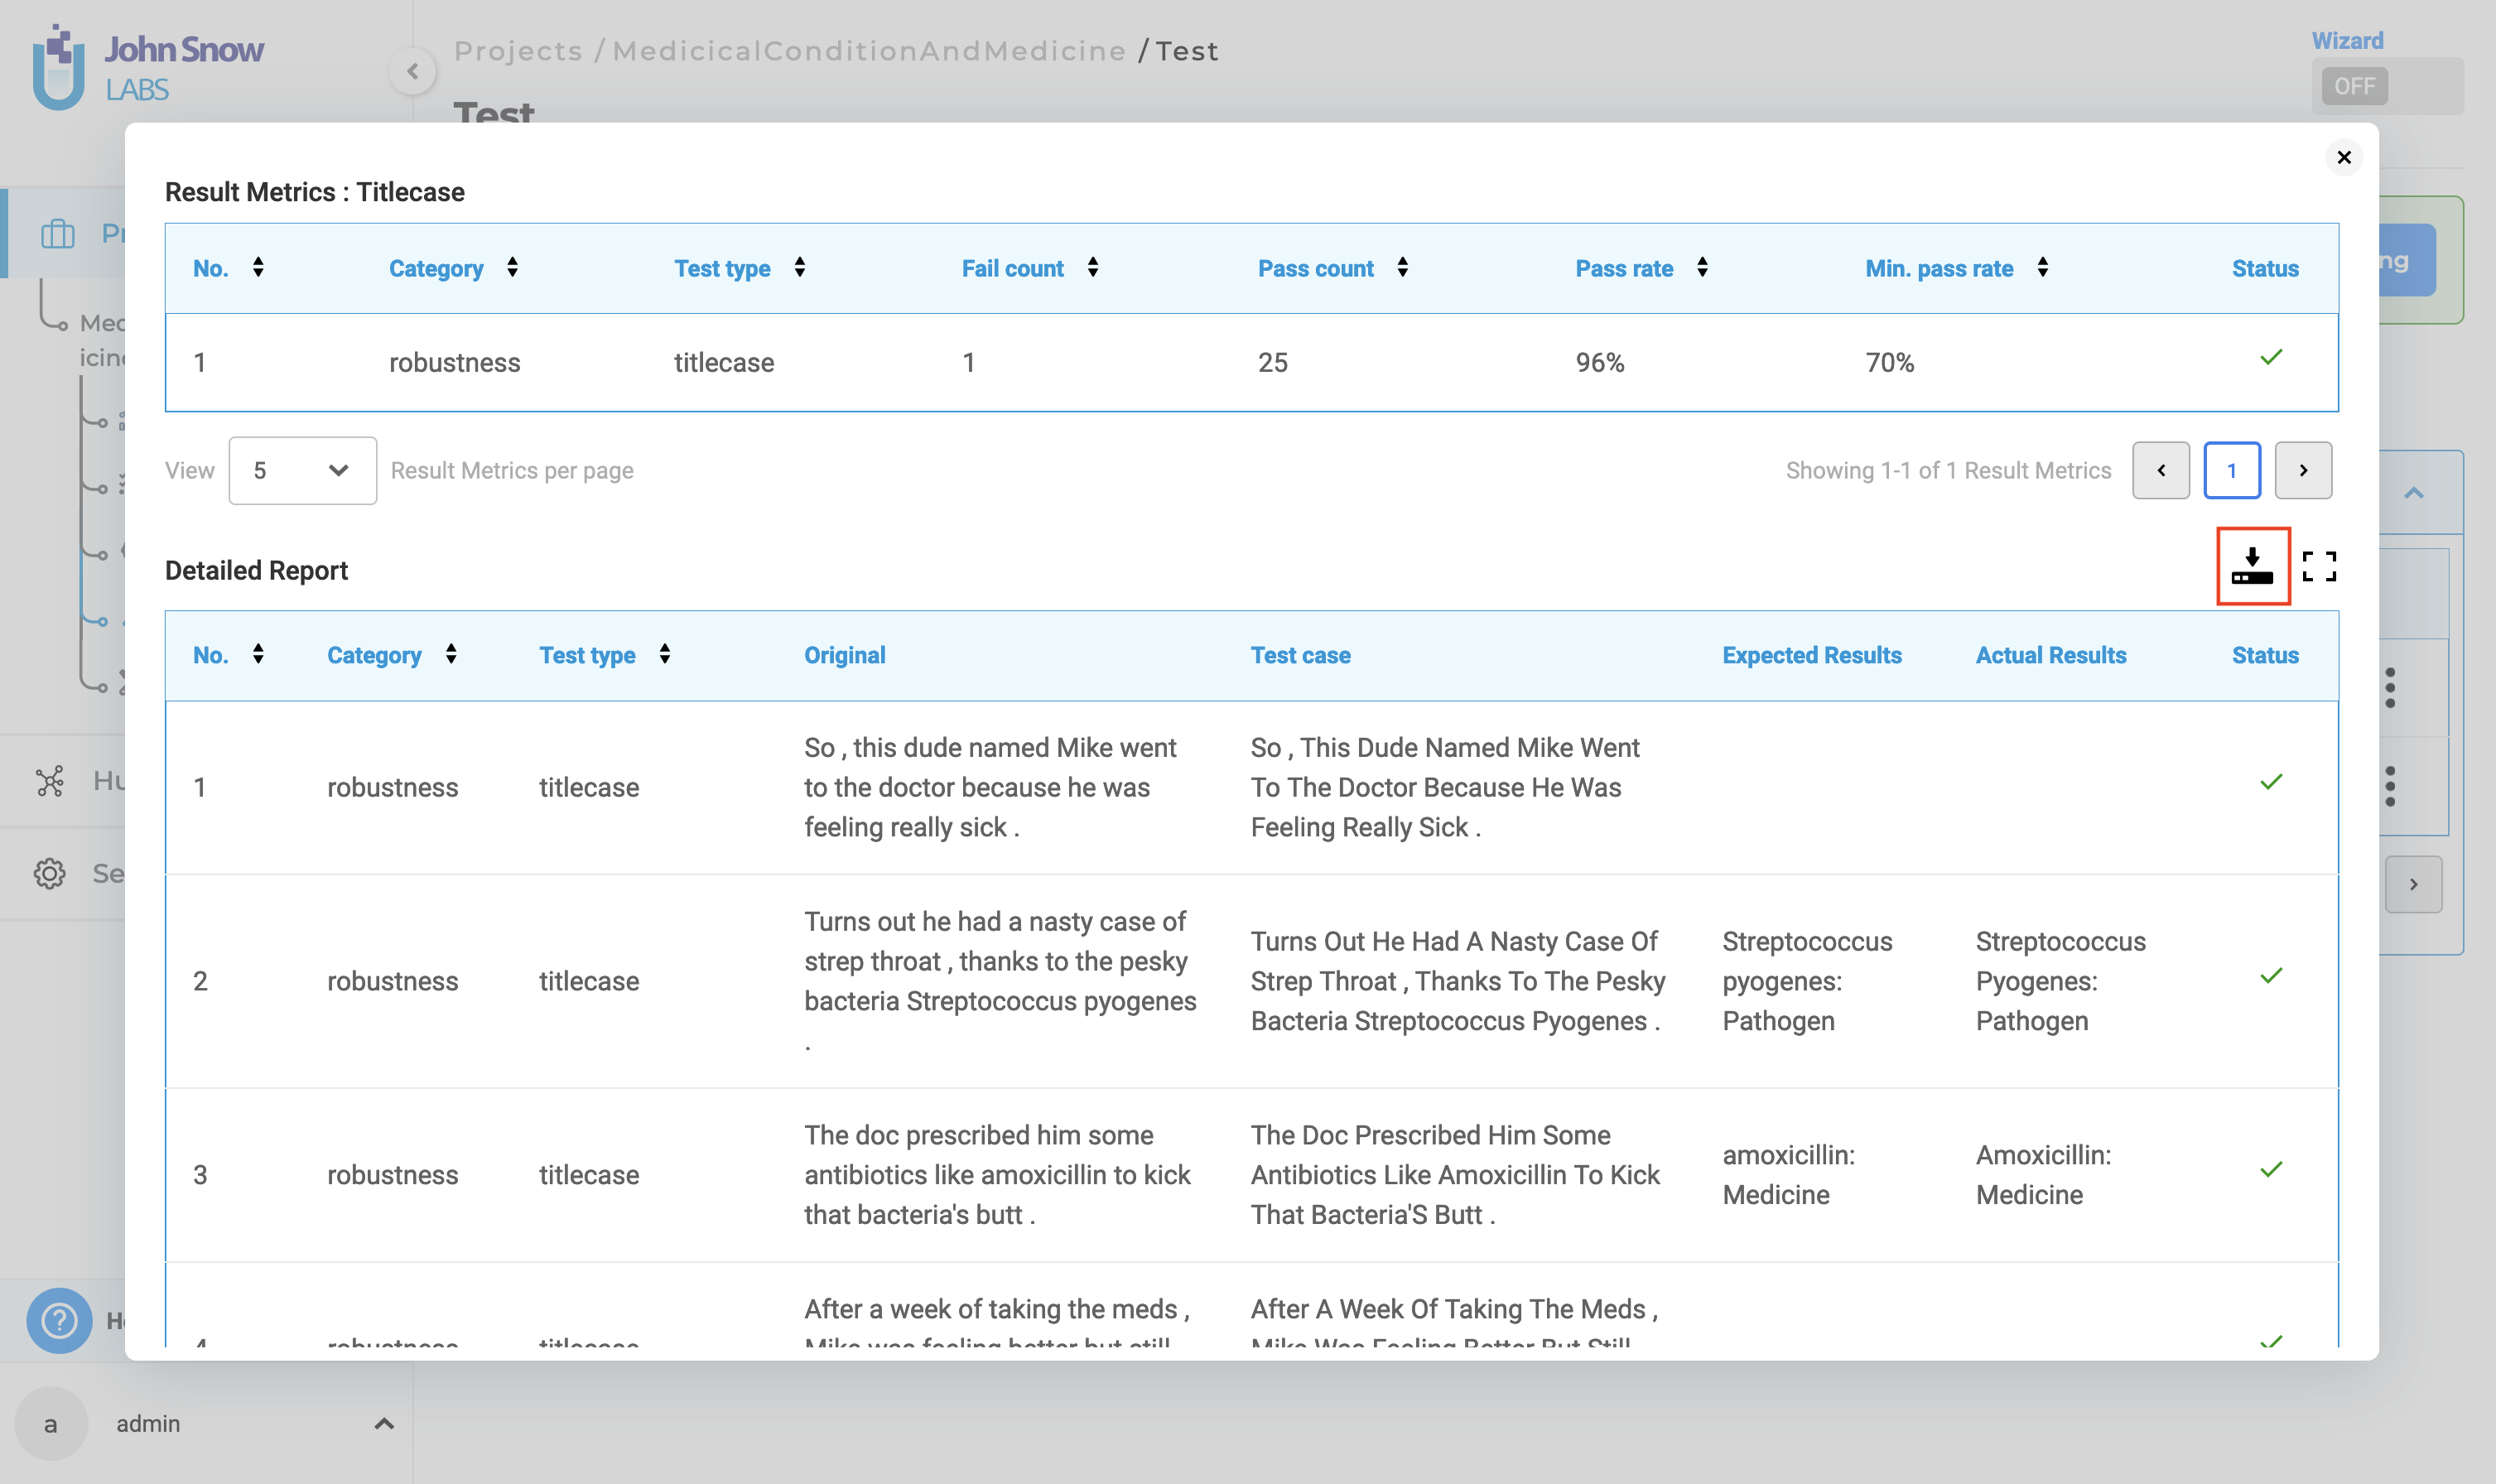
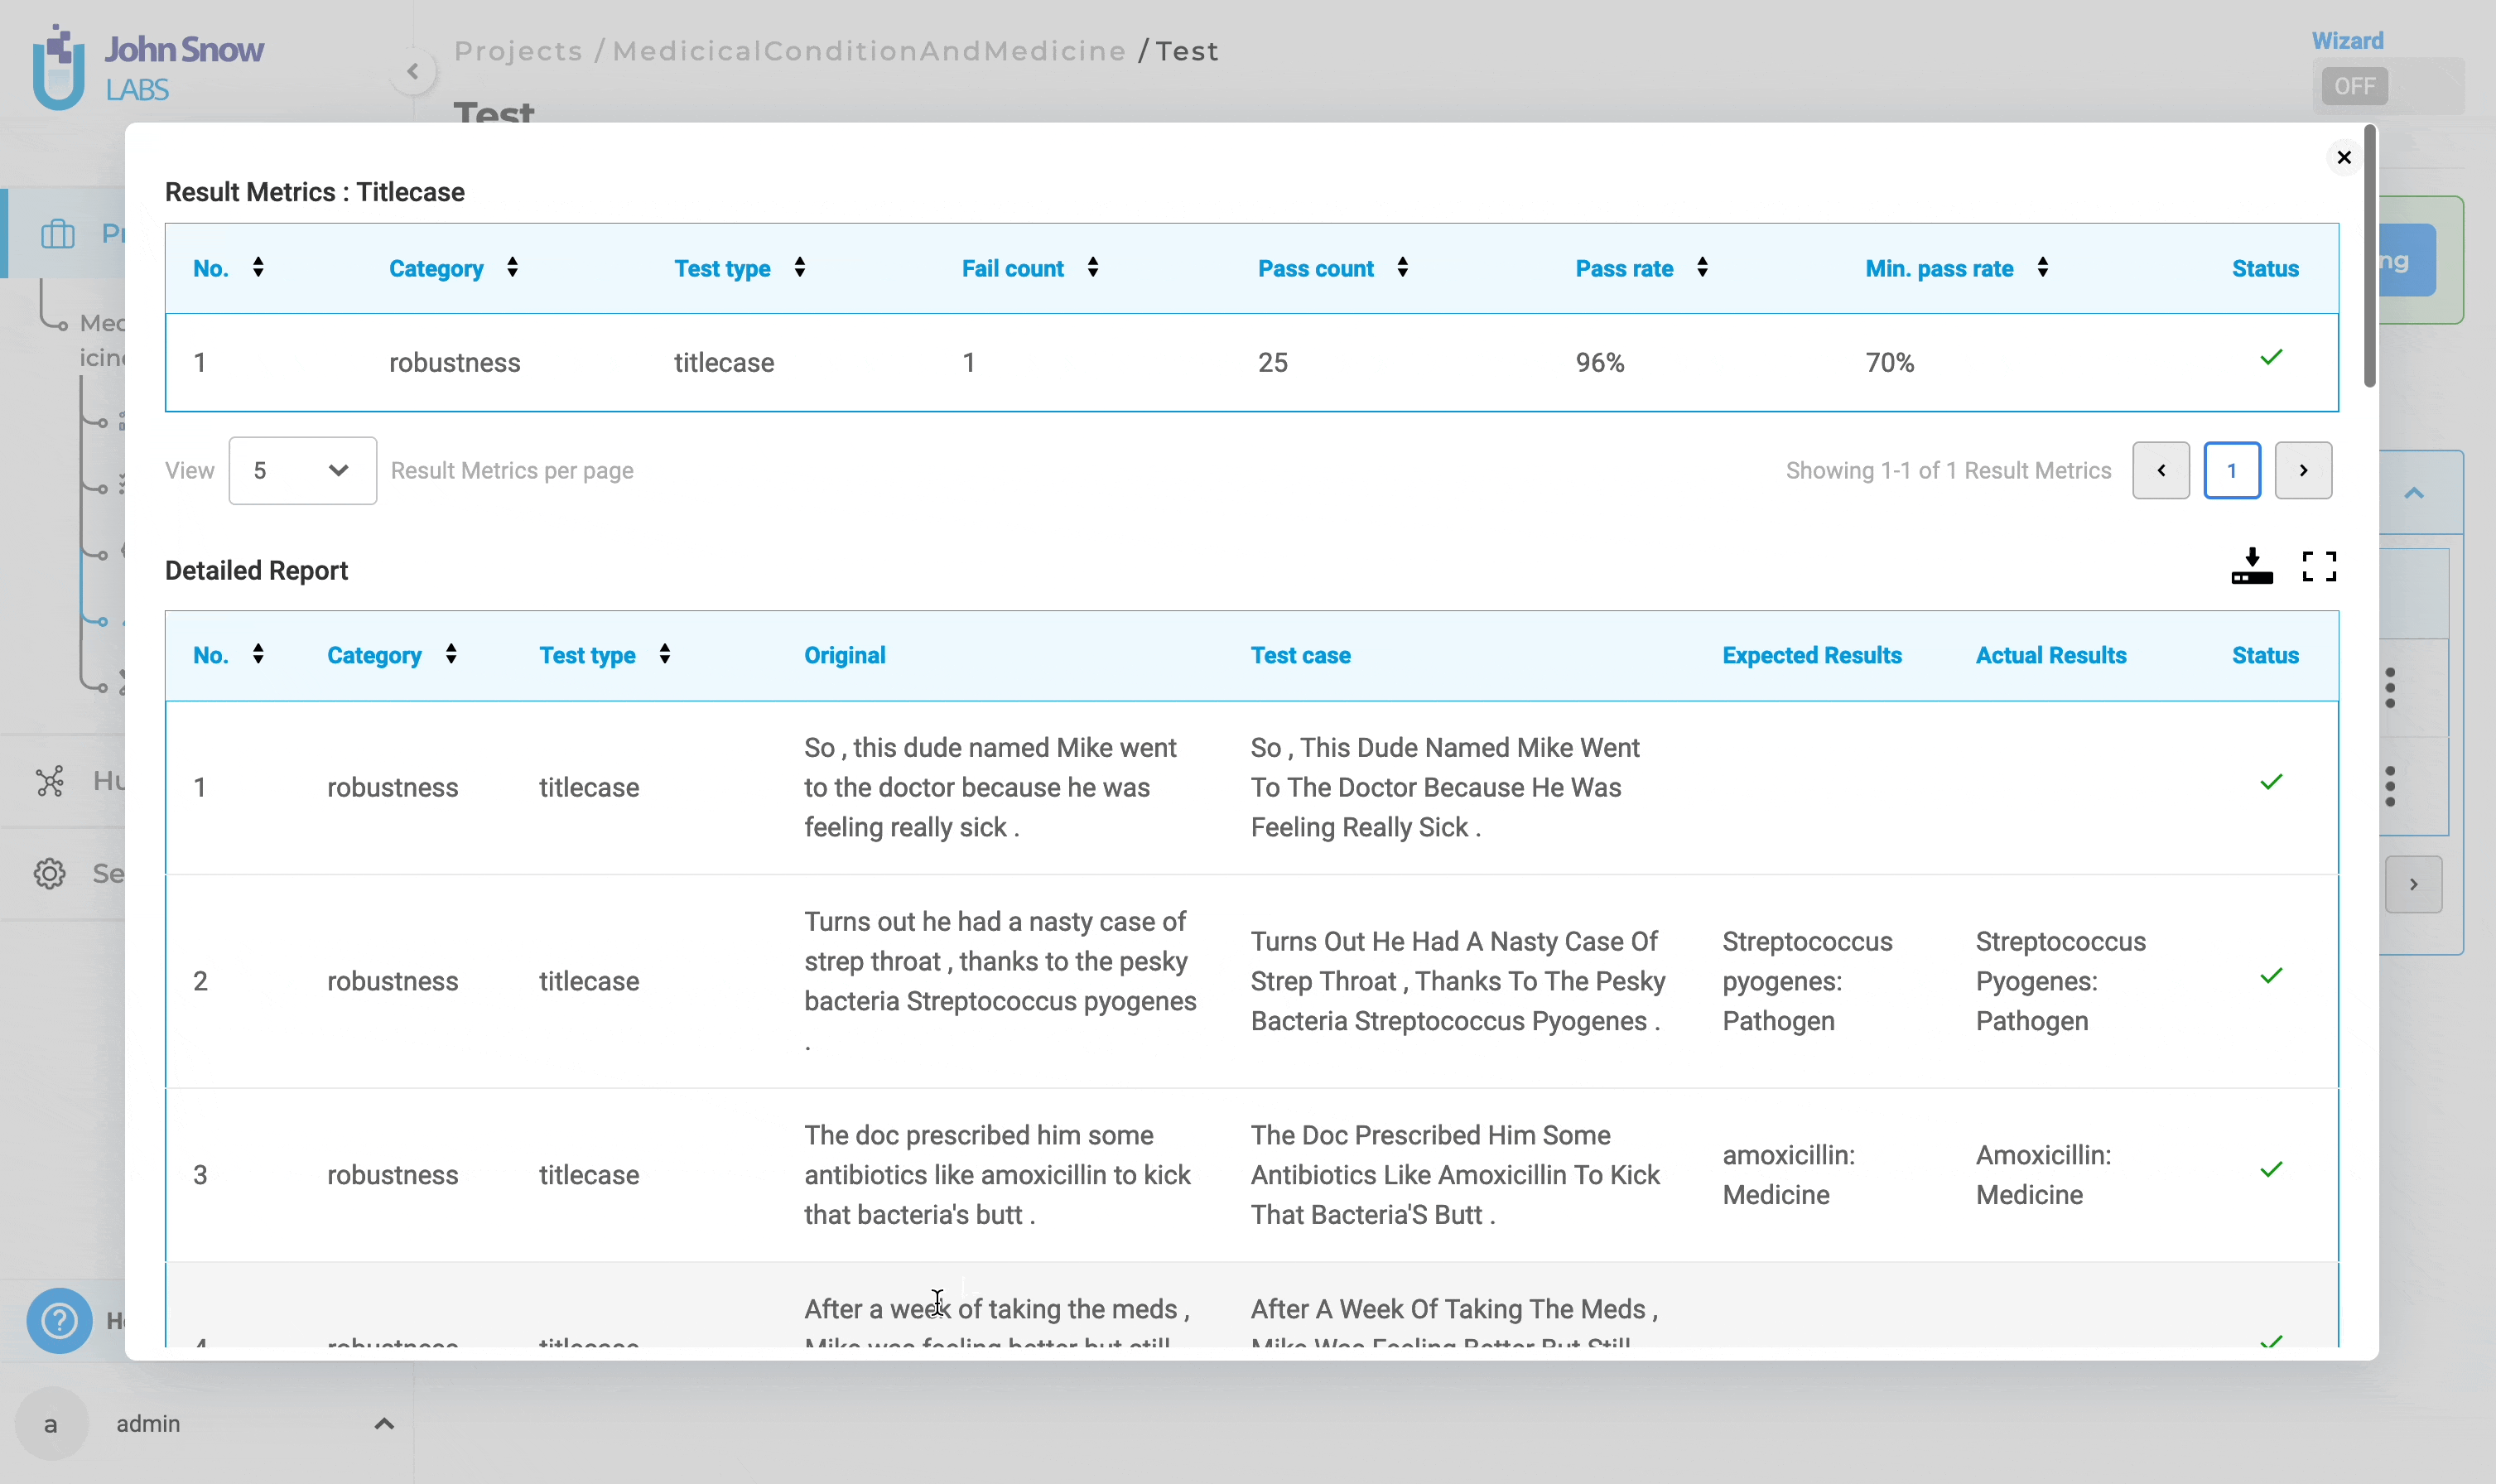
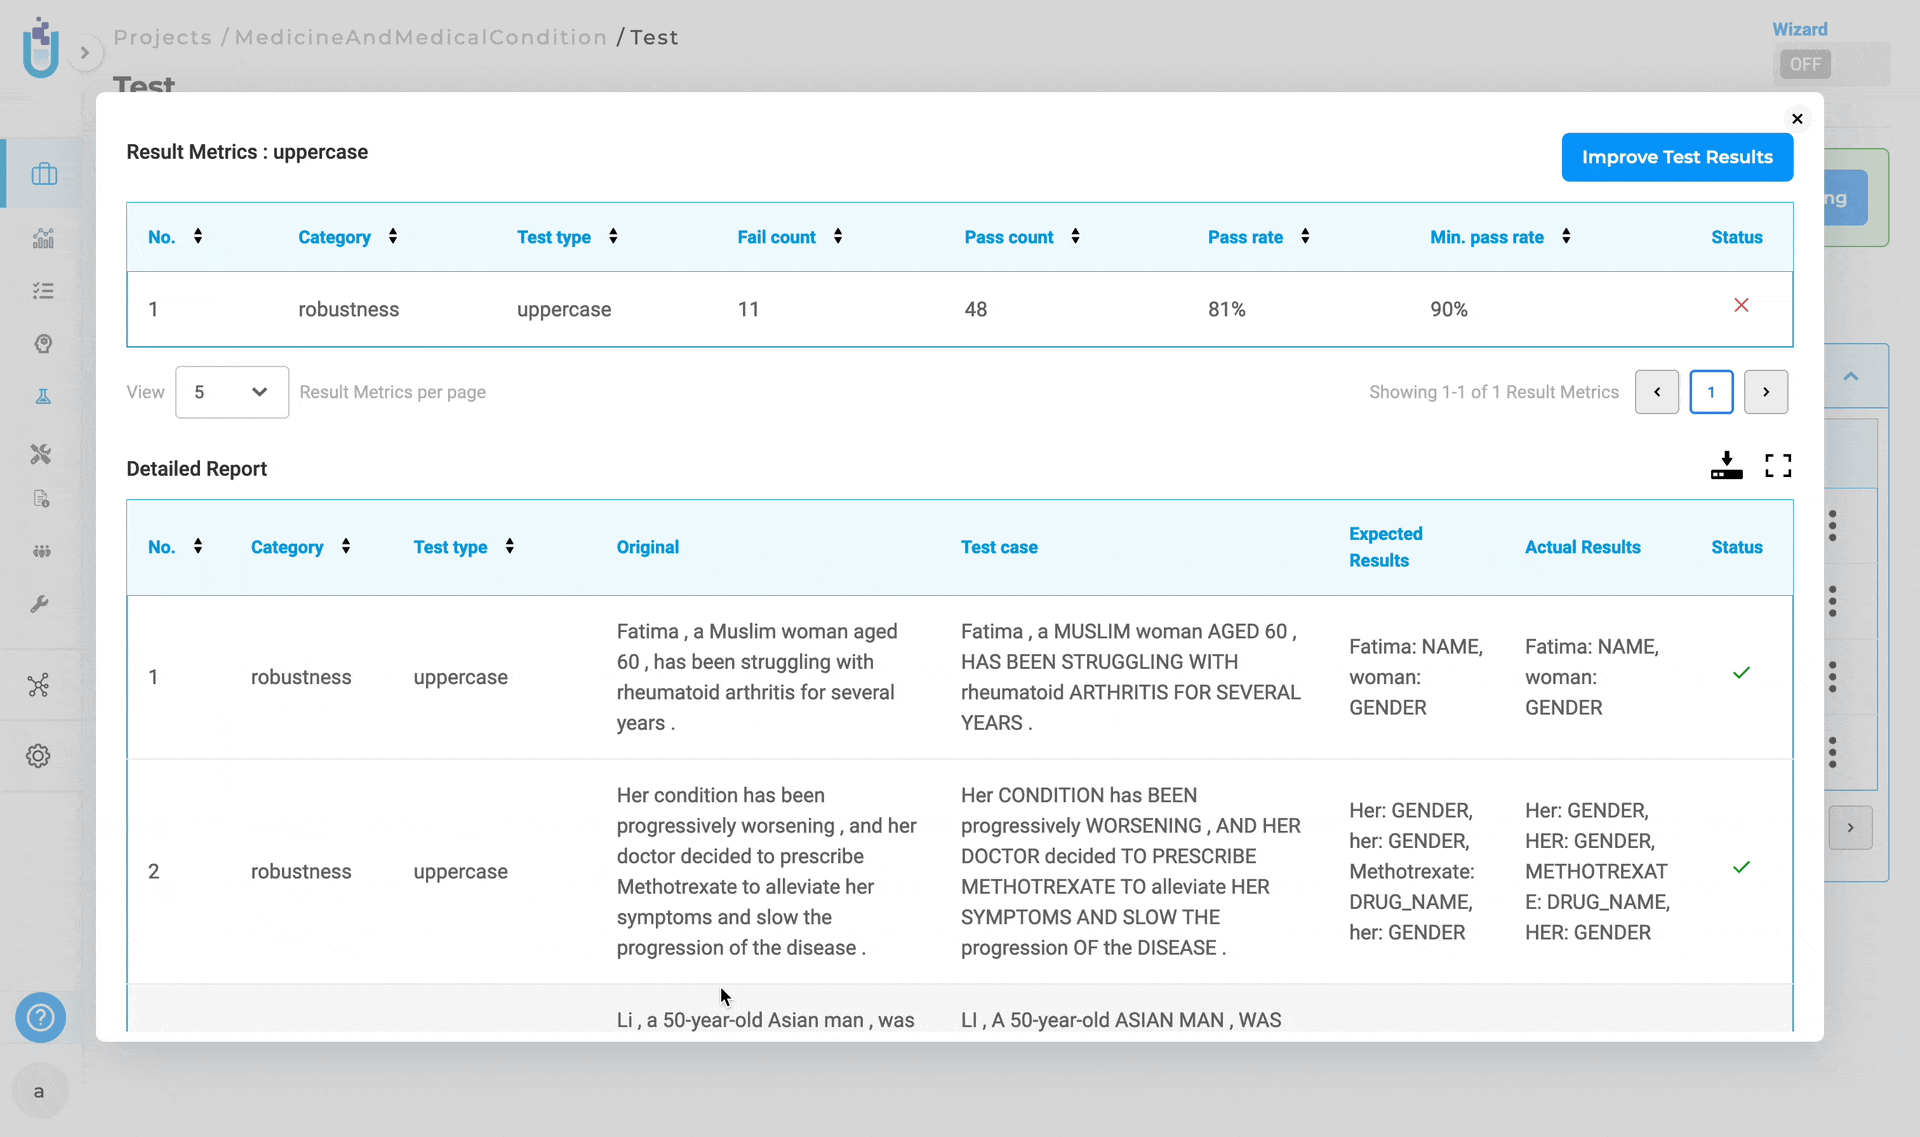
Clicking on “Show Results” will display the results for the selected test execution run. The test results consist of two reports:
1. Result Metrics:
This section of the results provides a summary of all tests performed, including their status. It includes details such as “Number”, “Category”, “Test Type”, “Fail Count”, “Pass Count”, “Pass Rate”, “Minimum Pass Rate” and “Status”.
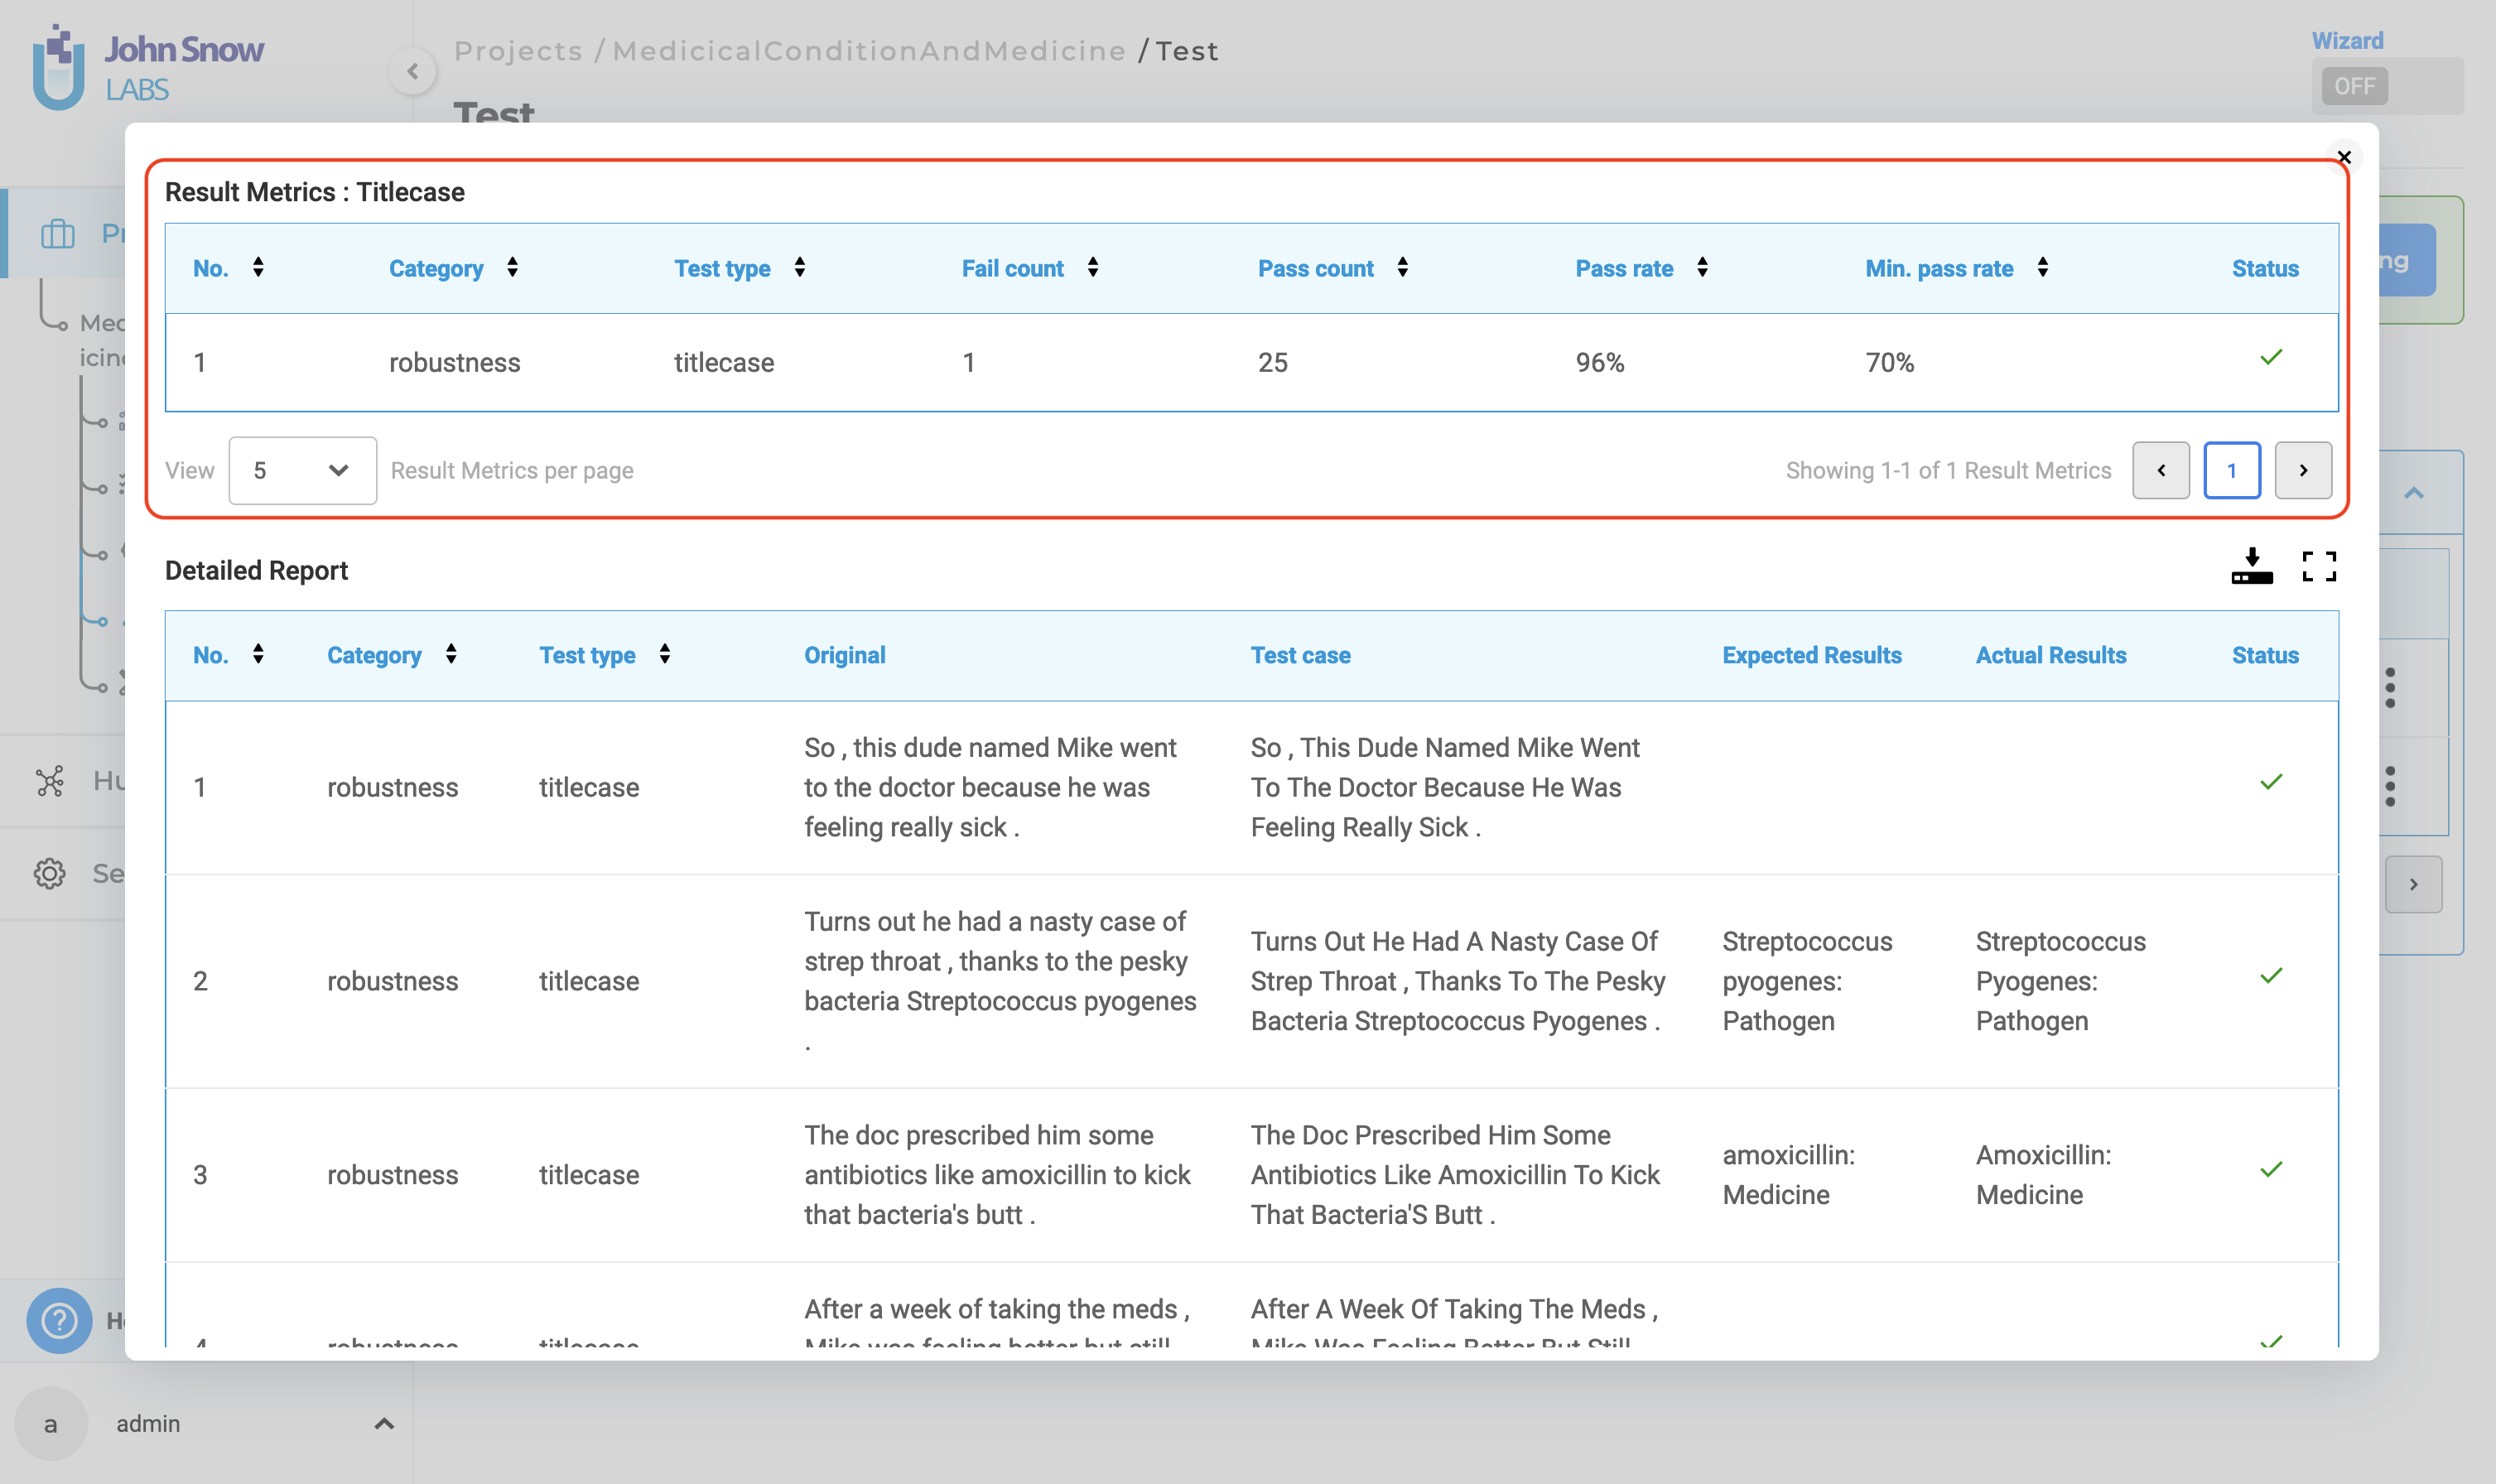
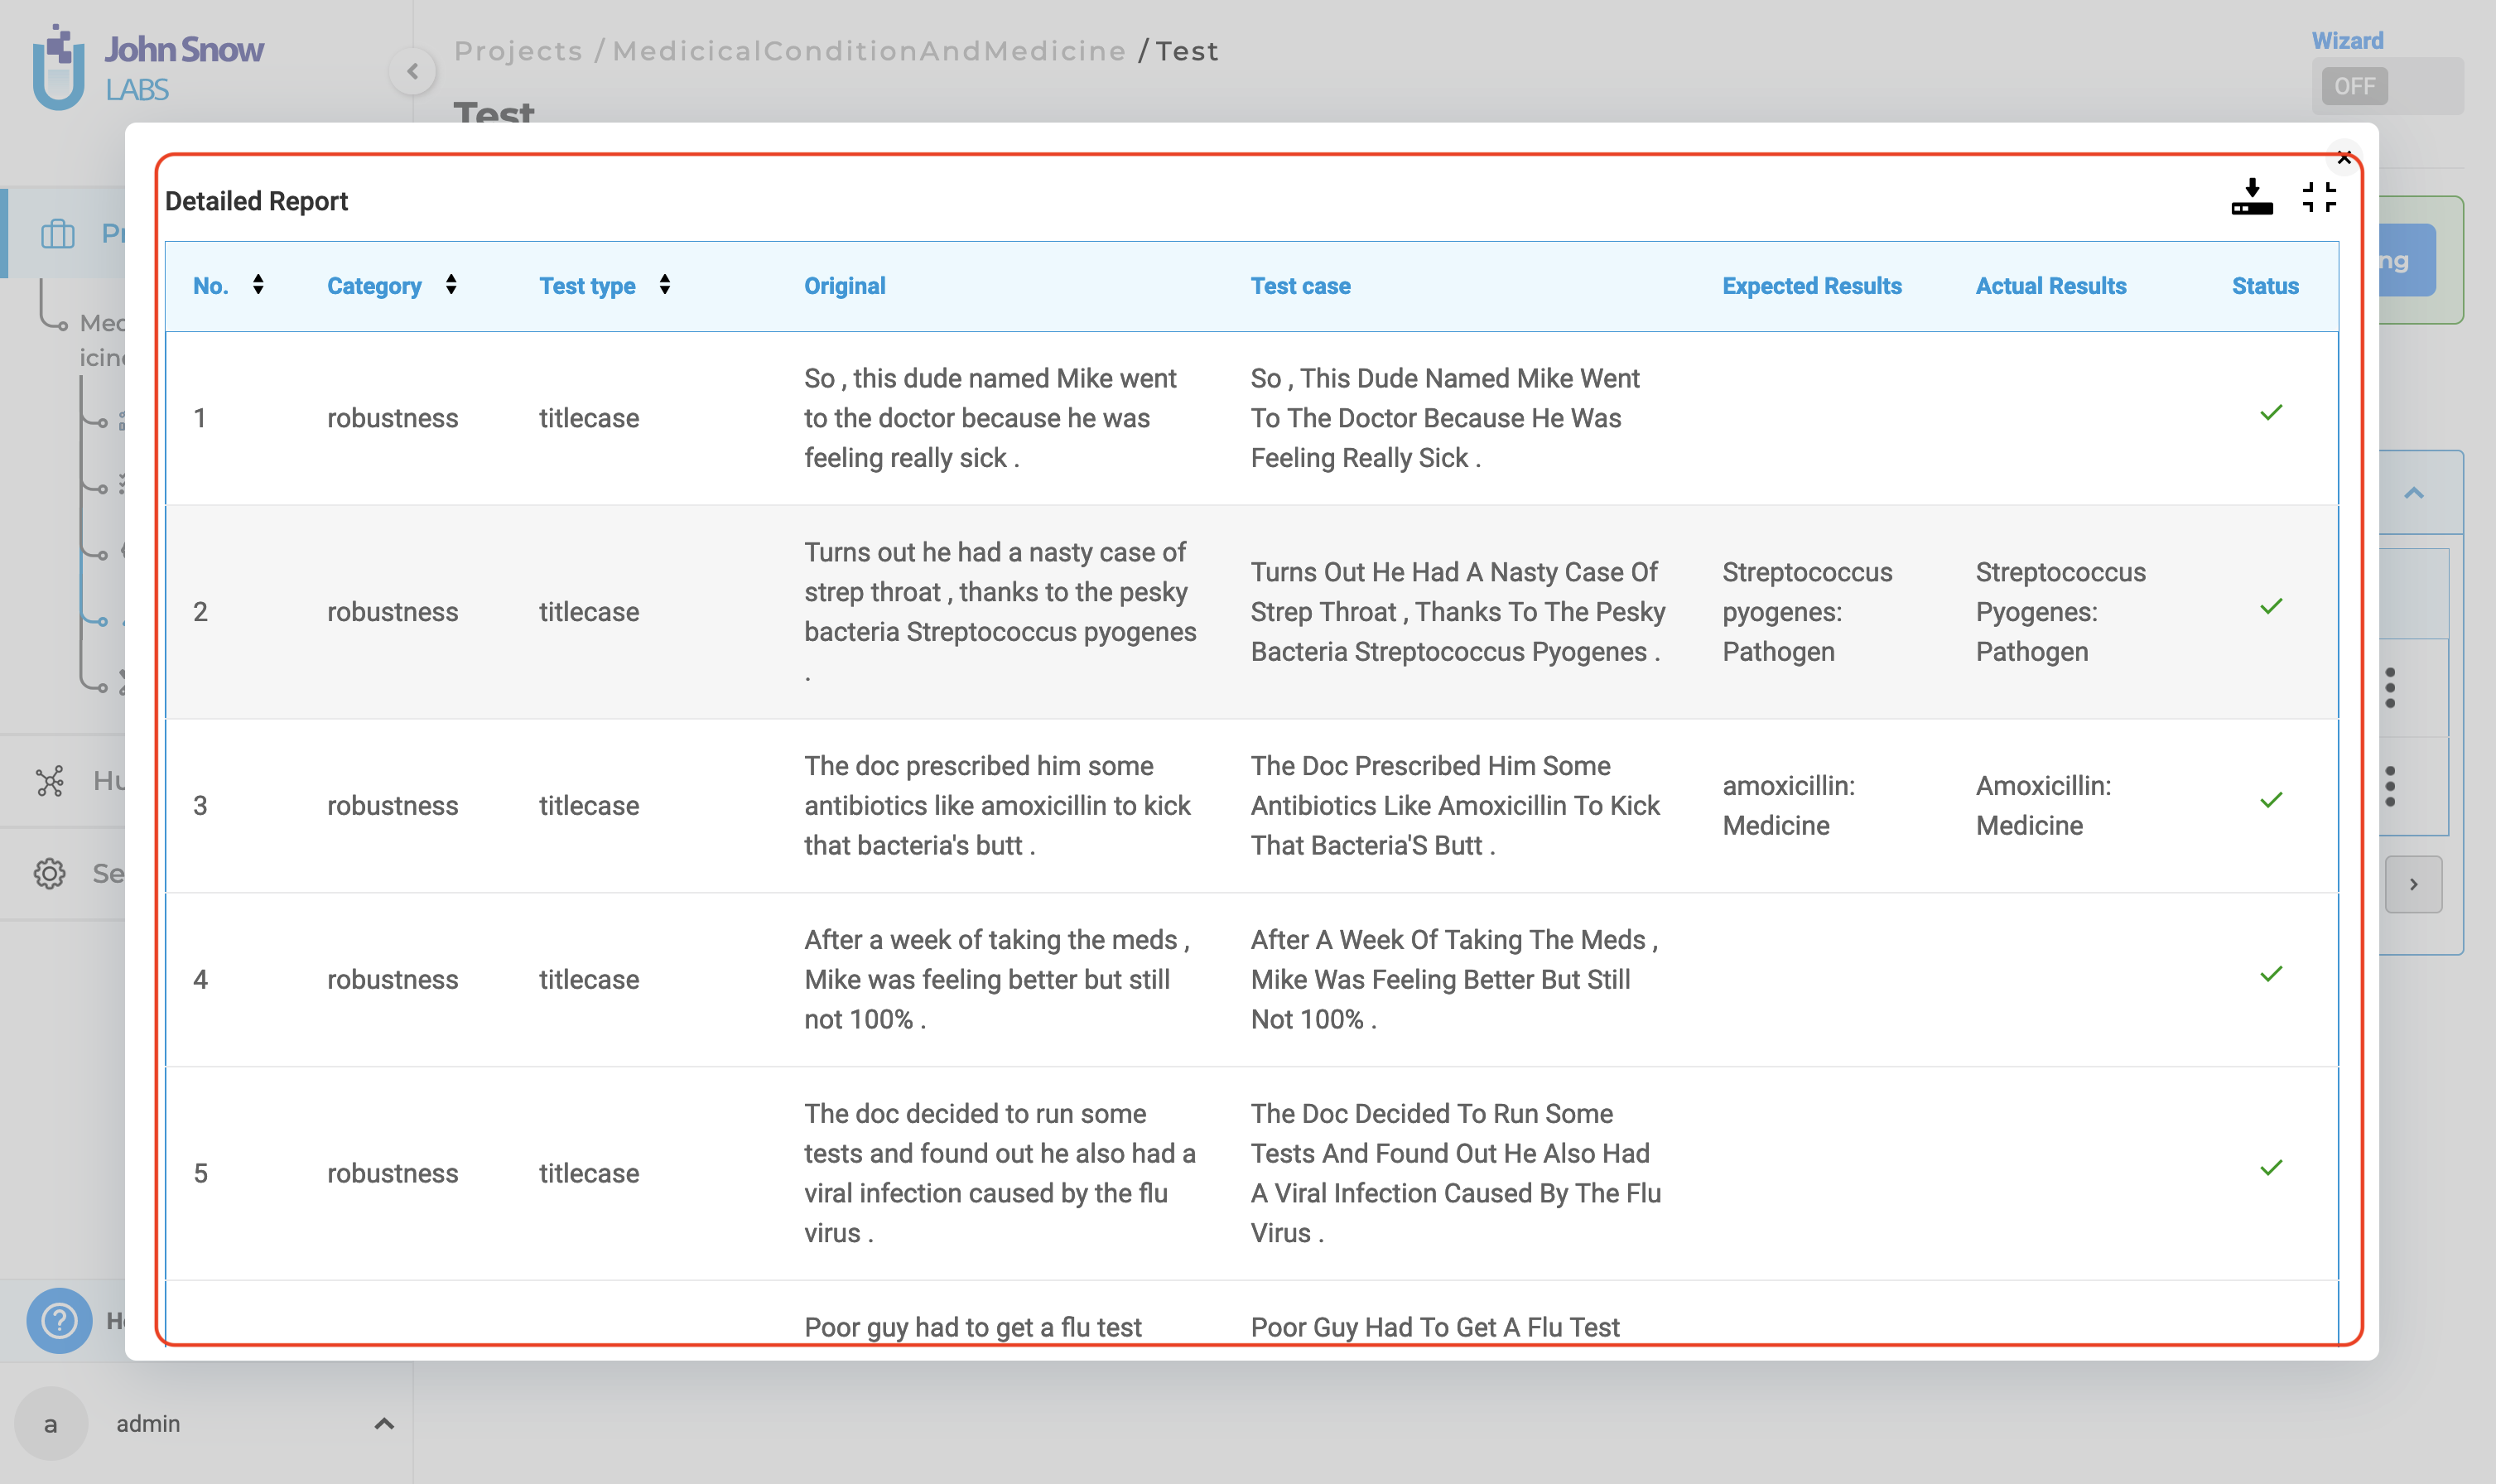
2. Detailed Report:
The detailed report contains information about each test case within the selected tests. It includes “Number”, “Category”, “Test Type”, “Original”,“Test Case”, “Expected Results”, “Actual Results” and “Status”.
In this context, “Expected Results” refer to the prediction output by the testing model on the “Original” data, while “Actual Results” indicate the prediction output by the testing model on the “Test Case” data generated. A test is considered passed if the “Expected Results” match the “Actual Results”; otherwise, it is deemed failed.
Users have the option to simultaneously download both reports in CSV format by selecting the download button.
For a detailed report, users can enter full-screen mode by clicking the full-screen button.
Furthermore, users can delete test results from the “Test Results History” by selecting the three dots followed by the “Delete” button.
Visualizing Test Reports
Turn on Show Graph to visualize test outcomes as a weighted bar chart of pass/fail percentages. This provides a quick overview, with adjacent controls for filtering by Test Category, Test Type, passing and failure rates. Toggle Show Graph off to hide the chart.
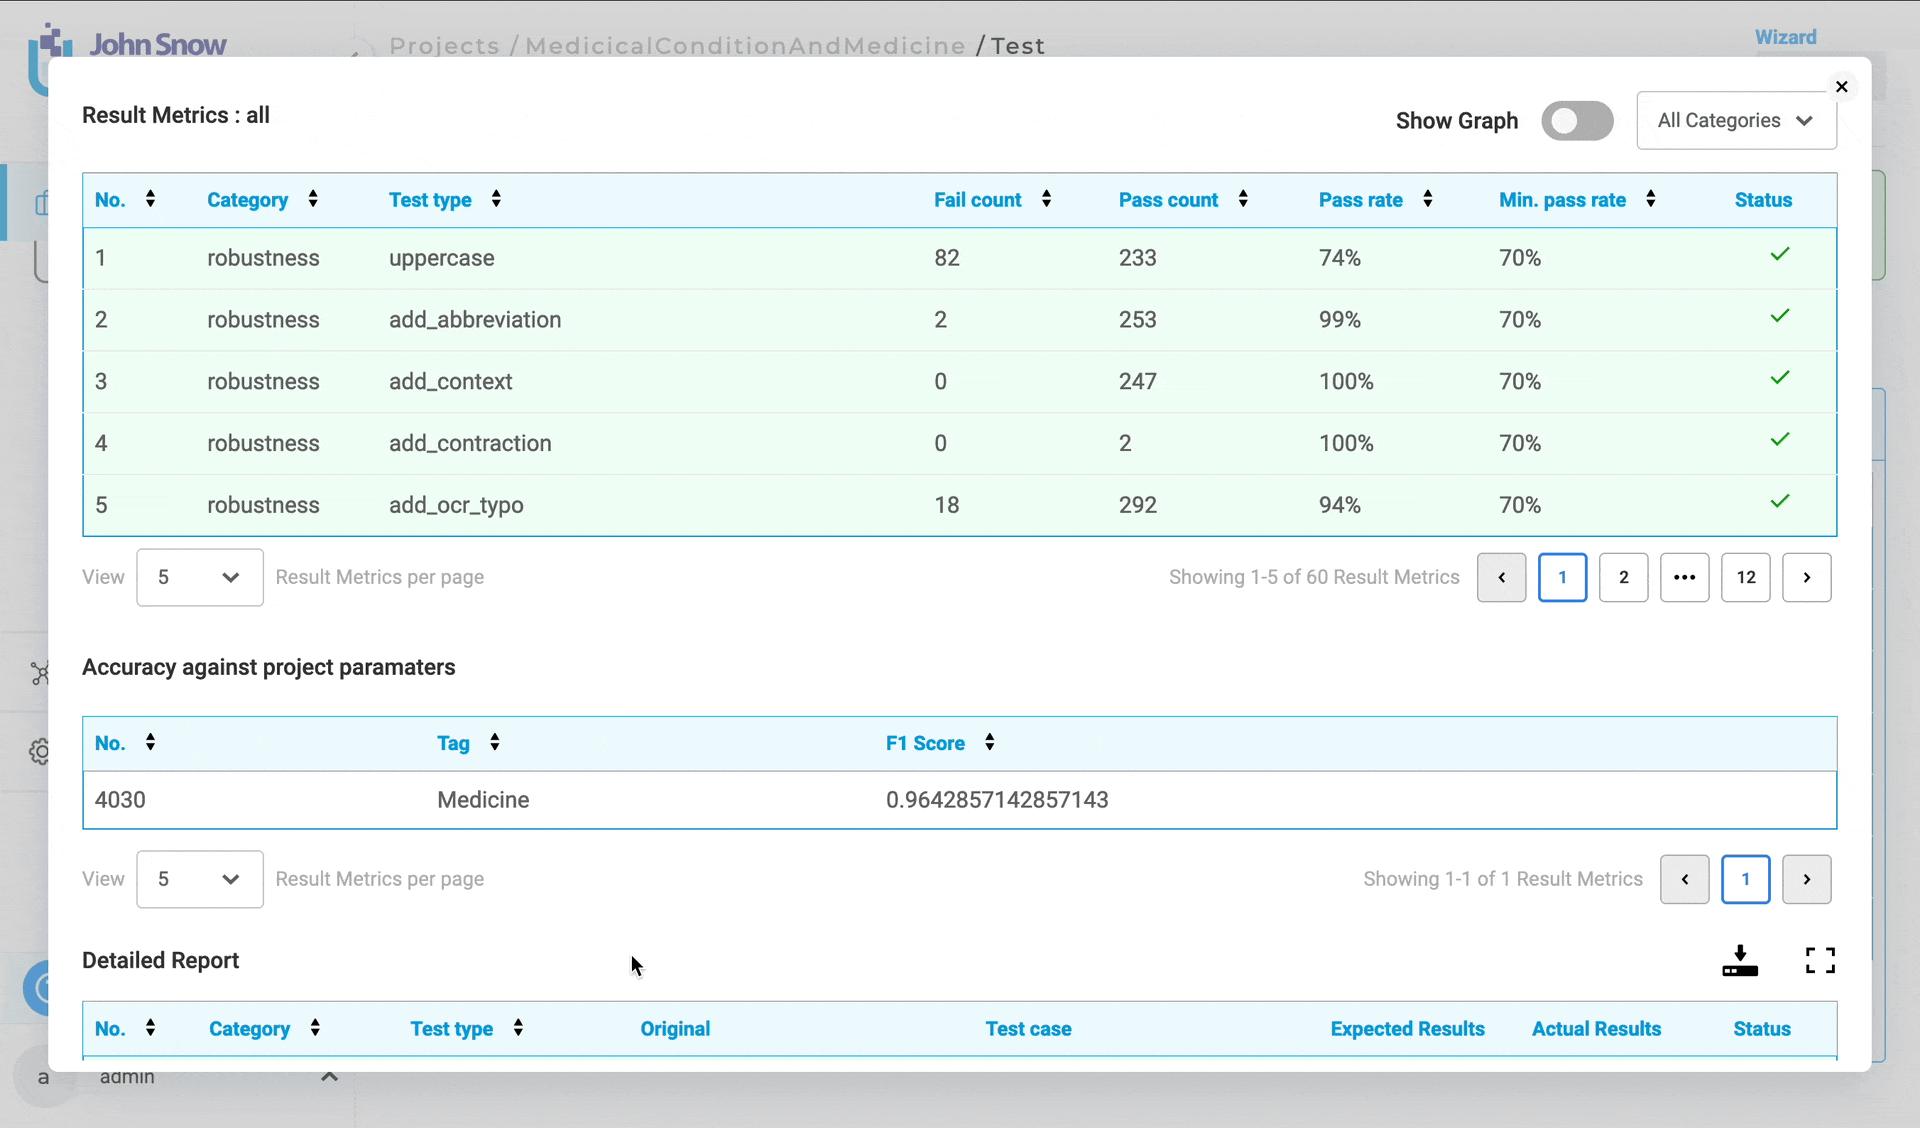
Once enabled, the graph visualizes data for all test categories and associated test types in the report. The chart’s pass and fail percentages and counts are computed based on the number of test types that passed or failed within each test category. Hovering over any segment of the chart allows users to see detailed statistics, including the pass and fail counts and their corresponding percentages.
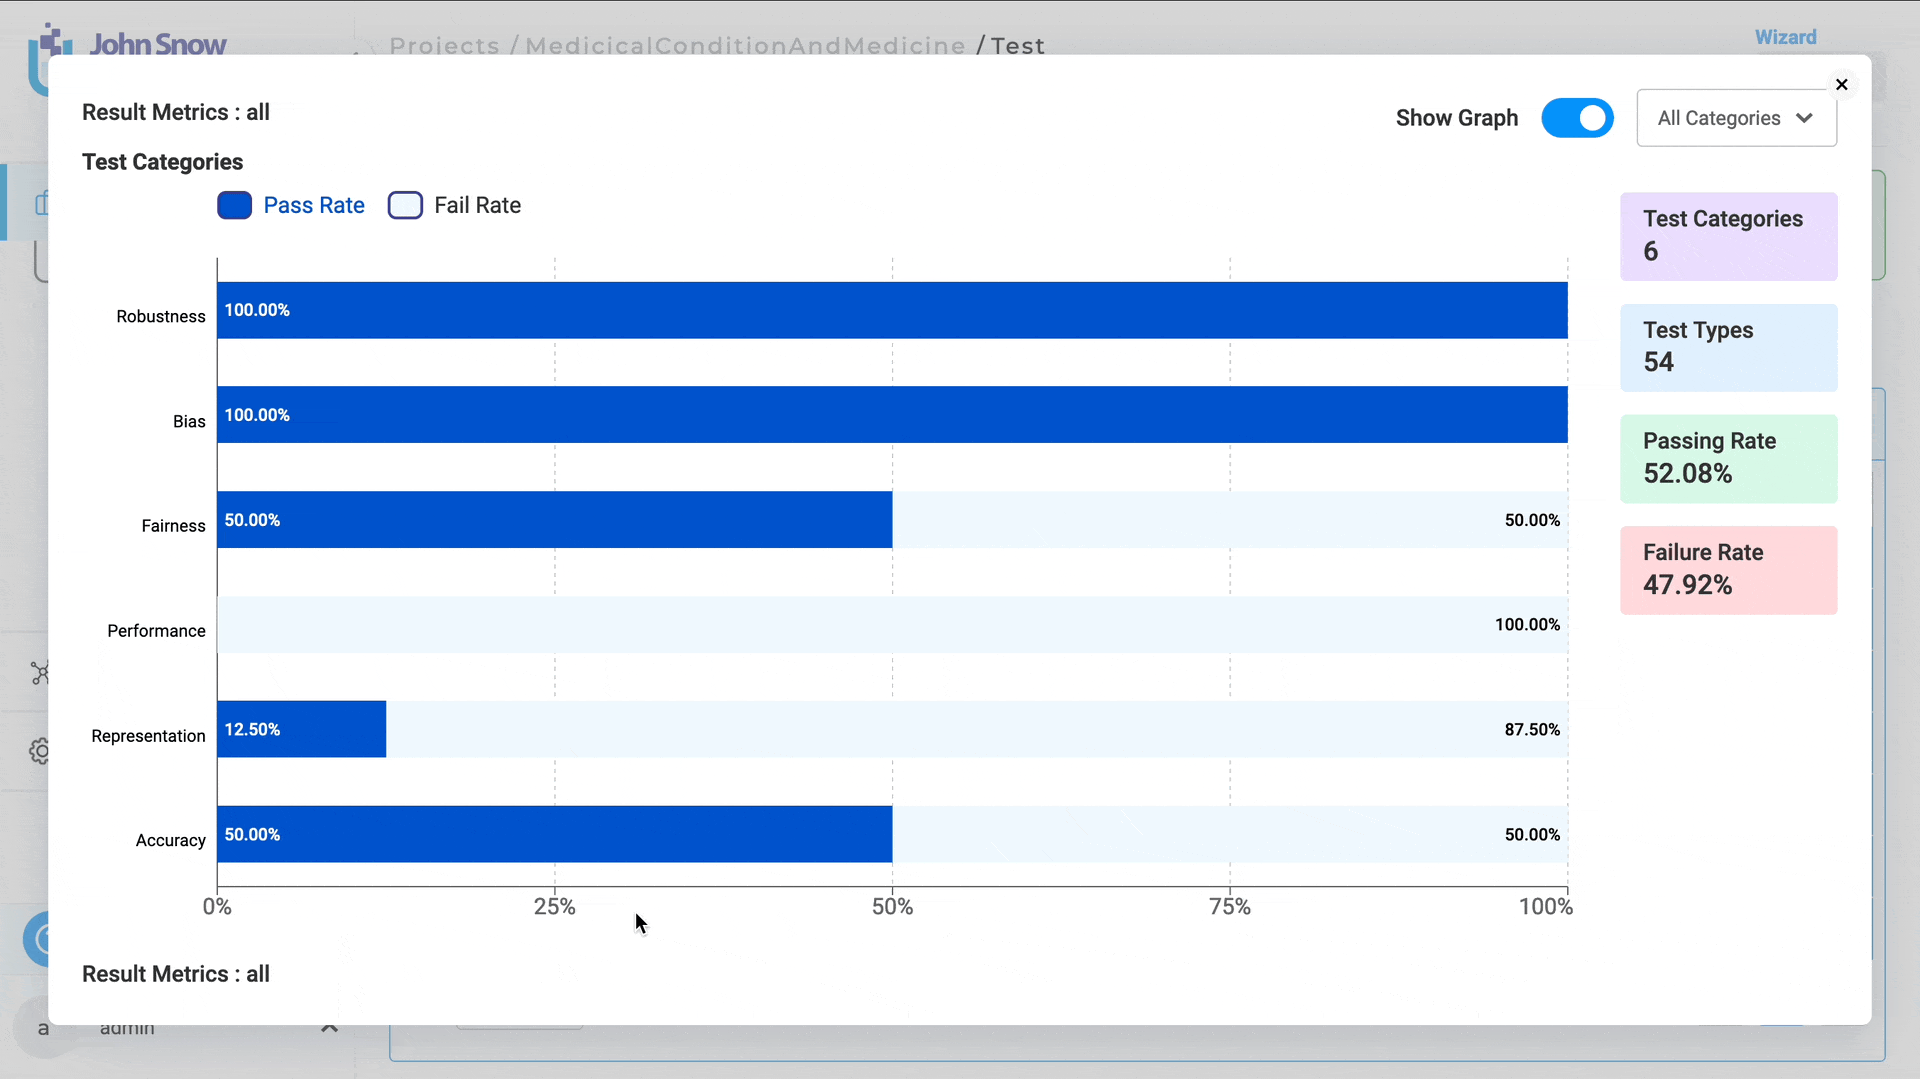
Clicking on a chart bar or a specific test category navigates users to a more detailed view of that category and its test types. This drill-down capability allows users to move from a high-level summary to an in-depth examination of each test category, offering a more comprehensive understanding of where issues lie or where tests are performing well.

The users can apply the filters on the graph based on the test category and the test types.
This visualization tool streamlines the process of analyzing test results, providing both high-level summaries and detailed breakdowns to assist in better decision-making and problem identification.
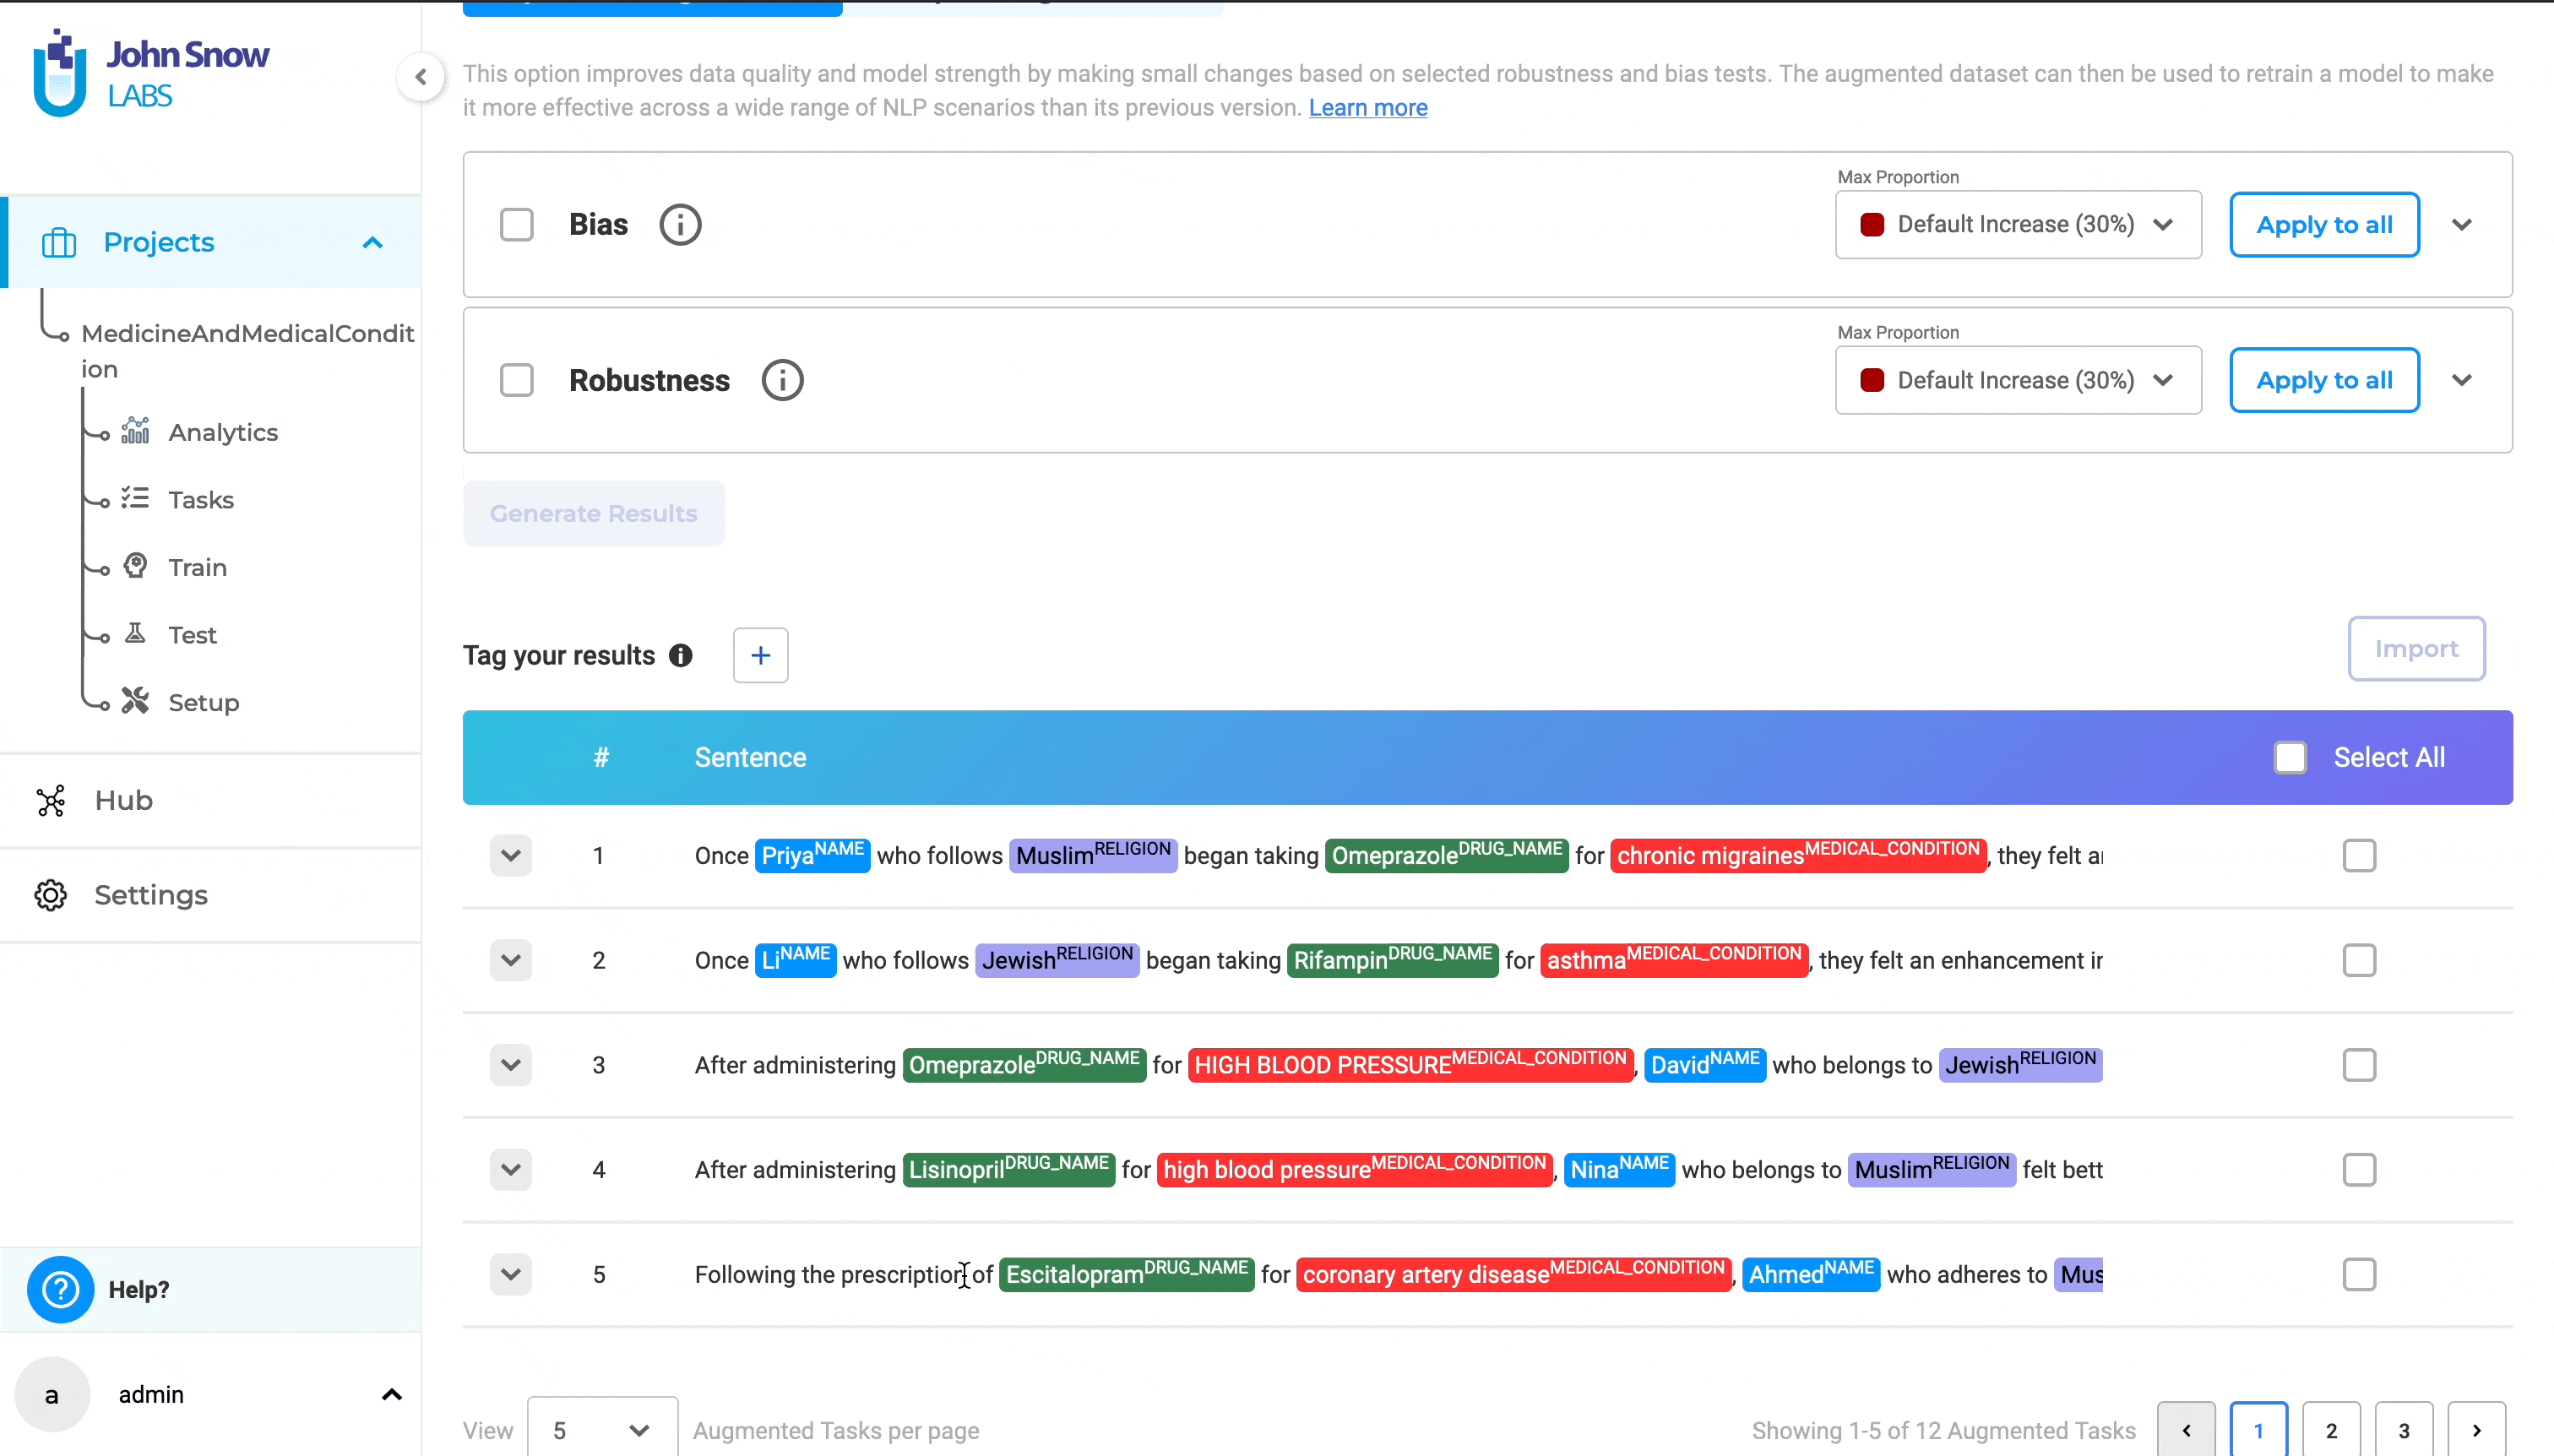
Data Augmentation for More Robust Model Training
Instead of manually creating new tasks or documents to improve model performance, project managers can use built-in data augmentation tools directly from the LangTest report. After reviewing test outcomes, users can click Improve Test Results to automatically generate new data for the test types that failed.
This workflow streamlines model improvement by creating augmented tasks, enabling retraining, and allowing retesting across a broader range of scenarios — all from within the same interface.
A dedicated Generate Augmented Data tab on the Import page simplifies this process. When Improve Test Results is selected, users are redirected to the Generate Augmented Data page, where the LangTest framework automatically preselects the failed test types and applies the corresponding max_proportion values for each test type under Proportional Augmentation.
Proportional Augmentaiton
This method enhances data quality by using various testing techniques to generate new data based on an existing dataset. Proportional Augmentation is particularly effective in improving model performance by addressing specific weaknesses, such as the inability to recognize lowercase text, uppercase text, typos, and more. It is especially beneficial for bias and robustness testing, ensuring that the model produces high-quality and accurate results for machine learning, predictive modeling, and decision-making tasks. After setting the test types and max_proportion, click on “Generate Results” to create augmented tasks. Based on your configuration, data augmentation will enhance the existing tasks and generate new ones.
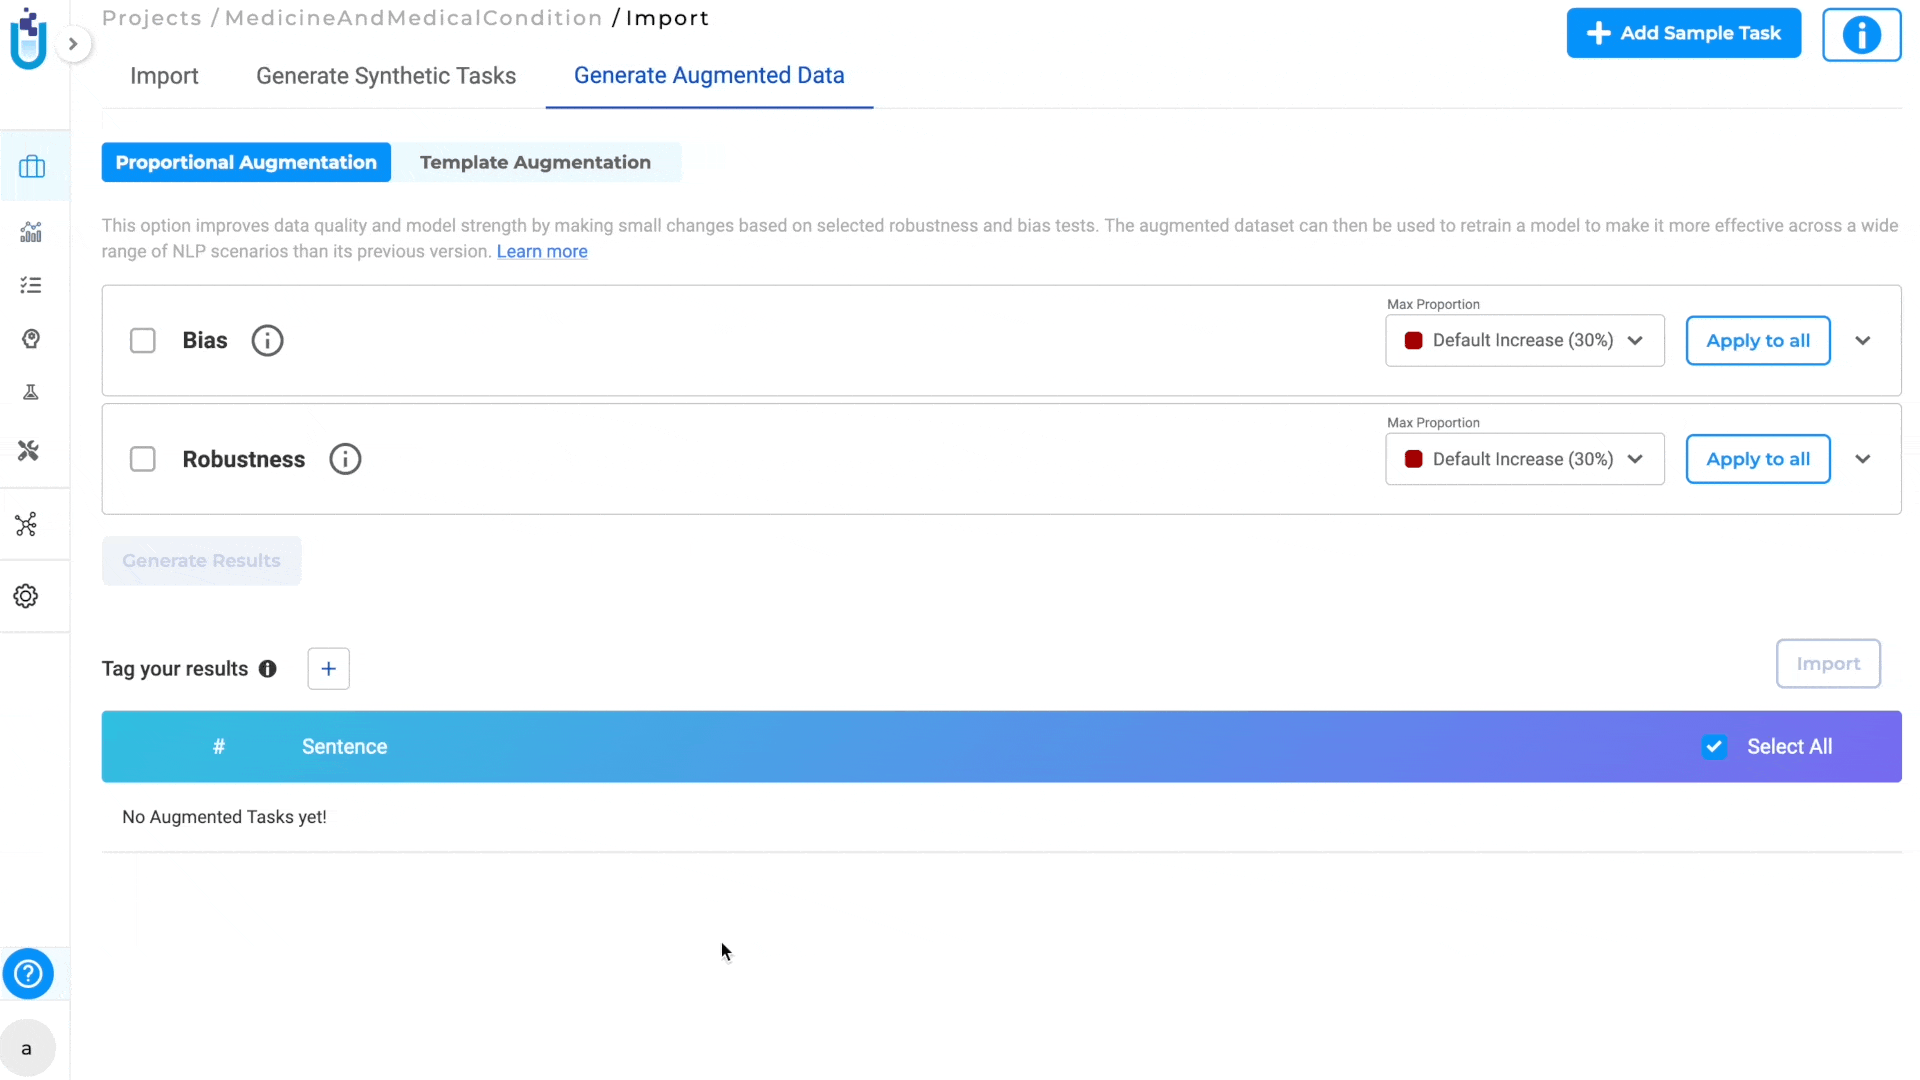
Another way to generate augmented tasks is through “Templatic augmentation”.
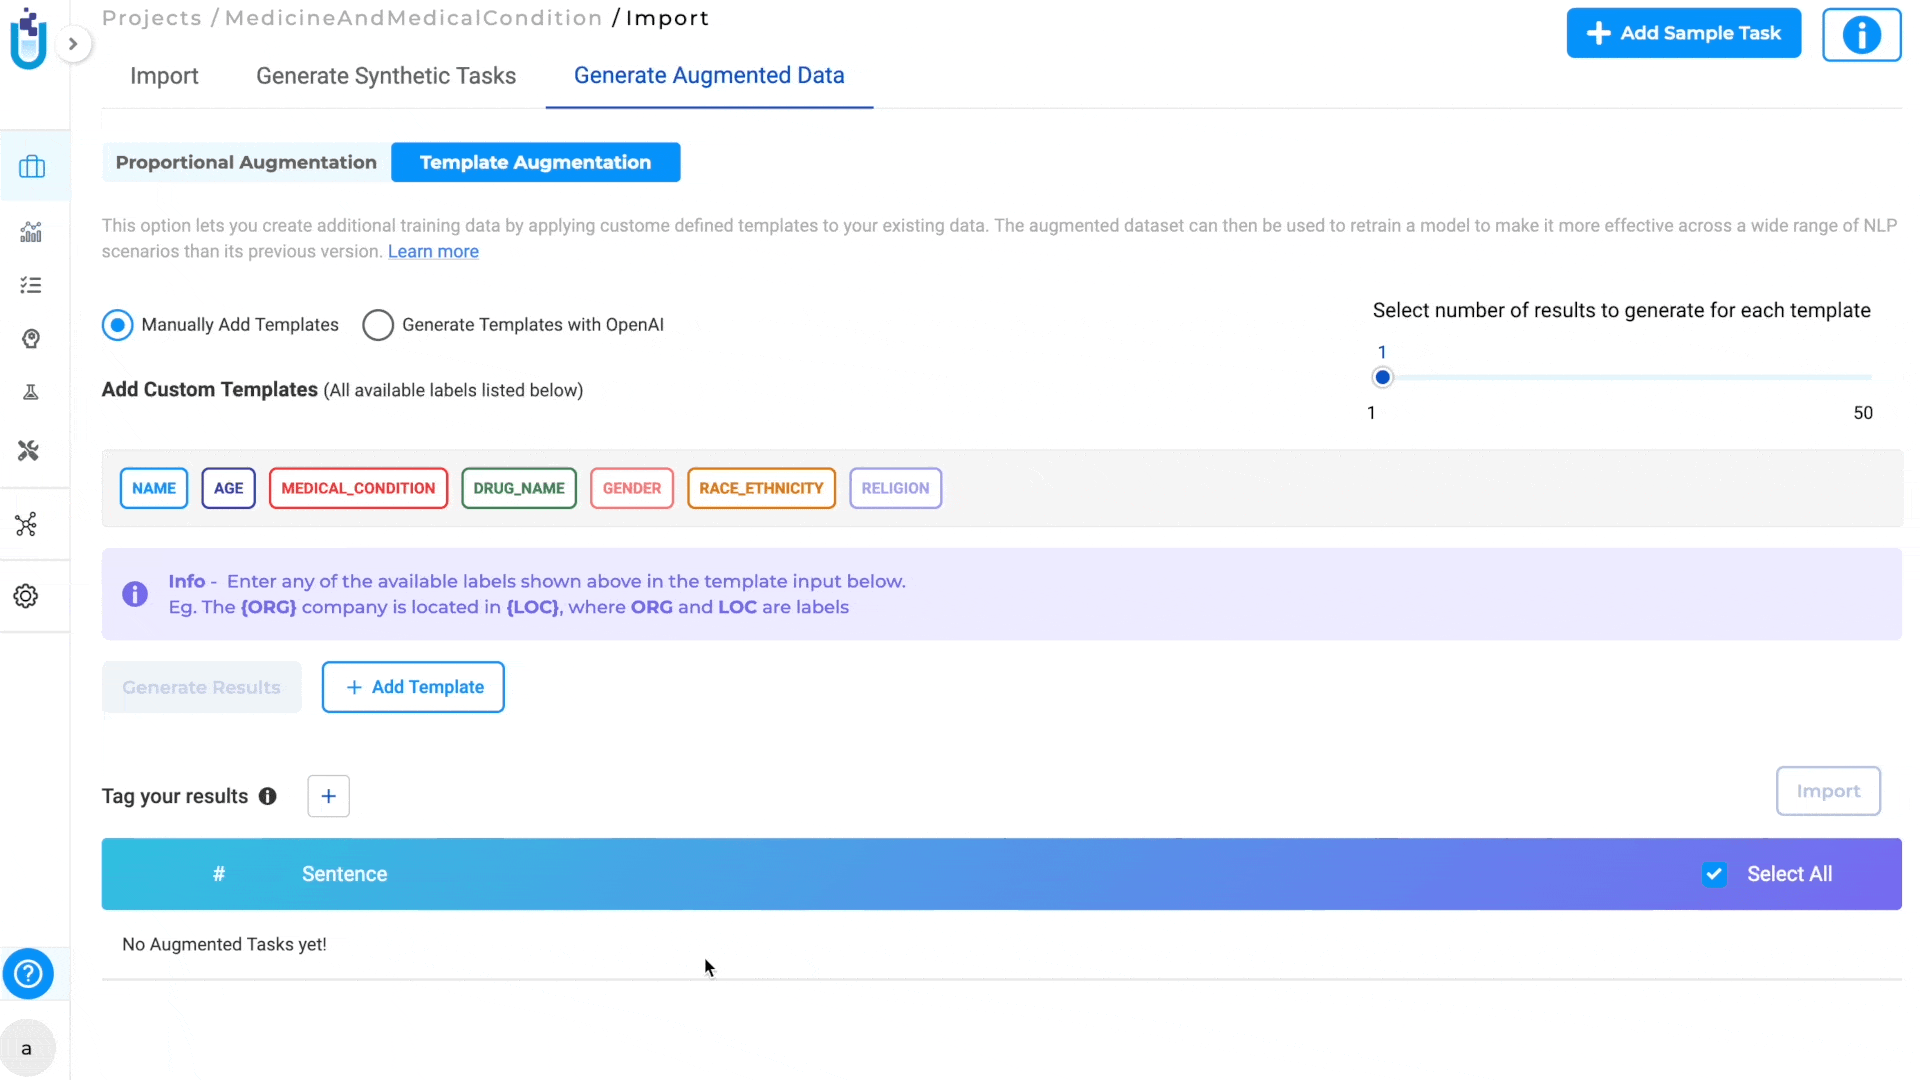
Templatic Augementation
Templatic Augmentation creates new data by using templates or patterns that are similar in structure and context to the original input. This method depends a lot on the templates provided by the user. There are two options for using this approach:
A. Manually Add Templates
Users can manually choose templates along with the available labels. They can choose how many results to generate for each template using a scroll bar, which can be set from 1 to 50.
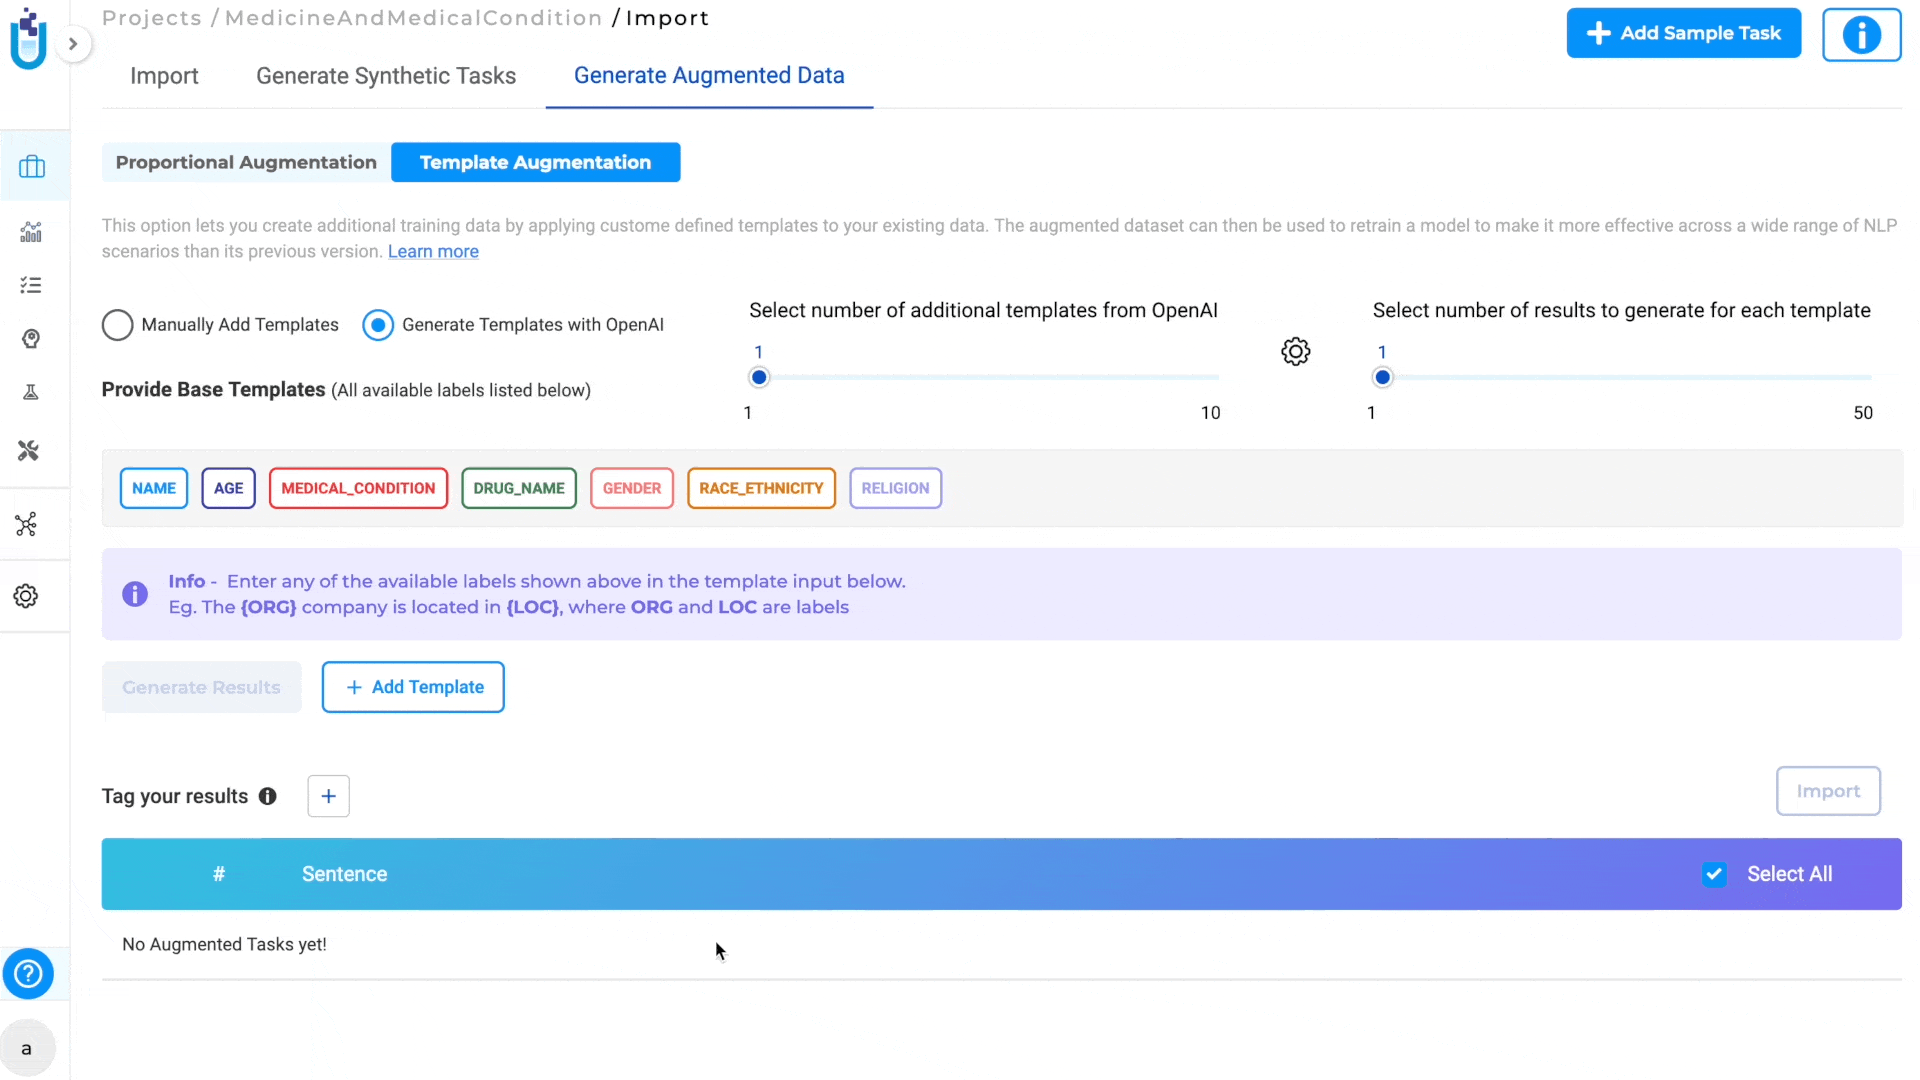
B. Generate Templates with OpenAI
Users can create more templates using OpenAI, which must be integrated into the project for this feature to work. After choosing how many extra templates to generate for each existing one (from 1 to 10), users can select how many results they want for each template by adjusting a scroll bar from 1 to 50. The total expected number of results will also be shown.
Note: Automatic tags in import augmented tasks After the augmented tasks are generated, the user can import the tasks. The augmented tasks are imported with the “Augmented” default tag.
Users can then re-train the model with the newly augmented tasks and run model testing, which will improve the model’s performance under the augmented conditions.
Test Classification Models
LangTest supports evaluating and testing Classification models in addition to Named Entity Recognition (NER) models, allowing users to assess the accuracy and performance of both pre-trained and custom models across various test types.
All standard LangTest categories — Bias, Robustness, Fairness, Representation, and Accuracy — are available for classification model testing. In addition, a dedicated Grammar test is included to evaluate how well classification models handle grammatically complex or varied sentences, ensuring strong performance even with challenging linguistic structures.
When creating a test suite, select Classification from the Model Type dropdown to configure tests for classification models.

Test Setup and Configuration for Classification Models
To set up and configure tests for classification models, follow these steps:
-
Navigate to the Test Page: Open the test page within the specific project where the model is used.
-
Select the Appropriate Test Suite: From the drop-down menu, choose the test suite for classification models. Test suites are clearly labeled with the model type in brackets, making it easy to identify the correct one.
-
Choose the Model and Target Choices: Select the classification model and the appropriate classification choices to test.
- Configure Additional Testing Parameters (optional):
- Set the “Filter Completions By” option if we need to narrow down specific completions for testing.
- Apply the “Filter Tasks by Tags for Testing” to run the tests on tasks with specific tags.
-
Save the Configuration: Once the settings are complete, save the configuration.
-
Generate Test Cases: After configuring the test, we can generate test cases based on the saved settings.
- Run the Test: Execute the tests and evaluate the classification model.
While the core workflow of the application and feature remains the same, users now have the ability to test classification models, allowing them to pinpoint potential issues and improve model performance without the need to develop custom testing solutions.