Type of installation
AWS Marketplace Azure Marketplace Migration from NLP Lab Dedicated Server
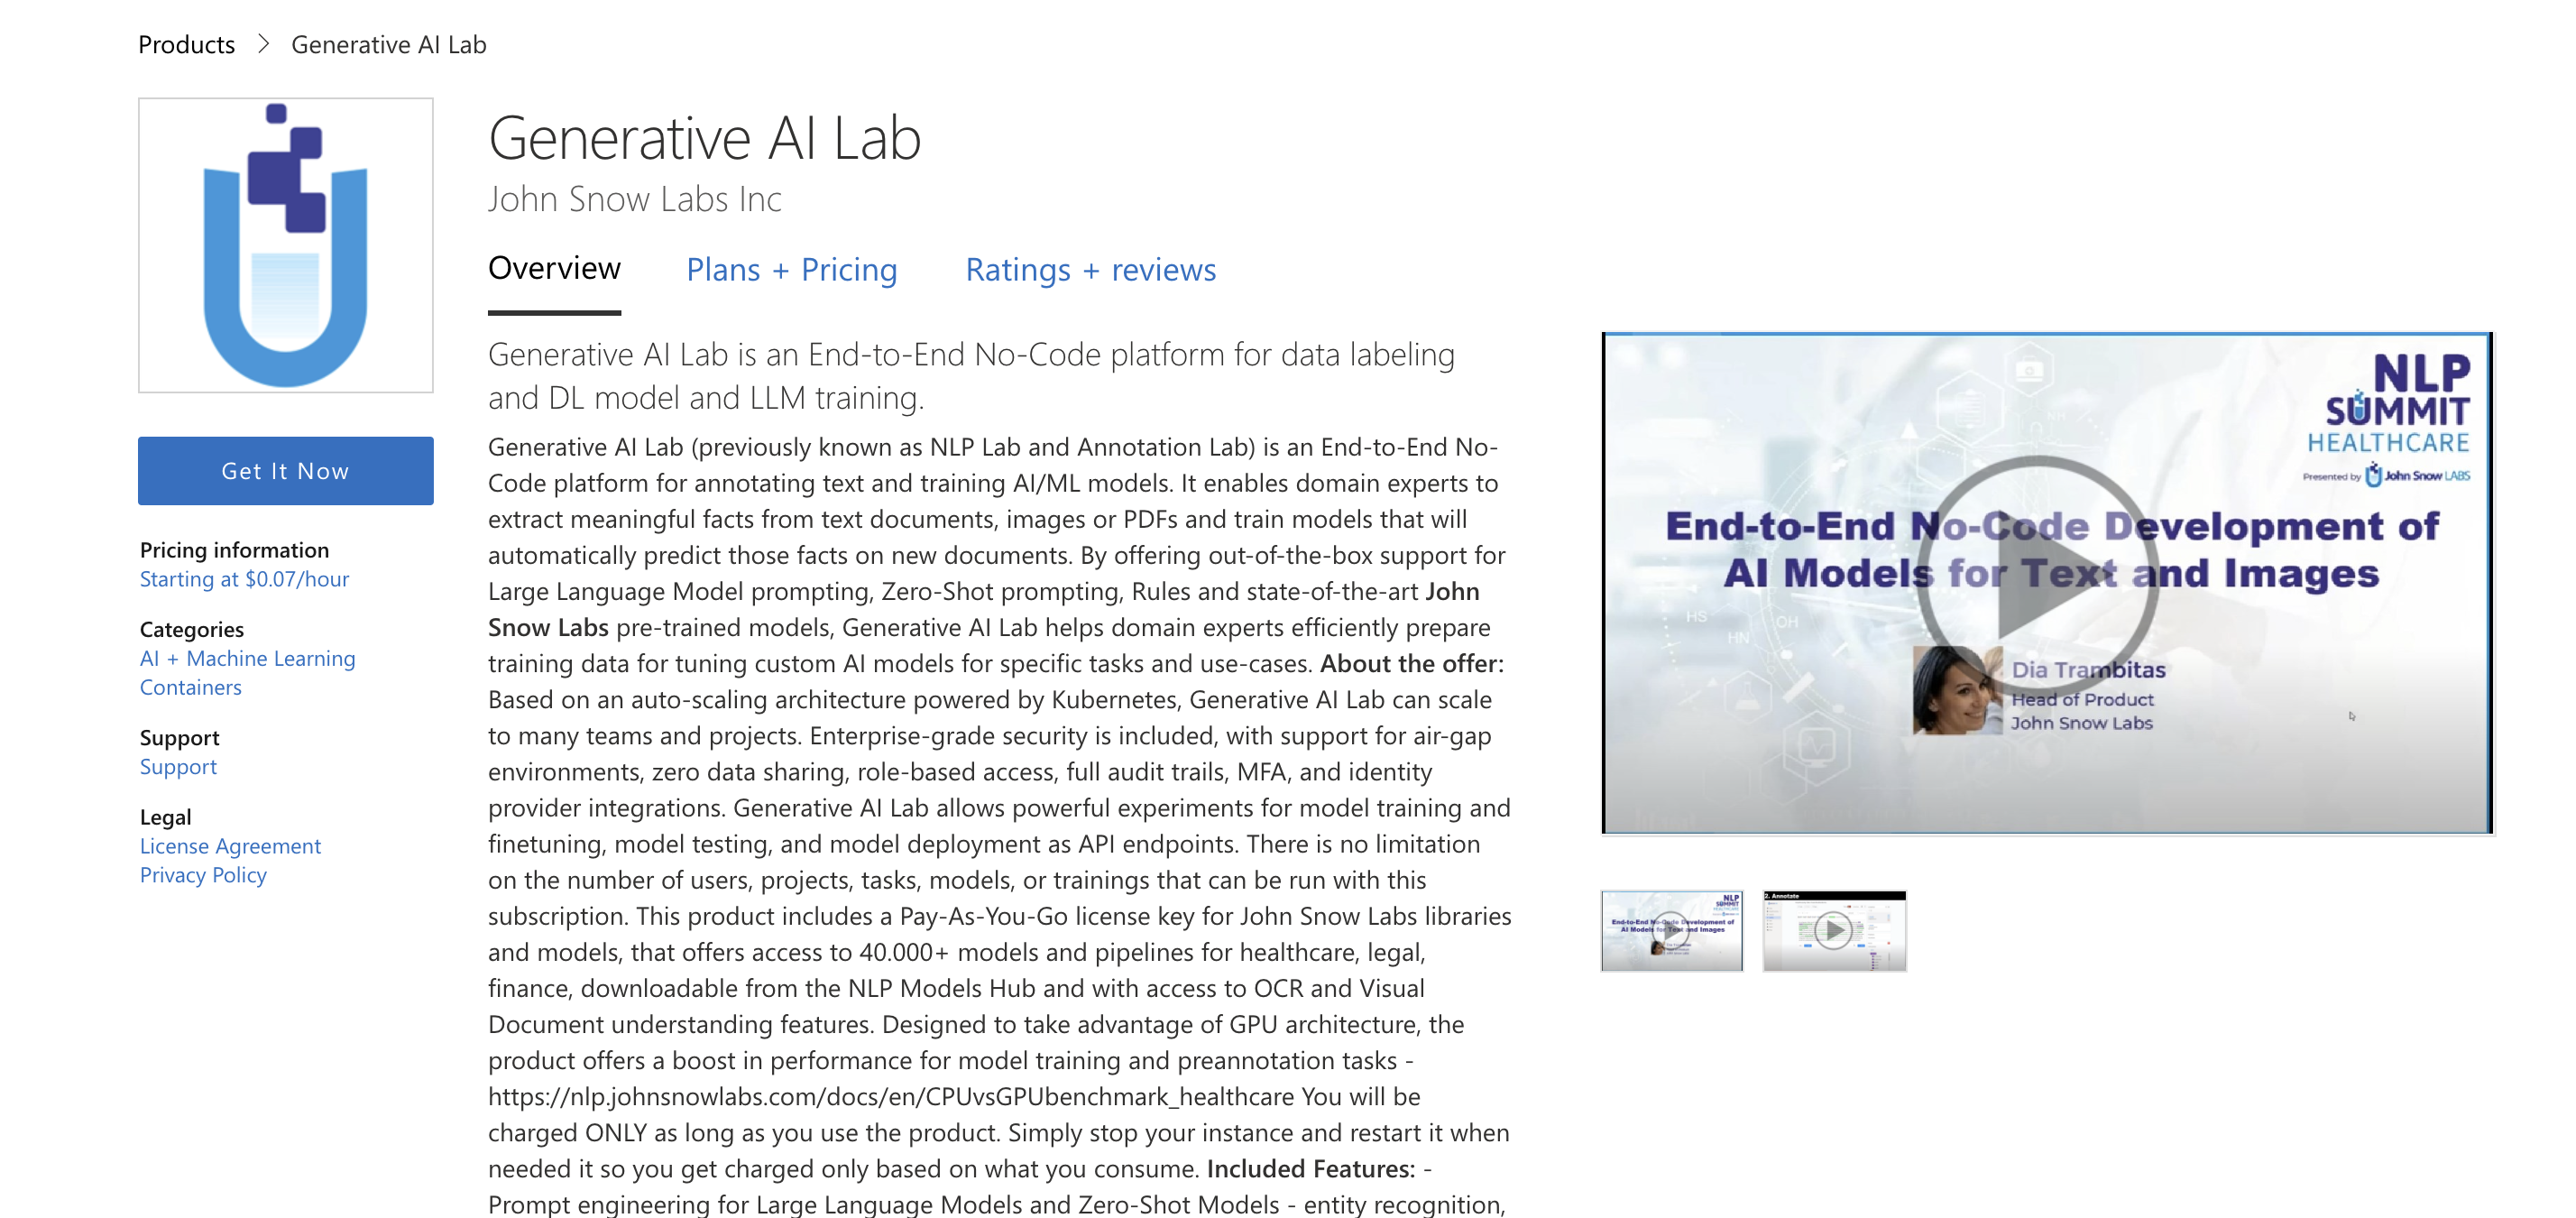
AWS Marketplace
The Generative AI Lab needs to be installed on a virtual machine. One of the most straight forward method is an installation from AWS Marketplace (also available on Azure). The fee for the Generative AI Lab depends on the number of CPU and GPU in the selected instance (Details can be listed in the product page in AWS marketplace). You will also have to pay for the underlying AWS EC2 instance.
Visit the product page on AWS Marketplace and follow the instructions on the video below to subscribe and deploy.
Steps to get started:
- Subscribe to the product on the AWS Marketplace.
- Deploy it on a new machine.
-
In Launch an instance configuration attach an IAM role to the AMI. The IAM role should include
aws-marketplace:MeterUsage,ec2:DescribeInstanceTypes, and S3 access permissions (s3:ListBucket,s3:GetObject,s3:PutObject) if you plan to import or export data. Generative AI Lab automatically uses the instance’s IAM role for S3 access, so no AWS credentials need to be entered or stored.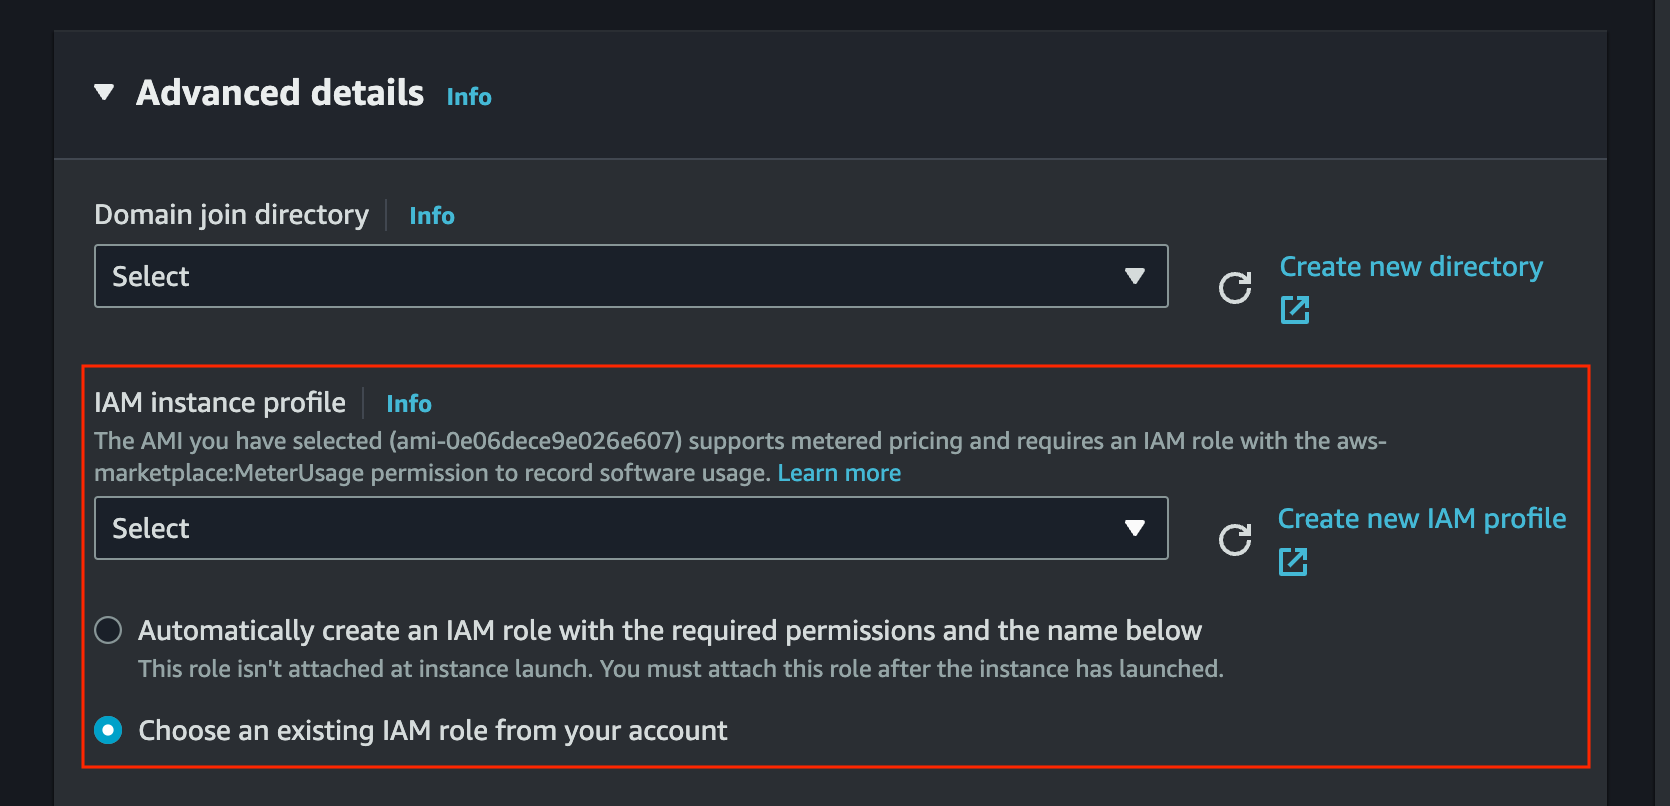
-
In advance details, enable
Metadata accessibleand selectV1 and V2inMetadata version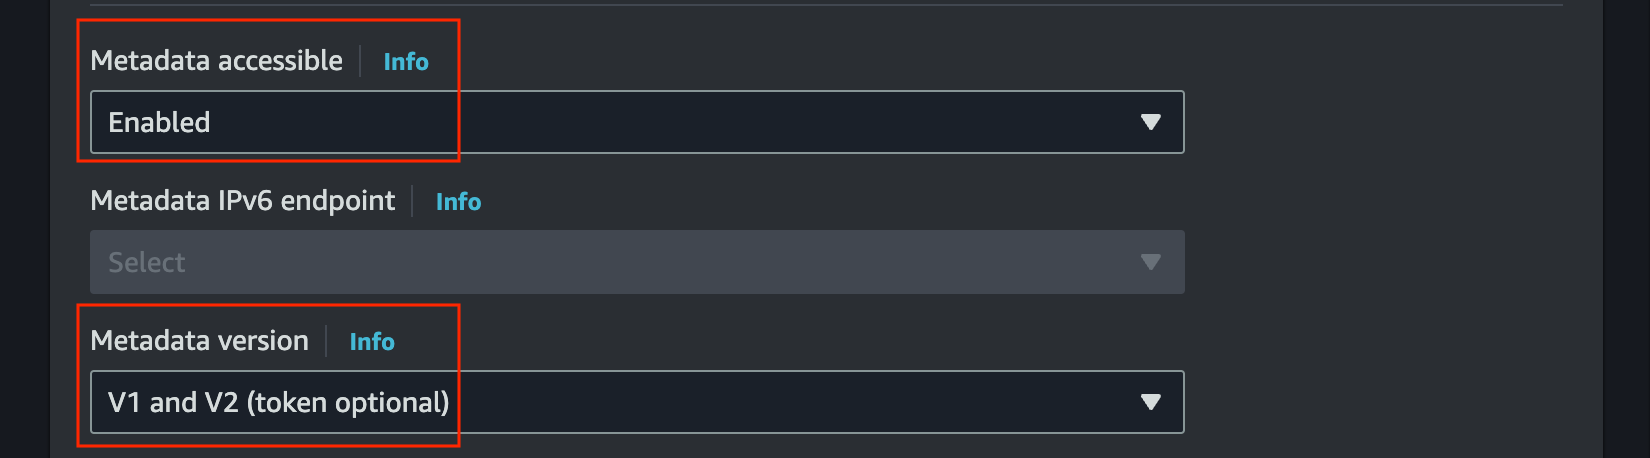
- Access the login page for a guided experience on
http://INSTANCE_IP. For the first login use the following credentials: Username: admin Password: INSTANCE_ID
- Azure Marketplace now also provides a CPU-only deployment option for users who do not require GPU resources. This enables more flexible and cost-efficient deployments while maintaining full functionality. The deployment process and UI remain identical; simply select a CPU-based instance size when creating the cluster.
Secure access to Generative AI Lab on AWS
When installed via the AWS Marketplace, Generative AI Lab has a private IP address and listens on an unsecured HTTP port. You can ask your DevOps department to incorporate the resource to your standard procedures to access from the internet in a secure manner. Alternatively, a Cloud Formation script is available that can be used to create a front end proxy (CloudFront, ELB, and auxiliary Lambda Function). Those resources are Free Tier Eligible.
Create the AWS Cloud Formation Script in YAML format:
vi cloudformation_https.yaml
AWSTemplateFormatVersion: '2010-09-09'
Metadata:
  License: Apache-2.0
Description: 'AWS CloudFormation To access Generative AI Lab via https:
  Create an Amazon EC2 instance running the Generative AI Lab Amazon Linux AMI. Once the
  Generative AI Lab instance is created, provide instance hostname as input. This Cloudfromation
  Creates Cloudfront. You can use Cloudfront Domain URL to access Generative AI Lab
  via https protocol.
  '
Parameters:
  NLPlabInstanceHostName:
    Description: HostName of the Generative AI Lab InstanceID
    Type: String
    ConstraintDescription: HostName of the Generative AI Lab InstanceID

Resources:
  CloudFront:
    Type: AWS::CloudFront::Distribution
    Properties:
      DistributionConfig:
        Enabled: True
        DefaultCacheBehavior:
          AllowedMethods:
            - DELETE
            - GET
            - HEAD
            - OPTIONS
            - PATCH
            - POST
            - PUT
          DefaultTTL: 0
          MaxTTL: 0
          MinTTL: 0
          Compress: True
          ForwardedValues:
            QueryString: true
            Headers:
              - '*'
            Cookies:
              Forward: all
          TargetOriginId: EC2CustomOrigin
          ViewerProtocolPolicy: redirect-to-https
        Origins:
          - DomainName: !Ref NLPlabInstanceHostName
            Id: EC2CustomOrigin
            CustomOriginConfig:
              HTTPPort: '80'
              OriginProtocolPolicy: http-only
Outputs:
  CloudfrontURL:
    Description: Cloudfront URL to access Generative AI Lab
    Value: !Join ["", ['https://', !GetAtt [CloudFront, DomainName]]]
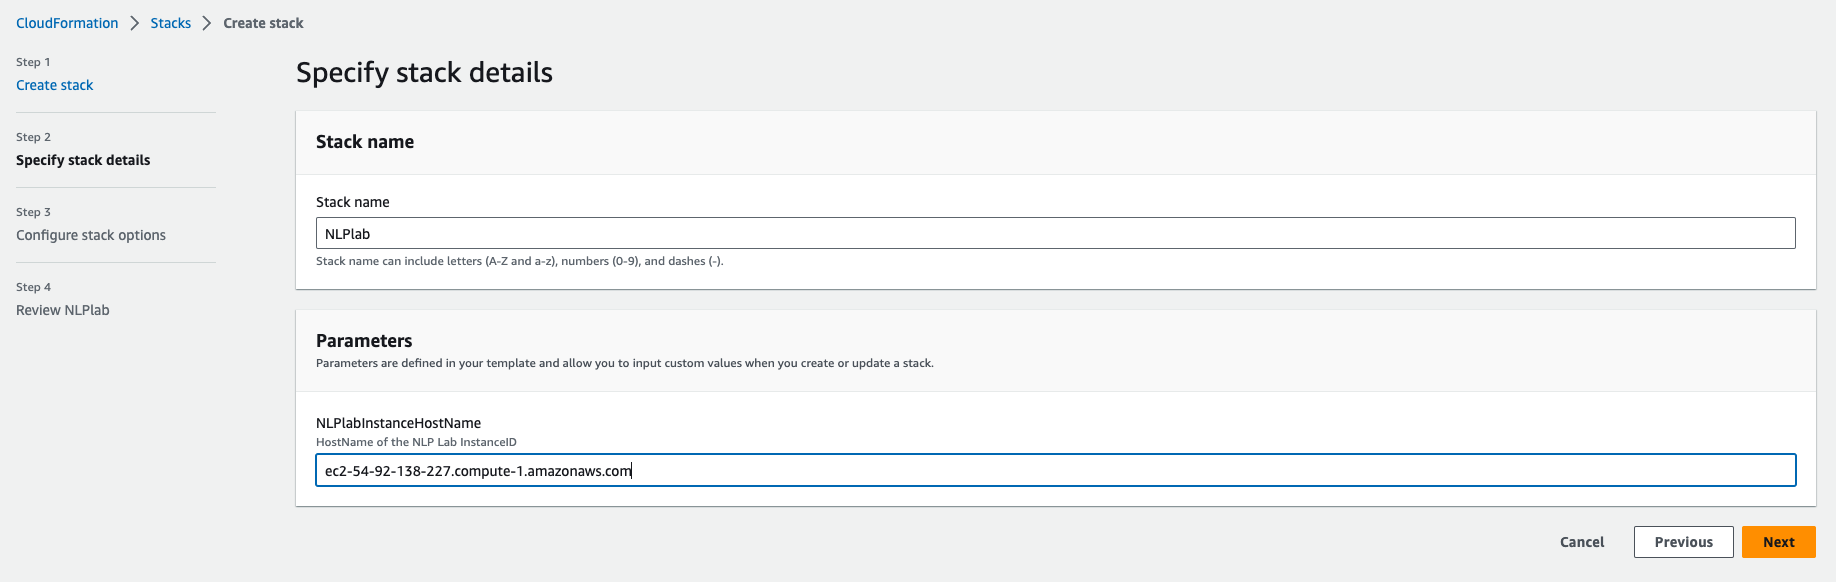
Click Create a stack, “Upload a template file”. Give the Stack a name and enter the Generative AI Lab instance Hostname(from the EC2 console) as a parameter.
Next -> Next -> Acknowledge that AWS CloudFormation might create IAM resources. -> Submit. Wait a few minutes until all resources are created.
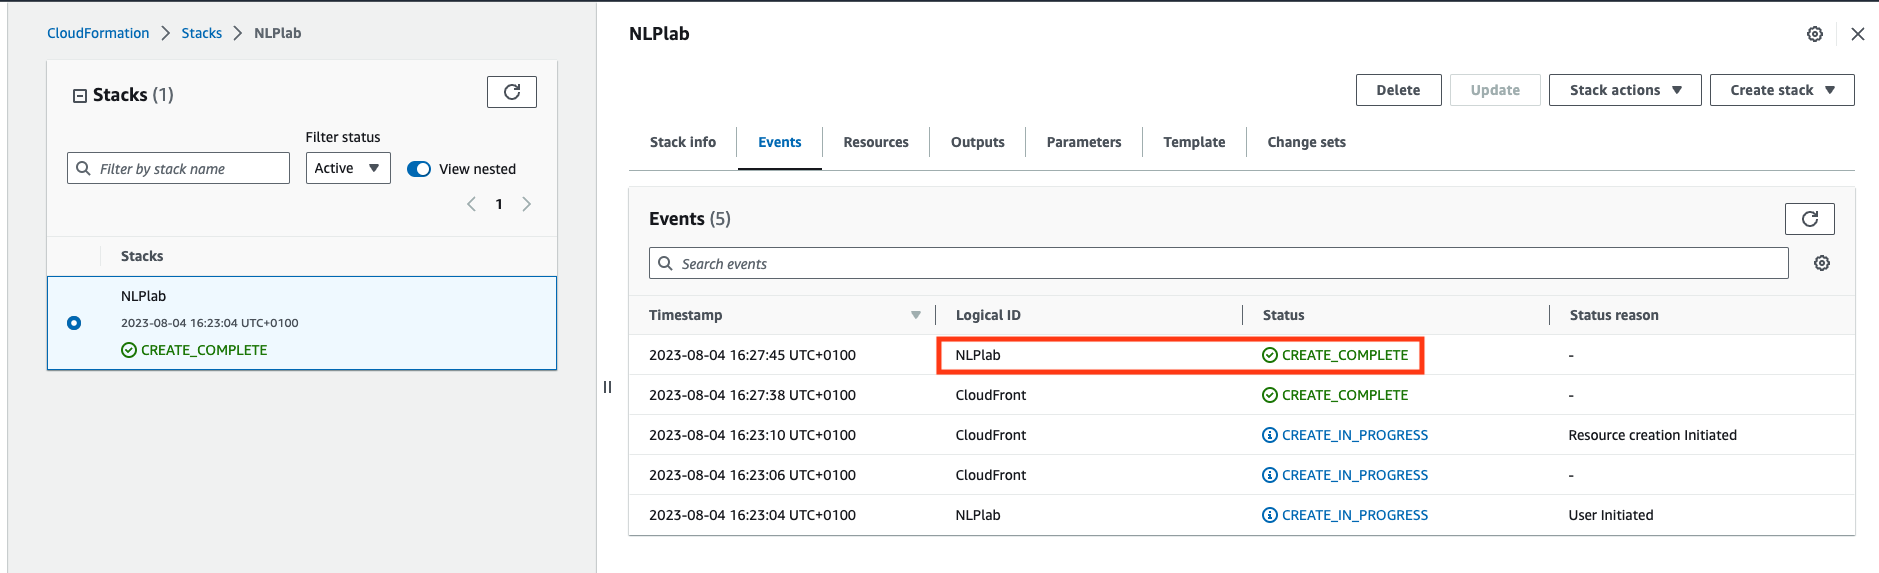
Once created, go do the Outputs tab and click on the Generative AI Lab URL. You may need to refresh the view.
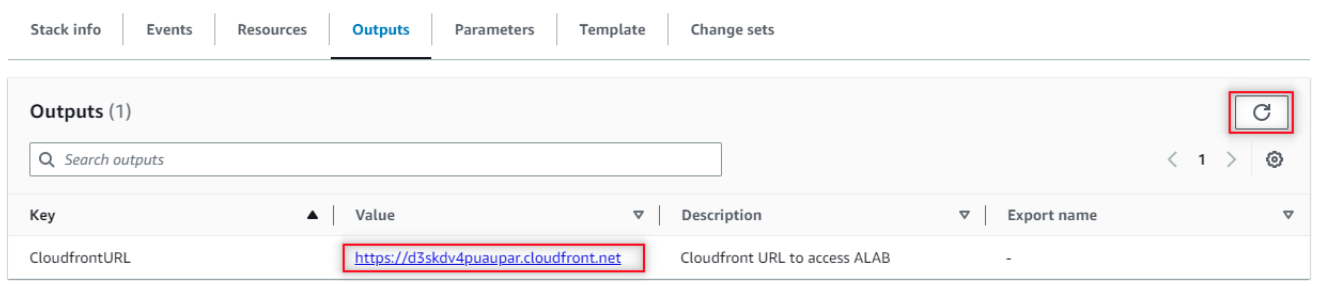
Now, to access the Generative AI Lab, you go to the CloudFront URL and log in with username “admin” and password equal to the EC2 Instance ID noted earlier.
Enabling SSL
Requirements:
- Fullchain certificate
- Private key used to sign the certificate
For ease of documenting the process we are going to use the following notations (please replace with your actual values in the process):
- fullchain.pem – name of the fullchain certificate file
- privkey.pem – key used to sign the certificate
- demo.example.com – the domain used for genailab app
For marketplace instance, the installer scripts files have to be downloaded (if installed with the the scripts, the files are already on the server and this step can be skipped):
wget -q https://s3.amazonaws.com/auxdata.johnsnowlabs.com/annotationlab/annotationlab-"$version".tar.gz
Extract the archive and copy fullchain.pem and privkey.pem into artifacts directory.
Create Kubernetes secret to be used by the ingress for SSL termination:
kubectl create secret tls demo.example.com --cert=fullchain.pem --key=privkey.pem
Edit the annotationlab-updater.sh in the same directory and add the following lines in the end of the script (helm command extra parameters):
--set ingress.enabled=true \
--set ingress.defaultBackend=false \
--set ingress.hosts[0].host='demo.example.com' \
--set ingress.hosts[0].path='/' \
--set ingress.tls[0].hosts[0]='demo.example.com' \
--set ingress.tls[0].secretName=demo.example.com
Note: If a self-signed certificate or any other type of internal certificates (not signed by any public CA) are used, an extra parameter is required for annotationlab-updater.sh:
--set ingress.sslVerify=false
After editing the script, run it to enable SSL:
bash -x annotationlab-updater.sh
Azure Marketplace
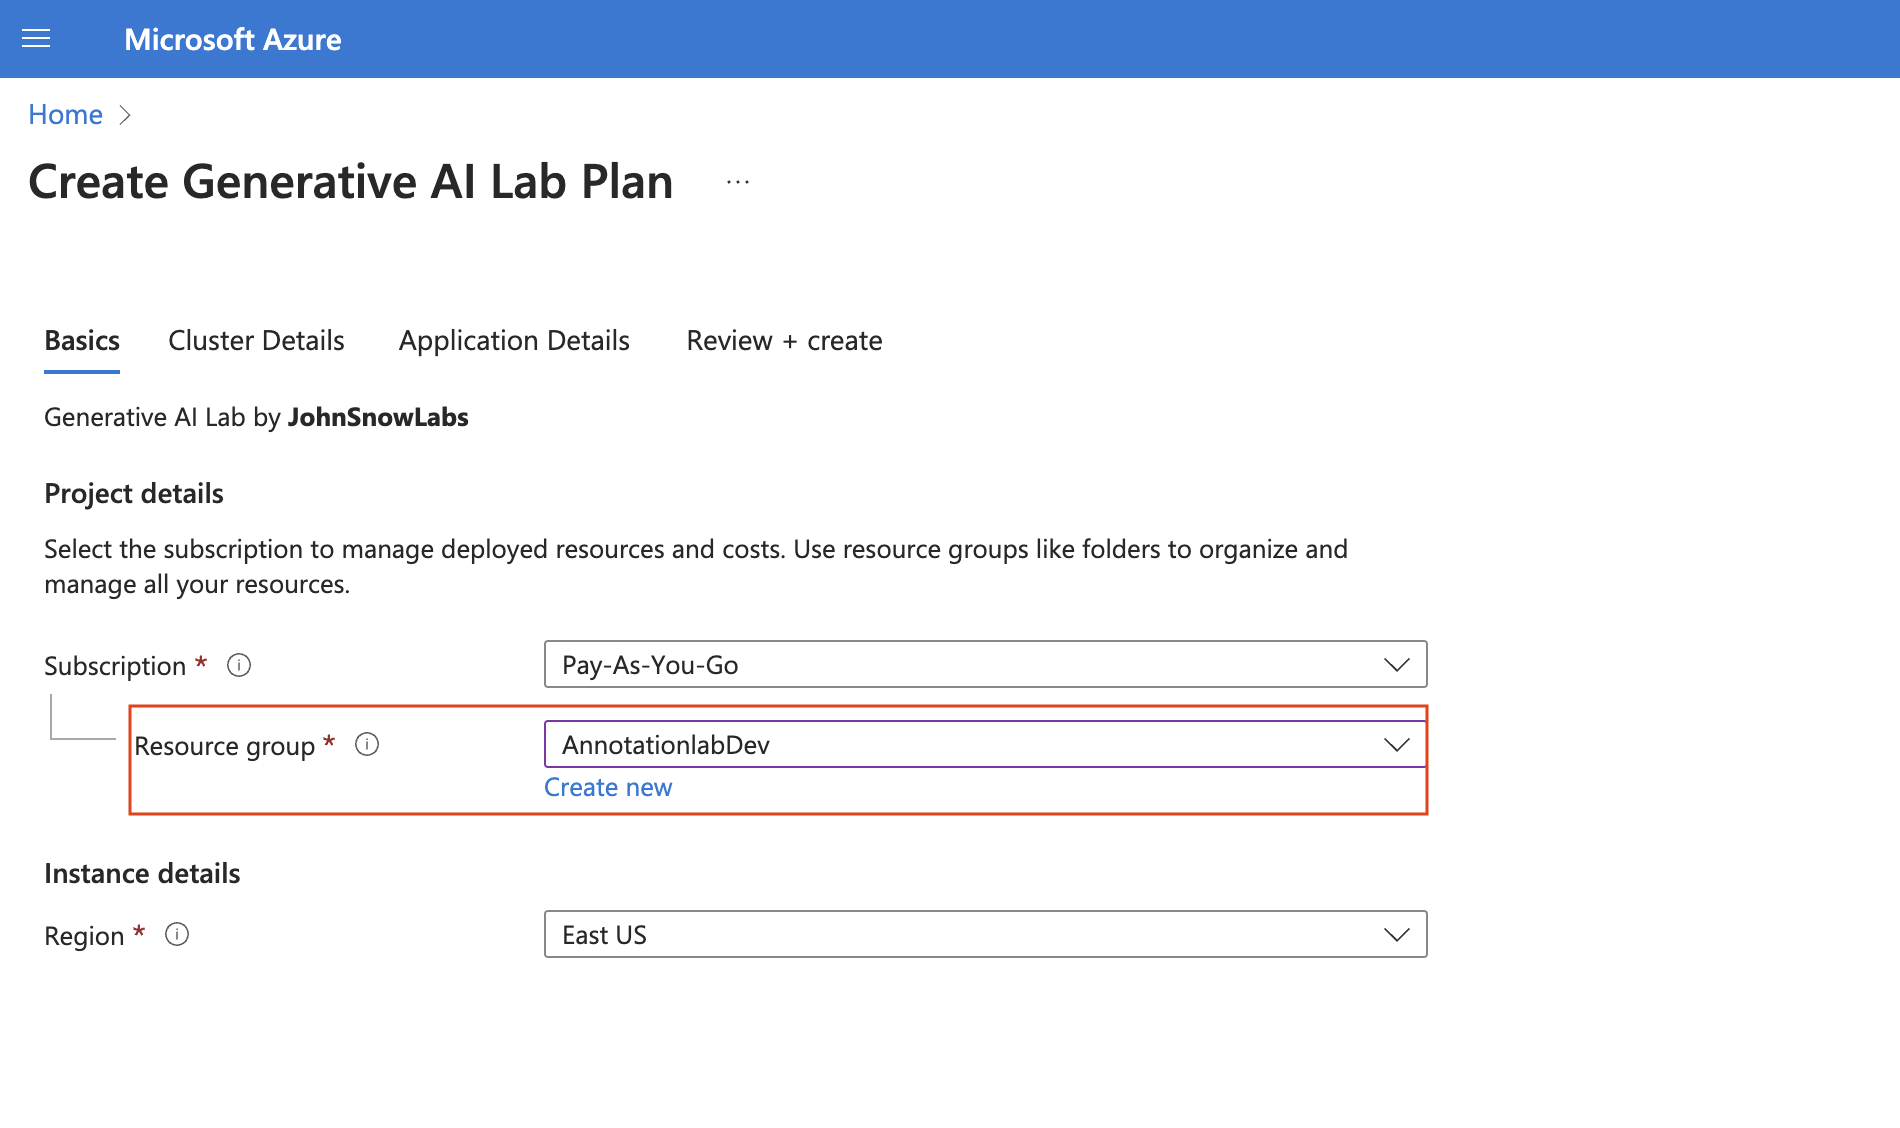
Visit the product page on Azure Marketplace and follow these steps. Generative AI Lab offers a one-click deployment within your security perimeter using Azure Kubernetes Service (AKS), a fully managed Kubernetes solution that simplifies the deployment, management, and scaling of containerized applications.
- Click on the “Get It Now” link.
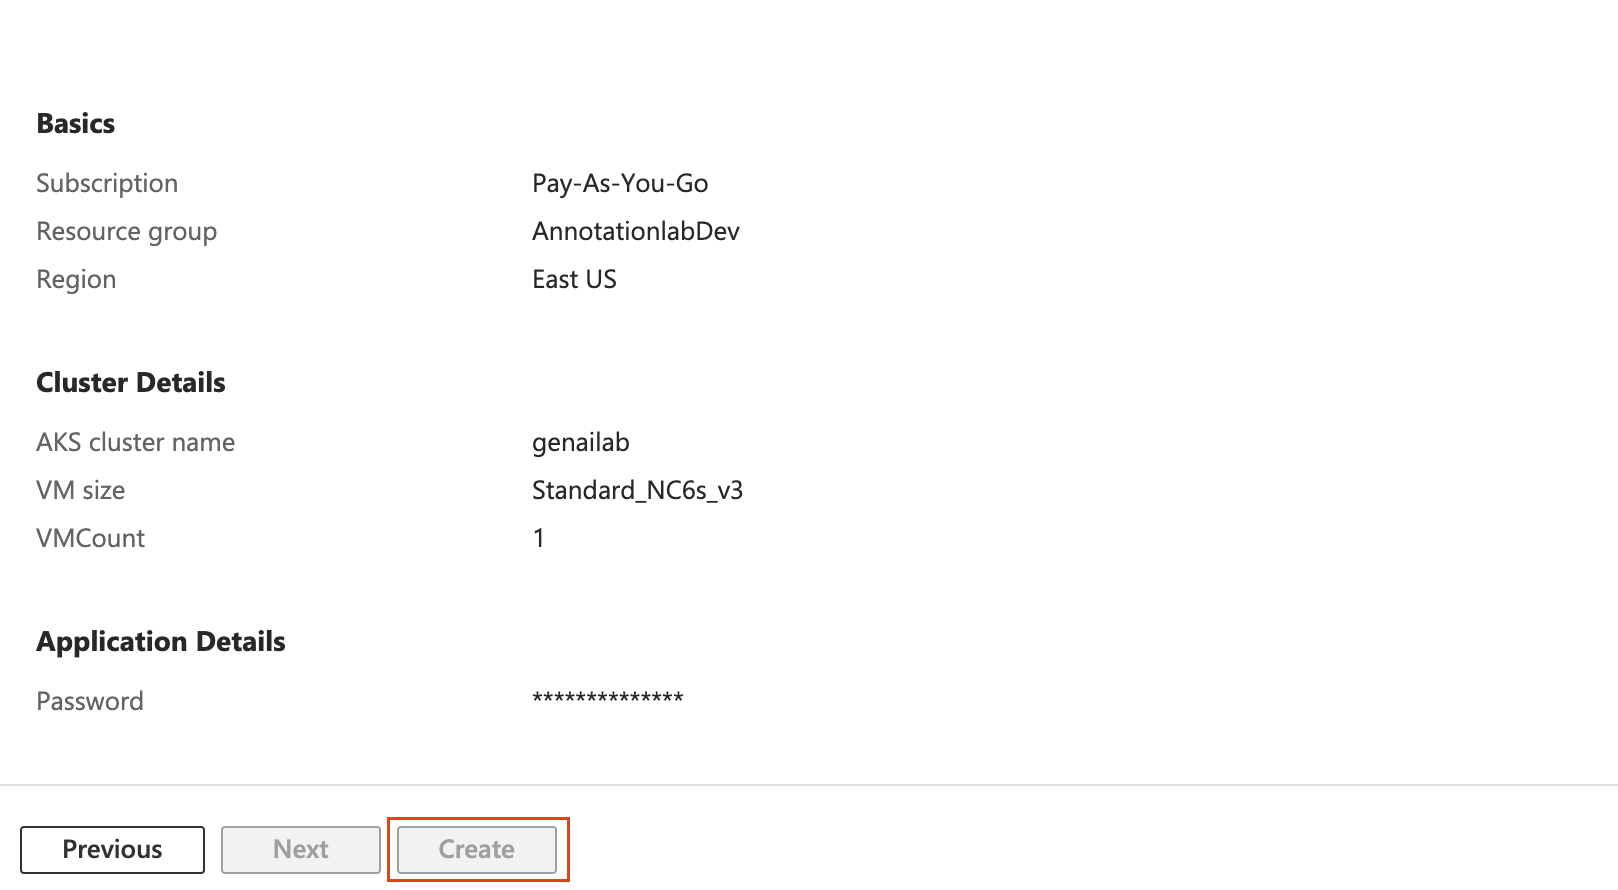
- Select your subscription and the region where you want to deploy the cluster, then click “Next.”
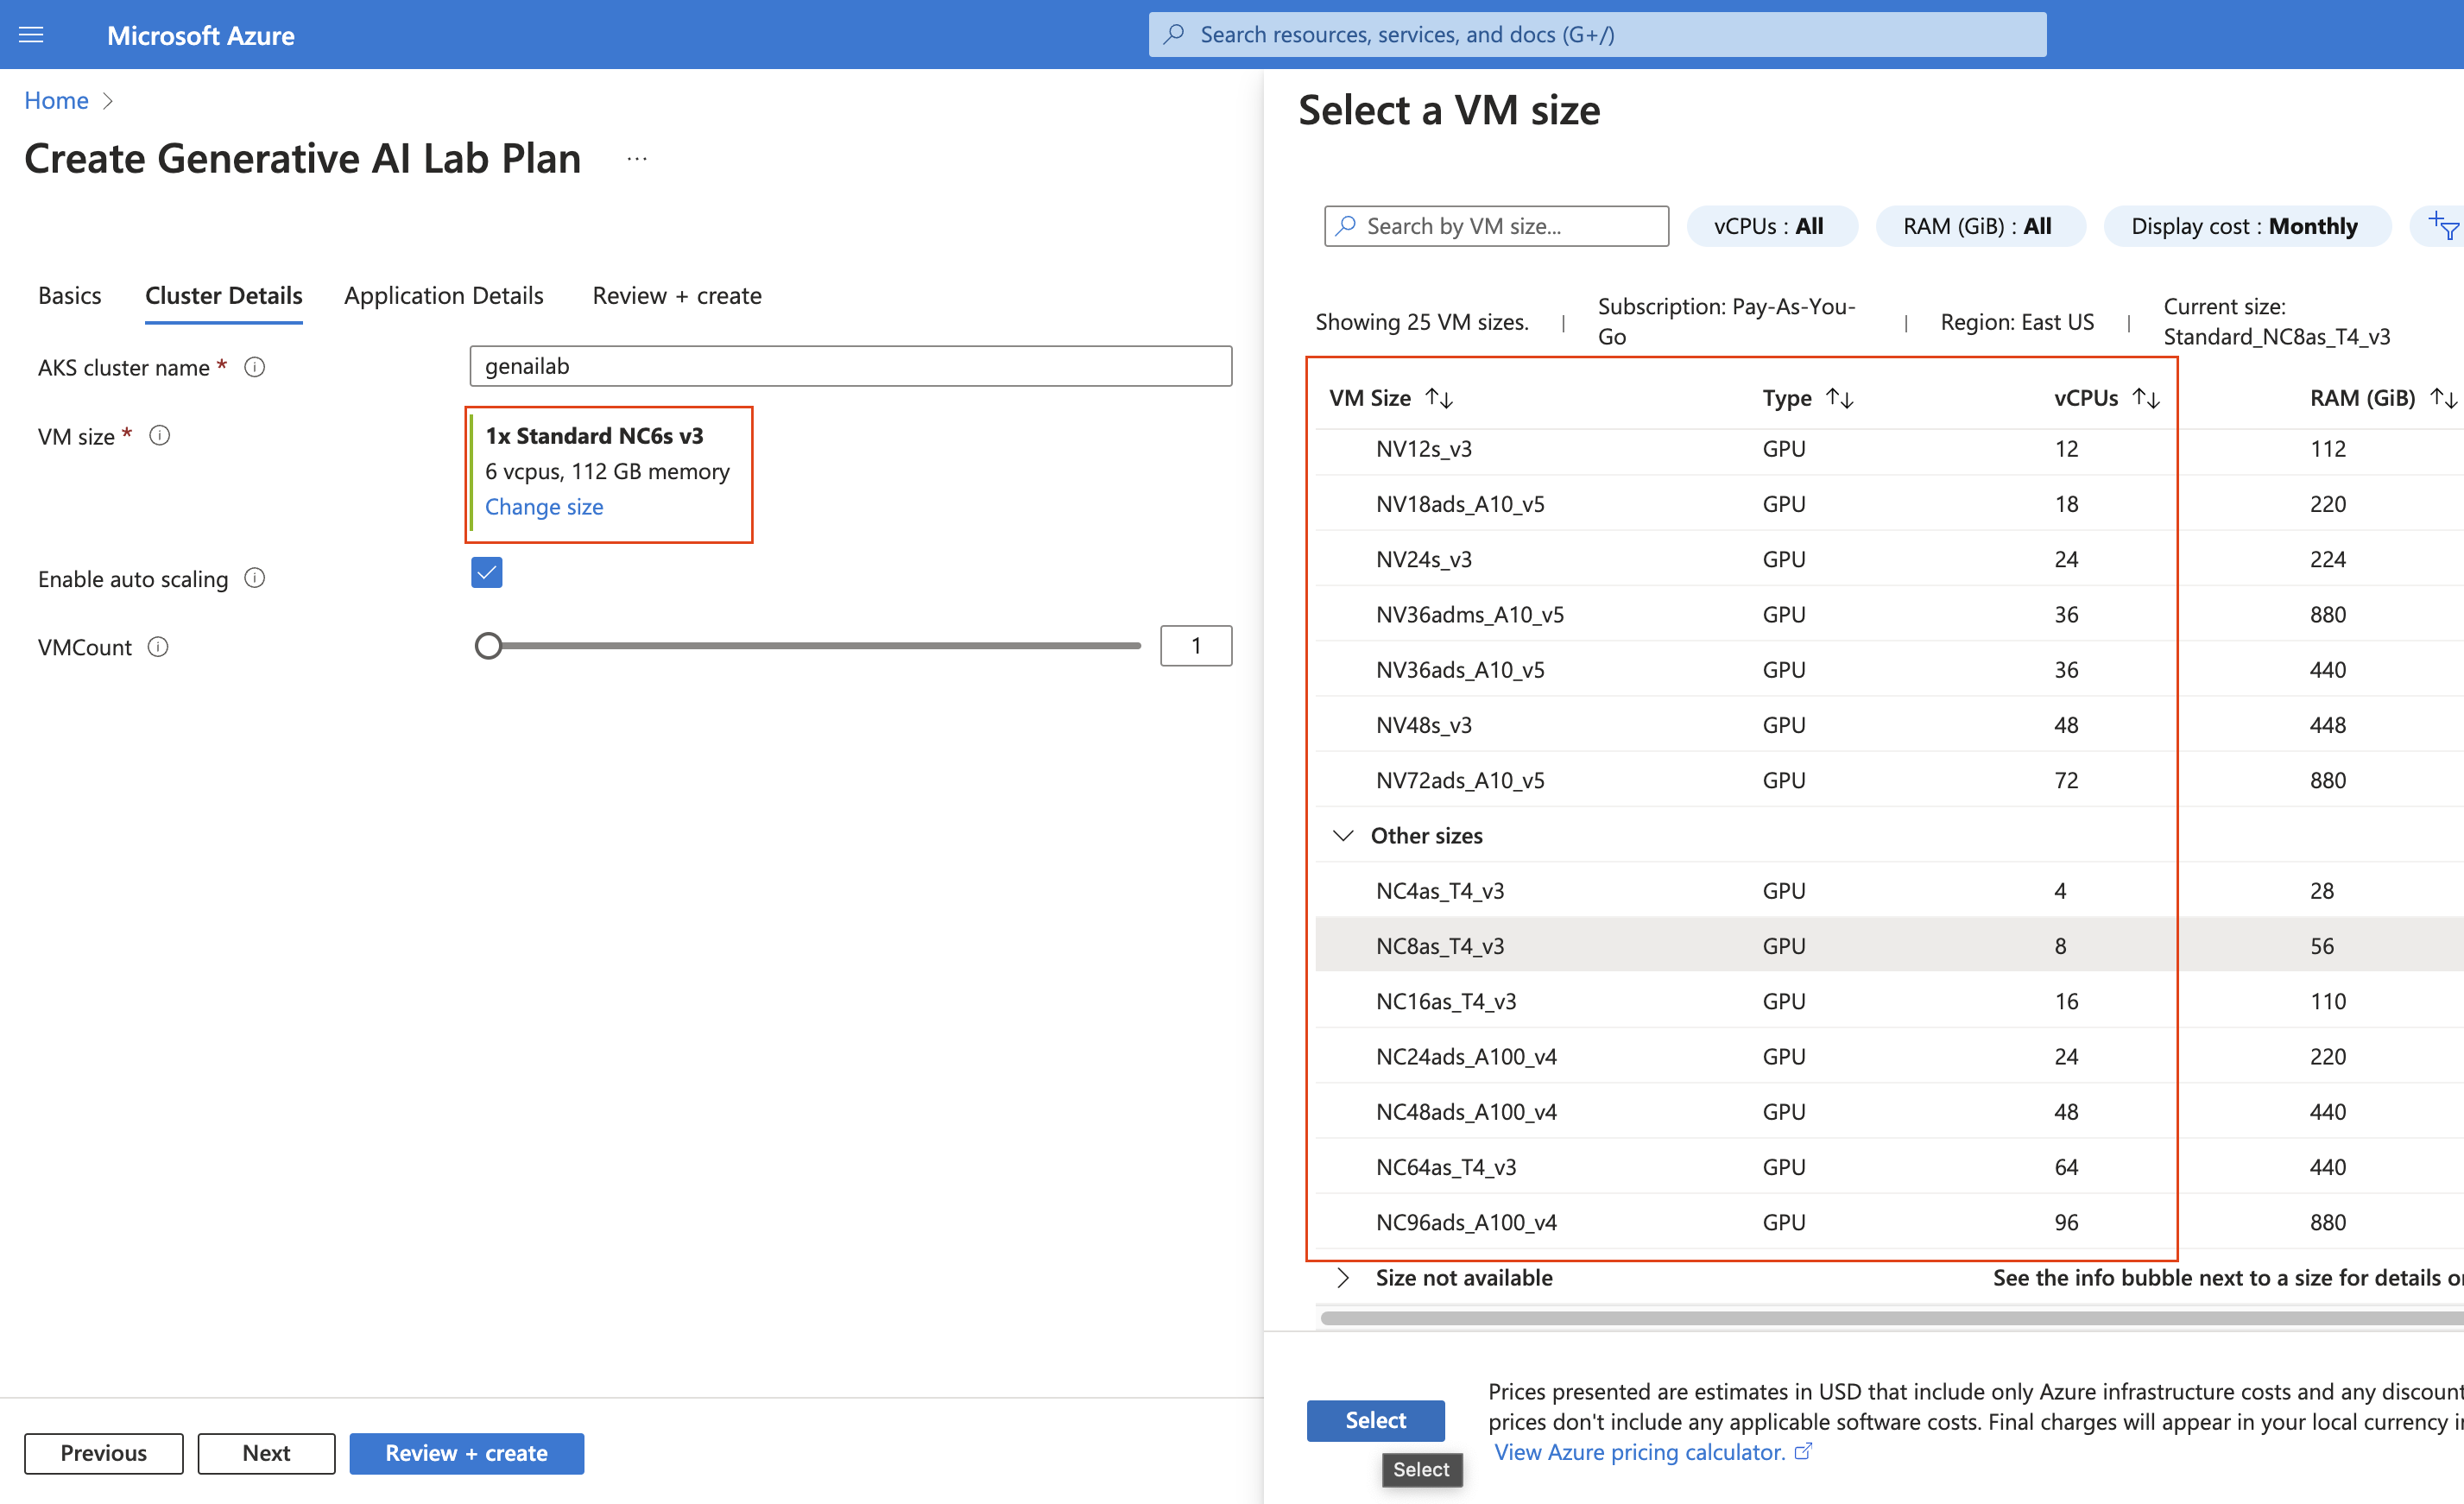
- Choose the appropriate VM size and enable auto-scaling if you want nodes to be added automatically when needed. Then click “Next.”
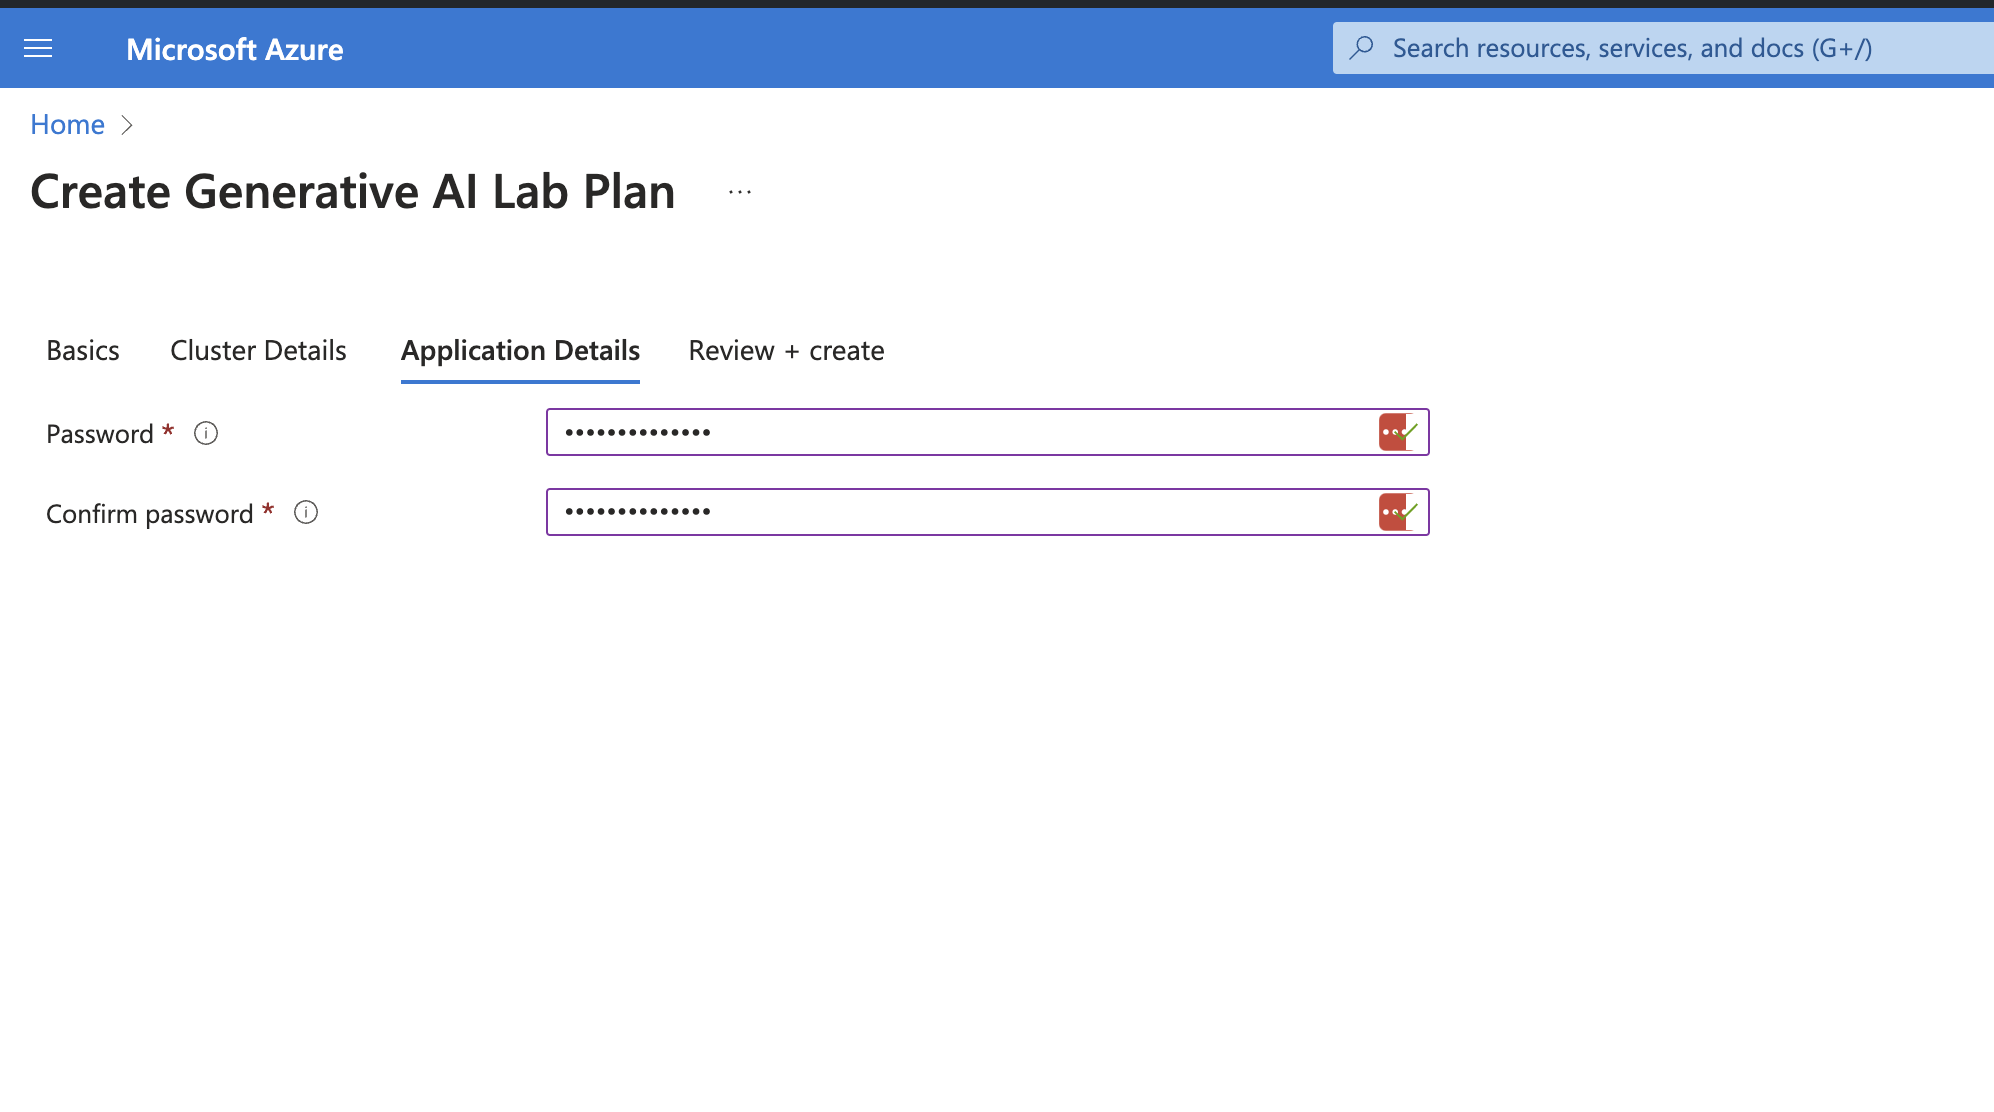
- Provide the password (this will be used to access the Generative AI Lab UI with the admin user), then click “Next.”
- Review the configuration and then click “Create.”
- Visit the login page at http://External_IP for a guided experience. For your initial login, use the following credentials: Username: admin, Password: the password set in step 4.
Note: You can find the External_IP under Kubernetes resources by navigating to Services and ingresses and locating the addon-http-application-routing-nginx-ingress service name.
Migration from NLP Lab to Generative AI Lab
At the end of 2024, NLP Lab will officially retire, and no longer be available. We advise anyone wishing to continue using this tool to migrate to Generative AI Lab.
For on-premise deployments, please contact us for the newest artifacts.
For all Cloud deployments, please purchase and Install Generative AI Lab on a new server before migration, and then follow the steps below:
Steps to Backup Data from NLP Lab
- Login to your current NLP Lab deployment as the admin user.
- Go to the
System Settingspage. - Navigate to the
Backuptab. - Enter the required backup details.
- Schedule an immediate backup using the
Backup nowfeature. - Monitor the backup pod status to ensure the process completes successfully.
kubectl get pods
Verify Backup: Upon completion, your backed-up database and files will be visible in cloud storage.
Steps to Restore Data
- Deploy a fresh instance of Generative AI Lab version 6.8.0 or higher from the marketplace.
- Login to the UI as the admin user.
- Go to the
System Settingspage. - Click on the
Restoretab and fill in the necessary details. - Click on
Restore Nowto initiate the process. - Monitor the restore pod status to ensure successful completion.
kubectl get pods
Verify Restoration: Access the UI, all projects, models, data and files should now be successfully restored.
Dedicated Server
On-Prem Installation Guide
Prerequisites: curl and jq tools must be installed.
Step 1: Create the License File
Create a file named License and add your application key inside the file. You can use the following command:
echo "YOUR_APPLICATION_KEY" > LICENSE
Step 2: Run the Installation/Upgrade Command
- Install
latestversion:curl -sSL https://s3.us-east-1.amazonaws.com/artifacts.genailab.johnsnowlabs.com/install.sh | bash - Install
latestversion with GPU support:curl -sSL https://s3.us-east-1.amazonaws.com/artifacts.genailab.johnsnowlabs.com/install.sh | bash -s -- --gpu - Install
latestversion with audit logs (Elasticsearch + Kibana):curl -sSL https://s3.us-east-1.amazonaws.com/artifacts.genailab.johnsnowlabs.com/install.sh | bash -s -- --enable-audit-logs - Install custom version:
curl -sSL https://s3.us-east-1.amazonaws.com/artifacts.genailab.johnsnowlabs.com/install.sh | bash -s -- 6.7.1 - Install custom version with GPU support and audit logs:
curl -sSL https://s3.us-east-1.amazonaws.com/artifacts.genailab.johnsnowlabs.com/install.sh | bash -s -- 6.7.1 --gpu --enable-audit-logs - Upgrade to
latestversion:curl -sSL https://s3.us-east-1.amazonaws.com/artifacts.genailab.johnsnowlabs.com/upgrade.sh | bash - Upgrade to custom version:
curl -sSL https://s3.us-east-1.amazonaws.com/artifacts.genailab.johnsnowlabs.com/upgrade.sh | bash -s -- 6.11.3 - Upgrade and enable audit logs:
curl -sSL https://s3.us-east-1.amazonaws.com/artifacts.genailab.johnsnowlabs.com/upgrade.sh | bash -s -- --enable-audit-logs - Upgrade and disable audit logs:
curl -sSL https://s3.us-east-1.amazonaws.com/artifacts.genailab.johnsnowlabs.com/upgrade.sh | bash -s -- --disable-audit-logs - Upgrade to custom version and enable audit logs:
curl -sSL https://s3.us-east-1.amazonaws.com/artifacts.genailab.johnsnowlabs.com/upgrade.sh | bash -s -- 6.11.3 --enable-audit-logs
EKS: Install Generative AI Lab from artifacts
Prerequisites
The following packages are required on the system running the script(s):
- curl
- helm
- jq
- kubectl
These packages are required only if Docker images sync to ECR is needed:
- aws
- skopeo
Install
The script is fully interactive, no parameters required. Simply run as:
bash <(curl -sSL https://s3.us-east-1.amazonaws.com/artifacts.genailab.johnsnowlabs.com/install_eks.sh)
Non-interactive mode (environment variables)
For automated/CI deployments, the following environment variables can be set:
| Variable | Values | Description |
|---|---|---|
AUTO_CONFIRM_CONTEXT |
true/false |
Skip k8s context confirmation |
USE_LATEST_VERSION |
true/false |
Use latest version without prompting |
CUSTOM_VERSION |
X.Y.Z |
Use a specific version |
ENABLE_GPU |
true/false |
Enable GPU support |
ENABLE_AUDIT_LOGS |
true/false |
Enable audit logs (Elasticsearch + Kibana) |
TARGET_NAMESPACE |
namespace name | Target namespace for installation |
INSTALL_NGINX |
true/false |
Install ingress-nginx |
SYNC_ECR |
true/false |
Sync images to ECR |
ECR_REPOSITORY |
ECR URL | ECR repository URL |
AWS_PROFILE_NAME |
profile name | AWS profile for ECR access |
ENABLE_CLEANUP |
true/false |
Cleanup artifacts after install |
CUSTOM_CONFIG_FILE |
file path | Custom configuration file |
Upgrade
The script is fully interactive, no parameters required. Simply run as:
bash <(curl -sSL https://s3.us-east-1.amazonaws.com/artifacts.genailab.johnsnowlabs.com/upgrade_eks.sh)
The same environment variables listed above apply to the upgrade script. For audit logs specifically:
ENABLE_AUDIT_LOGS=trueenables audit logsENABLE_AUDIT_LOGS=falsedisables audit logs- If unset, the script prompts interactively (with an option to keep the current setting)
For more information regarding installation of Generative AI Lab on a dedicated server please contact us at support@johnsnowlabs.com.
Recommended Configurations
| System requirements | You can install Generative AI Lab on a Ubuntu 20+ machine. |
|---|---|
| Port requirements | Generative AI Lab expects ports |
| Server requirements | The minimal required configuration is The ideal configuration in case model training and pre-annotations are required on a large number of tasks is |
| Web browser support | Generative AI Lab is tested with the latest version of Google Chrome and is expected to work in the latest versions of:
|