The Image tag shows an image on the page. Use it for all image annotation tasks to display an image on the labeling interface. The name and value parameters in the Image tag are mandatory.
Suppose you have an image sample in a JSON file as shown.
{
    "image": "/static/samples/sample.jpg",
    "title": "MyTestTitle"
}
There are many templates within image annotation to choose from. Visual NER and Image classification are the most used among all.
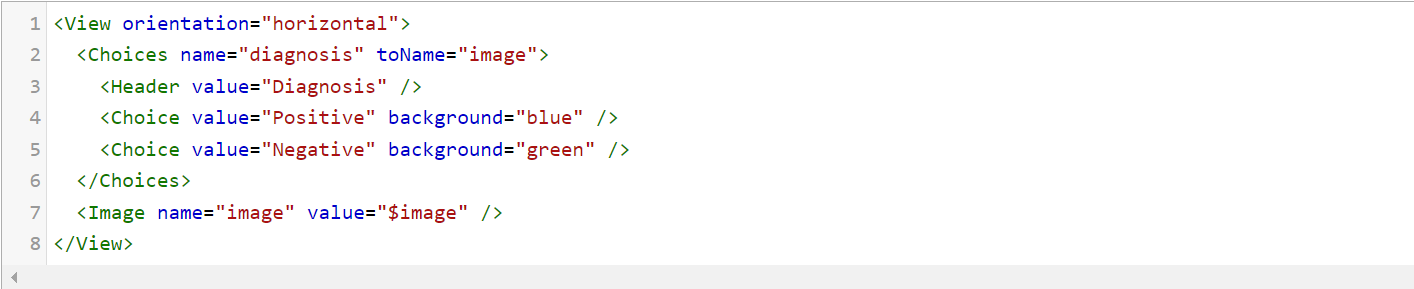
Image Classification
This task mainly uses the Image and Choices tags. You can optionally provide headers to the choices using the Headers tag.
Visual NER Labeling
To label entities in an image, you need to create rectangular labels spanning across the entity to be labeled. To enable this, you have to use RectangleLabels tag that creates labeled rectangles.They are used to apply labels to bounding box semantic segmentation tasks. The name and toName parameters are mandatory.
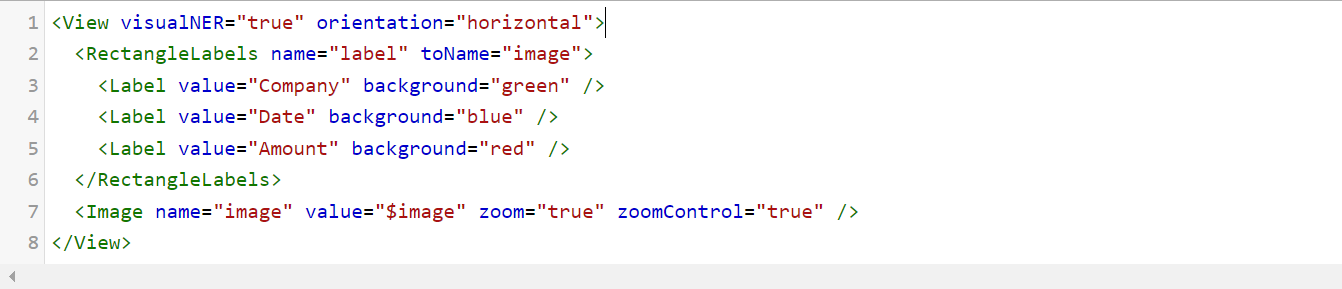
The zoom and zoomControl parameters in the Image tag enable you too zoom in or out the image.
Identify and Validate Checkboxes with Precision
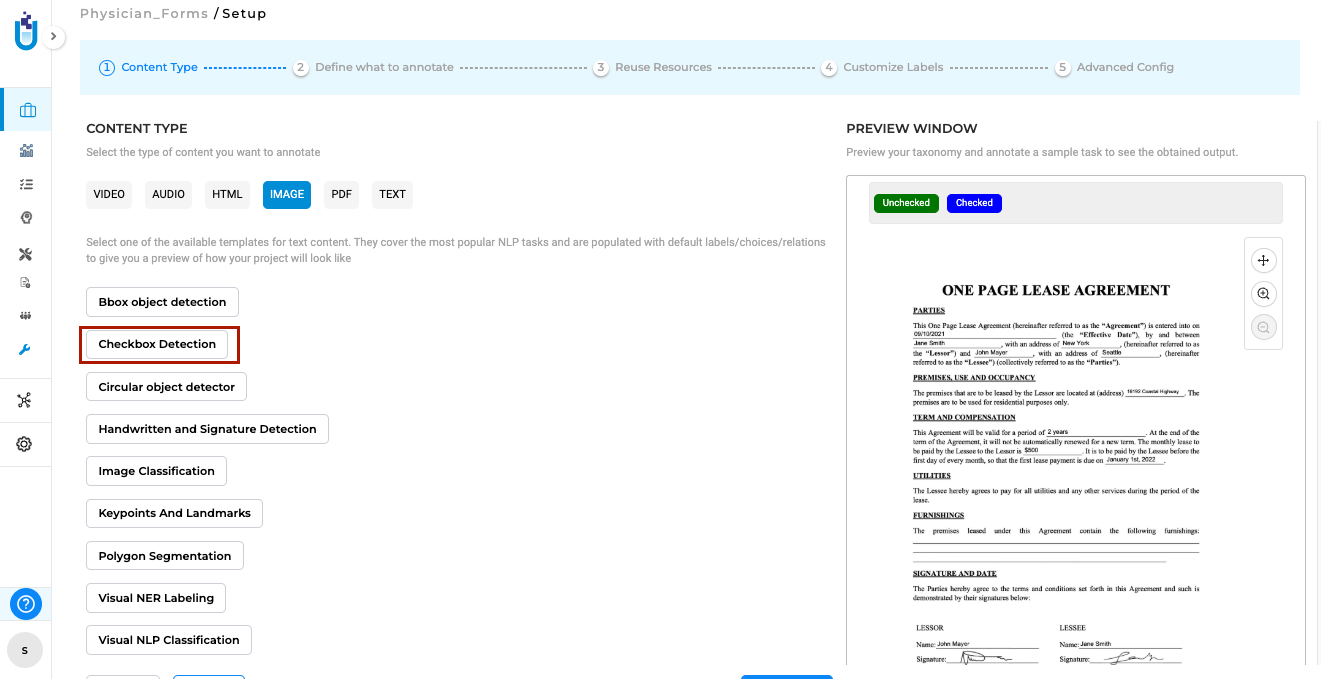
Generative AI Lab includes a dedicated Checkbox Detection project type that enables users to automatically identify checkboxes within image-based tasks and determine whether they are checked or unchecked.
This project type can be selected during project setup from the Content Type page under the Image tab. When selected, the default model for checkbox detection is automatically downloaded from the Models Hub and added to the project configuration, streamlining setup and ensuring readiness for immediate use.
Once the project is configured, users can import relevant image or PDF tasks and run the model to detect and label checkbox elements with their corresponding statuses. The detection results are displayed directly within the annotation interface, following the same intuitive workflow as other Visual NER–style projects.
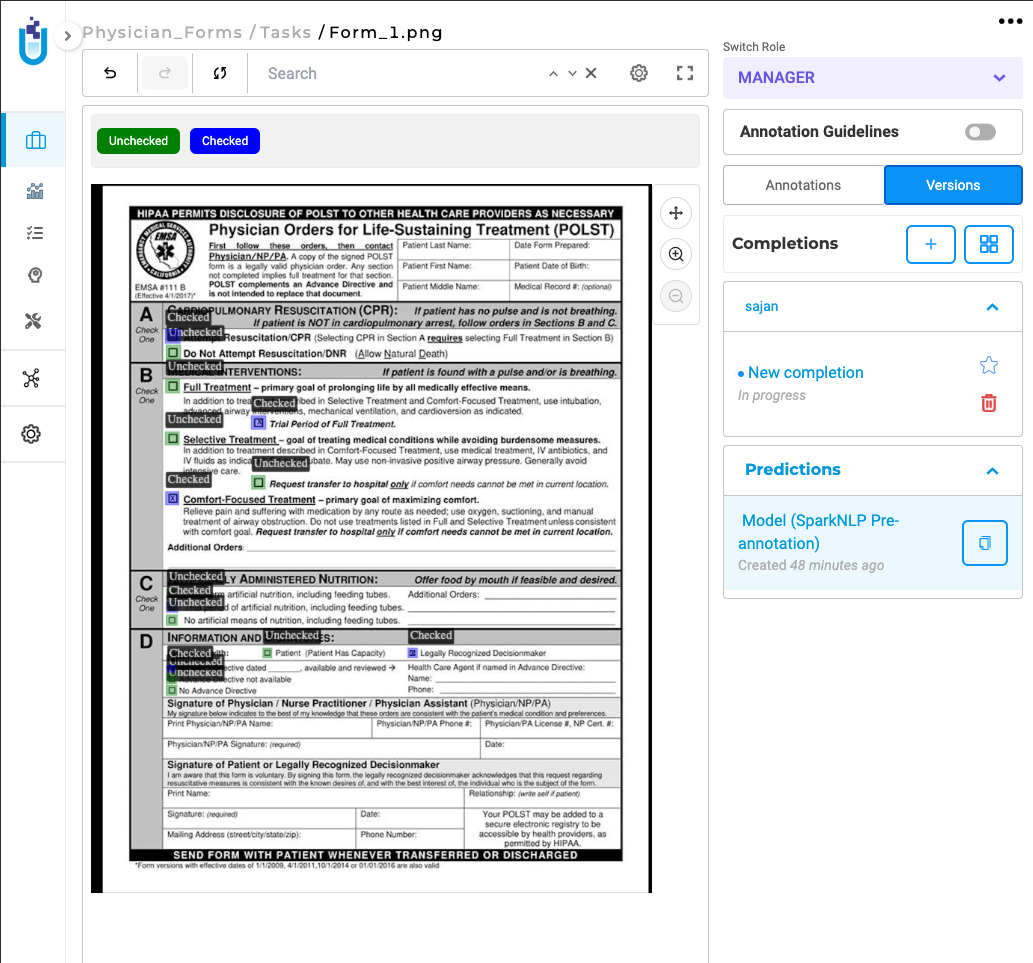
Checkbox Detection integrates seamlessly into existing annotation and review workflows without requiring any additional configuration.
Note: At this time, the Checkbox Detection model operates independently and cannot be combined with other models in a single project.
Detect and Validate Handwritten Text and Signatures
Generative AI Lab provides a Handwritten Text and Signature Detection project type that enables the automatic identification and annotation of handwritten content and signatures within scanned documents or images. This capability is powered by John Snow Labs’ Visual NLP library and designed to streamline document processing tasks involving mixed handwritten and printed text.
The project type can be selected during project setup from the Content Type page under the Image tab. When selected, the default model for Handwritten Text and Signature Detection is automatically downloaded from the Models Hub and added to the project configuration.

Once the project is configured, users can import image or PDF tasks and run the model to automatically detect handwritten text and signatures, which are then highlighted and labeled within the annotation interface.
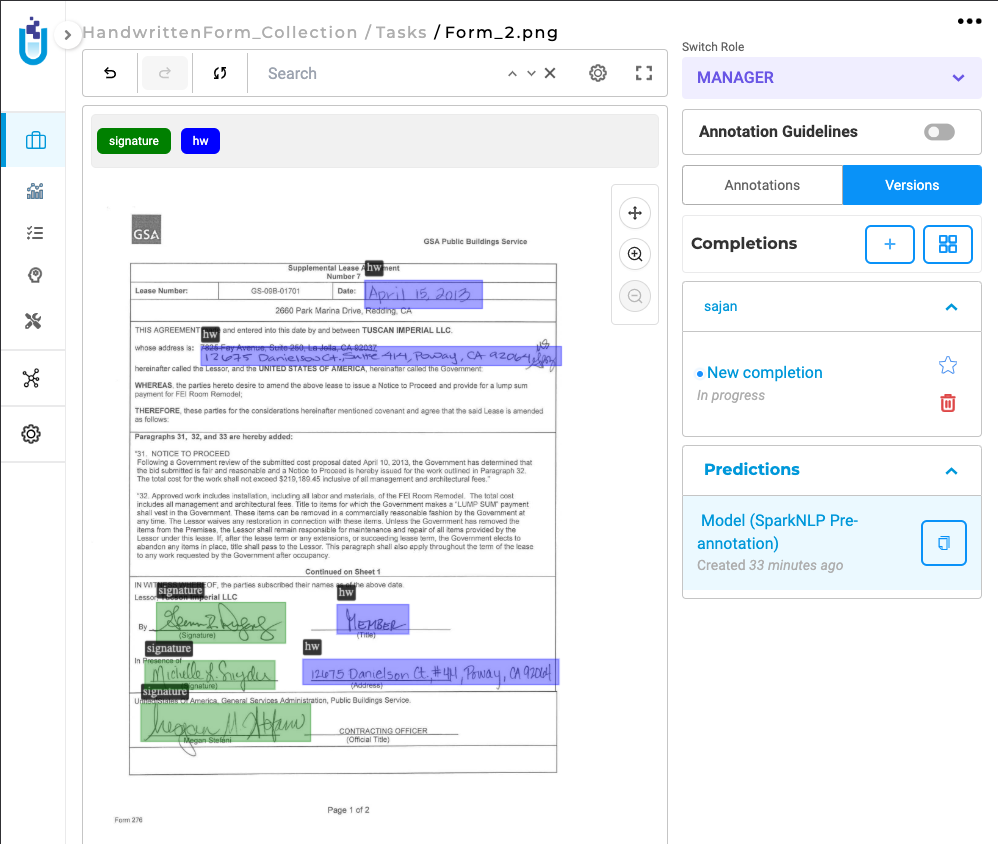
This project type integrates seamlessly into existing annotation workflows and requires no additional setup.
Note: The Handwritten Text and Signature Detection model currently operates independently and cannot be combined with other models in the same project.
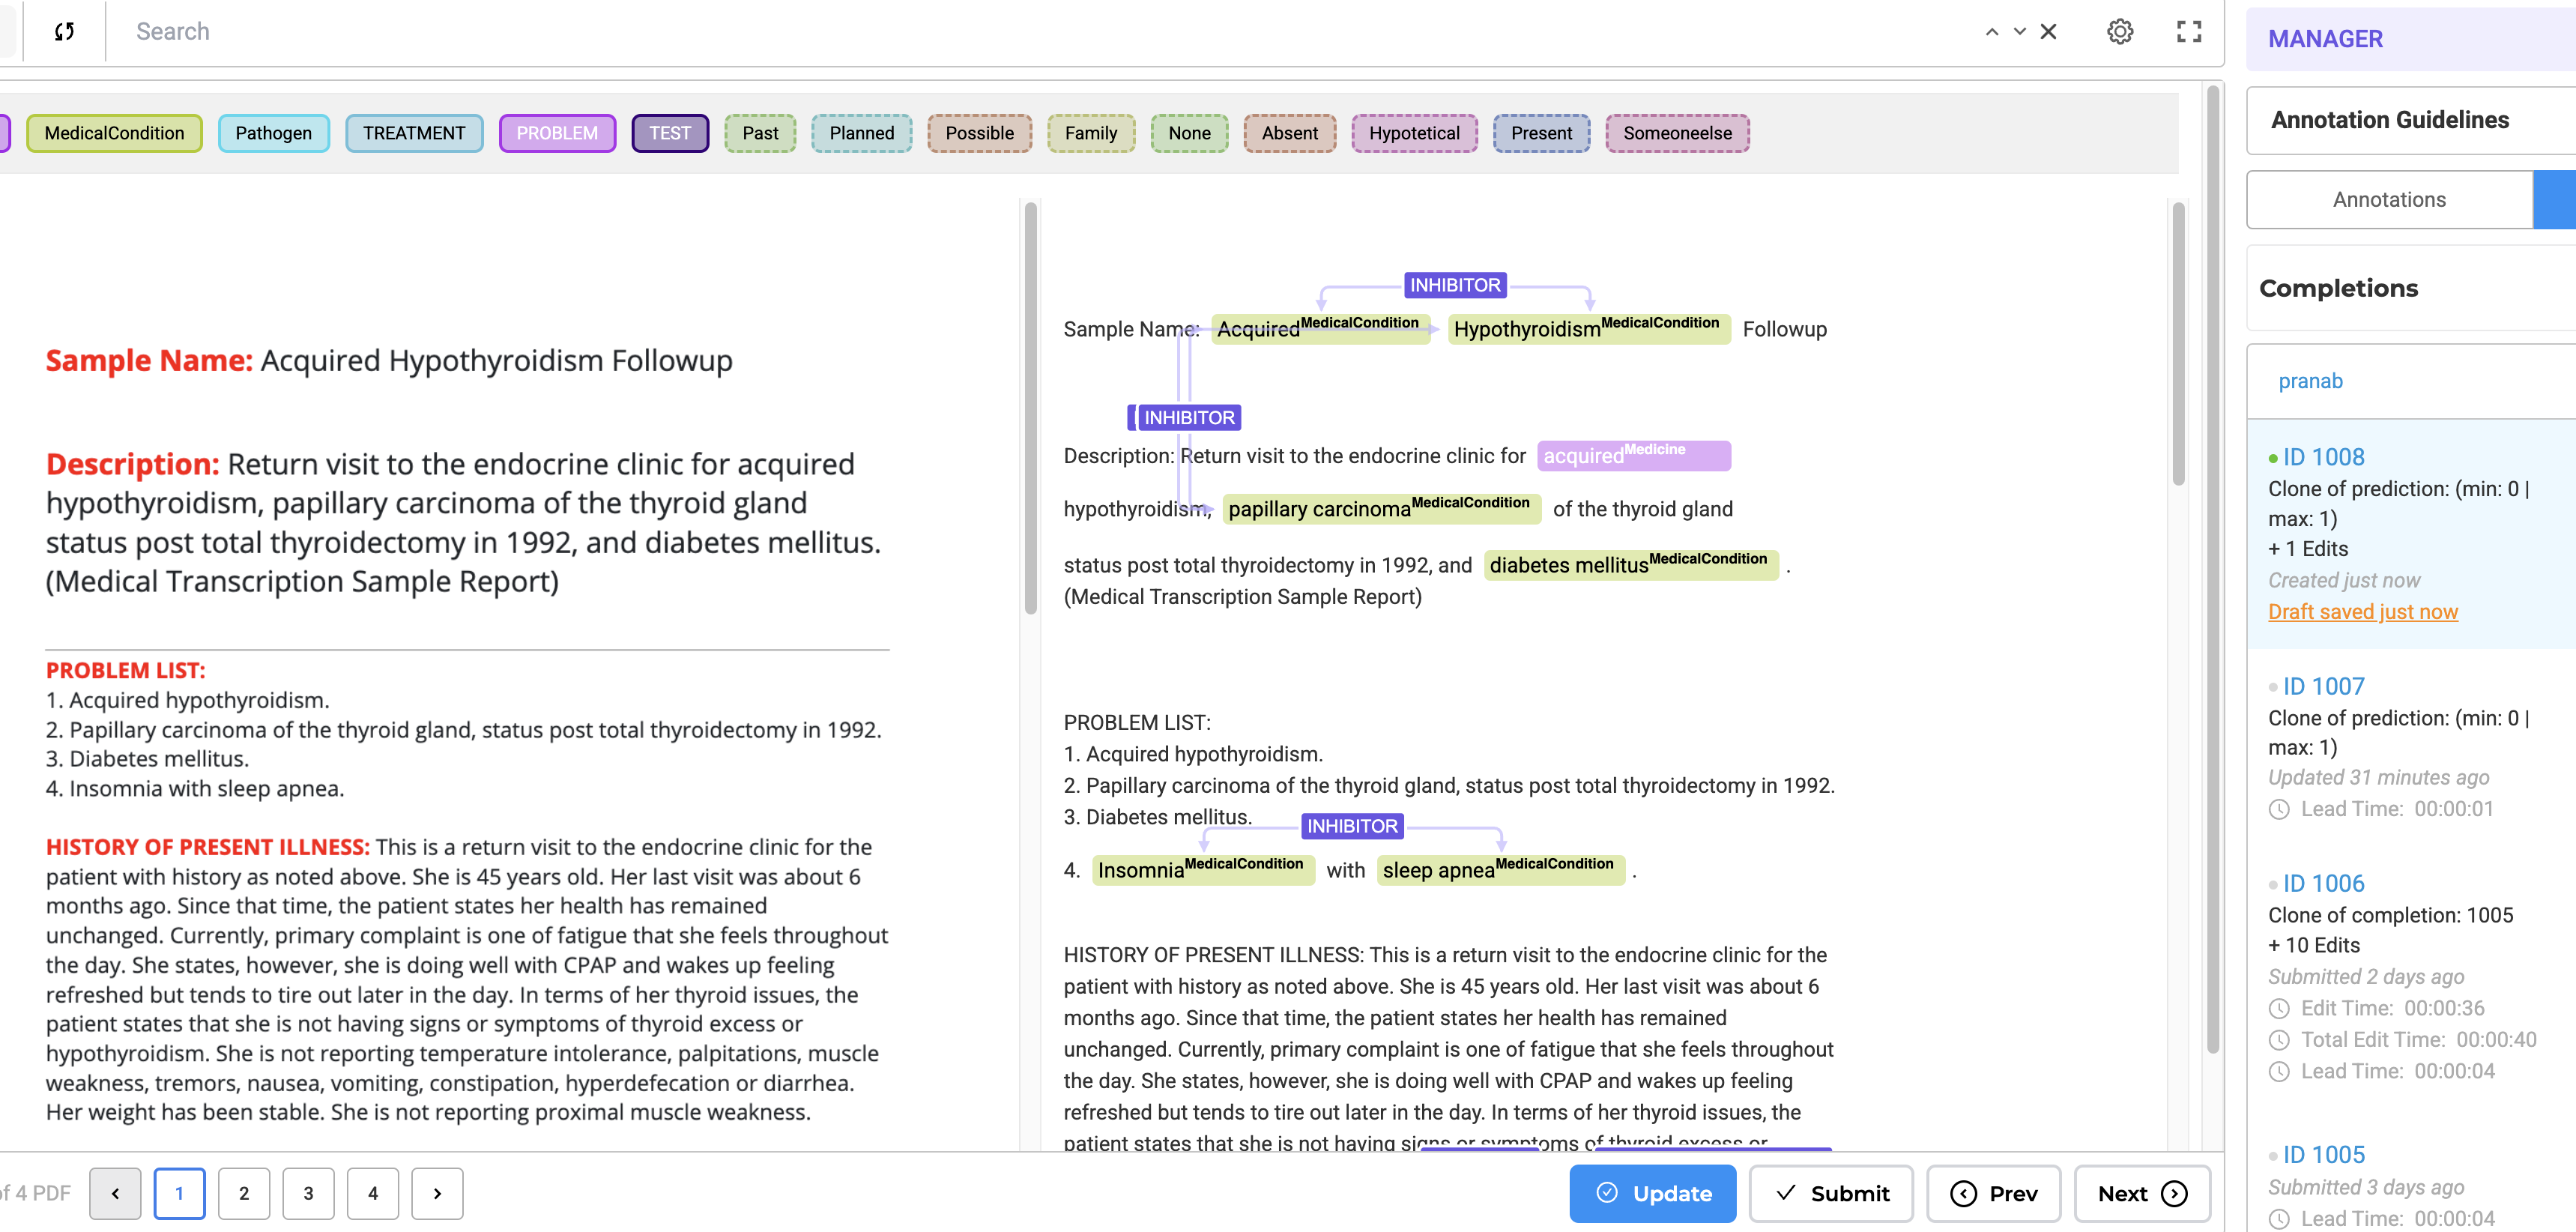
View Text Alongside Images and Optimized Image Loading in Visual NER
Generative AI Lab includes an Image-Text Side-by-Side Annotation project type, which enables users to view the original image or PDF alongside its OCR-extracted text. This layout makes it easier to compare visual and textual content during annotation, improving accuracy and reducing context switching.
In addition, Visual NER performance has been optimized for faster PDF and image processing. Enhancements include smoother zoom and navigation controls, efficient image loading, and reduced lag when working with large or multi-page documents. These updates make annotation workflows more responsive and reliable, particularly for projects involving high-resolution or lengthy files.
Other ongoing improvements enhance model training efficiency and de-identification accuracy, ensuring a more streamlined and productive annotation experience across all project types.
Annotate while referencing Orginal Documents
This feature improves visibility for image-based documents by displaying both the image/PDF and its OCR-extracted text side by side. Users can annotate more efficiently while maintaining a visual reference. While Generative AI Lab has offered annotation on top of Image and PDF formats for quite some time, there was a gap in annotating large amounts of data on top of the original document, as there was not enough space to adequately address more robust annotation projects.
Image on the Left, OCR Text on the Right: By Selecting this project type, users can view the image/PDF document on the left side of the interface and its corresponding OCR-extracted text on the right side.
Paginated Documents: All document pages are paginated, allowing users to navigate the document effortlessly.
Image and PDF documents support all text-based annotation features—including NER, assertion, relations, resolvers, and lookup code annotation—and allow OCR text annotation.
Key Features
How to Configure the Project
- Select the Project Template:
- Navigate to the Image tab and choose the Image & Text Side-By-Side Annotation template.
- Save the configuration to proceed.
- Add Models to the Reuse Resource Page:
- Click Next to move to the Reuse Resource page.
- Add the required models, such as NER, relation, and assertion models, to the project.
- Configure Individual Labels:
- Click Next again to access the label configuration page.
- Click on individual labels to add lookup data or resolver models.
- Save and Deploy the Preannotation Server:
- Once all configurations are complete, save the project.
- Deploy the preannotation server to start using the project.
For a visual guide, refer to the GIF below that demonstrates the configuration process step-by-step:
How to Use Preannotation
After deploying the preannotation server, follow these steps to preannotate your documents:
- Import a PDF or Image:
- Go to the Task Page and navigate to the Import Page.
- Import the PDF or image you wish to annotate.
- Automatic OCR Processing:
- The imported document will automatically pass through our OCR process.
- Once OCR is complete, a task will be generated for the document.
- Preannotate the Task:
- Use the deployed preannotation server to preannotate the task.
- Alternatively, click on the task to annotate it manually.
- Automatic NER Label Projection:
- As you annotate the text side, NER labels are automatically projected onto the image side for visual reference.
- This ensures a seamless and intuitive annotation experience.
For a visual guide, refer to the GIF below that demonstrates the pre-annotation/annotation process step-by-step:
Image with Text Annotation (Performance-Optimized)
The second project template is similar to the first but is optimized for speed and larger multi-page PDFs. It maintains the side-by-side view found in the above project without the NER labels appearing on the image. This is to improve annotation speed and reduce server resources. This will work better for high-volume document processing.
Advanced Capabilities
- Model Training: Train NER, assertion, and relation models seamlessly in both project types.
- Rule-Based & Prompt-Based Annotation: Utilize rules and prompts for efficient labeling.
- Support for Resolvers & ICD-10 Coding: Ensures compatibility with all text-based annotation features.
Native DICOM Support for Medical Imaging
Generative AI Lab provides native support for DICOM (Digital Imaging and Communications in Medicine), allowing healthcare organizations to work directly with medical images without converting them to standard image formats such as JPEG or PNG.
DICOM images can be uploaded directly into Visual NER and DICOM De-Identification projects, where they can be annotated, reviewed, compared, and de-identified using the same intuitive workflows available for other image-based projects.
Supported Capabilities
- Native DICOM Upload – Import
.dcmfiles directly through the user interface or supported APIs without external conversion. - Image Annotation – Use existing Visual NER annotation tools to label medical images while preserving original image quality.
- Metadata Viewing – Inspect supported DICOM metadata directly within the annotation interface.
- Image & Metadata De-Identification – Configure masking rules for both image content and supported DICOM metadata fields.
- Comparison View – Compare original and de-identified images alongside metadata changes before exporting.
Supported metadata fields for masking: Institution Name, Patient ID, Patient Name, and Study Date.
DICOM support integrates seamlessly into existing image annotation workflows, allowing healthcare teams to work with clinical imaging data while maintaining patient privacy and preserving the metadata required for downstream review and research.