Generative AI Lab is optimized to keep human experts productive, minimizing manual effort by streamlining the annotation interface. Features such as keyboard shortcuts, task auto-navigation, and visual clarity are all designed to support efficient annotation.
Generative AI Lab supports keyboard shortcuts for all types of annotations. It enables having one hand on the keyboard, one hand on the mouse, and both eyes on the screen at all times. One-click completion and automatic switching to the next task keep experts in the loop.
Interface Overview
- Top Panel: Displays all project-defined labels.
- Center Panel: Shows the content of the current task.
- Right Panel Widgets:
- Annotations
- Versions
- Progress
Labeling Widgets
Completions
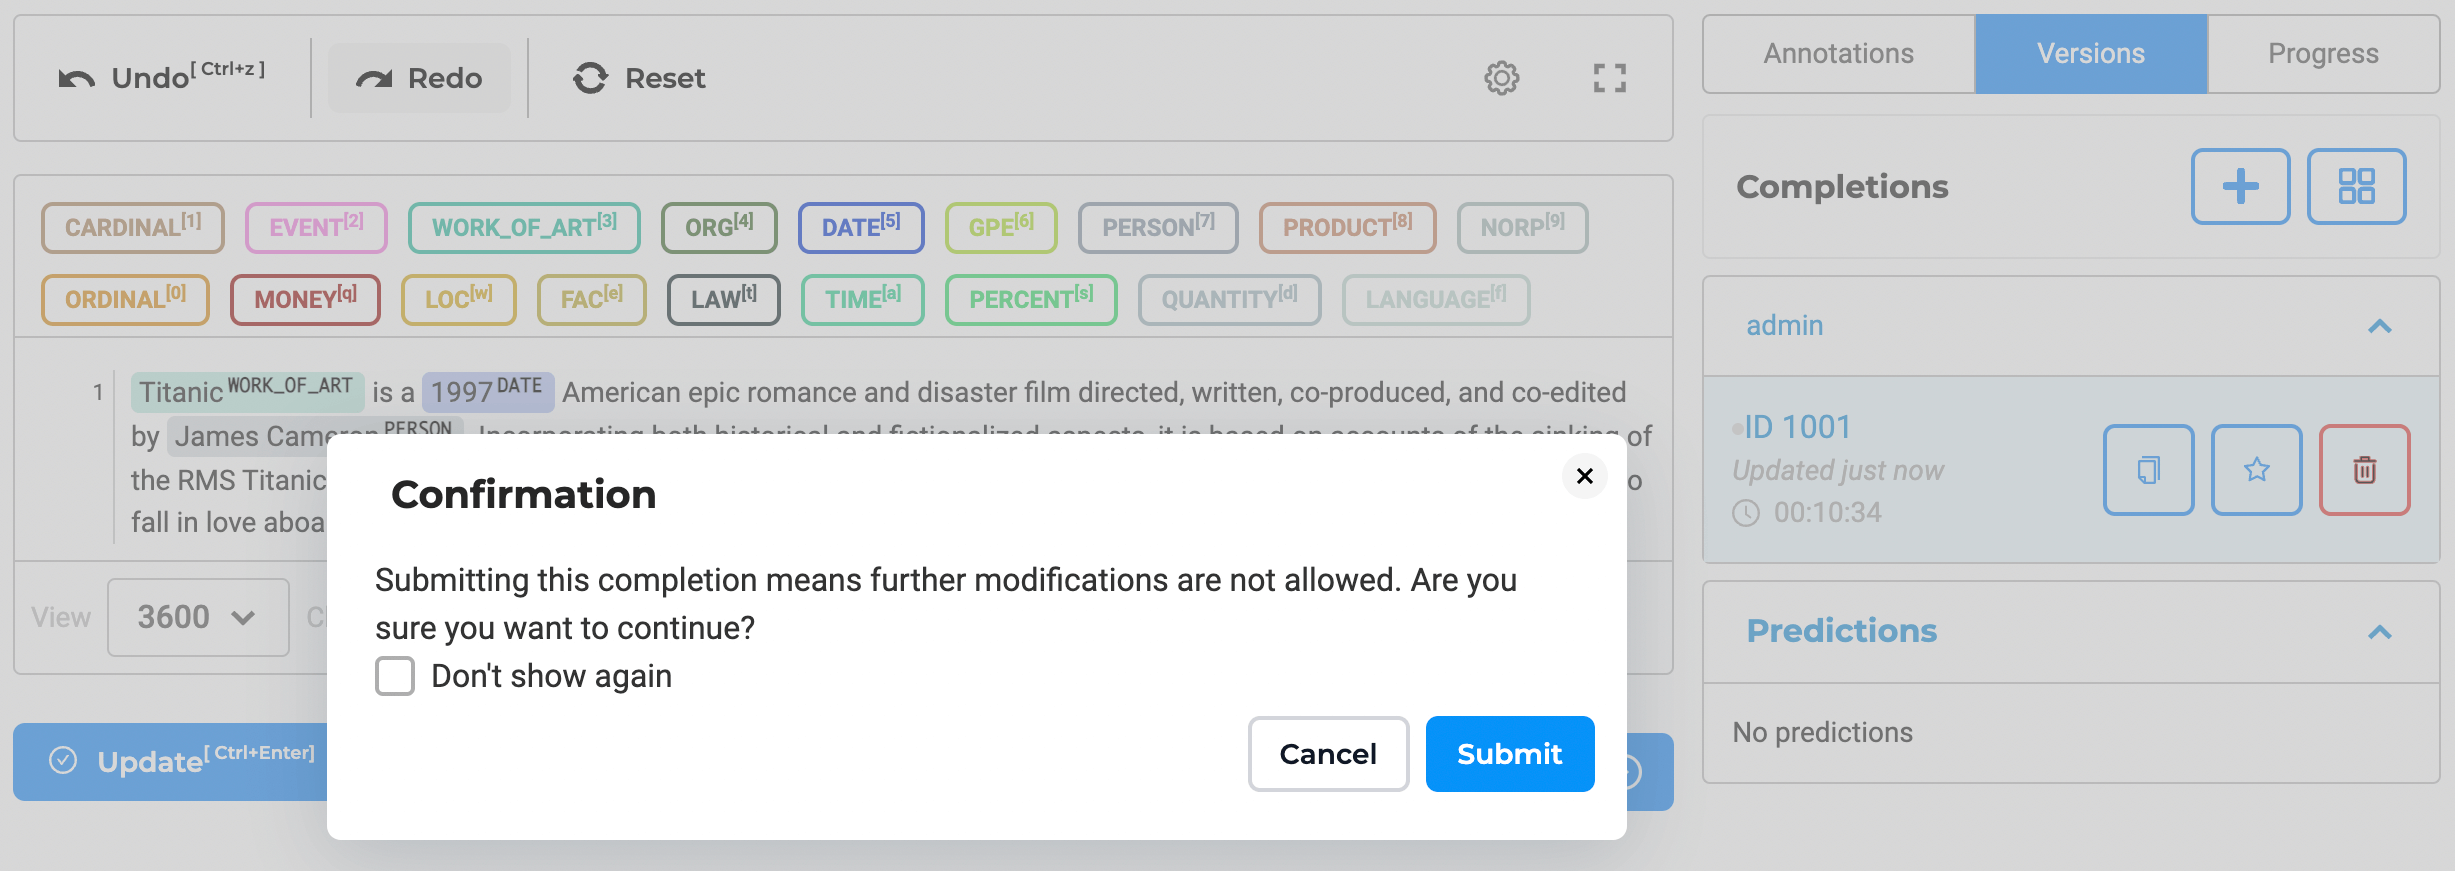
A completion is a list of annotations manually defined by a user for a given task. After completing annotation on a task (e.g., all entities highlighted in the text, or one or more classes is assigned to the task in the case of classification projects) user clicks on the Save button to save their progress or Submit button to submit the completion.
A submitted completion is no longer editable, and the user cannot delete it. Creating a new copy of the submitted completion is the only option to edit it. An annotator can modify or delete their completions only if completions are not submitted yet.
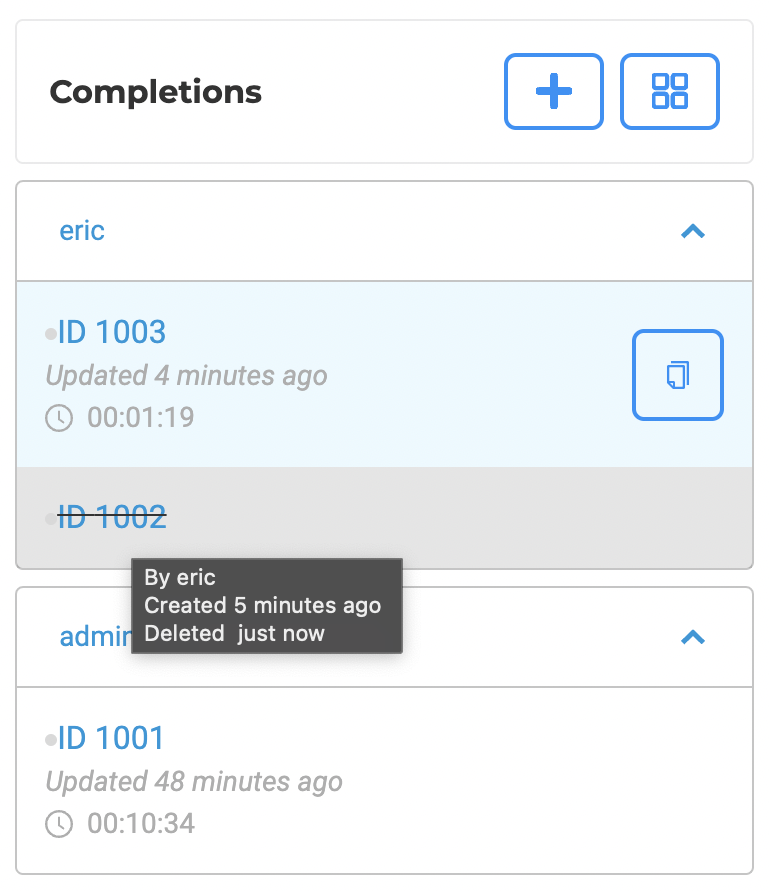
Dedicated action icons are available on the completions widgets to allow users to quickly run actions like delete, copy, set ground-truth.

It is an important to ensure a complete audit trail of all user actions. Generative AI Lab tracks the history and details of any deleted completions. It means it is possible to see the name of the completion creator, date of creation, and deletion.
Reviewer Completions & Cloning
Annotators can open completions submitted by a Reviewer and clone them as a starting point for further edits.
From the Annotations / Versions panel, open the reviewer’s completion and click Clone to create an editable copy under your account.
When comparing the original and the cloned completion, the Diff View automatically highlights differences between the two, streamlining handoffs and collaborative review.
Predictions
A prediction is a list of annotations created automatically by Pre-Annotate button from the
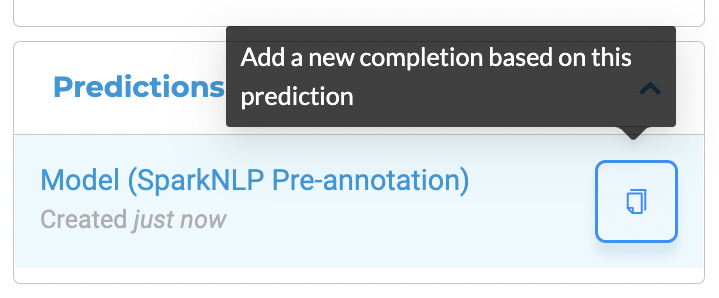
To reuse a prediction to bootstrap the annotation process, users can copy it to a new completion. This new completion bootstrapped from the prediction is editable.
Confidence
Each predicted annotation includes a confidence score, helping users assess reliability. This score shows the confidence the model has for each of the labeled chunks it predicts. It is calculated based on the benchmarking information of the model used to pre-annotate and the score of each prediction. The confidence score is available when working on
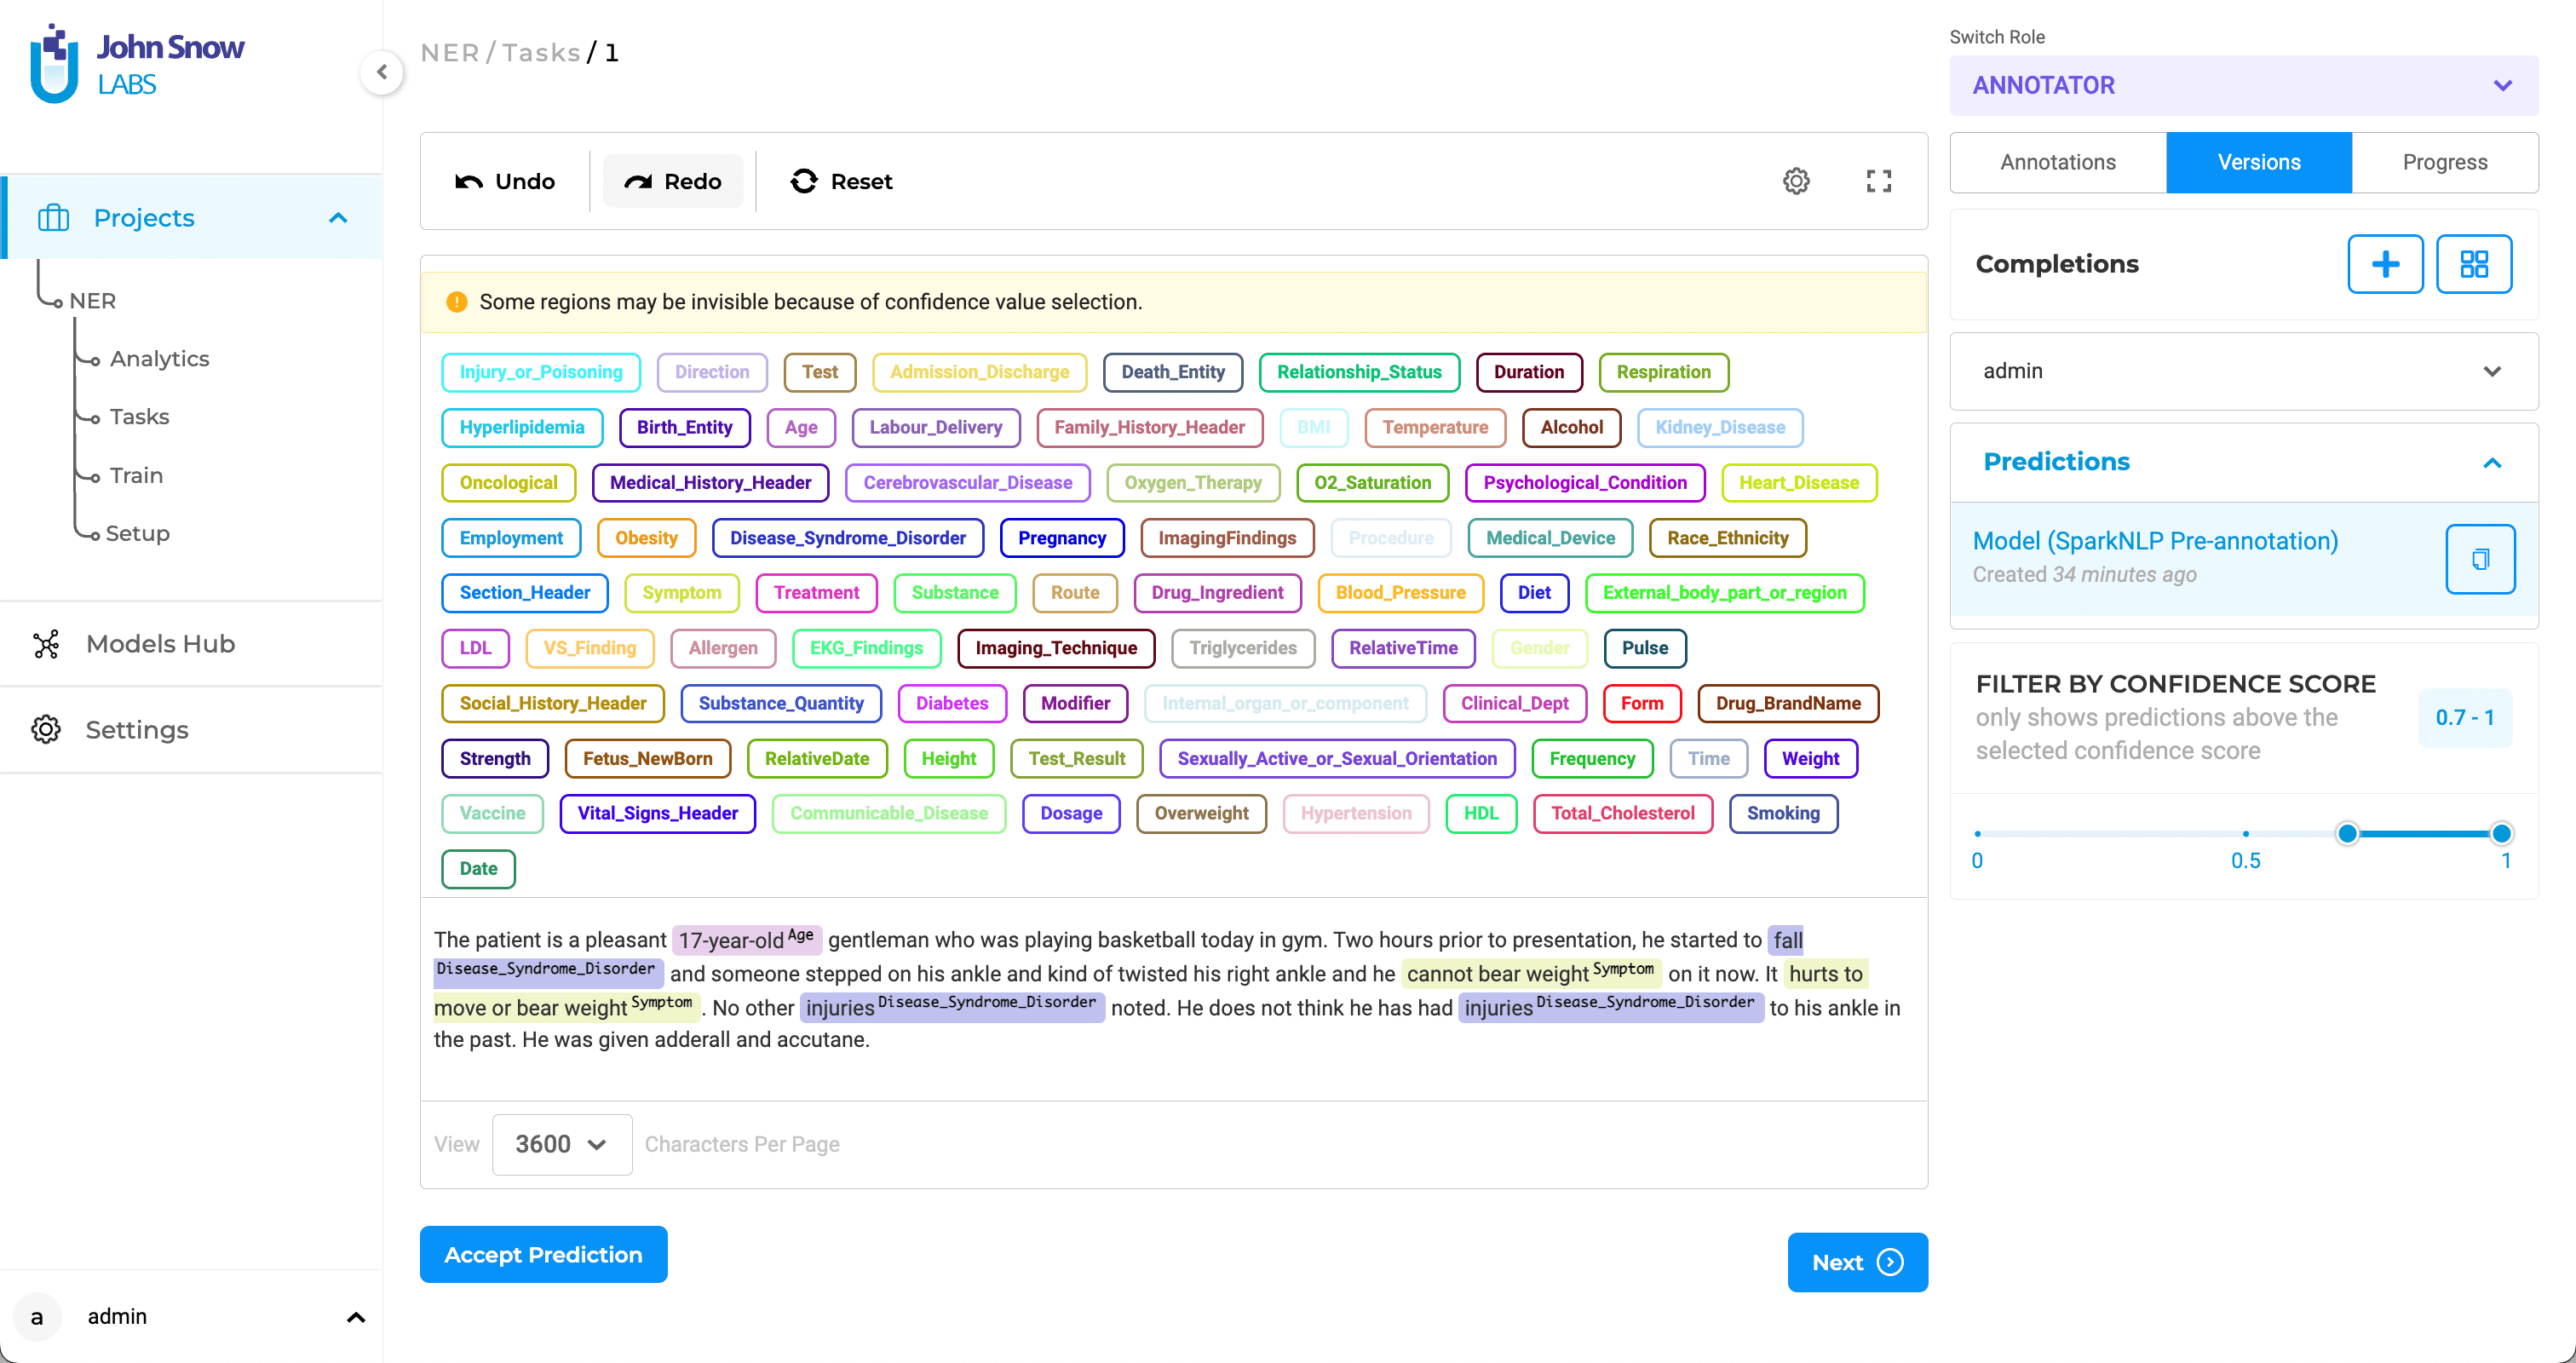
On the Labeling page, when selecting the Prediction widget, all pre-annotations appear in the Annotations section with their scores.
Using the confidence slider, users can filter out low-confidence labels and relations before editing or correcting results.
Both Accept Prediction and Add a new completion based on this prediction apply to the set currently visible after confidence filtering.
Enable Bulk Hiding of Labels
Users can hide multiple labels at once, significantly improving efficiency when working with large datasets.
The eye icon on the Annotations widget, enables users to hide all labels within selected groups with a single click. To use this feature, users must switch from Region View to Labels View in the annotation widget.
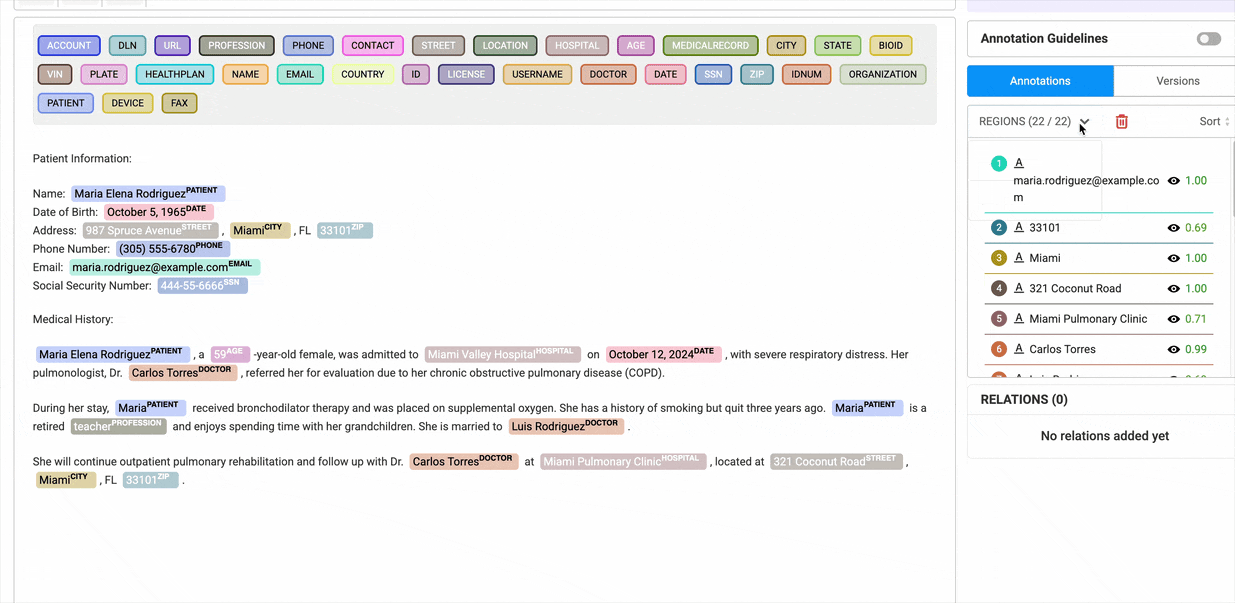
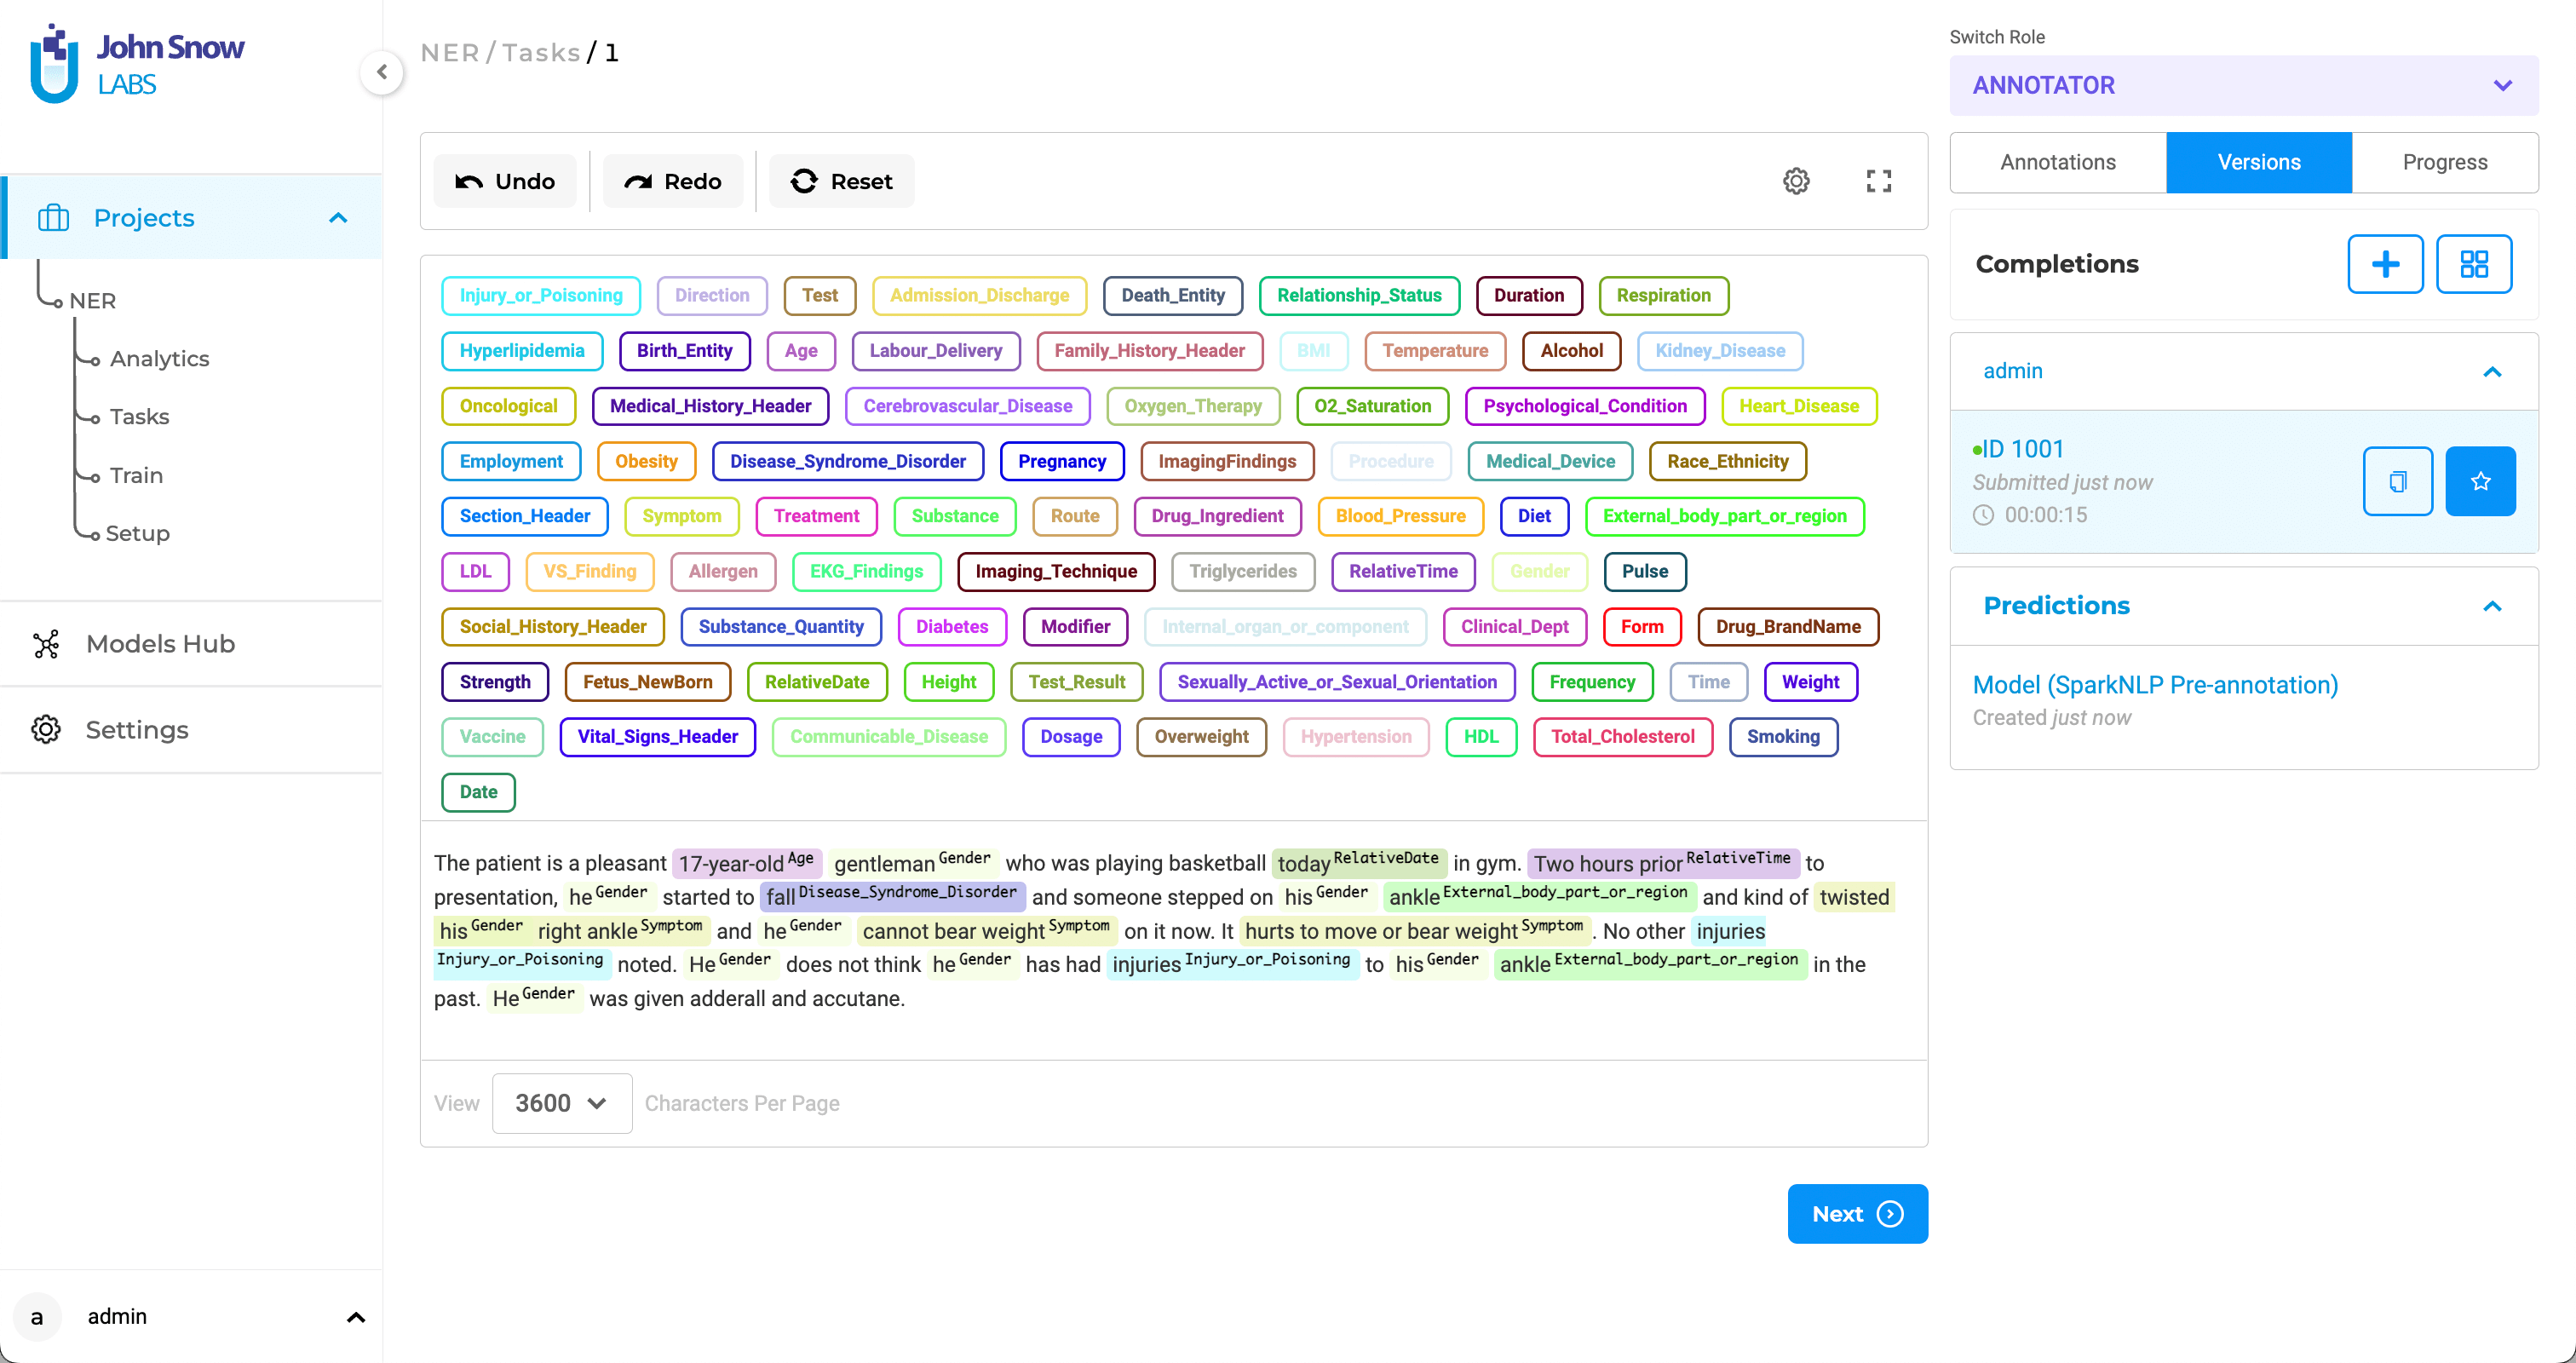
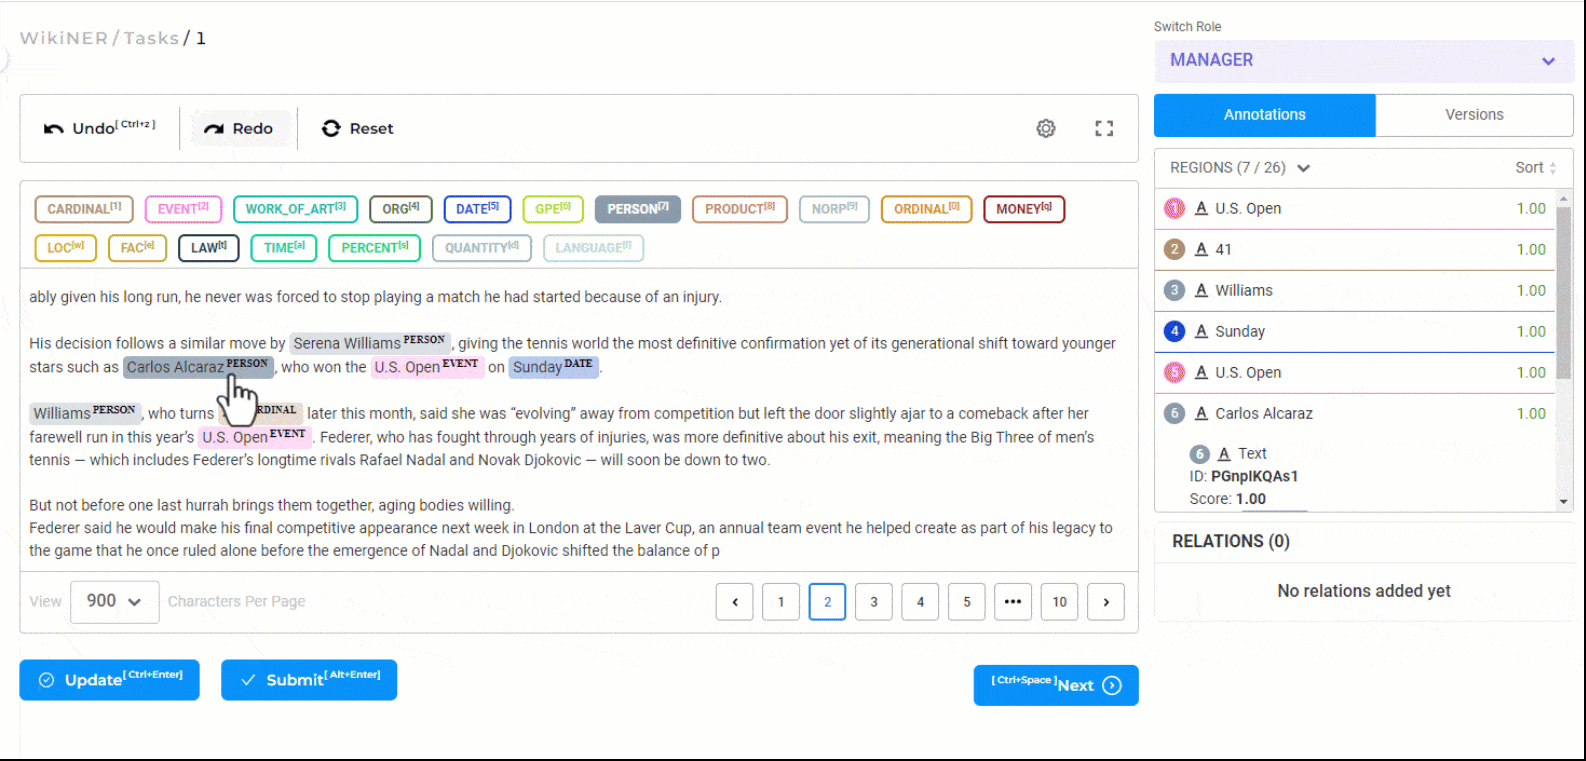
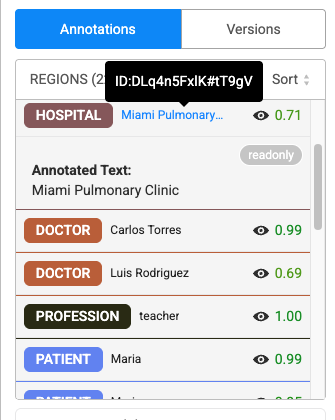
Annotations
The Annotations widget has two sections.
- Gives a list overview of all annotated chunks. When you click on any annotation, it gets automatically highlighted in the labeling editor. We can edit or remove annotations from here.
- Lists all the relations that have been created. When the user moves the mouse over any one relation, it is highlighted in the labeling editor.
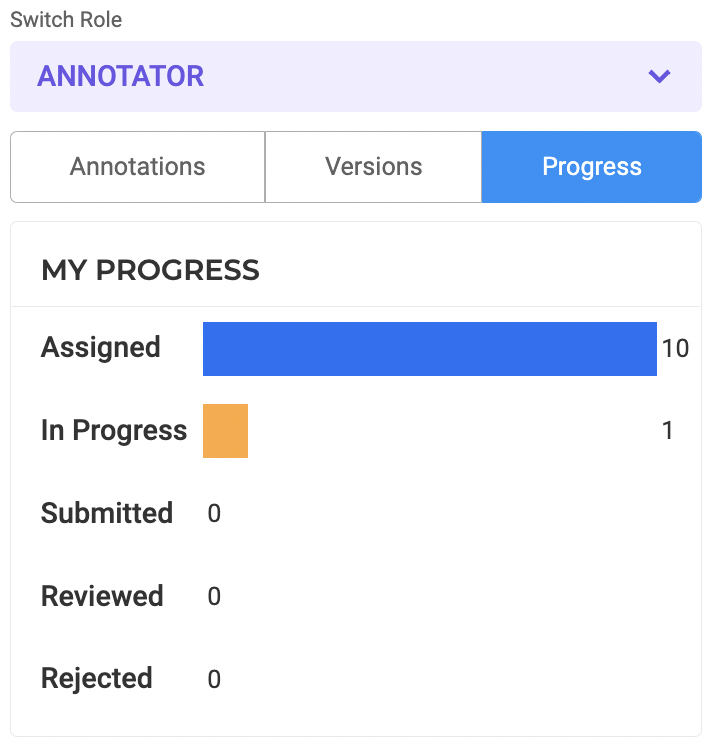
Progress Tracking
Annotator/Reviewer can see their overall work progress from within the labeling page. The status is calculated for their assigned work.

Enhanced Comparison View for Completion Differences
Annotators and managers can easily compare two completions side-by-side. This significantly simplifies the process of identifying differences between versions as they are automatically highlighted.
How to Use:
- Step 1: Click on the Comparison View button.
- Step 2: Select the two completions you want to compare.
- Step 3: Click on Show Diff.
The Diff View will then open, displaying the differences between the two completions. Annotations that differ are highlighted, with green indicating the annotation in base completion and red indicating the annotations in compared completion.
Benefits:
- Efficiency and Clarity: Automatically highlighting differences saves time and reduces the potential for human error in identifying discrepancies. Also, the visual differentiation between annotations makes it easy to understand what changes have been made.
- Collaboration: Facilitates better communication between annotators and project managers by clearly showing where differences occur.
This feature enhances the accuracy and efficiency of the annotation process, ensuring that all team members can easily identify and address any inconsistencies between completions.
Text Annotation
Named Entity Recognition
To extract information using NER labels, we first click on the label to select it or press the shortcut key assigned to it, and then, with the mouse, select the relevant part of the text. We can easily edit the incorrect labeling by clicking on the labeled text and then selecting the new label you want to assign to this text.

To delete the label from the text, we first click on the text on the labeling editor and then press backspace.
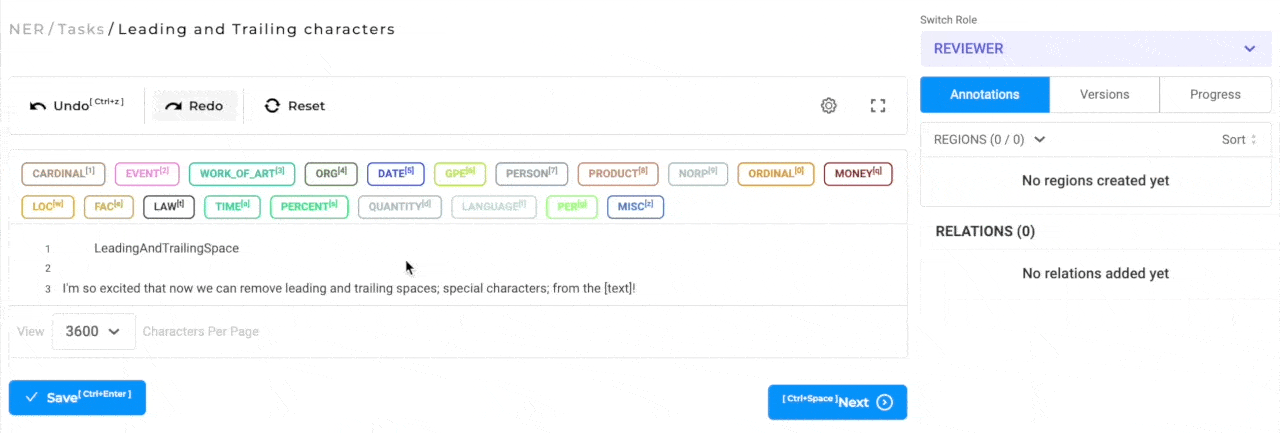
Trim leading and ending special characters in annotated chunks
When annotating text, it is possible and probable that the annotation is not very precise and the chunks contain leading/trailing spaces and punctuation marks. By default all the leading/trailing spaces and punctuation marks are excluded from the annotated chunk. The labeling editor settings has a new configuration option that can be used to enable/disable this feature if necessary.
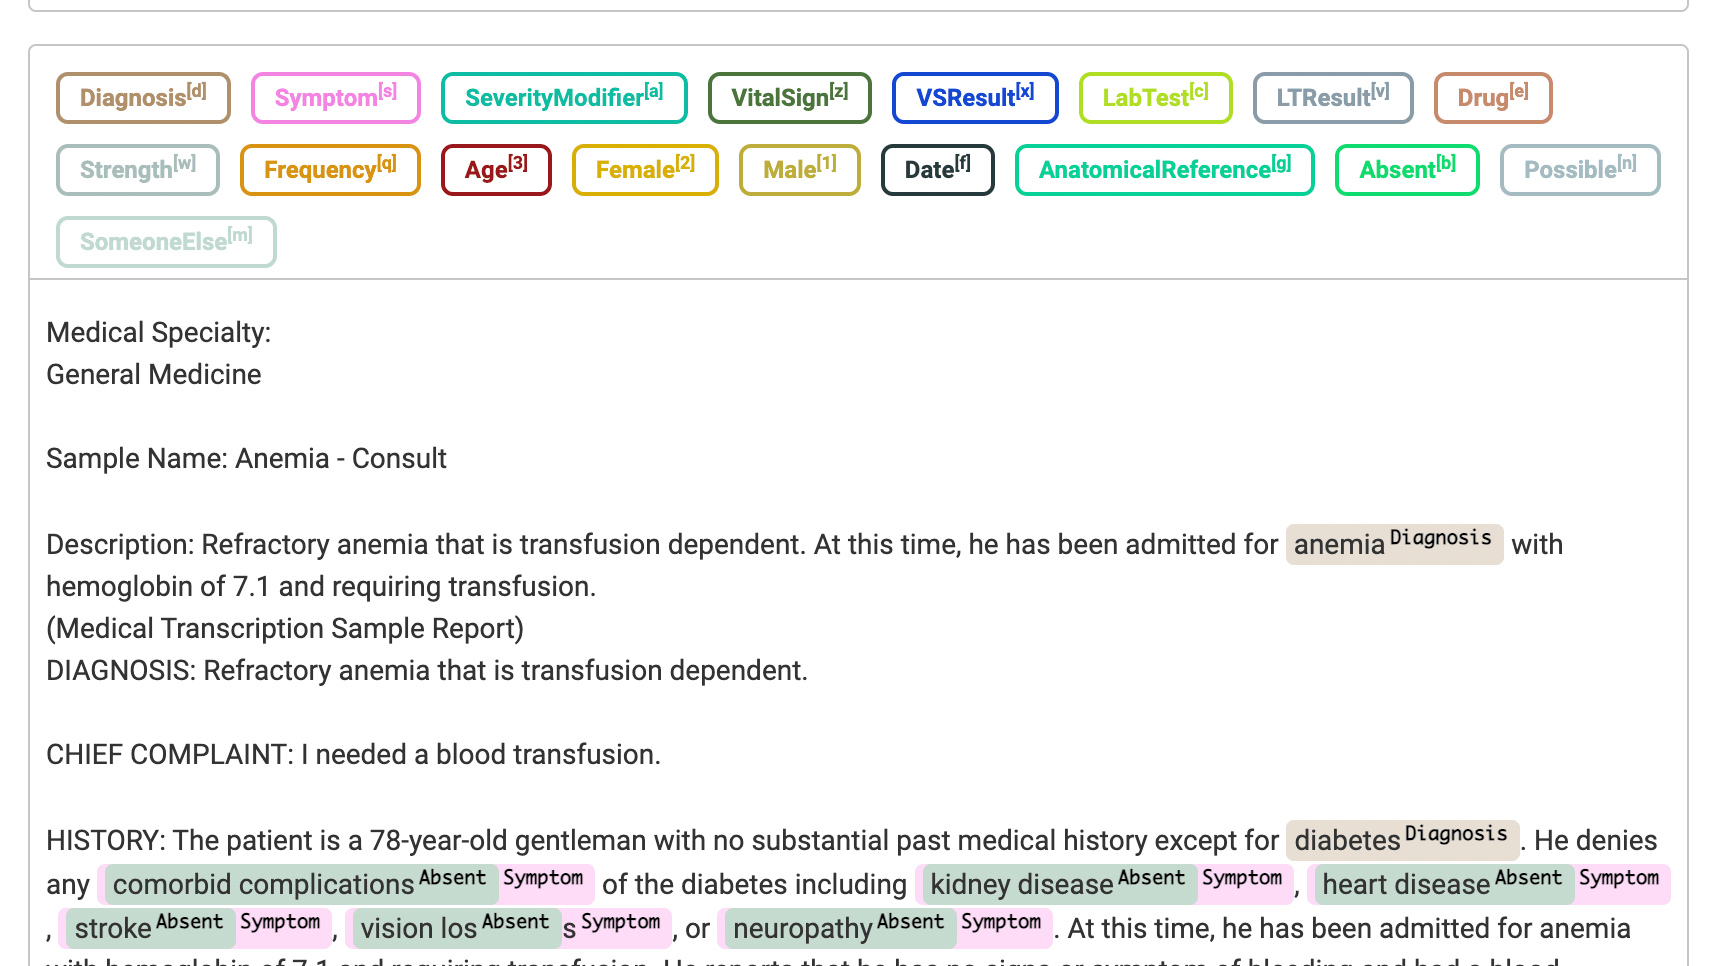
Assertion Labels
To add an assertion label to an extracted entity, select the assertion label and select the labeled entity (from NER) in the labeling editor. After this, the extracted entity will have two labels - one for NER and one for assertion. In the example below, the chunks
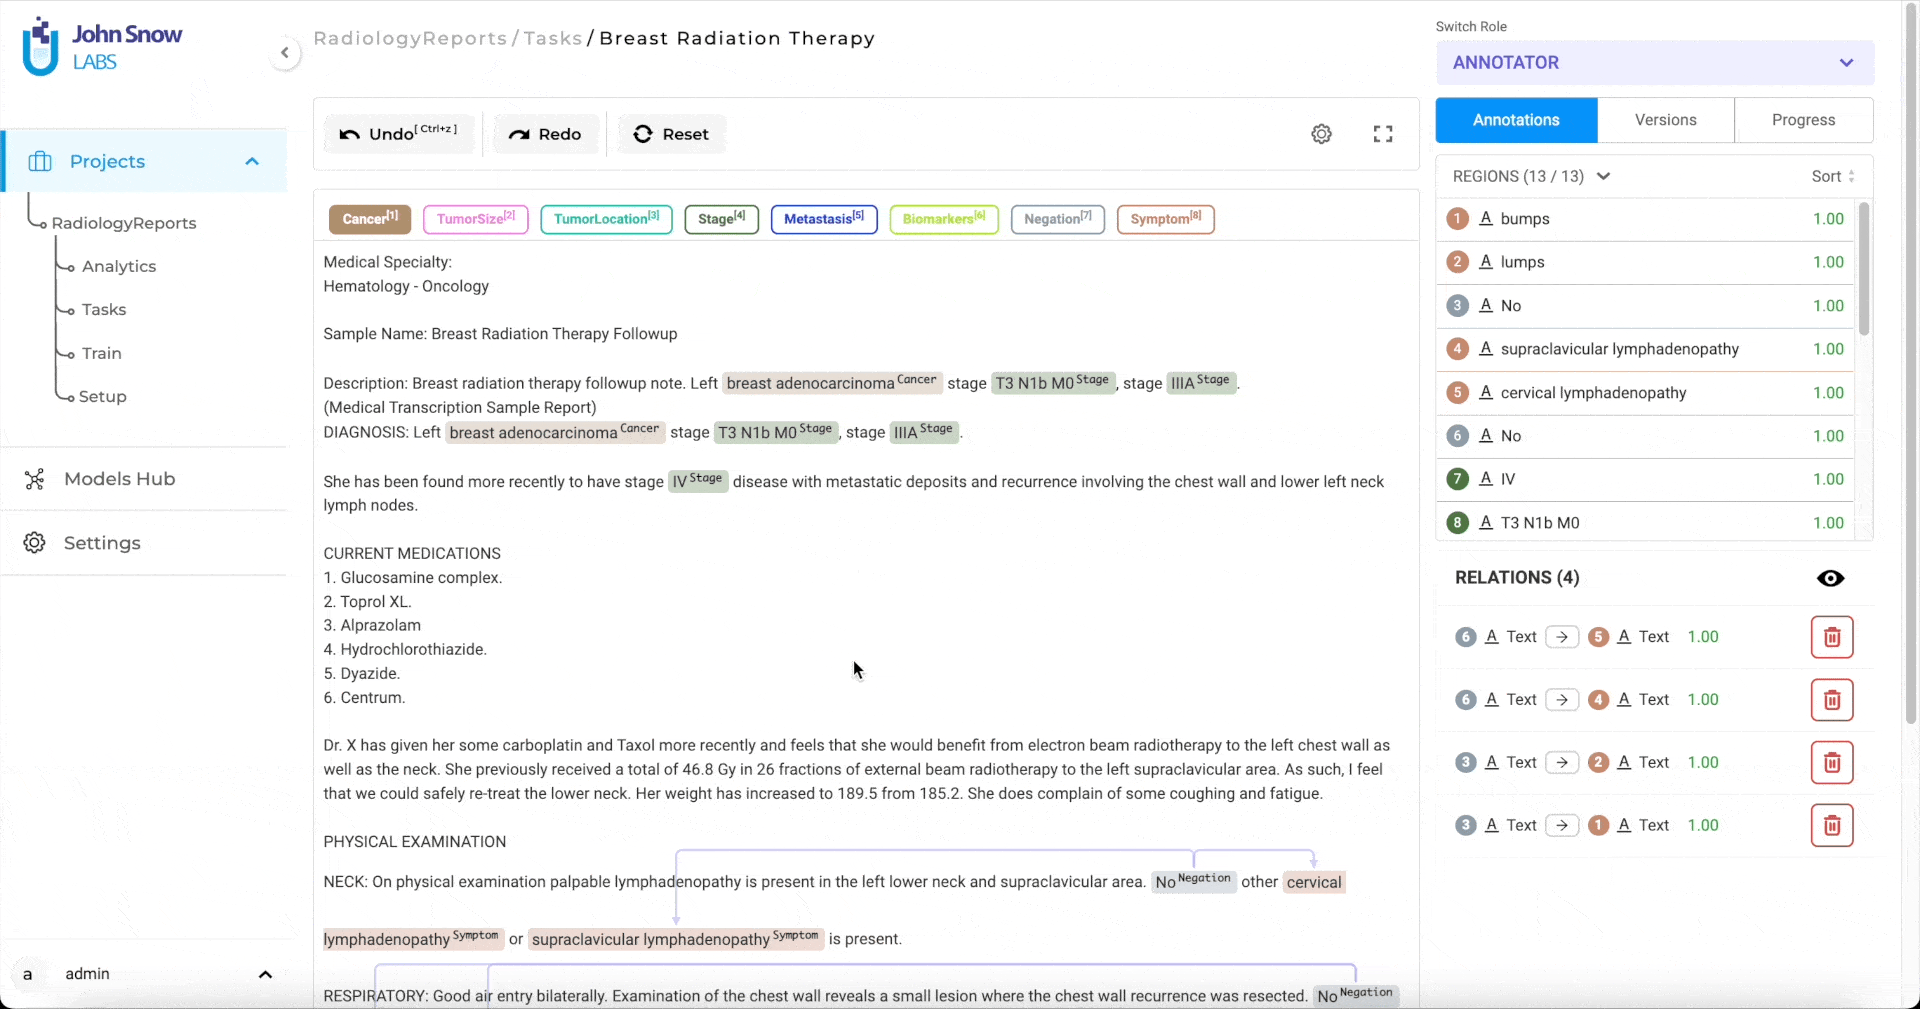
Relation Extraction
Creating relations with the Generative AI Lab is very simple. First, click on any one labeled entity, then press the
You can add a label to the relation, change its direction or delete it using the contextual menu displayed next to the relation arrow or from the relation box.

Cross page Annotation
Generative AI Lab supports cross-page NER annotation for
Visual NER Annotation
Annotating text included in image documents (e.g., scanned documents) is a common use case in many verticals but comes with several challenges. With the
This feature is powered by
Here is how we can use it:
- Upload a valid
[Visual NLP](/docs/en/ocr) license. See how to do this here. - Create a new project, specify a name for your project, add team members if necessary, and from the list of predefined templates (Default Project Configs) choose
Visual NER Labelingunder IMAGE content type. - Update the configuration if necessary. This might be useful if you want to use other labels than the default ones. Click the
Save Configbutton. While saving the project, a confirmation dialog is displayed to ask if you want to deploy the OCR pipeline. SelectYesfrom the confirmation dialog. - Import the tasks you want to annotate (images or PDF documents).
- Start annotating text on top of the image by clicking on the text tokens, or by drawing bounding boxes on top of chunks or image areas.
- Export annotations in your preferred format.
The entire process is illustrated below:
Redesigned Annotation Interface for NER Projects
The annotation widget interface has been streamlined for Text and Visual NER project types. This update focuses on enhancing clarity, reducing visual clutter, and improving overall usability, without altering the core workflow. All previously available data remains intact in the exported JSON, even if not shown in the UI.
Cleaner interface layout
- Removed redundant or non-essential data from the annotation view.
- Grouped the Meta section visually to distinguish it clearly and associate the delete button specifically with metadata entries.
- Default confidence scores display (1.00) with green highlighting.
- Hover functionality on labeled text reveals text ID.
Support for multi-page PDF documents
When a valid Visual NLP license is available, Generative AI Lab offers support for multi-page PDF annotation. We can import, annotate, and export multi-page PDF files easily.
Users have two options for importing a new PDF file into the Visual NER project:
- Import PDF file from local storage.
- Add a link to the PDF file in the file attribute.

After import, the task becomes available on the
Users can also jump to a specific page in multi-page task, instead of passing through all pages to reach a target section of a PDF document.

Support for multiple OCR servers
Just like for Preannotation servers, Generative AI Lab supports deployment of multiple OCR servers. If a user has uploaded a Visual NLP license,
To work on a Visual NER project, users have to deploy at least one OCR server. Any OCR server can perform preannotation. To select the OCR server, users need to go to the Create Server option and then clicking on the Deploy button.
