New project
Every project in Generative AI Lab should have the following information:
- a unique name and a short description;
- a team of annotators, reviewers and a manager who will collaborate on the project;
- a configuration which specifies the type of annotations that will be created.
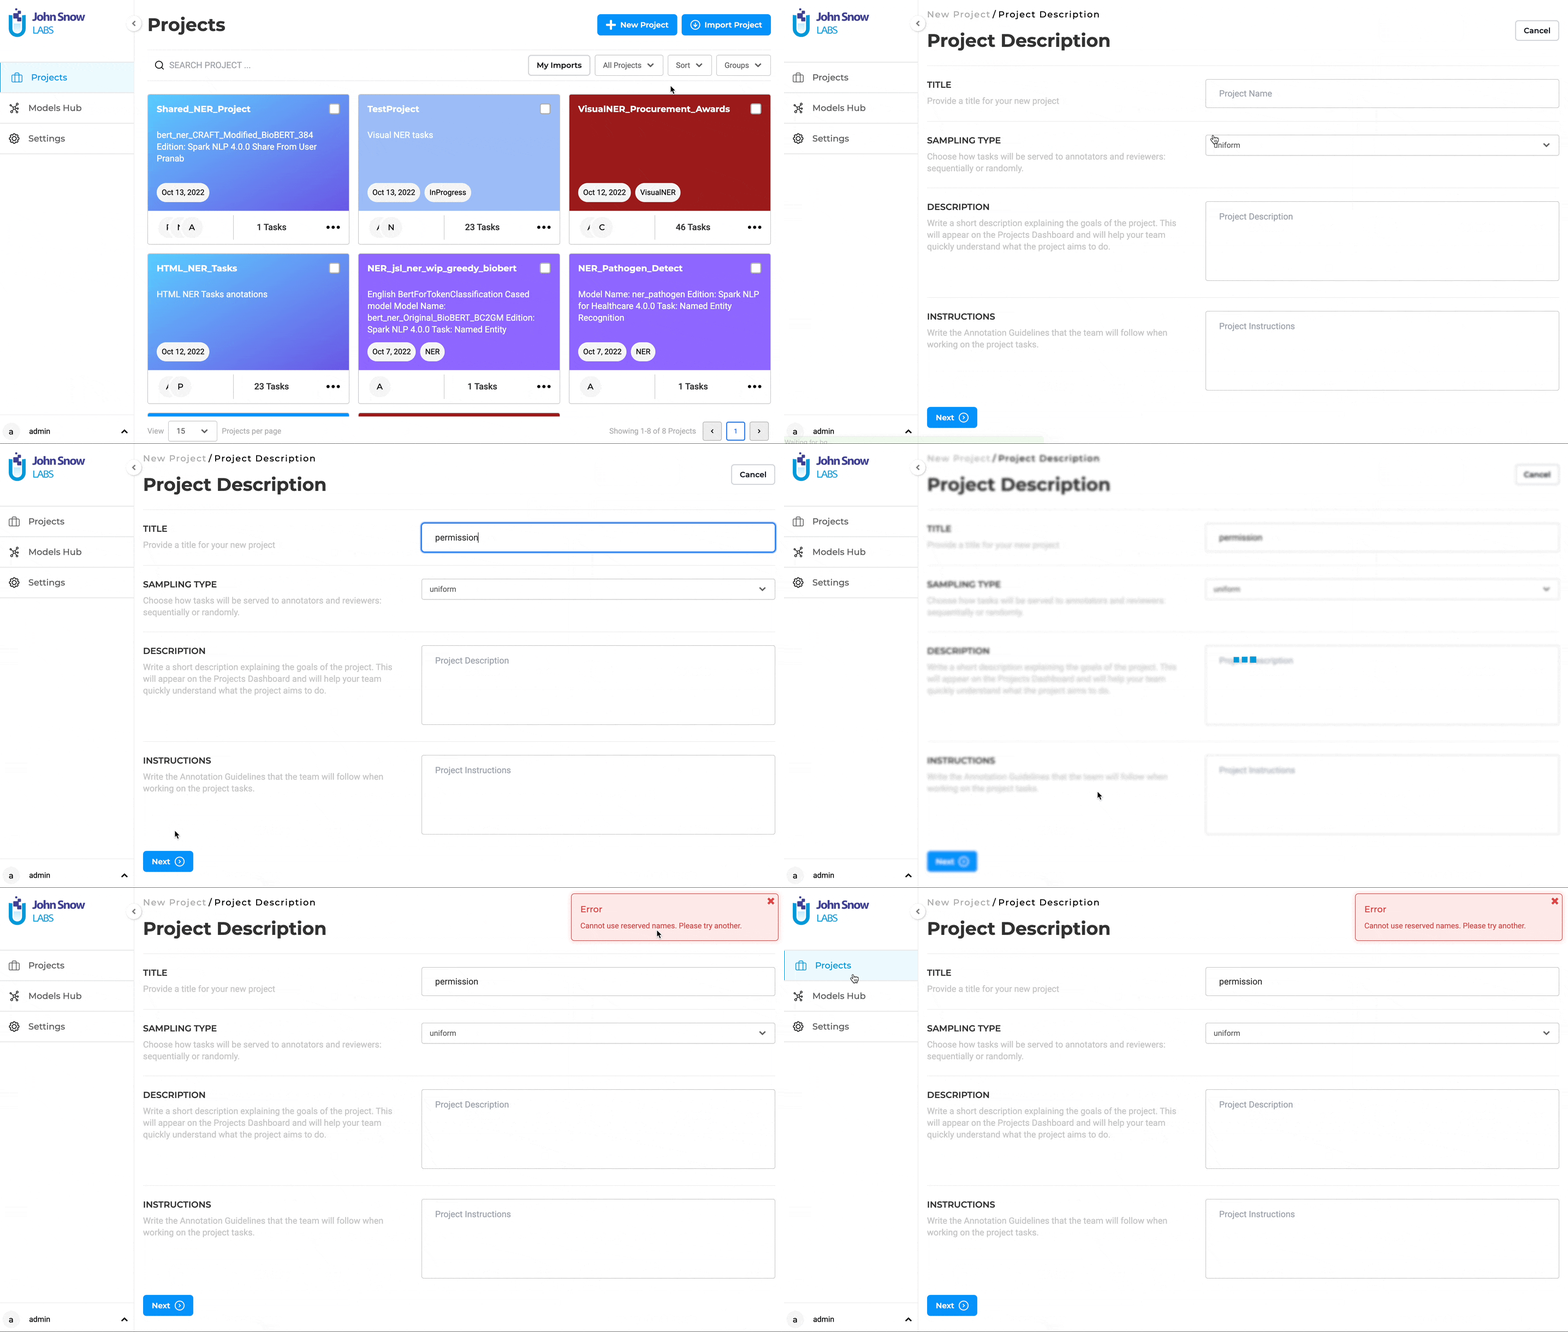
You can create a new project using the dedicated wizard which will guide users through each step of the project creation and configuration process. Those steps are illustrated below.
Project Description
To open the project creation wizard click on the + New Project button on the Projects Dashboard, then provide the following information:
- a unique name or title;
- a sampling type which will define how the tasks assigned to annotators/reviewers will be served - randomly or sequentially;
- a short description that helps users quickly grasp the main purpose of the project;
- instructions for annotators or Annotation Guidelines which will help annotators and reviewers generate high quality annotations.

NOTE: Reserved words cannot be used as project names. The use of keywords like count, permission, or name as project names generated UI glitches. To avoid such issues, these keywords are no longer accepted as project names.

Adding Team Members
When working in teams, projects can be shared with other team members.
The user who creates a project is called a Project Owner. He/she has complete visibility and ownership of the project for its entire lifecycle. If the Project Owner is removed from the user database, then all his/her projects are transfered to a new project owner. The Project Owner can edit the project configuration, can import/export tasks, can create a project team that will work on his project and can access project analytics.
When defining the project team, a project owner has access to three distinct roles: Annotator, Reviewer, and Manager. These are very useful for most of the workflows that our users follow.
- An
Annotatoris able to see the tasks which have been assigned to him or her and can create annotations on the documents. - The
Revieweris able to see the work of the annotators and approve it or reject in case he finds issues that need to be solved. - The
Manageris able to see the work of theAnnotatorsand of theReviewersand he can assign tasks to team members. This is useful for eliminating work overlap and for a better management of the work load.
To add a user to your project team, select your Project, then from the left side menu access the Setup option and then the Team option. On the Add Team Member page that opens, start typing the name of a user in the available text box. This will populate a list of available users having the username start with the characters you typed. From the dropdown select the user you want to add to your team. Select a role for the user and click on the Add to team button.

In the Add Team Member page users can add/remove/update the team members even in the case of a large number of members. The team members are displayed in a tabular view. Each member has a priority assigned to them for CONLL export which can be changed by dragging users across the list.
NOTE: The priority assigned for users in the
Add Team Memberpage is taken into account by the Model Training script for differentiating among the available ground truth completions (when more than one is available for a task) in view of choosing the higer priority completion which will be used for model training. Learn more here.
Project Configuration
The Project Configuration itself is a multi-step process. The wizard will guide users through each step while providing useful information and hints for all available options.

Clone
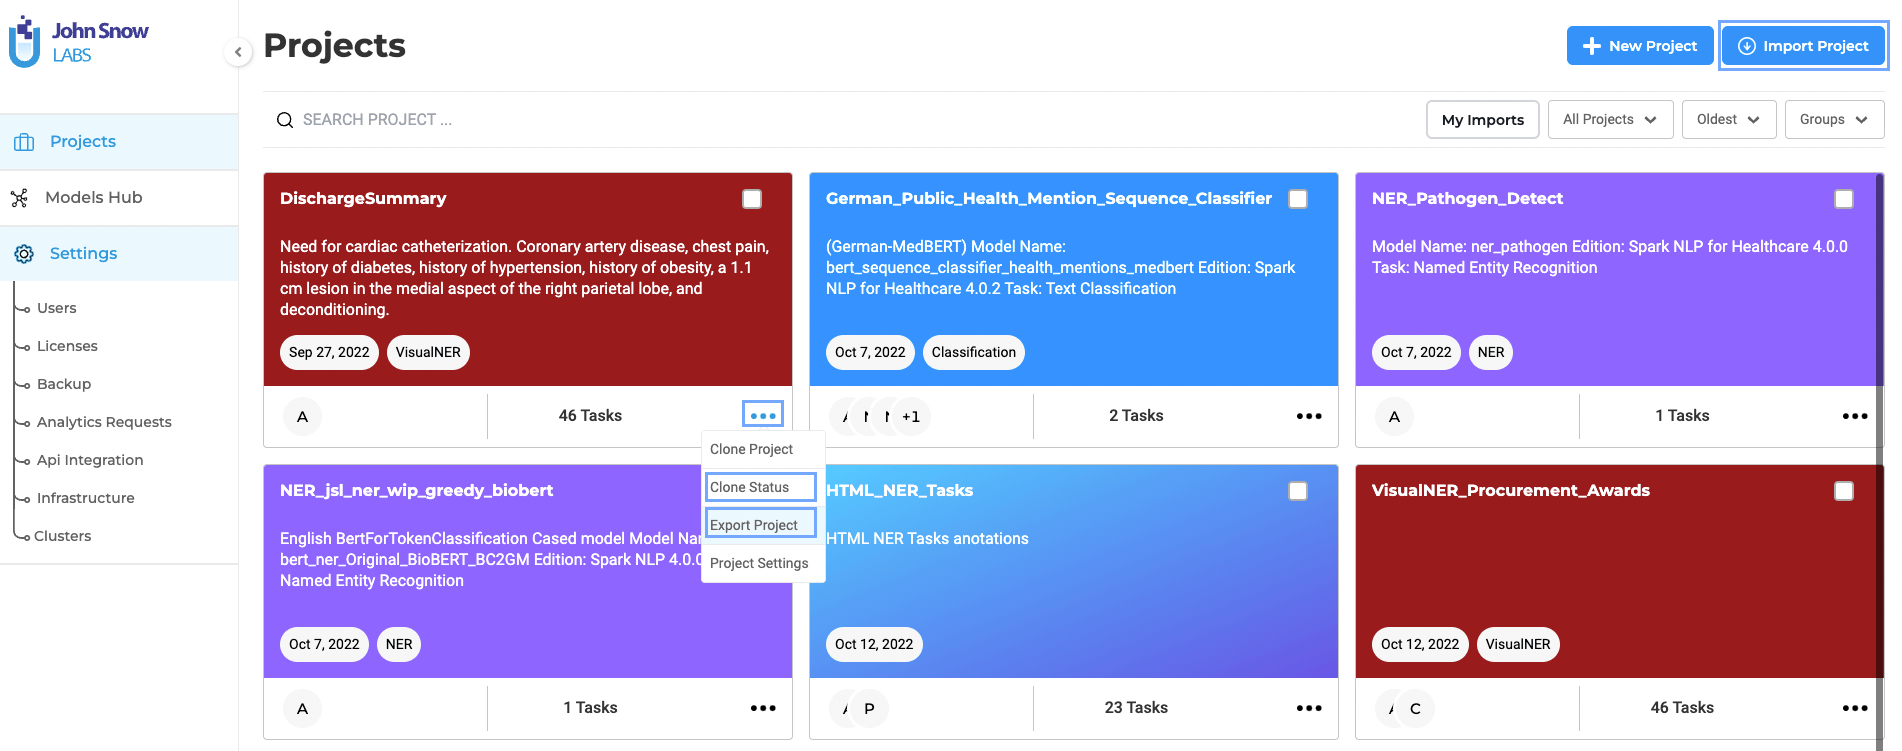
You can create a copy of a project, by using the Clone option. The option to clone the project is also listed in the kebab menu of each project. The cloned project is differentiated as it contains cloned suffix in its project name.

Export
Projects can be exported. The option to export a project is listed in the kebab menu of each project. All project-related items such as tasks, project configuration, project members, task assignments, and comments are included in the export file.
NOTE: Project export does not contain the model trained in the project as models are independent and not attached to a particular project.
Import
A project can be imported by uploading the project zip archive in the upload dialog box. When the project is imported back to Generative AI Lab, all elements of the original project configuration will be included in the new copy.
Project Grouping
As the number of projects can grow significantly over time, for an easier management and organization of those, Generative AI Lab allows project grouping. As such, a project owner can assign a group to one or several of his/her projects. Each group can be assigned a color which will be used to highlight projects included in that group. Once a project is assigned to a group, the group name will appear as a tag on the project tile. At any time a project can be remove from one group and added to another group.
The list of visible projects can be filtered based on group name, or using the search functionality which applies to both group name and project name.

Projects can be organized in custom groups, and each project card will inherit the group color so that the users can visually distinguish the projects easily in a large cluster of projects. The new color picker for the group is user-friendly and customizable.
