Rate PDF
You can rate PDF in Generative AI Lab. The HyperText tag shows the PDF, when you specify “pdf” as the name parameter and pdf header of the JSON in the value parameter. To rate the article, you also need the Rating tag. The Rating tag adds a rating selection to the labeling interface. A simple example configuration is shown below.
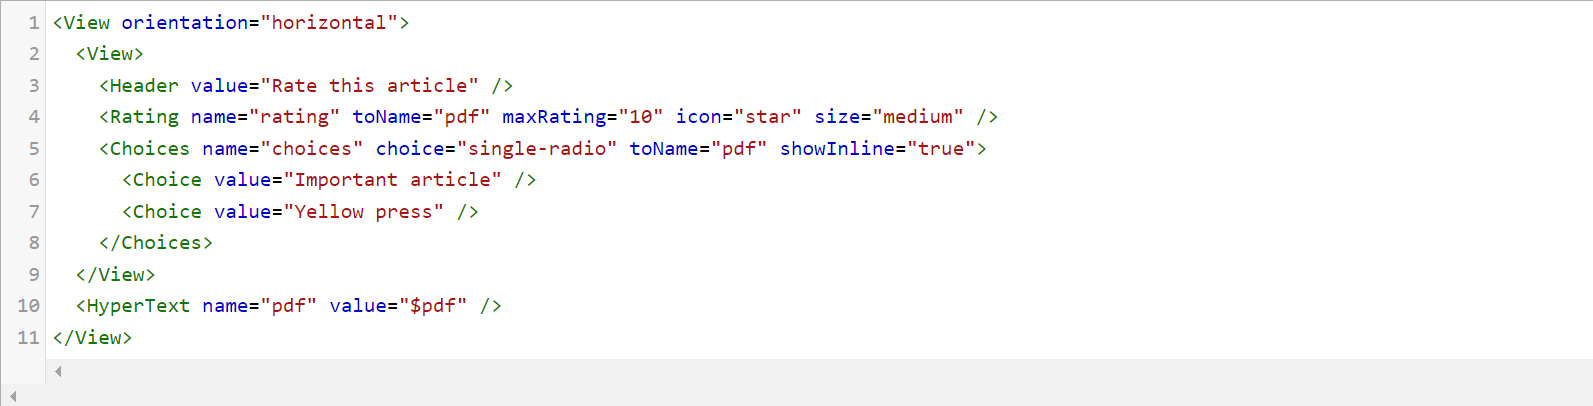
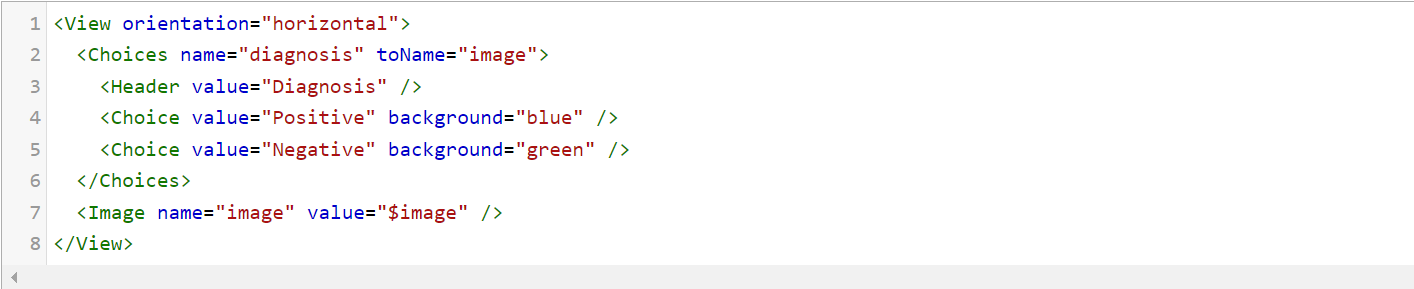
Image Classification
This task mainly uses the Image and Choices tags. You can optionally provide headers to the choices using the Headers tag.
</div><div class="h3-box" markdown="1">
Visual NER Labeling
To label entities in an image, you need to create rectangular labels spanning across the entity to be labeled. To enable this, you have to use RectangleLabels tag that creates labeled rectangles.They are used to apply labels to bounding box semantic segmentation tasks. The name and toName parameters are mandatory.
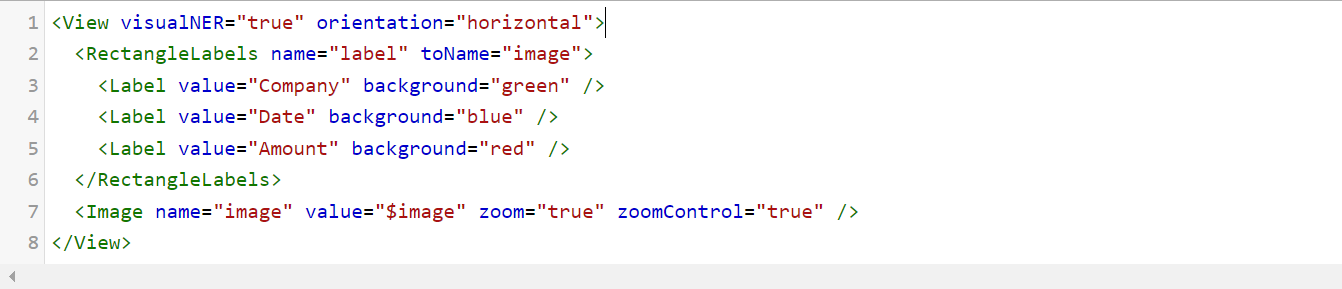
The zoom and zoomControl parameters in the Image tag enable you too zoom in or out the image.
</div>
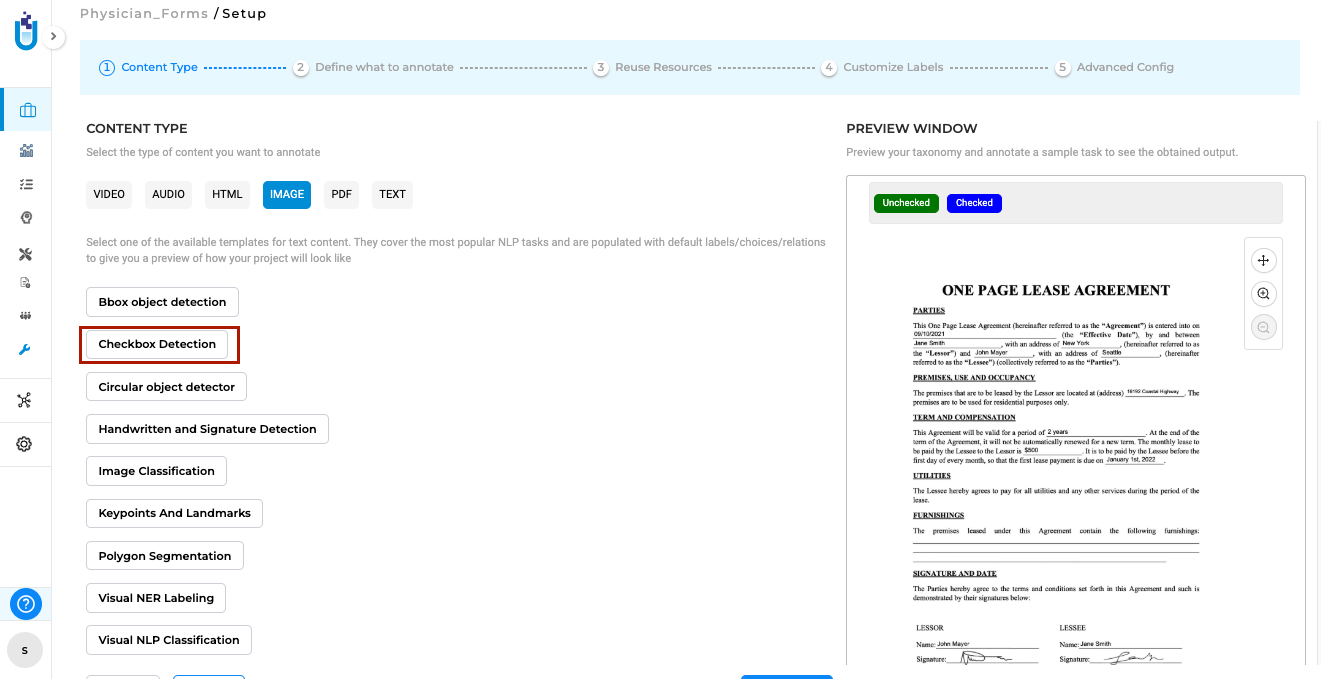
Identify and Validate Checkboxes with Precision
Generative AI Lab includes a dedicated Checkbox Detection project type that enables automatic identification of checkboxes within image-based tasks, detecting both checked and unchecked states.
This project type can be selected during project setup from the Content Type page under the Image tab. When chosen, the default model for checkbox detection is automatically downloaded from the Models Hub and added to the project configuration, allowing users to get started immediately.
Once configured, users can upload PDF or image tasks and use the model to detect checkbox elements and their status directly within the annotation interface.
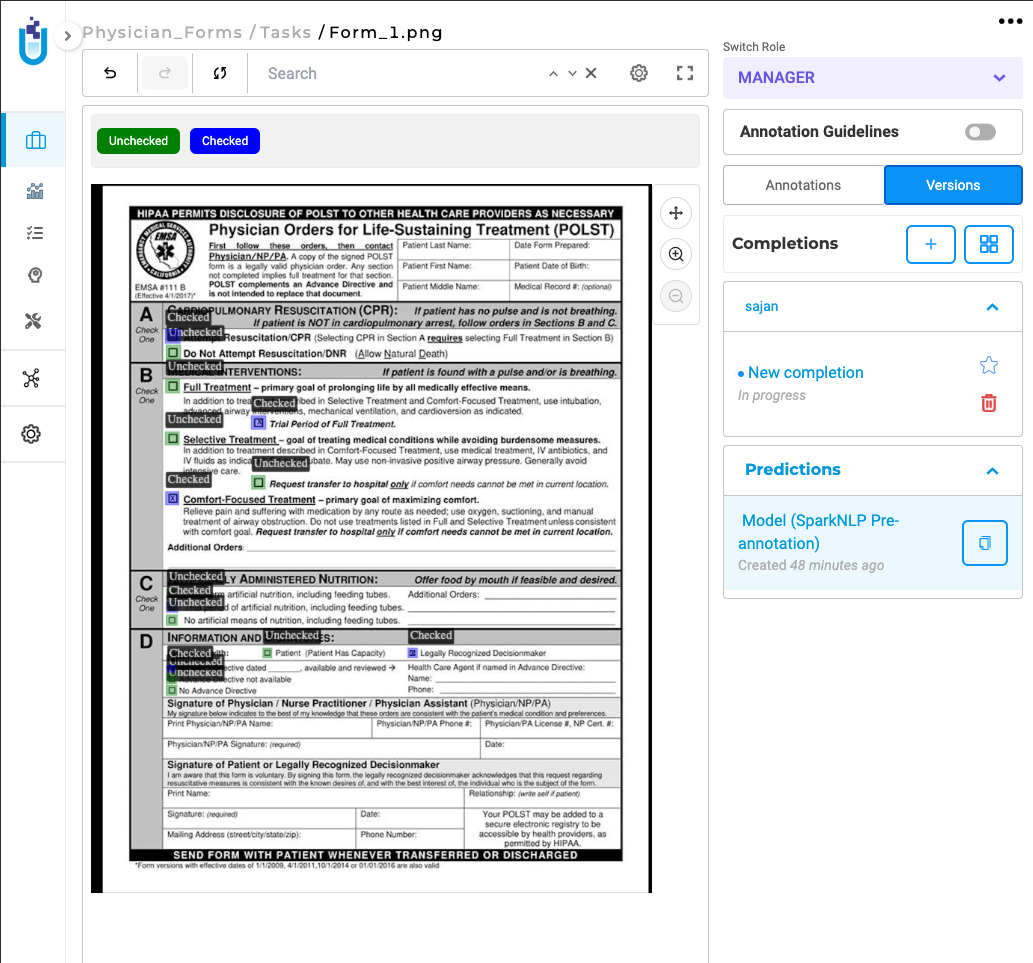
Checkbox Detection integrates seamlessly with existing annotation workflows and requires no additional setup.
Note: The Checkbox Detection model currently operates independently and cannot be combined with other models within the same project.
Detect and Validate Handwritten Text and Signatures
The Handwritten Text and Signature Detection project type enables the automatic identification and annotation of handwritten text and signatures within documents, using John Snow Lab’s Visual NLP Library. The project type can be selected from the Content Type page under Image tab during project configuration. Upon selection, the default model for Handwritten Text and Signature Detection is automatically downloaded from the Models Hub and integrated into the project configuration.

Users can then add relevant tasks to the project and use the model to identify and annotate handwritten content and signatures in documents efficiently.
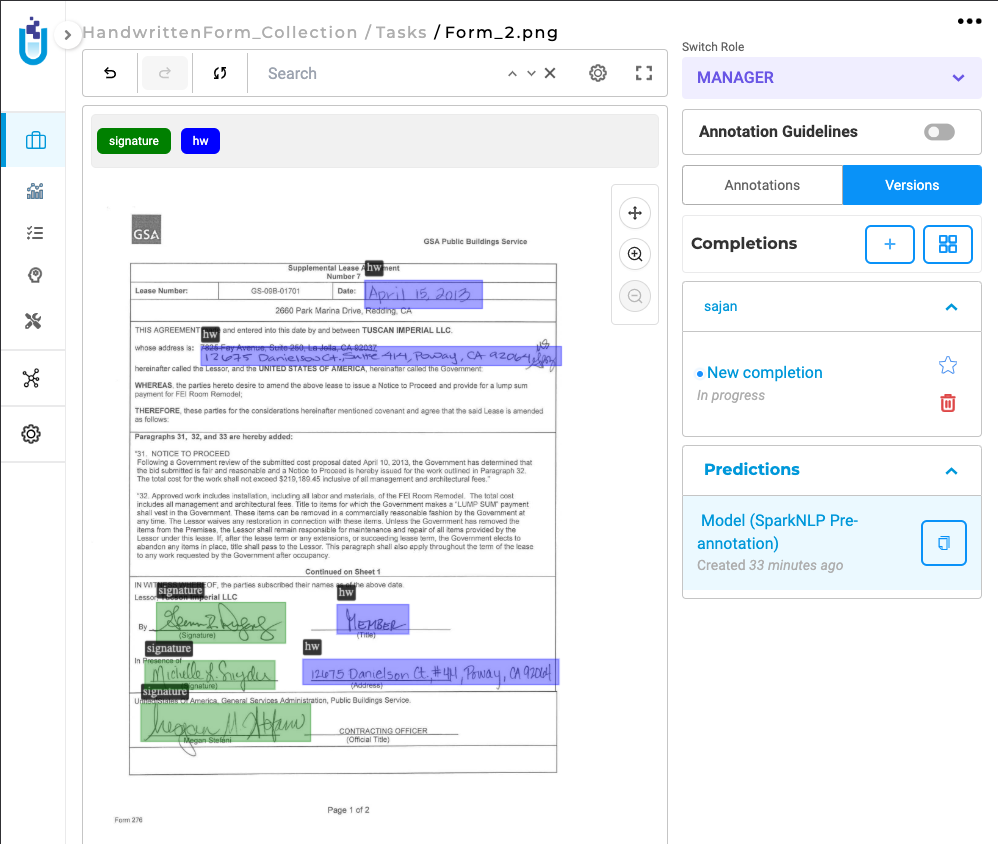
This feature doesn’t change the existing application workflow, and can not be combined with other models at this time.
View Text Alongside Images and Optimized Image Loading in Visual NER
Generative AI Lab introduces an Image-Text Side-by-Side Annotation project type, enabling users to view the original image or PDF alongside its OCR-extracted text. This dual-view layout simplifies the comparison between visual and textual content, allowing annotators to review and label information more accurately and efficiently.
In addition, Visual NER performance has been optimized for faster PDF and image processing. Enhancements include improved zoom and navigation, smoother page transitions, and optimized image loading—especially beneficial for projects handling large, multi-page, or high-resolution documents.
These updates ensure a more responsive and seamless annotation experience. Additional improvements have also been made to model training and de-identification workflows, enhancing accuracy, performance, and overall usability across project types.
Annotate while referencing Orginal Documents
This feature improves visibility for image-based documents by displaying both the image/PDF and its OCR-extracted text side by side. Users can now annotate more efficiently while maintaining a visual reference. While Generative AI Lab has offered annotation on top of Image and PDF formats for quite some time, there was a gap in annotating large amounts of data on top of the original document, as there was not enough space to adequately address more robust annotation projects.
Image on the Left, OCR Text on the Right: By Selecting this project type, users can now view the image/PDF document on the left side of the interface and its corresponding OCR-extracted text on the right side.
Paginated Documents: All document pages are paginated, allowing users to navigate the document effortlessly.
Image and PDF documents now support all text-based annotation features—including NER, assertion, relations, resolvers, and lookup code annotation—and allow OCR text annotation.
Key Features
How to Configure the Project
- Select the Project Template:
- Navigate to the Image tab and choose the Image & Text Side-By-Side Annotation template.
- Save the configuration to proceed.
- Add Models to the Reuse Resource Page:
- Click Next to move to the Reuse Resource page.
- Add the required models, such as NER, relation, and assertion models, to the project.
- Configure Individual Labels:
- Click Next again to access the label configuration page.
- Click on individual labels to add lookup data or resolver models.
- Save and Deploy the Preannotation Server:
- Once all configurations are complete, save the project.
- Deploy the preannotation server to start using the project.
For a visual guide, refer to the GIF below that demonstrates the configuration process step-by-step:
How to Use Preannotation
After deploying the preannotation server, follow these steps to preannotate your documents:
- Import a PDF or Image:
- Go to the Task Page and navigate to the Import Page.
- Import the PDF or image you wish to annotate.
- Automatic OCR Processing:
- The imported document will automatically pass through our OCR process.
- Once OCR is complete, a task will be generated for the document.
- Preannotate the Task:
- Use the deployed preannotation server to preannotate the task.
- Alternatively, click on the task to annotate it manually.
- Automatic NER Label Projection:
- As you annotate the text side, NER labels are automatically projected onto the image side for visual reference.
- This ensures a seamless and intuitive annotation experience.
For a visual guide, refer to the GIF below that demonstrates the pre-annotation/annotation process step-by-step:
Image with Text Annotation (Performance-Optimized)
The second project template is similar to the first but is optimized for speed and larger multi-page PDFs. It maintains the side-by-side view found in the above project without the NER labels appearing on the image. This is to improve annotation speed and reduce server resources. This will work better for high-volume document processing.
HCC Coding for PDF Projects
Generative AI Lab supports HCC (Hierarchical Condition Category) Coding for PDF and text-based projects.
These specialized project types enable annotators to link clinical entities detected in PDFs to their corresponding HCC codes, improving efficiency in medical coding and risk adjustment workflows.
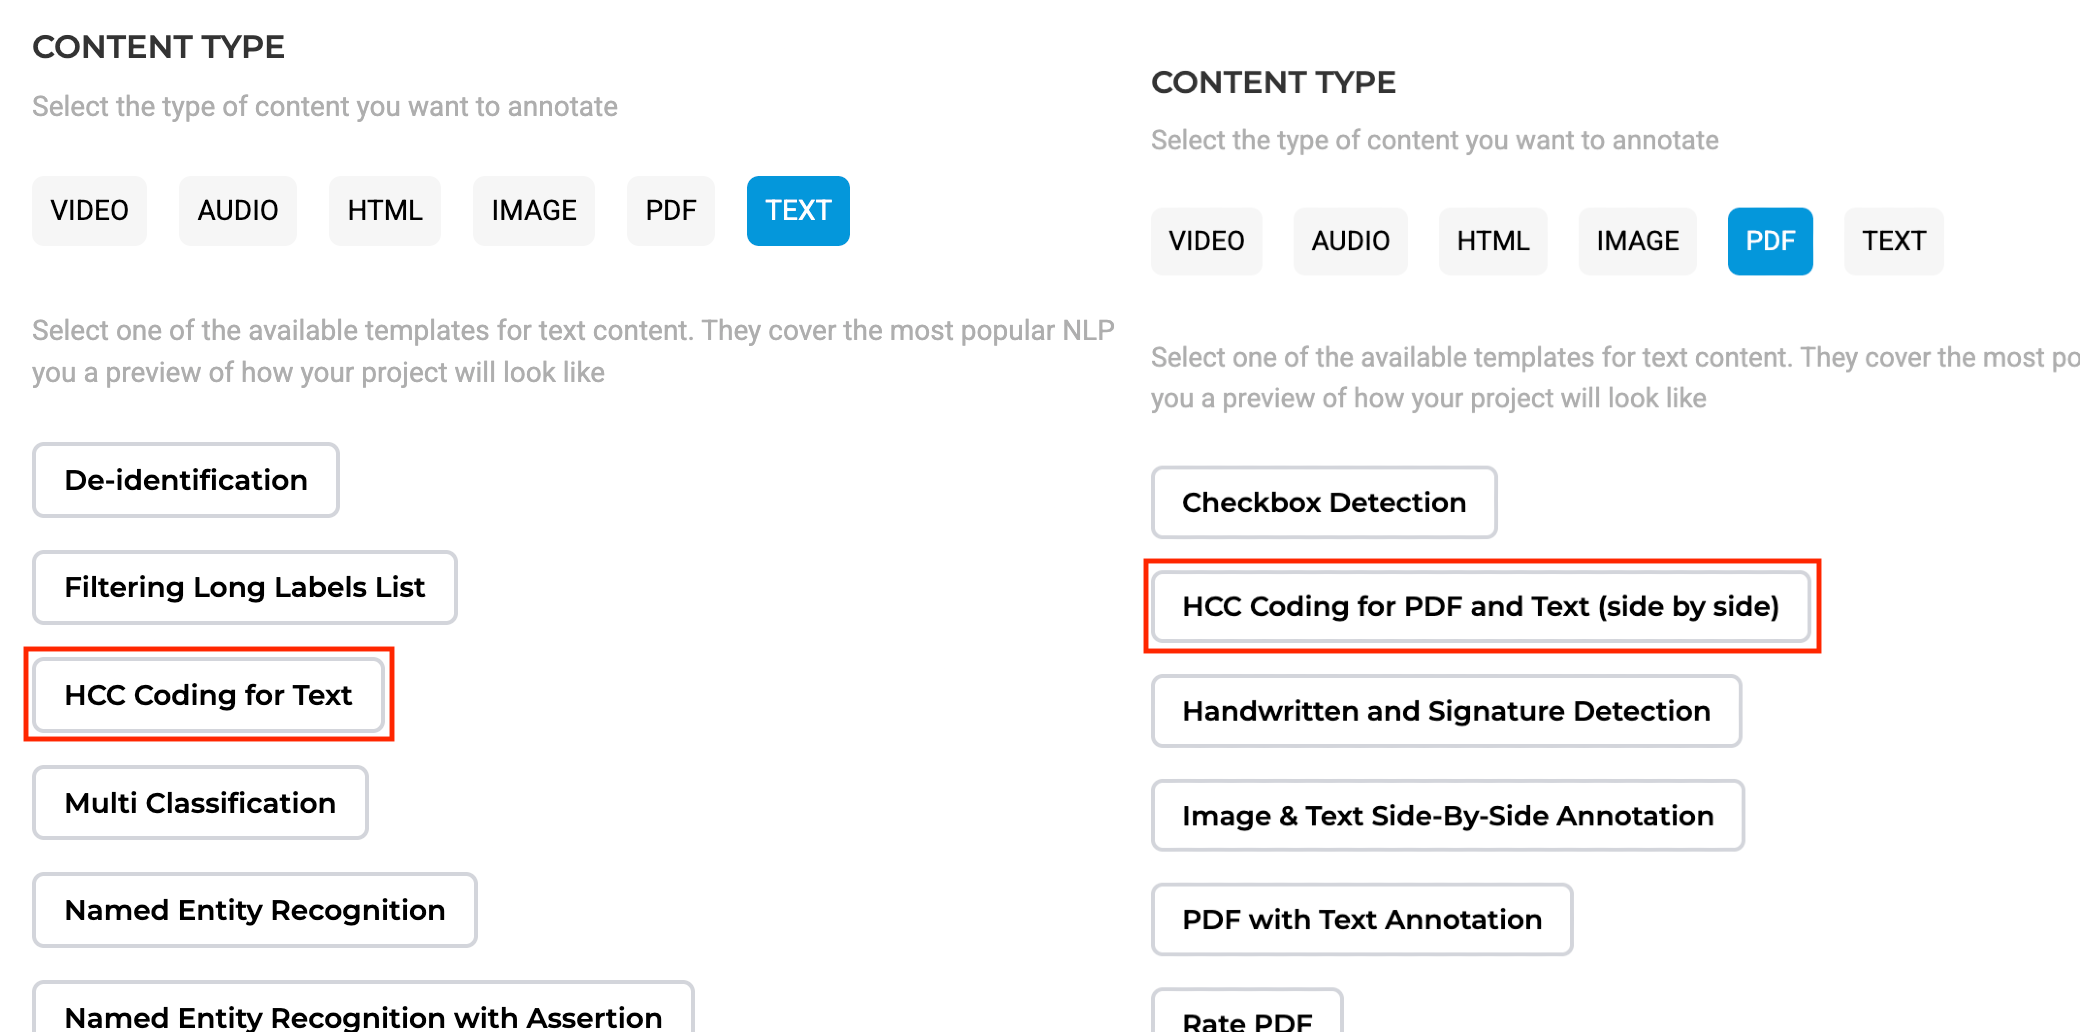
Available Templates
- HCC Coding for Text
- HCC Coding for PDF + Text (side-by-side)
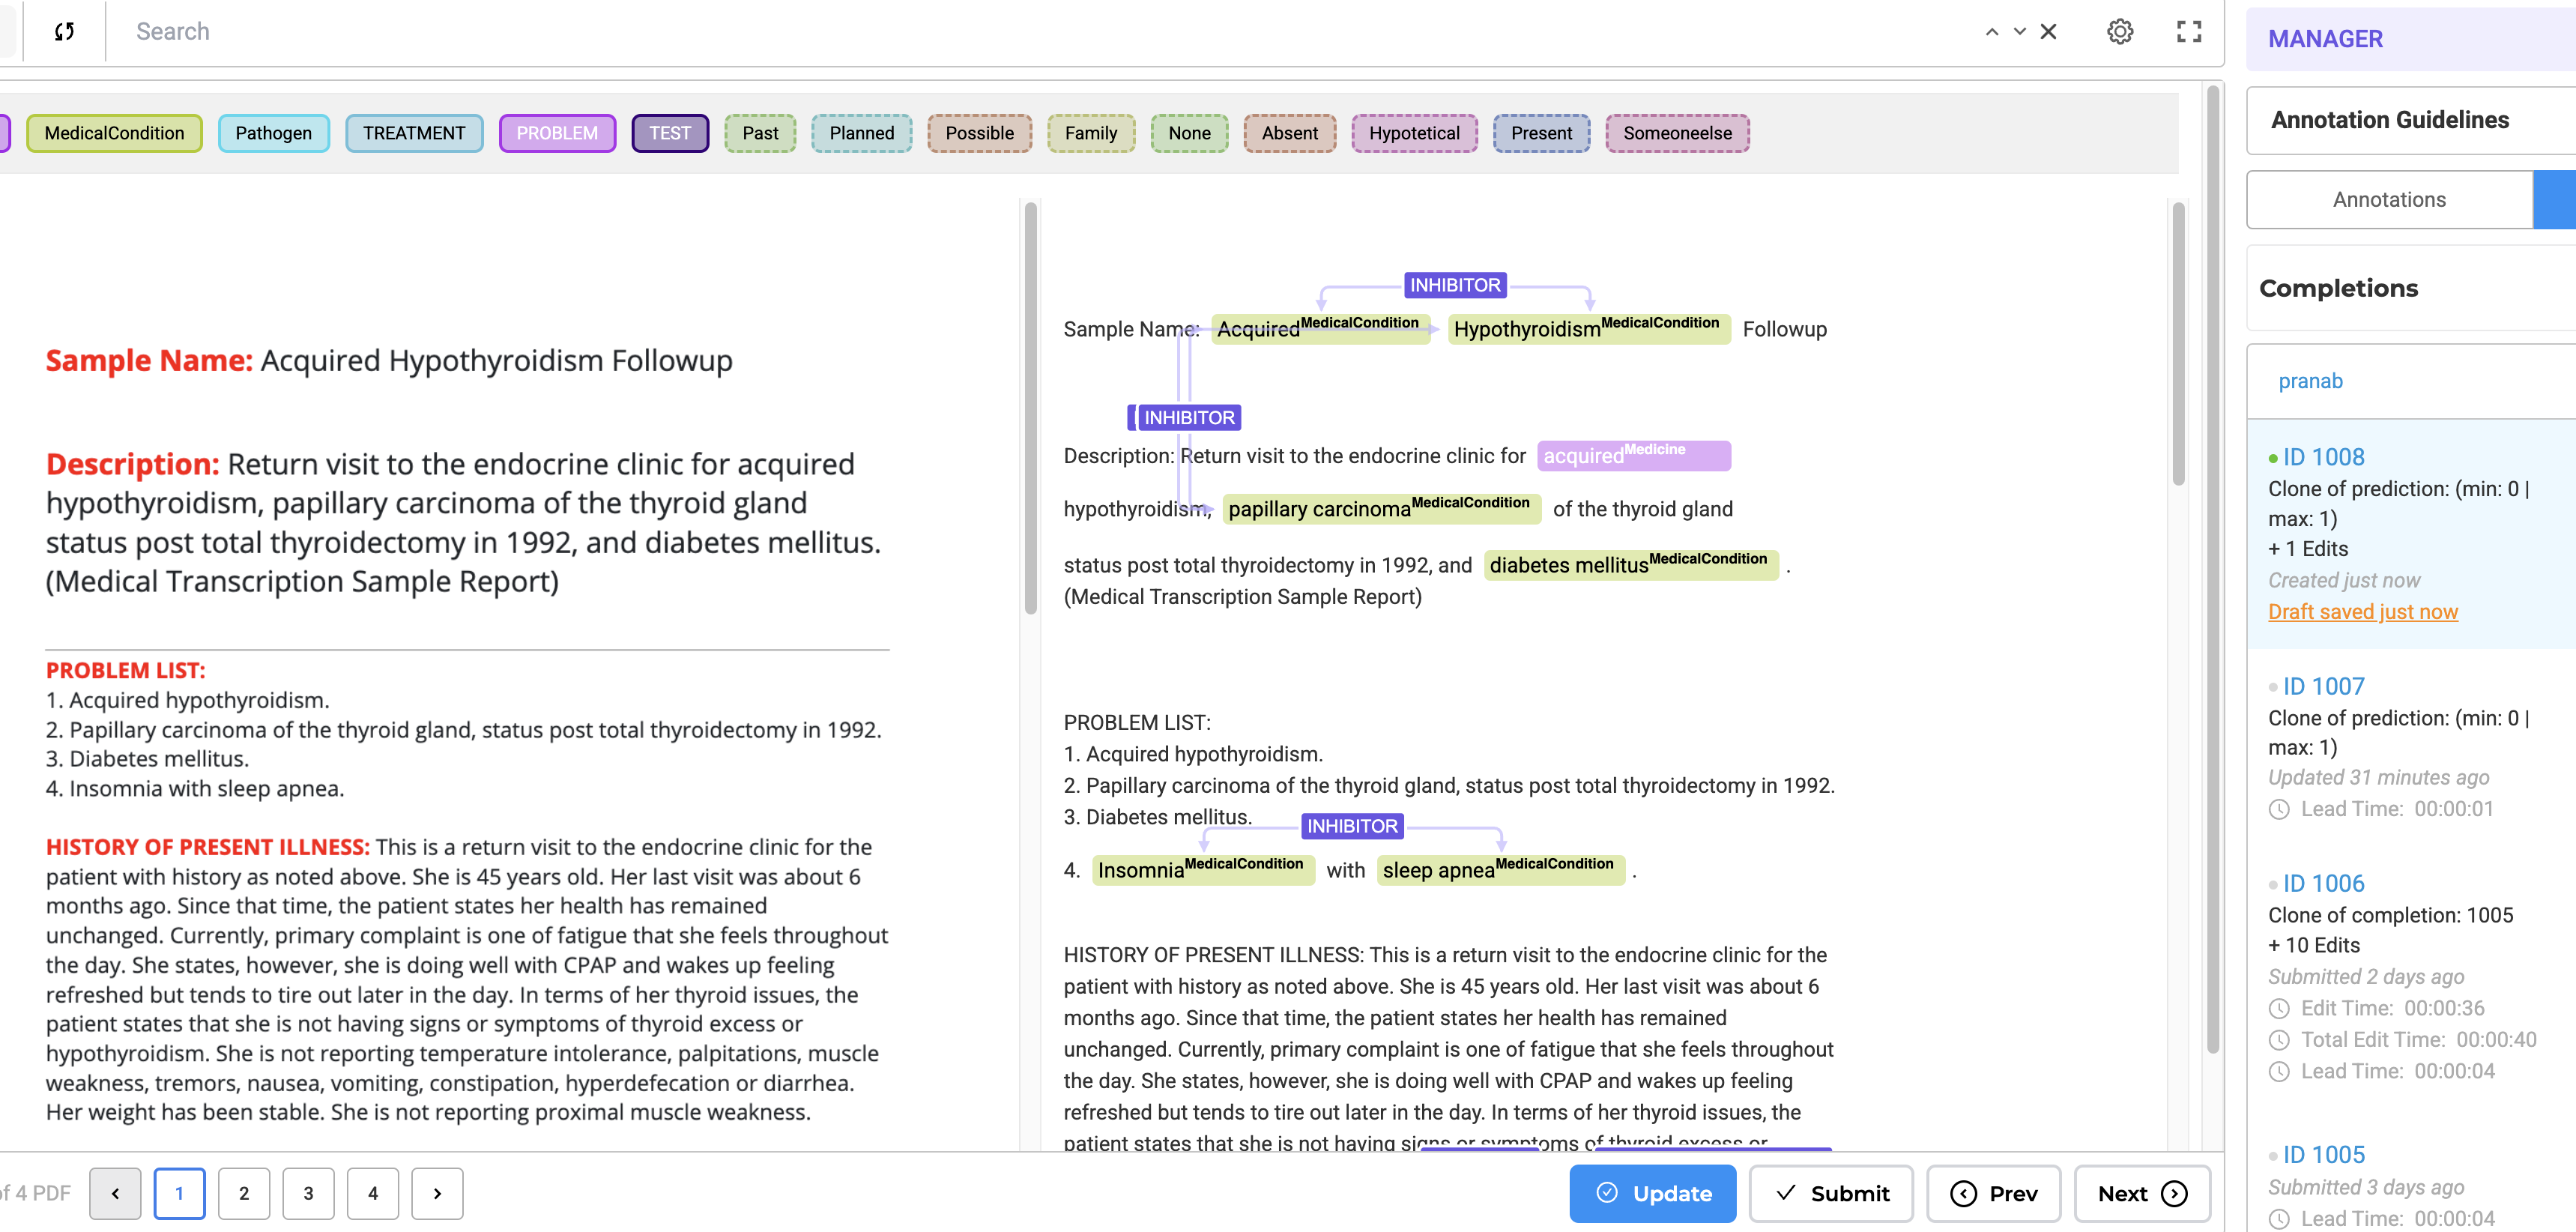
The side-by-side HCC Coding template displays the original PDF document next to its extracted text, allowing annotators to label entities and review mapped codes while maintaining full context of the source material.
These projects use preconfigured lookup datasets that automatically map ICD-10 codes to their respective HCC categories, reducing manual data entry and improving coding consistency.
Usage Instructions
To enable HCC Coding Support, follow these steps:
To enable HCC Coding Support, follow these steps:
- Project Setup
- Select either of the HCC project templates during project creation.
- Choose the HCC Coding for PDF and Text (side by side) option if you need a visual representation of the original document while performing HCC coding.
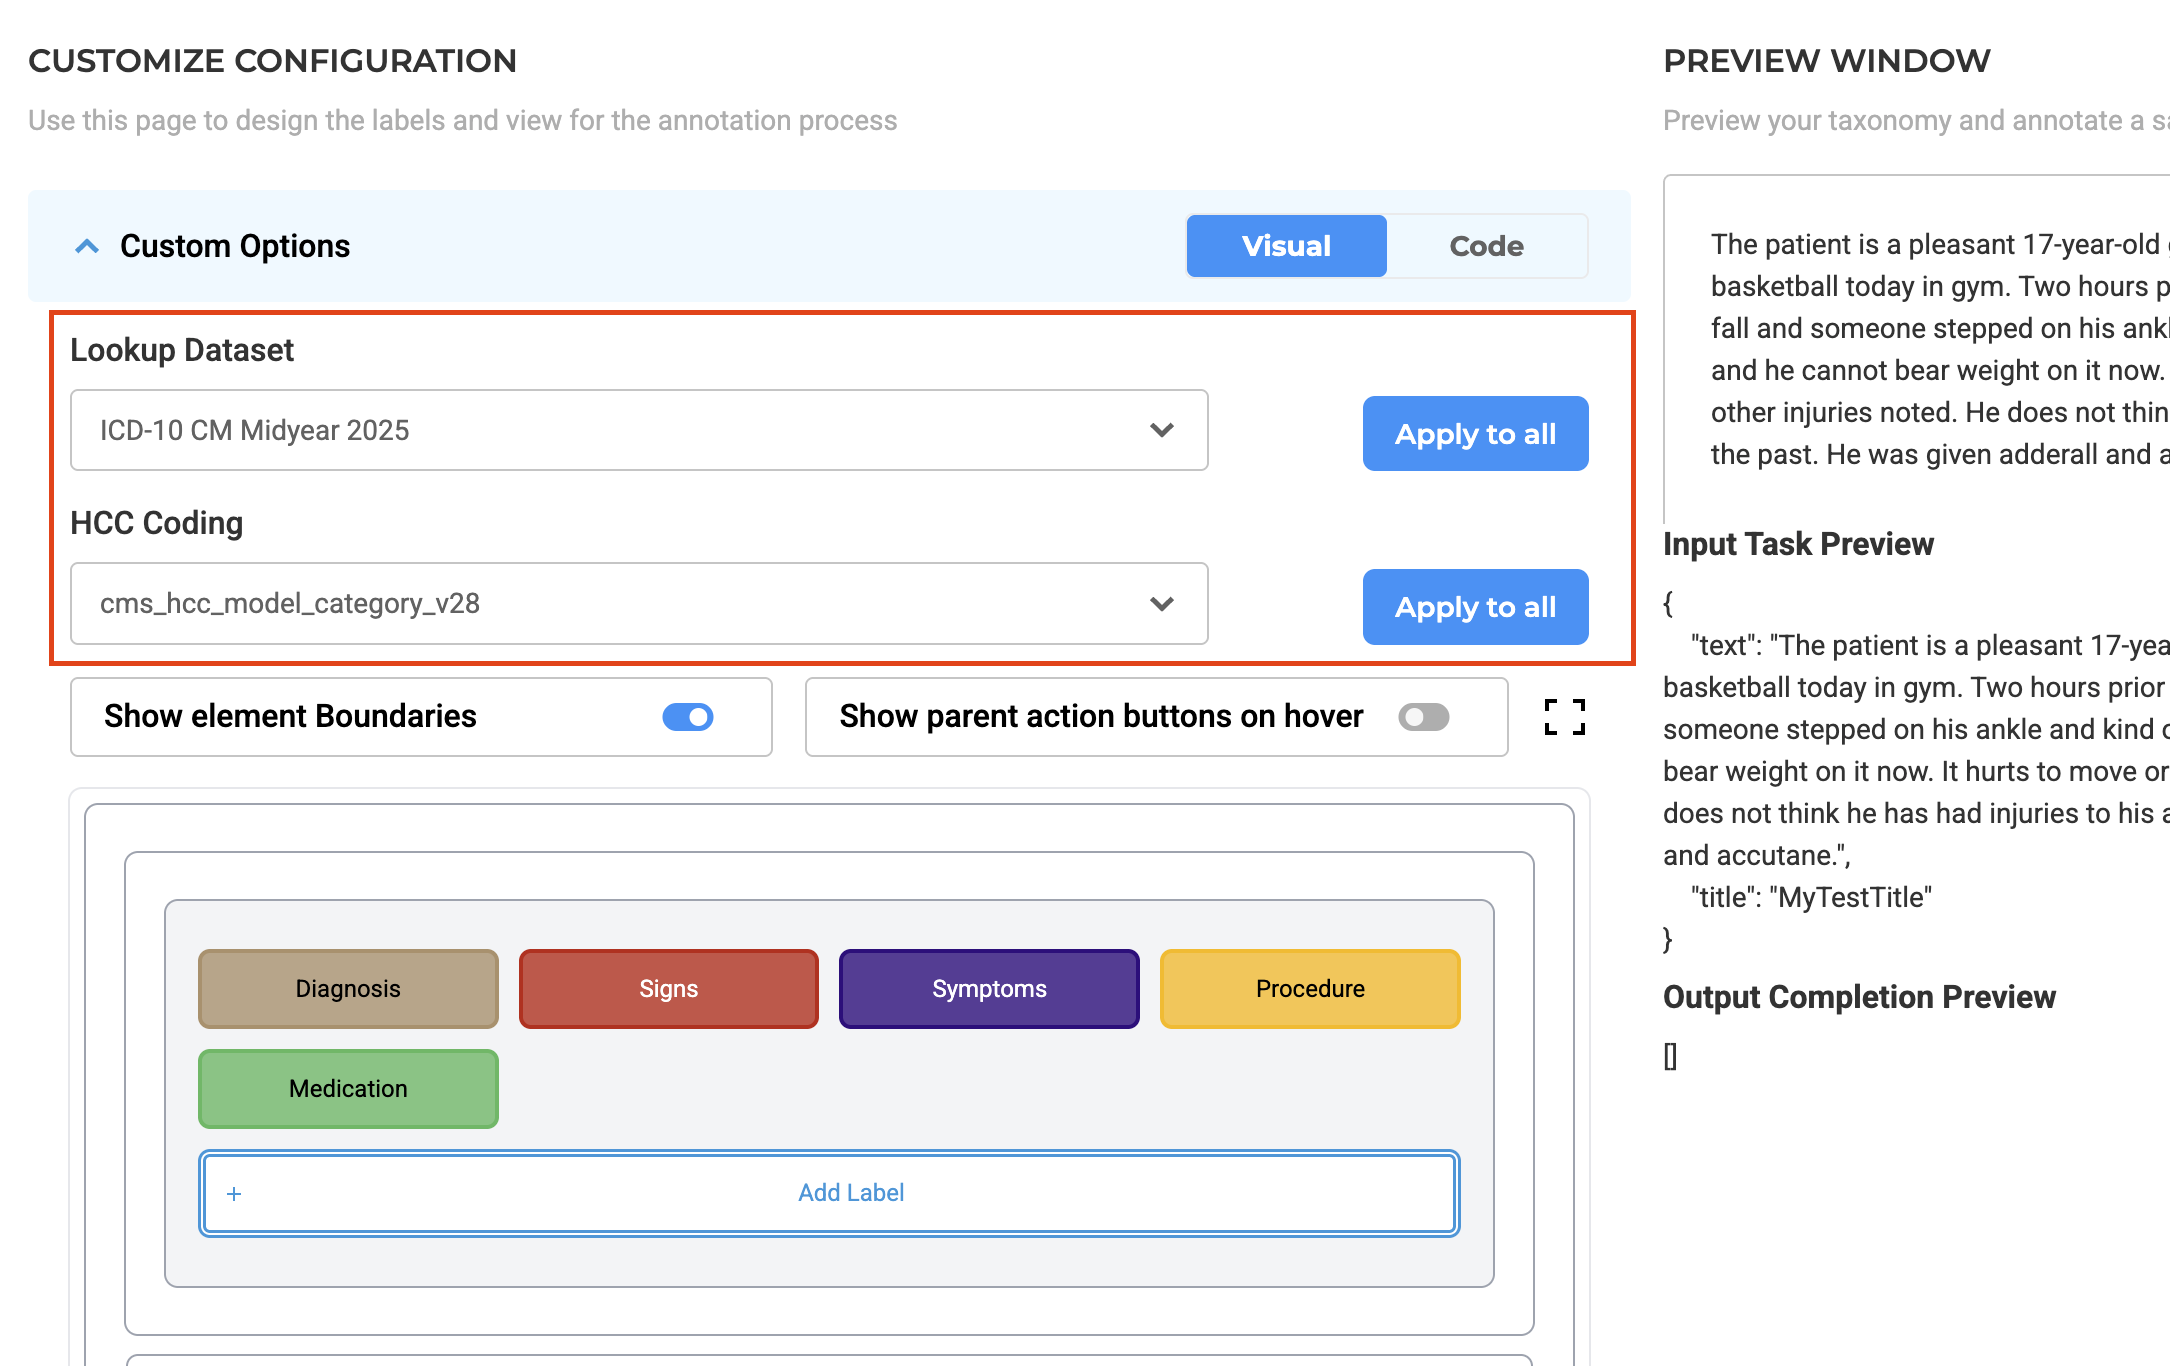
- Label Customization
- On the Customize Labels page, you can apply a lookup dataset globally to all labels or assign lookup options individually.
- This setup defines how entities in the document link to their ICD-10 and HCC mappings.
- Annotation Process
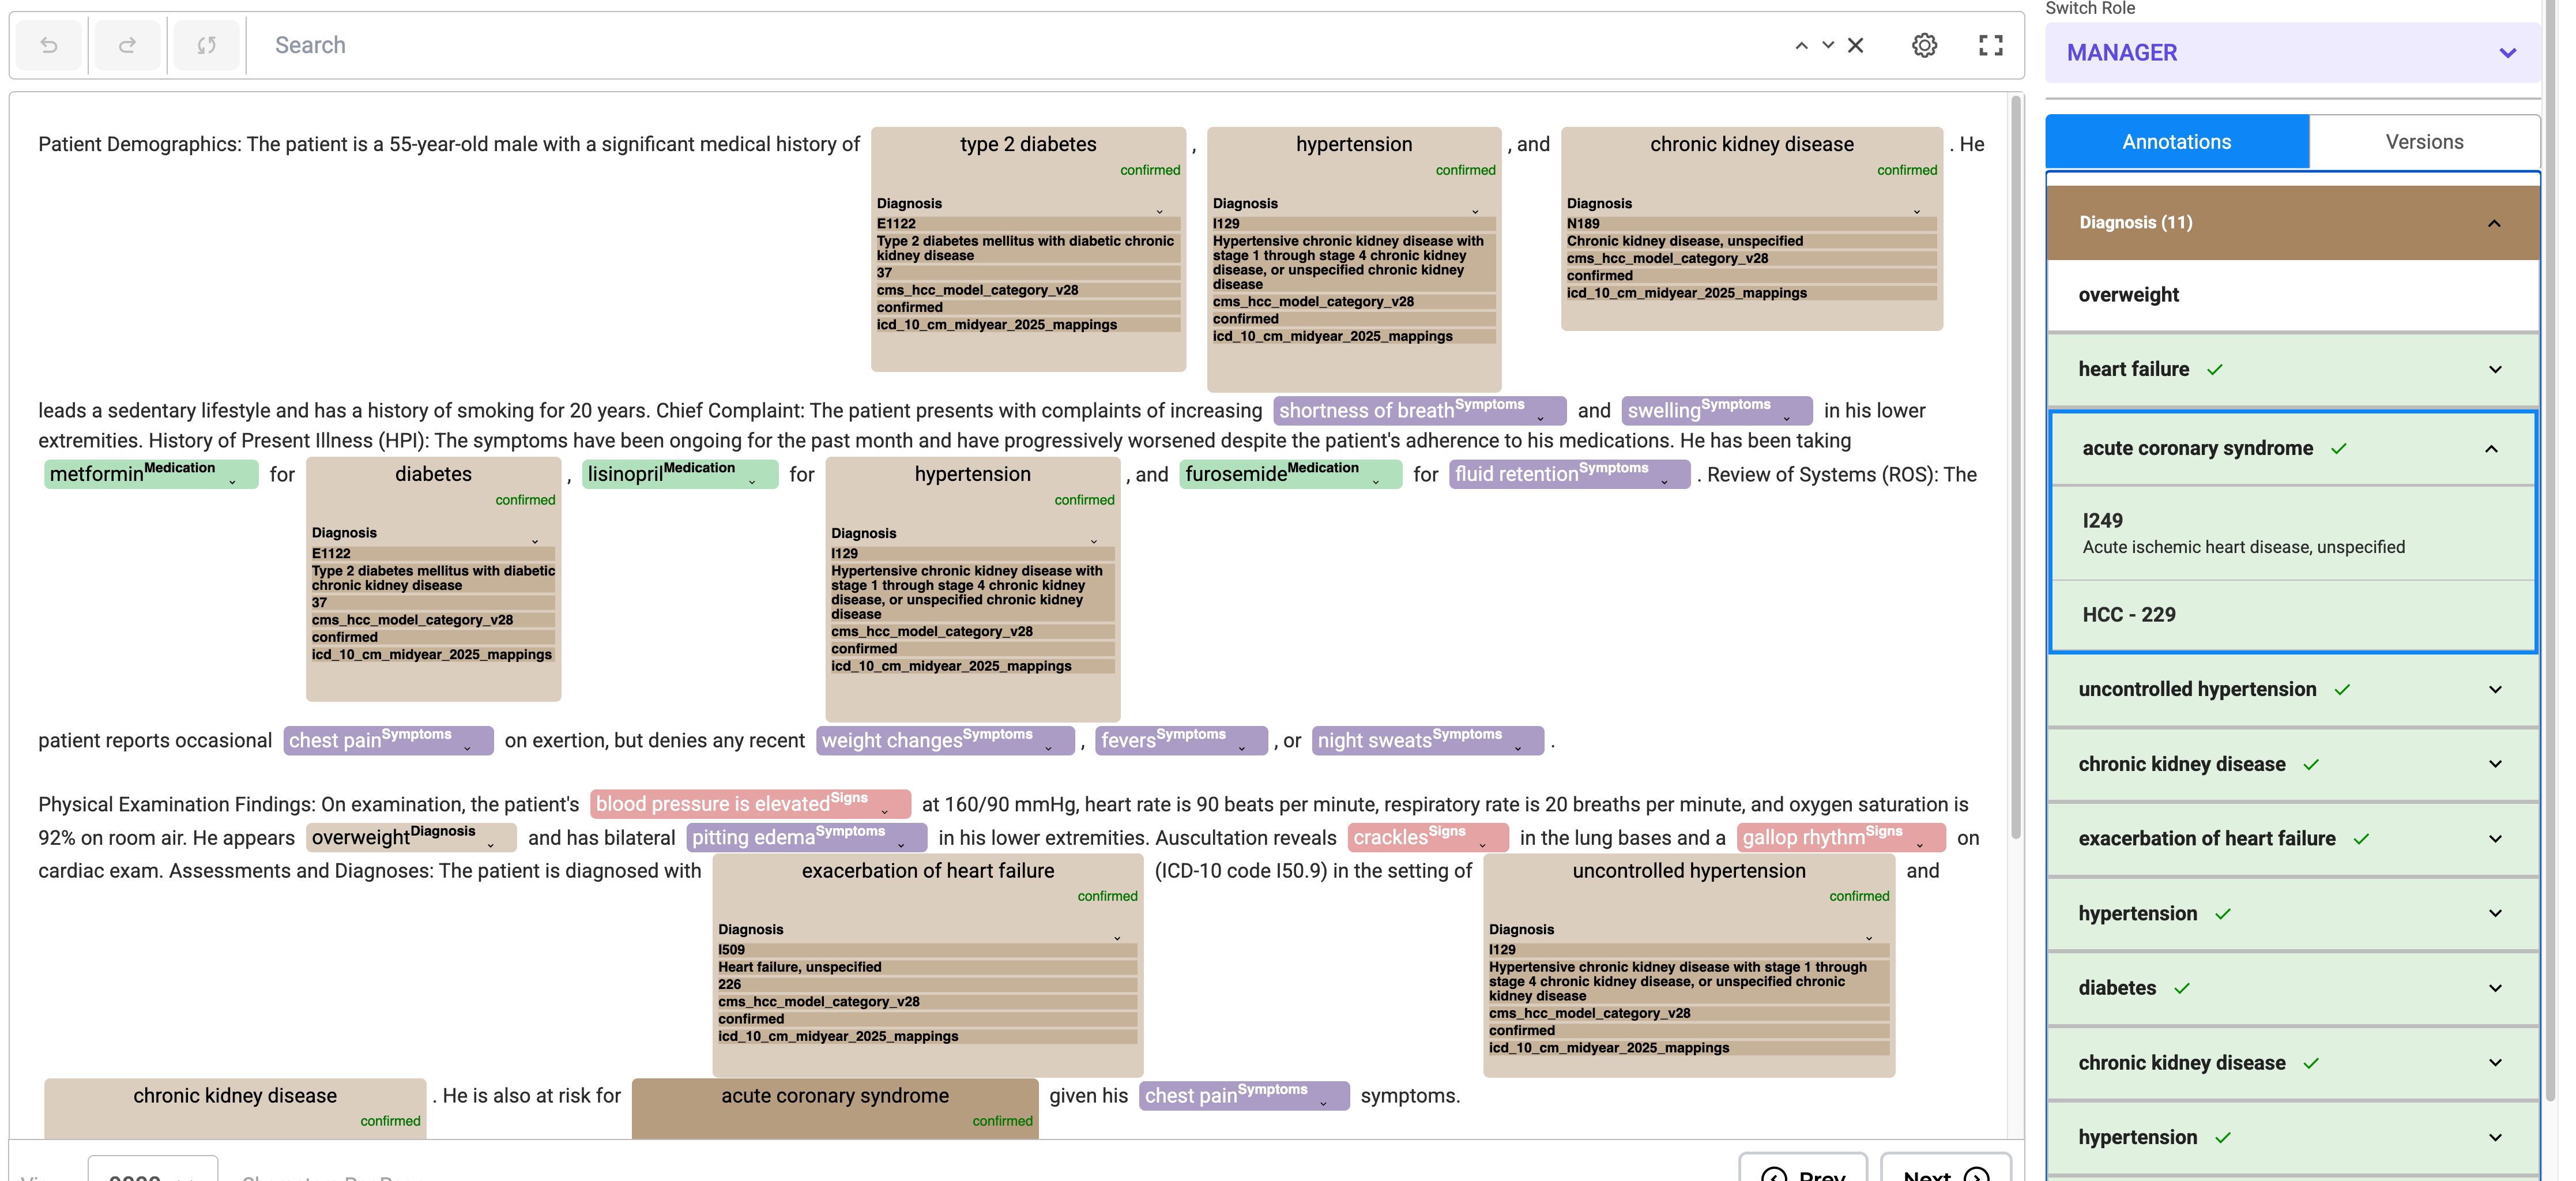
- Annotate entities and assign codes using the annotation widget.
- Edit codes inline or through the Annotation Widget from the right panel.
- Annotated chunks are listed under their respective labels. Users can expand labels by clicking the down arrow to view all chunks associated with them.
- Lookup code can be edited or updated directly from labeled tokens or via the labeling section by clicking the edit button.
- Predictions can be copied to generate a completion, allowing the HCC code to be reviewed using the annotation widget on the right.
- Review and Confirmation
Once a task is labeled and lookup codes are assigned along with HCC Codes, reviewers have the following options:
- Accept and confirm the labeled text.
- Decline and remove the labels.
- Tag the label as non-billable, if necessary.

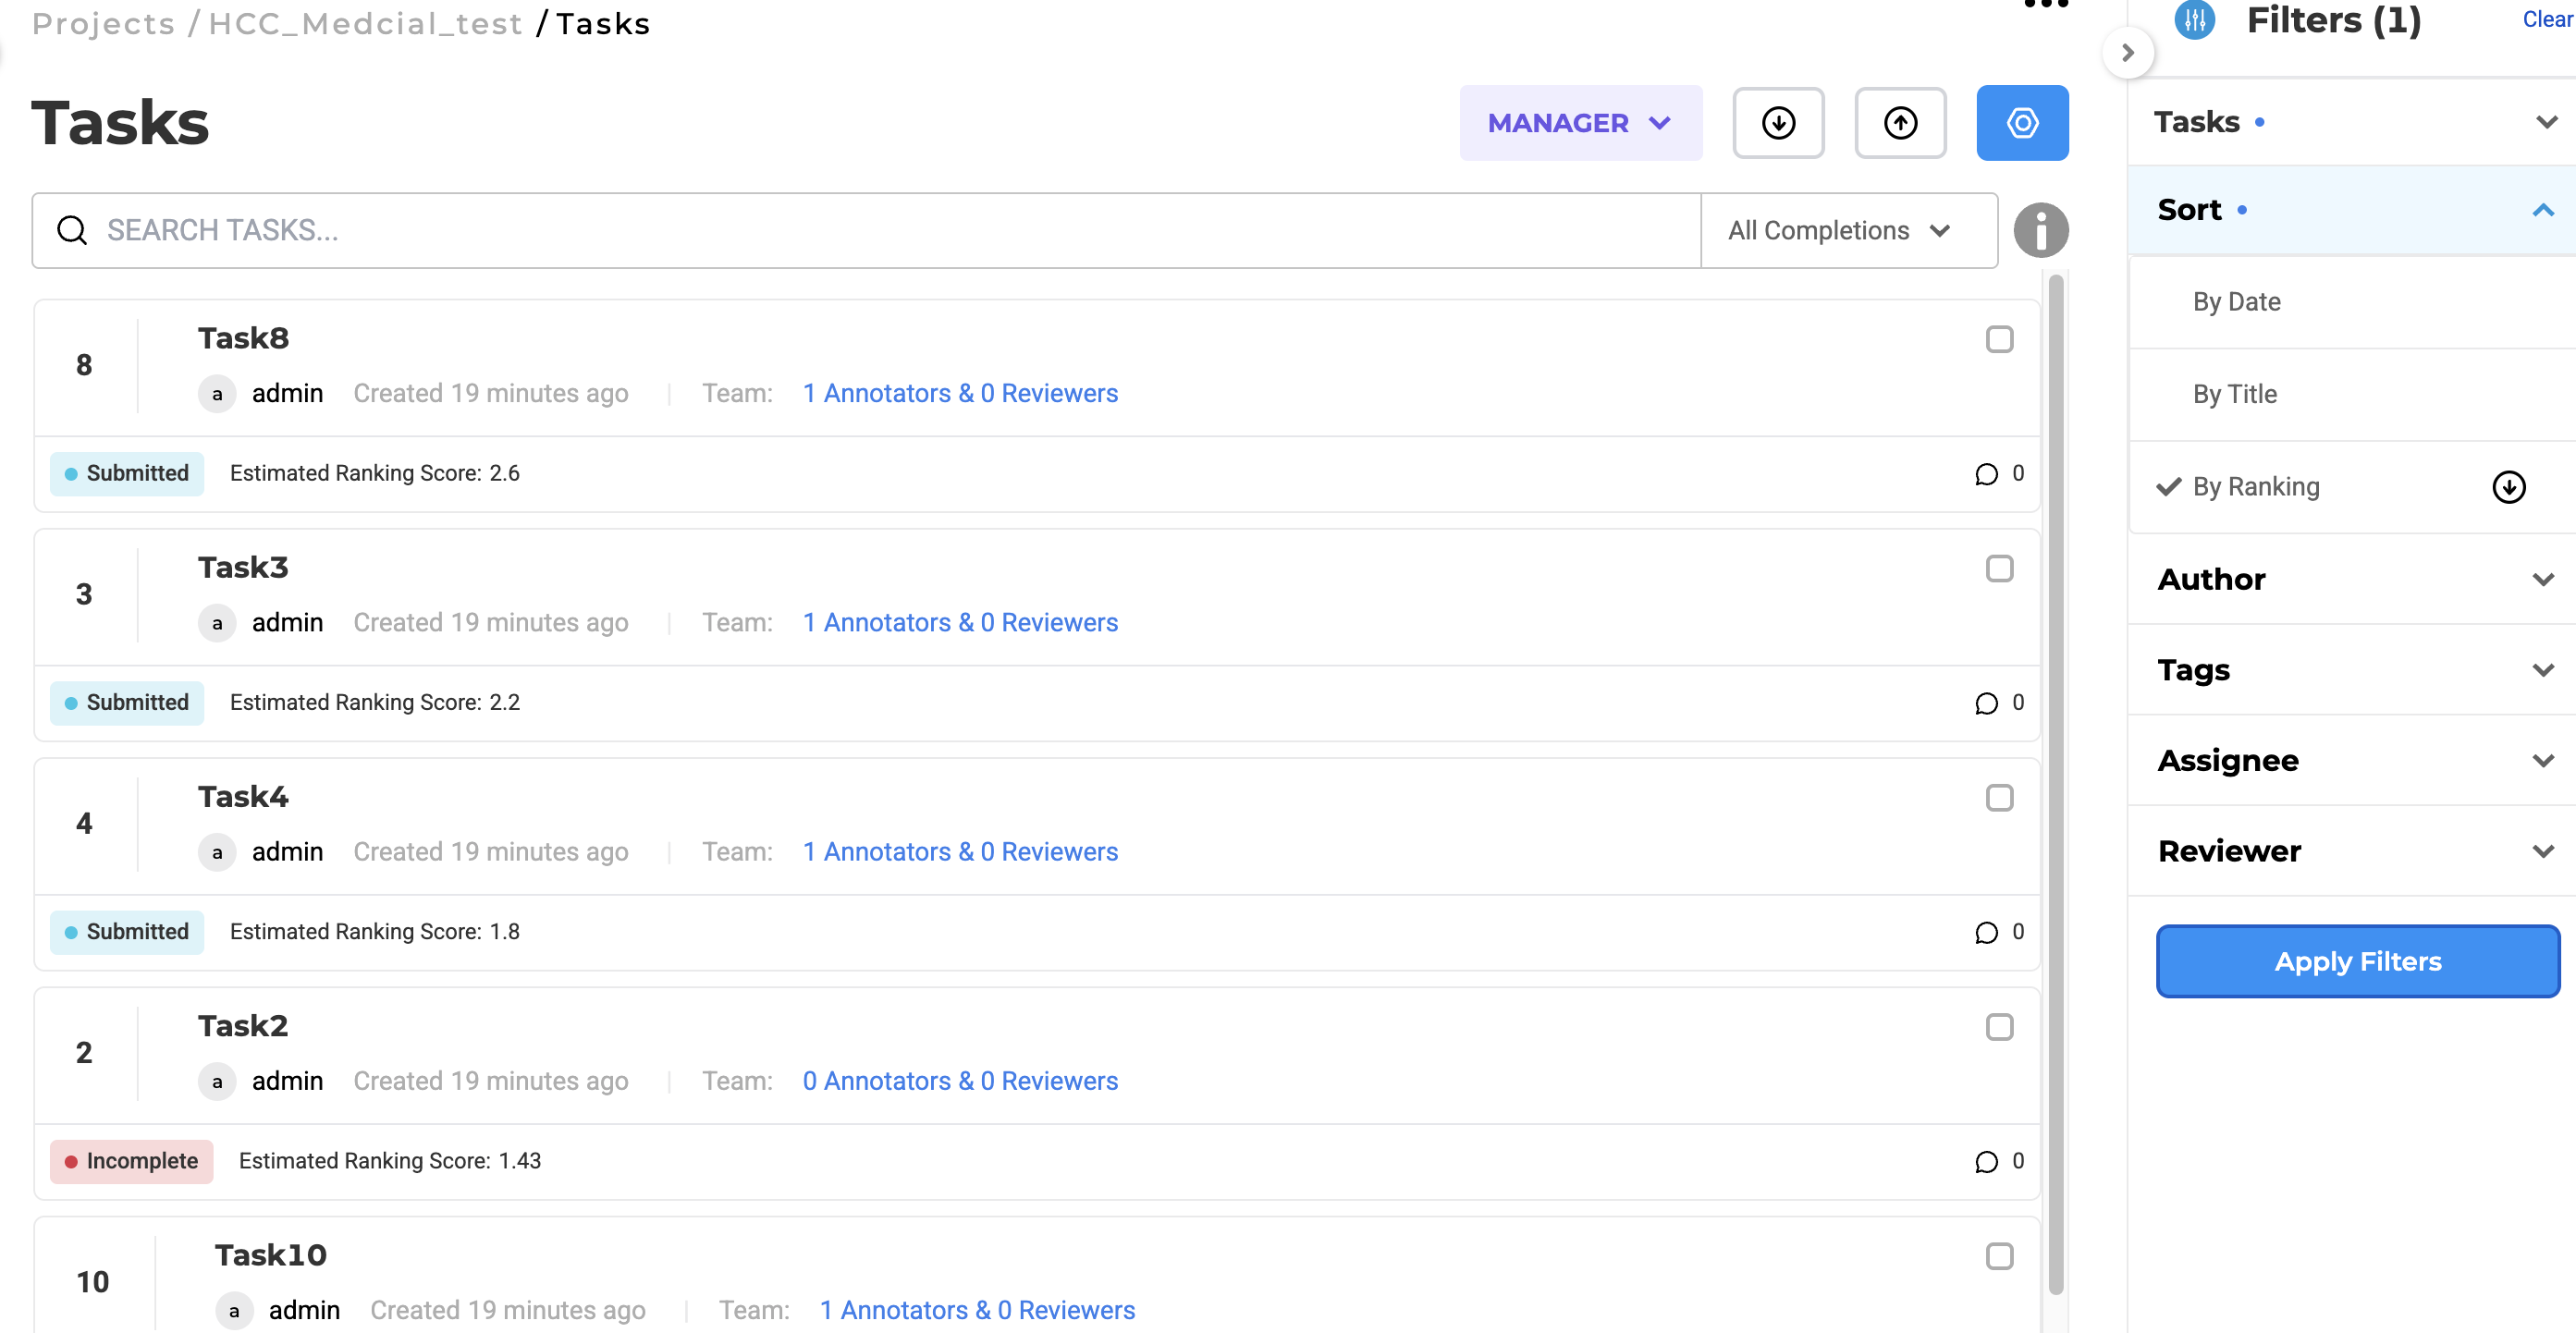
Raking Score Integration
Tasks can now include ranking scores to support triaging and prioritization, allowing users to manage large annotation datasets more effectively. When importing tasks, users can associate each task with a ranking score that reflects its clinical significance or urgency. These scores are then displayed in the task list and can be used to sort and filter tasks dynamically. This functionality is particularly beneficial in risk adjustment workflows where prioritizing complex or high-impact cases is critical. Ranking scores also integrate with the HCC coding workflow, enabling annotators and reviewers to systematically focus on the most relevant cases for validation.
Fine-Grained OCR Page Control
For image and PDF-based projects that rely on OCR, users can now choose to exclude specific pages from OCR processing.
This provides finer control when certain pages—such as cover sheets, disclaimers, or scanned tables—don’t require text extraction.
To configure:
- In the OCR options during import or project setup, deselect the pages you want excluded.
- Only the remaining pages will be processed and displayed for annotation, improving accuracy and performance.
This selective OCR feature helps optimize resource usage and ensures annotations focus only on relevant content.