Spark NLP Cheatsheet
# Install Spark NLP from PyPI
pip install spark-nlp==5.3.3

# Install Spark NLP from Anaconda/Conda
conda install -c johnsnowlabs spark-nlp

# Load Spark NLP with Spark Shell
spark-shell --packages com.johnsnowlabs.nlp:spark-nlp_2.12:5.3.3

# Load Spark NLP with PySpark
pyspark --packages com.johnsnowlabs.nlp:spark-nlp_2.12:5.3.3

# Load Spark NLP with Spark Submit
spark-submit --packages com.johnsnowlabs.nlp:spark-nlp_2.12:5.3.3

# Load Spark NLP as external JAR after compiling and building Spark NLP by `sbt assembly`
spark-shell --jars spark-nlp-assembly-5.3.3.jar
Python
Spark NLP supports Python 3.7.x and above depending on your major PySpark version.
NOTE: Since Spark version 3.2, Python 3.6 is deprecated. If you are using this python version, consider sticking to lower versions of Spark.
Quick Install
Let’s create a new Conda environment to manage all the dependencies there. You can use Python Virtual Environment if you prefer or not have any environment.
$ java -version
# should be Java 8 (Oracle or OpenJDK)
$ conda create -n sparknlp python=3.8 -y
$ conda activate sparknlp
$ pip install spark-nlp==5.3.3 pyspark==3.3.1
Of course you will need to have jupyter installed in your system:
pip install jupyter
Now you should be ready to create a jupyter notebook running from terminal:
jupyter notebook
Start Spark NLP Session from Python
Spark session for Spark NLP can be created (or retrieved) by using sparknlp.start():
import sparknlp
spark = sparknlp.start()
If you need to manually start SparkSession because you have other configurations and sparknlp.start() is not including them,
you can manually start the SparkSession with:
spark = SparkSession.builder \
    .appName("Spark NLP") \
    .master("local[*]") \
    .config("spark.driver.memory", "16G") \
    .config("spark.serializer", "org.apache.spark.serializer.KryoSerializer") \
    .config("spark.kryoserializer.buffer.max", "2000M") \
    .config("spark.driver.maxResultSize", "0") \
    .config("spark.jars.packages", "com.johnsnowlabs.nlp:spark-nlp_2.12:5.3.3") \
    .getOrCreate()
Scala and Java
Maven
spark-nlp on Apache Spark 3.0.x, 3.1.x, 3.2.x, 3.3.x, and 3.4.x
<!-- https://mvnrepository.com/artifact/com.johnsnowlabs.nlp/spark-nlp -->
<dependency>
    <groupId>com.johnsnowlabs.nlp</groupId>
    <artifactId>spark-nlp_2.12</artifactId>
    <version>5.3.3</version>
</dependency>
spark-nlp-gpu:
<!-- https://mvnrepository.com/artifact/com.johnsnowlabs.nlp/spark-nlp-gpu -->
<dependency>
    <groupId>com.johnsnowlabs.nlp</groupId>
    <artifactId>spark-nlp-gpu_2.12</artifactId>
    <version>5.3.3</version>
</dependency>
spark-nlp-silicon:
<!-- https://mvnrepository.com/artifact/com.johnsnowlabs.nlp/spark-nlp-silicon -->
<dependency>
    <groupId>com.johnsnowlabs.nlp</groupId>
    <artifactId>spark-nlp-silicon_2.12</artifactId>
    <version>5.3.3</version>
</dependency>
spark-nlp-aarch64:
<!-- https://mvnrepository.com/artifact/com.johnsnowlabs.nlp/spark-nlp-aarch64 -->
<dependency>
    <groupId>com.johnsnowlabs.nlp</groupId>
    <artifactId>spark-nlp-aarch64_2.12</artifactId>
    <version>5.3.3</version>
</dependency>
SBT
spark-nlp on Apache Spark 3.0.x, 3.1.x, 3.2.x, 3.3.x, and 3.4.x
// https://mvnrepository.com/artifact/com.johnsnowlabs.nlp/spark-nlp
libraryDependencies += "com.johnsnowlabs.nlp" %% "spark-nlp" % "5.3.3"
spark-nlp-gpu:
// https://mvnrepository.com/artifact/com.johnsnowlabs.nlp/spark-nlp-gpu
libraryDependencies += "com.johnsnowlabs.nlp" %% "spark-nlp-gpu" % "5.3.3"
spark-nlp-silicon:
// https://mvnrepository.com/artifact/com.johnsnowlabs.nlp/spark-nlp-silicon
libraryDependencies += "com.johnsnowlabs.nlp" %% "spark-nlp-silicon" % "5.3.3"
spark-nlp-aarch64:
// https://mvnrepository.com/artifact/com.johnsnowlabs.nlp/spark-nlp-aarch64
libraryDependencies += "com.johnsnowlabs.nlp" %% "spark-nlp-aarch64" % "5.3.3"
Maven Central: https://mvnrepository.com/artifact/com.johnsnowlabs.nlp
If you are interested, there is a simple SBT project for Spark NLP to guide you on how to use it in your projects Spark NLP SBT Starter
Installation for M1 Macs
Starting from version 4.0.0, Spark NLP has experimental support for M1 macs. Note that at the moment, only the standard variant of the M1 is supported. Other variants (e.g. M1 Pro/Max/Ultra, M2) will most likely not work.
Make sure the following prerequisites are met:
-
An M1 compiled java version needs to be installed. For example to install the Zulu Java 11 JDK head to Download Azul JDKs and install that java version.
To check if the installed java environment is running natively on arm64 and not rosetta, you can run the following commands in your shell:
 johnsnow@m1mac ~ % cat $(which java) | file -
 /dev/stdin: Mach-O 64-bit executable arm64
The environment variable
JAVA_HOMEshould also be set to this java version. You can check this by runningecho $JAVA_HOMEin your terminal. If it is not set, you can set it by addingexport JAVA_HOME=$(/usr/libexec/java_home)to your~/.zshrcfile. -
If you are planning to use Annotators or Pipelines that use the RocksDB library (for example
WordEmbeddings,TextMatcherorexplain_document_dl_enPipeline respectively) withspark-submit, then a workaround is required to get it working. See M1 RocksDB workaround for spark-submit with Spark version >= 3.2.0.
M1 RocksDB workaround for spark-submit with Spark version >= 3.2.0
Starting from Spark version 3.2.0, Spark includes their own version of the RocksDB dependency. Unfortunately, this is an older version of RocksDB does not include the necessary binaries of M1. To work around this issue, the default packaged RocksDB jar has to be removed from the Spark distribution.
For example, if you downloaded Spark version 3.2.0 from the official archives, you will find the following folders in the directory of Spark:
$ ls
bin  conf  data  examples  jars  kubernetes  LICENSE  licenses
NOTICE  python  R  README.md  RELEASE  sbin  yarn
To check for the RocksDB jar, you can run
$ ls jars | grep rocksdb
rocksdbjni-6.20.3.jar
to find the jar you have to remove. After removing the jar, the pipelines should work as expected.
Scala and Java for M1
Adding Spark NLP to your Scala or Java project is easy:
Simply change to dependency coordinates to spark-nlp-silicon and add the dependency to your
project.
How to do this is mentioned above: Scala And Java
So for example for Spark NLP with Apache Spark 3.0.x and 3.1.x you will end up with maven coordinates like these:
<!-- https://mvnrepository.com/artifact/com.johnsnowlabs.nlp/spark-nlp-silicon -->
<dependency>
    <groupId>com.johnsnowlabs.nlp</groupId>
    <artifactId>spark-nlp-silicon_2.12</artifactId>
    <version>5.3.3</version>
</dependency>
or in case of sbt:
// https://mvnrepository.com/artifact/com.johnsnowlabs.nlp/spark-nlp
libraryDependencies += "com.johnsnowlabs.nlp" %% "spark-nlp-silicon" % "5.3.3"
If everything went well, you can now start Spark NLP with the m1 flag set to true:
import com.johnsnowlabs.nlp.SparkNLP

val spark = SparkNLP.start(apple_silicon = true)
Python for M1 & M2
First, make sure you have a recent Python 3 installation.
johnsnow@m1mac ~ % python3 --version
Python 3.9.13
Then we can install the dependency as described in the Python section. It is also recommended to use a virtual environment for this.
If everything went well, you can now start Spark NLP with the m1 flag set to True:
import sparknlp

spark = sparknlp.start(apple_silicon=True)
Installation for Linux Aarch64 Systems
Starting from version 5.3.3, Spark NLP supports Linux systems running on an aarch64 processor architecture. The necessary dependencies have been built on Ubuntu 16.04, so a recent system with an environment of at least that will be needed.
Check the Python section and the Scala And Java section on to install Spark NLP for your system.
Starting Spark NLP
Spark NLP needs to be started with the aarch64 flag set to true:
For Scala:
import com.johnsnowlabs.nlp.SparkNLP

val spark = SparkNLP.start(aarch64 = true)
For Python:
import sparknlp

spark = sparknlp.start(aarch64=True)
Google Colab Notebook
Google Colab is perhaps the easiest way to get started with spark-nlp. It requires no installation or setup other than having a Google account.
Run the following code in Google Colab notebook and start using spark-nlp right away.
# This is only to setup PySpark and Spark NLP on Colab
!wget http://setup.johnsnowlabs.com/colab.sh -O - | bash
This script comes with the two options to define pyspark and spark-nlp versions via options:
# -p is for pyspark
# -s is for spark-nlp
# by default they are set to the latest
!wget http://setup.johnsnowlabs.com/colab.sh -O - | bash /dev/stdin -p 3.2.3 -s 5.3.3
Spark NLP quick start on Google Colab is a live demo on Google Colab that performs named entity recognitions and sentiment analysis by using Spark NLP pretrained pipelines.
Kaggle Kernel
Run the following code in Kaggle Kernel and start using spark-nlp right away.
# Let's setup Kaggle for Spark NLP and PySpark
!wget http://setup.johnsnowlabs.com/kaggle.sh -O - | bash
Spark NLP quick start on Kaggle Kernel is a live demo on Kaggle Kernel that performs named entity recognitions by using Spark NLP pretrained pipeline.
Databricks Support
Spark NLP 5.3.3 has been tested and is compatible with the following runtimes:
CPU:
- 9.1
- 9.1 ML
- 10.1
- 10.1 ML
- 10.2
- 10.2 ML
- 10.3
- 10.3 ML
- 10.4
- 10.4 ML
- 10.5
- 10.5 ML
- 11.0
- 11.0 ML
- 11.1
- 11.1 ML
- 11.2
- 11.2 ML
- 11.3
- 11.3 ML
- 12.0
- 12.0 ML
- 12.1
- 12.1 ML
- 12.2
- 12.2 ML
- 13.0
- 13.0 ML
- 13.1
- 13.1 ML
- 13.2
- 13.2 ML
- 13.3
- 13.3 ML
- 14.0
- 14.0 ML
- 14.1
- 14.1 ML
GPU:
- 9.1 ML & GPU
- 10.1 ML & GPU
- 10.2 ML & GPU
- 10.3 ML & GPU
- 10.4 ML & GPU
- 10.5 ML & GPU
- 11.0 ML & GPU
- 11.1 ML & GPU
- 11.2 ML & GPU
- 11.3 ML & GPU
- 12.0 ML & GPU
- 12.1 ML & GPU
- 12.2 ML & GPU
- 13.0 ML & GPU
- 13.1 ML & GPU
- 13.2 ML & GPU
- 13.3 ML & GPU
- 14.0 ML & GPU
- 14.1 ML & GPU
Install Spark NLP on Databricks
-
Create a cluster if you don’t have one already
-
On a new cluster or existing one you need to add the following to the
Advanced Options -> Sparktab:spark.kryoserializer.buffer.max 2000M spark.serializer org.apache.spark.serializer.KryoSerializer -
In
Librariestab inside your cluster you need to follow these steps:3.1. Install New -> PyPI ->
spark-nlp-> Install3.2. Install New -> Maven -> Coordinates ->
com.johnsnowlabs.nlp:spark-nlp_2.12:5.3.3-> Install -
Now you can attach your notebook to the cluster and use Spark NLP!
NOTE: Databrick’s runtimes support different Apache Spark major releases. Please make sure you choose the correct Spark NLP Maven pacakge name (Maven Coordinate) for your runtime from our Packages Cheatsheet
Databricks Notebooks
You can view all the Databricks notebooks from this address:
https://johnsnowlabs.github.io/spark-nlp-workshop/databricks/index.html
Note: You can import these notebooks by using their URLs.
EMR Support
Spark NLP 5.3.3 has been tested and is compatible with the following EMR releases:
- emr-6.2.0
- emr-6.3.0
- emr-6.3.1
- emr-6.4.0
- emr-6.5.0
- emr-6.6.0
- emr-6.7.0
- emr-6.8.0
- emr-6.9.0
- emr-6.10.0
- emr-6.11.0
- emr-6.12.0
- emr-6.13.0
- emr-6.14.0
Full list of Amazon EMR 6.x releases
NOTE: The EMR 6.1.0 and 6.1.1 are not supported.
How to create EMR cluster via CLI
To lanuch EMR cluster with Apache Spark/PySpark and Spark NLP correctly you need to have bootstrap and software configuration.
A sample of your bootstrap script
#!/bin/bash
set -x -e

echo -e 'export PYSPARK_PYTHON=/usr/bin/python3
export HADOOP_CONF_DIR=/etc/hadoop/conf
export SPARK_JARS_DIR=/usr/lib/spark/jars
export SPARK_HOME=/usr/lib/spark' >> $HOME/.bashrc && source $HOME/.bashrc

sudo python3 -m pip install awscli boto spark-nlp

set +x
exit 0
A sample of your software configuration in JSON on S3 (must be public access):
[{
  "Classification": "spark-env",
  "Configurations": [{
    "Classification": "export",
    "Properties": {
      "PYSPARK_PYTHON": "/usr/bin/python3"
    }
  }]
},
{
  "Classification": "spark-defaults",
    "Properties": {
      "spark.yarn.stagingDir": "hdfs:///tmp",
      "spark.yarn.preserve.staging.files": "true",
      "spark.kryoserializer.buffer.max": "2000M",
      "spark.serializer": "org.apache.spark.serializer.KryoSerializer",
      "spark.driver.maxResultSize": "0",
      "spark.jars.packages": "com.johnsnowlabs.nlp:spark-nlp_2.12:5.3.3"
    }
}
]
A sample of AWS CLI to launch EMR cluster:
aws emr create-cluster \
--name "Spark NLP 5.3.3" \
--release-label emr-6.2.0 \
--applications Name=Hadoop Name=Spark Name=Hive \
--instance-type m4.4xlarge \
--instance-count 3 \
--use-default-roles \
--log-uri "s3://<S3_BUCKET>/" \
--bootstrap-actions Path=s3://<S3_BUCKET>/emr-bootstrap.sh,Name=custome \
--configurations "https://<public_access>/sparknlp-config.json" \
--ec2-attributes KeyName=<your_ssh_key>,EmrManagedMasterSecurityGroup=<security_group_with_ssh>,EmrManagedSlaveSecurityGroup=<security_group_with_ssh> \
--profile <aws_profile_credentials>
GCP Dataproc Support
- Create a cluster if you don’t have one already as follows.
At gcloud shell:
gcloud services enable dataproc.googleapis.com \
  compute.googleapis.com \
  storage-component.googleapis.com \
  bigquery.googleapis.com \
  bigquerystorage.googleapis.com
REGION=<region>
BUCKET_NAME=<bucket_name>
gsutil mb -c standard -l ${REGION} gs://${BUCKET_NAME}
REGION=<region>
ZONE=<zone>
CLUSTER_NAME=<cluster_name>
BUCKET_NAME=<bucket_name>
You can set image-version, master-machine-type, worker-machine-type, master-boot-disk-size, worker-boot-disk-size, num-workers as your needs. If you use the previous image-version from 2.0, you should also add ANACONDA to optional-components. And, you should enable gateway.
gcloud dataproc clusters create ${CLUSTER_NAME} \
  --region=${REGION} \
  --zone=${ZONE} \
  --image-version=2.0 \
  --master-machine-type=n1-standard-4 \
  --worker-machine-type=n1-standard-2 \
  --master-boot-disk-size=128GB \
  --worker-boot-disk-size=128GB \
  --num-workers=2 \
  --bucket=${BUCKET_NAME} \
  --optional-components=JUPYTER \
  --enable-component-gateway \
  --metadata 'PIP_PACKAGES=spark-nlp spark-nlp-display google-cloud-bigquery google-cloud-storage' \
  --initialization-actions gs://goog-dataproc-initialization-actions-${REGION}/python/pip-install.sh
-
On an existing one, you need to install spark-nlp and spark-nlp-display packages from PyPI.
-
Now, you can attach your notebook to the cluster and use the Spark NLP!
Amazon Linux 2 Support
# Update Package List & Install  Required Packages
sudo yum update
sudo yum install -y amazon-linux-extras
sudo yum -y install python3-pip

# Create Python virtual environment and activate it:
python3 -m venv .sparknlp-env
source .sparknlp-env/bin/activate
Check JAVA version:
- For Sparknlp versions above 3.x, please use JAVA-11
Checking Java versions installed on your machine:
sudo alternatives --config java
You can pick the index number (I am using java-8 as default - index 2):

If you dont have java-11 or java-8 in you system, you can easily install via:
sudo yum install java-1.8.0-openjdk
Now, we can start installing the required libraries:
pip install pyspark==3.3.1
pip install spark-nlp
Docker Support
For having Spark NLP, PySpark, Jupyter, and other ML/DL dependencies as a Docker image you can use the following template:
#Download base image ubuntu 18.04
FROM ubuntu:18.04

ENV NB_USER jovyan
ENV NB_UID 1000
ENV HOME /home/${NB_USER}

ENV PYSPARK_PYTHON=python3
ENV PYSPARK_DRIVER_PYTHON=python3

RUN apt-get update && apt-get install -y \
    tar \
    wget \
    bash \
    rsync \
    gcc \
    libfreetype6-dev \
    libhdf5-serial-dev \
    libpng-dev \
    libzmq3-dev \
    python3 \
    python3-dev \
    python3-pip \
    unzip \
    pkg-config \
    software-properties-common \
    graphviz

RUN adduser --disabled-password \
    --gecos "Default user" \
    --uid ${NB_UID} \
    ${NB_USER}

# Install OpenJDK-8
RUN apt-get update && \
    apt-get install -y openjdk-8-jdk && \
    apt-get install -y ant && \
    apt-get clean;

# Fix certificate issues
RUN apt-get update && \
    apt-get install ca-certificates-java && \
    apt-get clean && \
    update-ca-certificates -f;
# Setup JAVA_HOME -- useful for docker commandline
ENV JAVA_HOME /usr/lib/jvm/java-8-openjdk-amd64/
RUN export JAVA_HOME

RUN echo "export JAVA_HOME=/usr/lib/jvm/java-8-openjdk-amd64/" >> ~/.bashrc

RUN apt-get clean && rm -rf /var/lib/apt/lists/* /tmp/* /var/tmp/*

RUN pip3 install --upgrade pip
# You only need pyspark and spark-nlp paclages to use Spark NLP
# The rest of the PyPI packages are here as examples
RUN pip3 install --no-cache-dir pyspark spark-nlp==3.2.3 notebook==5.* numpy pandas mlflow Keras scikit-spark scikit-learn scipy matplotlib pydot tensorflow==2.4.1 graphviz

# Make sure the contents of our repo are in ${HOME}
RUN mkdir -p /home/jovyan/tutorials
RUN mkdir -p /home/jovyan/jupyter

COPY data ${HOME}/data
COPY jupyter ${HOME}/jupyter
COPY tutorials ${HOME}/tutorials
RUN jupyter notebook --generate-config
COPY jupyter_notebook_config.json /home/jovyan/.jupyter/jupyter_notebook_config.json
USER root
RUN chown -R ${NB_UID} ${HOME}
USER ${NB_USER}

WORKDIR ${HOME}

# Specify the default command to run
CMD ["jupyter", "notebook", "--ip", "0.0.0.0"]
Finally, use jupyter_notebook_config.json for the password:
{
  "NotebookApp": {
    "password": "sha1:65adaa6ffb9c:36df1c2086ef294276da703667d1b8ff38f92614"
  }
}
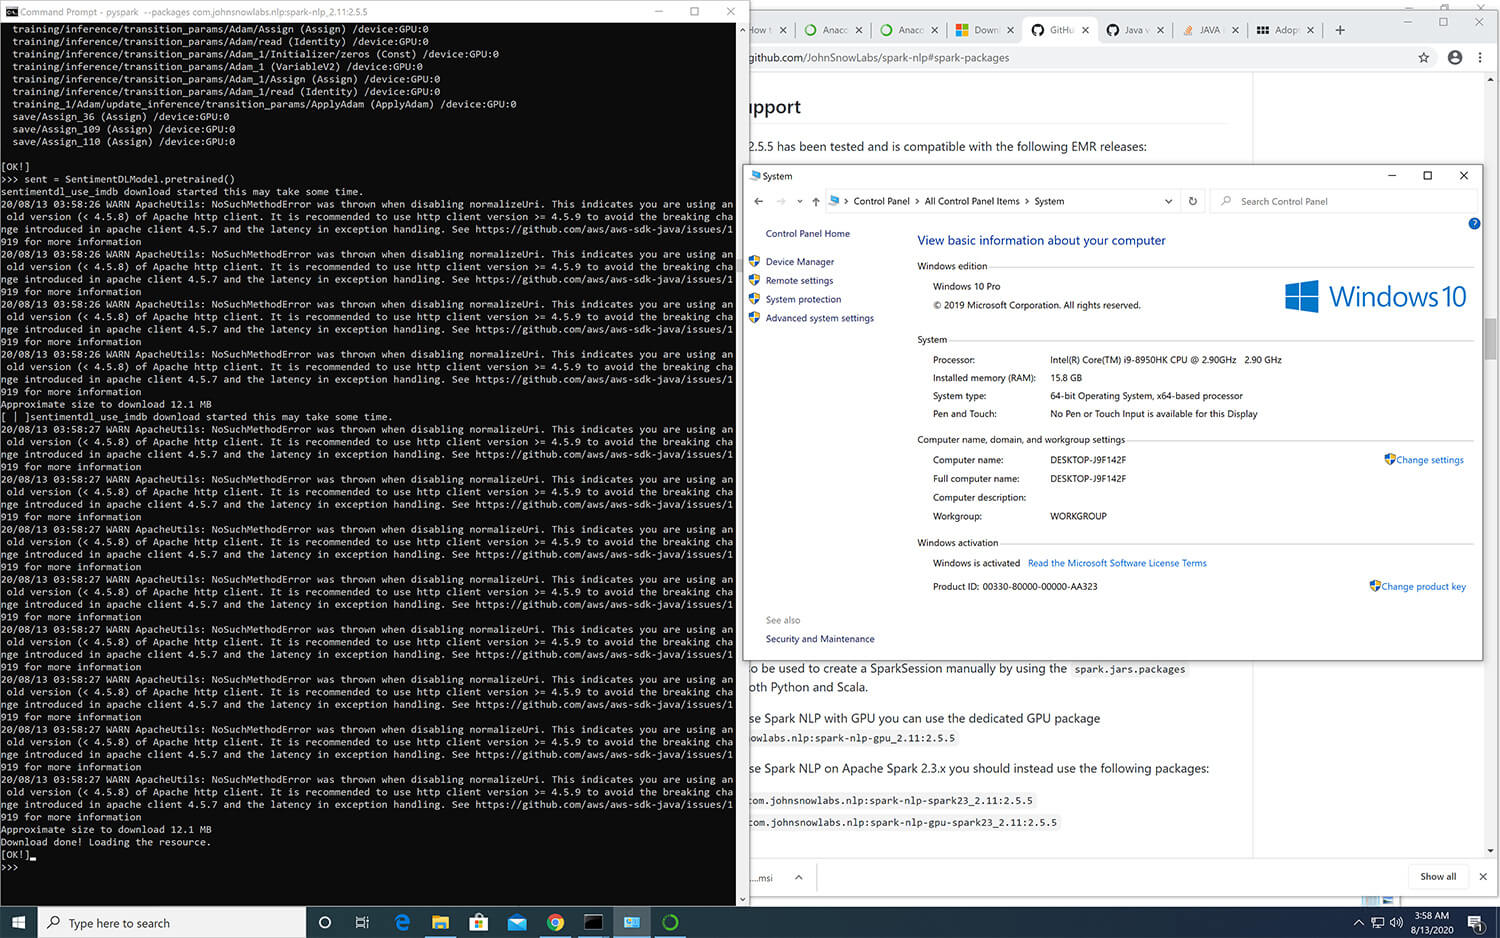
Windows Support
In order to fully take advantage of Spark NLP on Windows (8 or 10), you need to setup/install Apache Spark, Apache Hadoop, Java and a Pyton environment correctly by following the following instructions: https://github.com/JohnSnowLabs/spark-nlp/discussions/1022
\
How to correctly install Spark NLP on Windows
Follow the below steps to set up Spark NLP with Spark 3.2.3:
- Download Adopt OpenJDK 1.8
- Make sure it is 64-bit
- Make sure you install it in the root of your main drive
C:\java. - During installation after changing the path, select setting Path
- Download the pre-compiled Hadoop binaries
winutils.exe,hadoop.dlland put it in a folder calledC:\hadoop\binfrom https://github.com/cdarlint/winutils/tree/master/hadoop-3.2.0/bin- Note: The version above is for Spark 3.2.3, which was built for Hadoop 3.2.0. You might have to change the hadoop version in the link, depending on which Spark version you are using.
-
Download Apache Spark 3.2.3 and extract it to
C:\spark. -
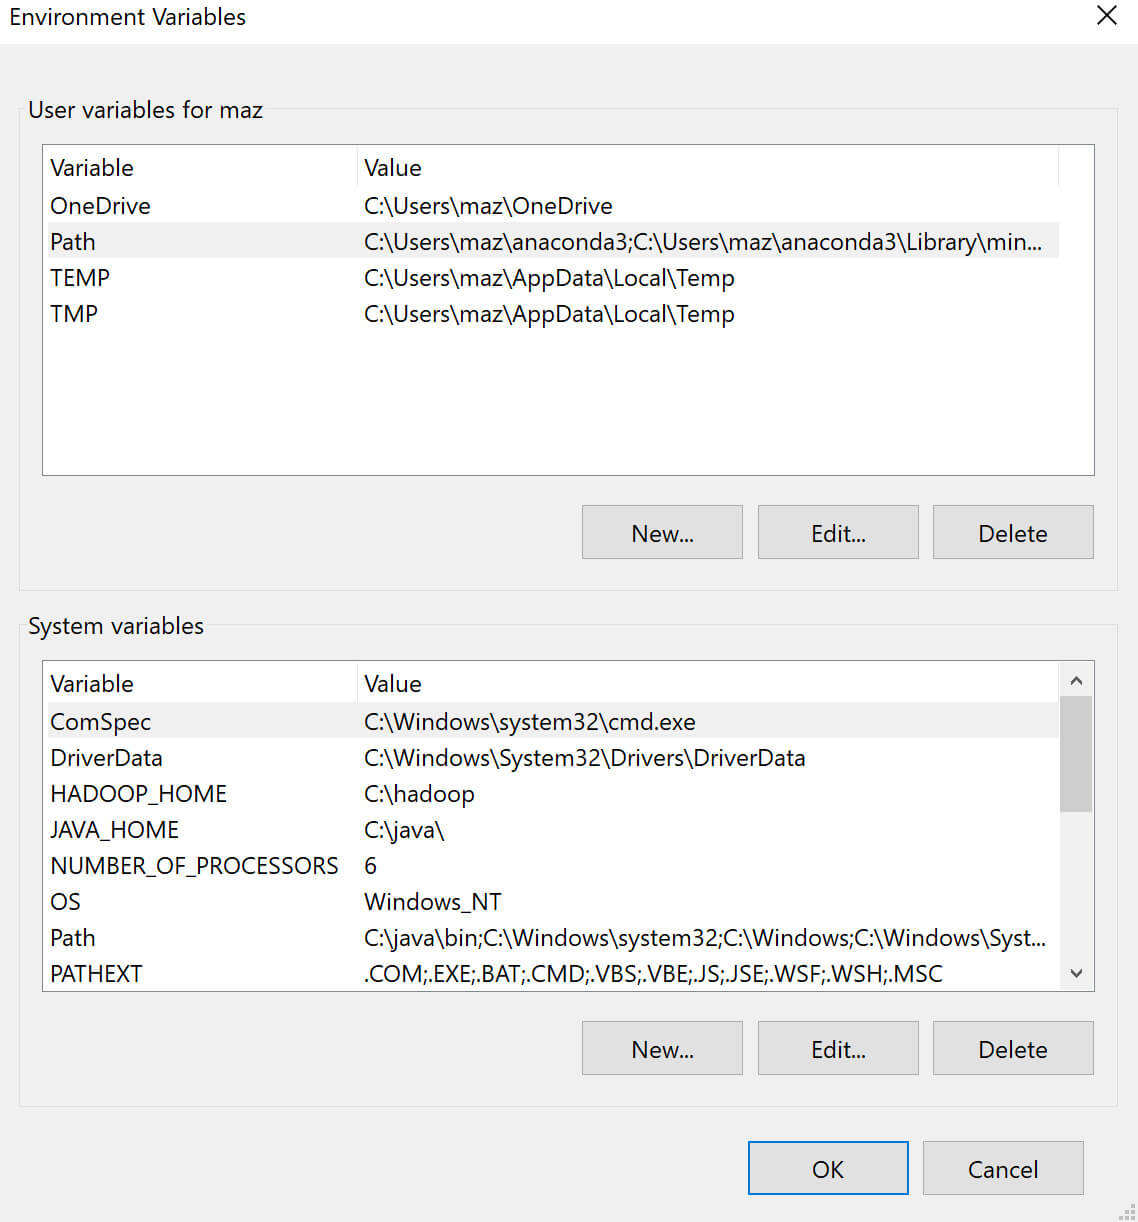
Set/add environment variables for
HADOOP_HOMEtoC:\hadoopandSPARK_HOMEtoC:\spark. -
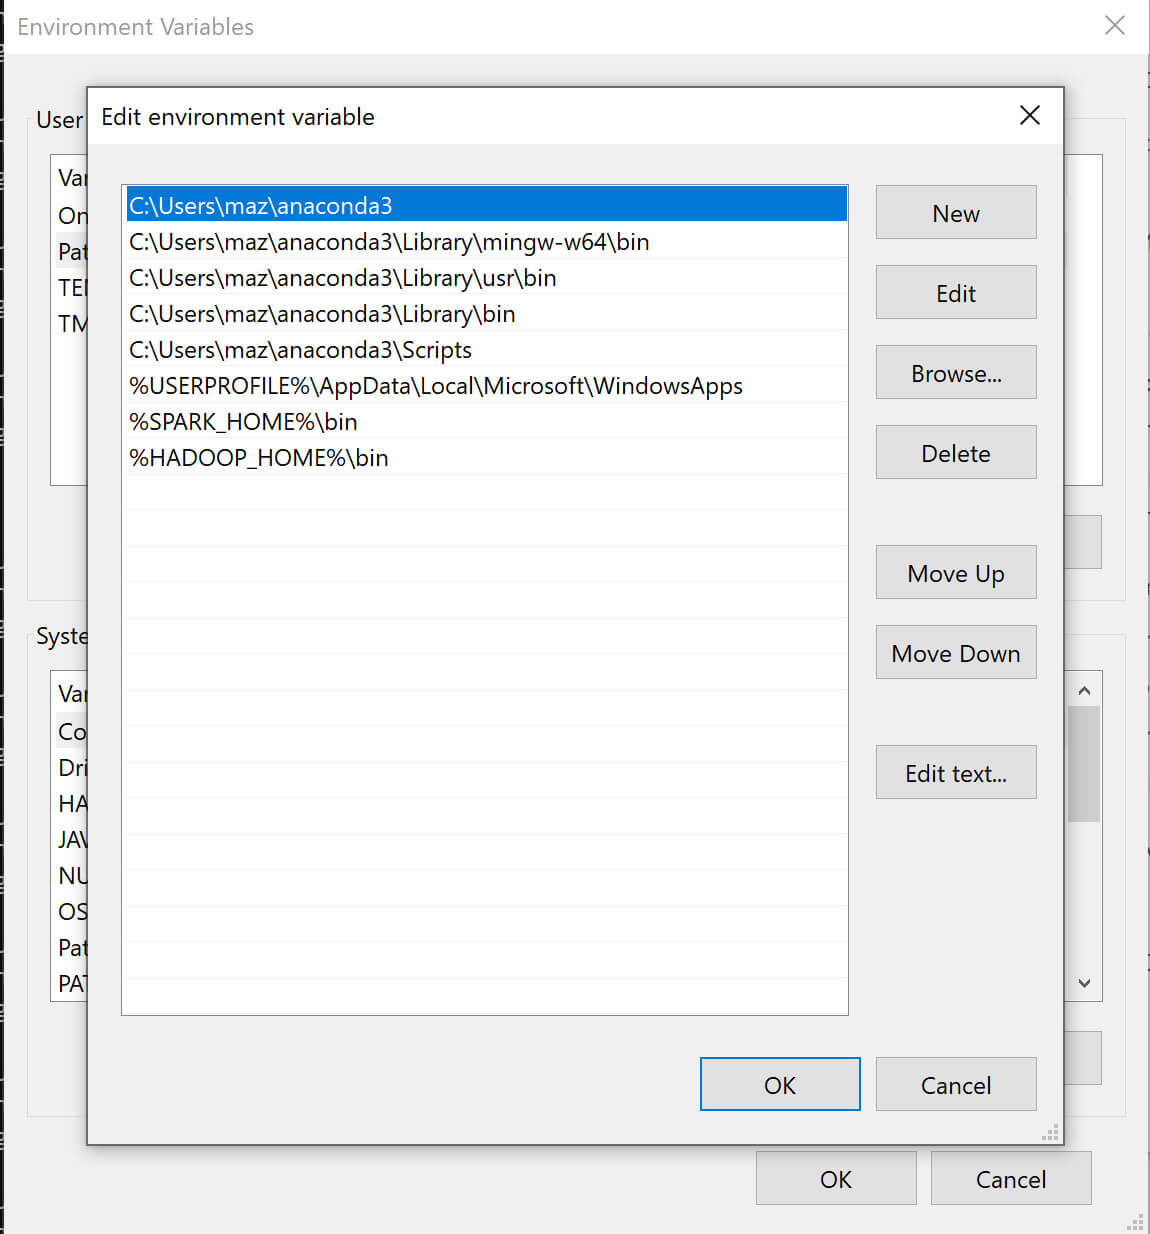
Add
%HADOOP_HOME%\binand%SPARK_HOME%\binto thePATHenvironment variable. -
Install Microsoft Visual C++ 2010 Redistributed Package (x64).
- Create folders
C:\tmpandC:\tmp\hive- If you encounter issues with permissions to these folders, you might need
to change the permissions by running the following commands:
%HADOOP_HOME%\bin\winutils.exe chmod 777 /tmp/hive
%HADOOP_HOME%\bin\winutils.exe chmod 777 /tmp/
- If you encounter issues with permissions to these folders, you might need
to change the permissions by running the following commands:
Requisites for PySpark
We recommend using conda to manage your Python environment on Windows.
- Download Miniconda for Python 3.8
- See Quick Install on how to set up a conda environment with Spark NLP.
- The following environment variables need to be set:
PYSPARK_PYTHON=python- Optionally, if you want to use the Jupyter Notebook runtime of Spark:
- first install it in the environment with
conda install notebook - then set
PYSPARK_DRIVER_PYTHON=jupyter,PYSPARK_DRIVER_PYTHON_OPTS=notebook
- first install it in the environment with
- The environment variables can either be directly set in windows, or if only
the conda env will be used, with
conda env config vars set PYSPARK_PYTHON=python. After setting the variable with conda, you need to deactivate and re-activate the environment.
Now you can use the downloaded binary by navigating to %SPARK_HOME%\bin and
running
Either create a conda env for python 3.6, install pyspark==3.3.1 spark-nlp numpy and use Jupyter/python console, or in the same conda env you can go to spark bin for pyspark –packages com.johnsnowlabs.nlp:spark-nlp_2.12:5.3.3.
Offline
Spark NLP library and all the pre-trained models/pipelines can be used entirely offline with no access to the Internet. If you are behind a proxy or a firewall with no access to the Maven repository (to download packages) or/and no access to S3 (to automatically download models and pipelines), you can simply follow the instructions to have Spark NLP without any limitations offline:
- Instead of using the Maven package, you need to load our Fat JAR
- Instead of using PretrainedPipeline for pretrained pipelines or the
.pretrained()function to download pretrained models, you will need to manually download your pipeline/model from Models Hub, extract it, and load it.
Example of SparkSession with Fat JAR to have Spark NLP offline:
spark = SparkSession.builder \
    .appName("Spark NLP")\
    .master("local[*]")\
    .config("spark.driver.memory","16G")\
    .config("spark.driver.maxResultSize", "0") \
    .config("spark.kryoserializer.buffer.max", "2000M")\
    .config("spark.jars", "/tmp/spark-nlp-assembly-5.3.3.jar")\
    .getOrCreate()
- You can download provided Fat JARs from each release notes, please pay attention to pick the one that suits your environment depending on the device (CPU/GPU) and Apache Spark version (3.x)
- If you are local, you can load the Fat JAR from your local FileSystem, however, if you are in a cluster setup you need to put the Fat JAR on a distributed FileSystem such as HDFS, DBFS, S3, etc. (i.e.,
hdfs:///tmp/spark-nlp-assembly-5.3.3.jar)
Example of using pretrained Models and Pipelines in offline:
# instead of using pretrained() for online:
# french_pos = PerceptronModel.pretrained("pos_ud_gsd", lang="fr")
# you download this model, extract it, and use .load
french_pos = PerceptronModel.load("/tmp/pos_ud_gsd_fr_2.0.2_2.4_1556531457346/")\
      .setInputCols("document", "token")\
      .setOutputCol("pos")

# example for pipelines
# instead of using PretrainedPipeline
# pipeline = PretrainedPipeline('explain_document_dl', lang='en')
# you download this pipeline, extract it, and use PipelineModel
PipelineModel.load("/tmp/explain_document_dl_en_2.0.2_2.4_1556530585689/")
- Since you are downloading and loading models/pipelines manually, this means Spark NLP is not downloading the most recent and compatible models/pipelines for you. Choosing the right model/pipeline is on you
- If you are local, you can load the model/pipeline from your local FileSystem, however, if you are in a cluster setup you need to put the model/pipeline on a distributed FileSystem such as HDFS, DBFS, S3, etc. (i.e.,
hdfs:///tmp/explain_document_dl_en_2.0.2_2.4_1556530585689/)