Spark NLP is an open-source library and everyone’s contribution is welcome! In this section we provide a guide on how to setup your environment using IntelliJ IDEA for a smoother start. You can also check our video tutorials available on our YouTube channel: https://www.youtube.com/johnsnowlabs
Setting up the Environment
Import to IntelliJ IDEA
Setup Spark NLP development environment. This section will cover library set up for IntelliJ IDEA.
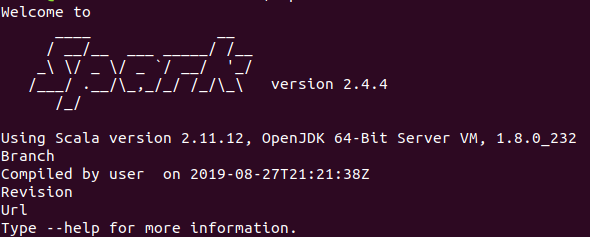
Before you begin, make sure what you have Java and Spark installed in your system. We suggest that you have installed jdk 8 and Apache Spark 2.4.x. To check installation run:
java -version

and
spark-submit --version
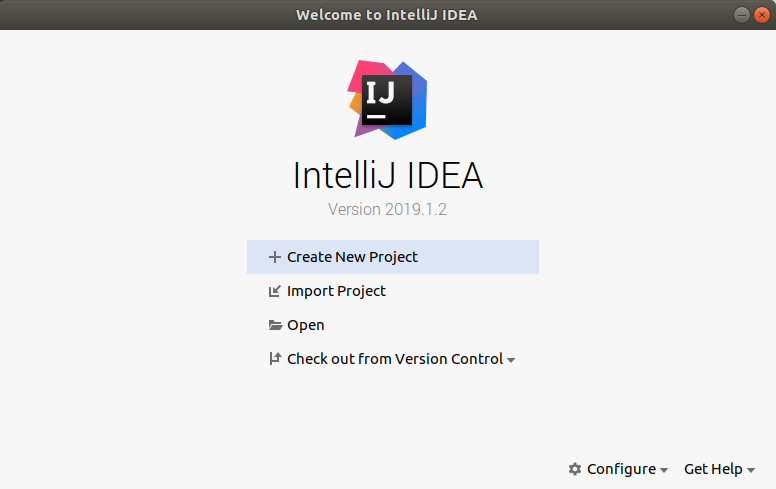
Next step is to open IntelliJ IDEA. On the Welcome to IntelliJ IDEA screen you will see ability to Check out from Version Controle.
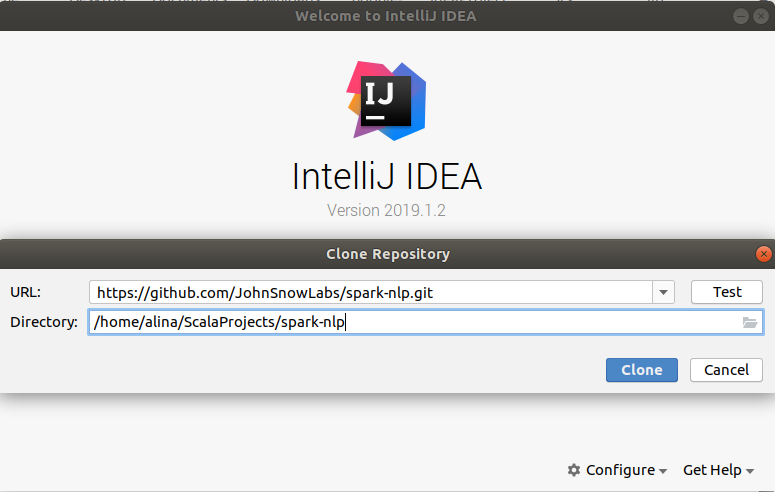
Log in into your github account in pop up. After select from a list Spark NLP repo url:
https://github.com/JohnSnowLabs/spark-nlp
and press clone button. If you don’t see url in the list, clone or fork repo first to your Github account and try again.
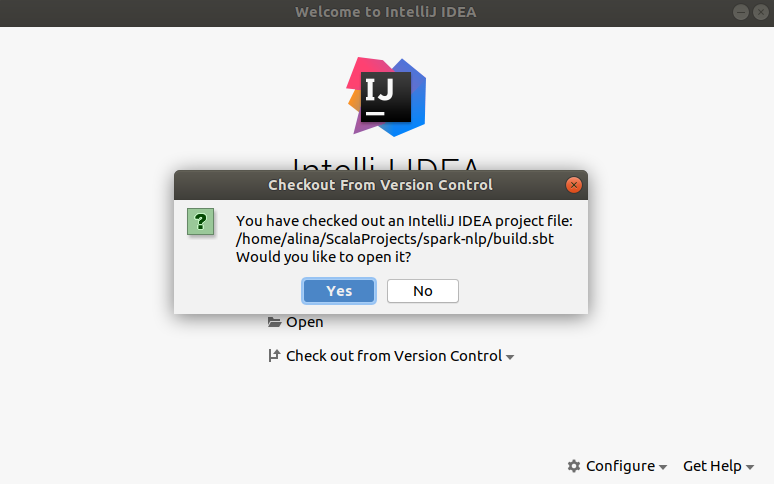
When the repo cloned IDE will detect SBT file with dependencies. Click Yes to start import from sbt.
In the Import from sbt pop up make sure you have JDK 8 detected. Click Ok to proceed and download required resources.
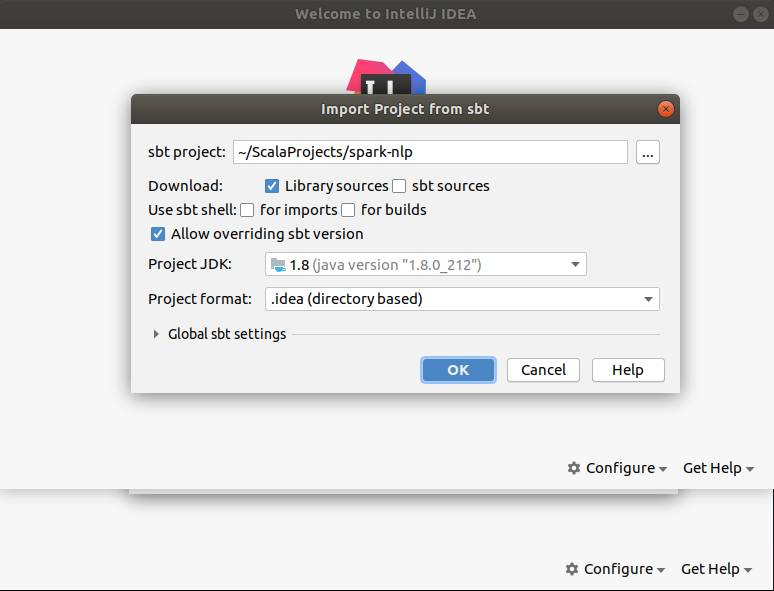
If you already had dependences installed you may see the pop up Not empty folder, click Ok to ignore it and reload resources.
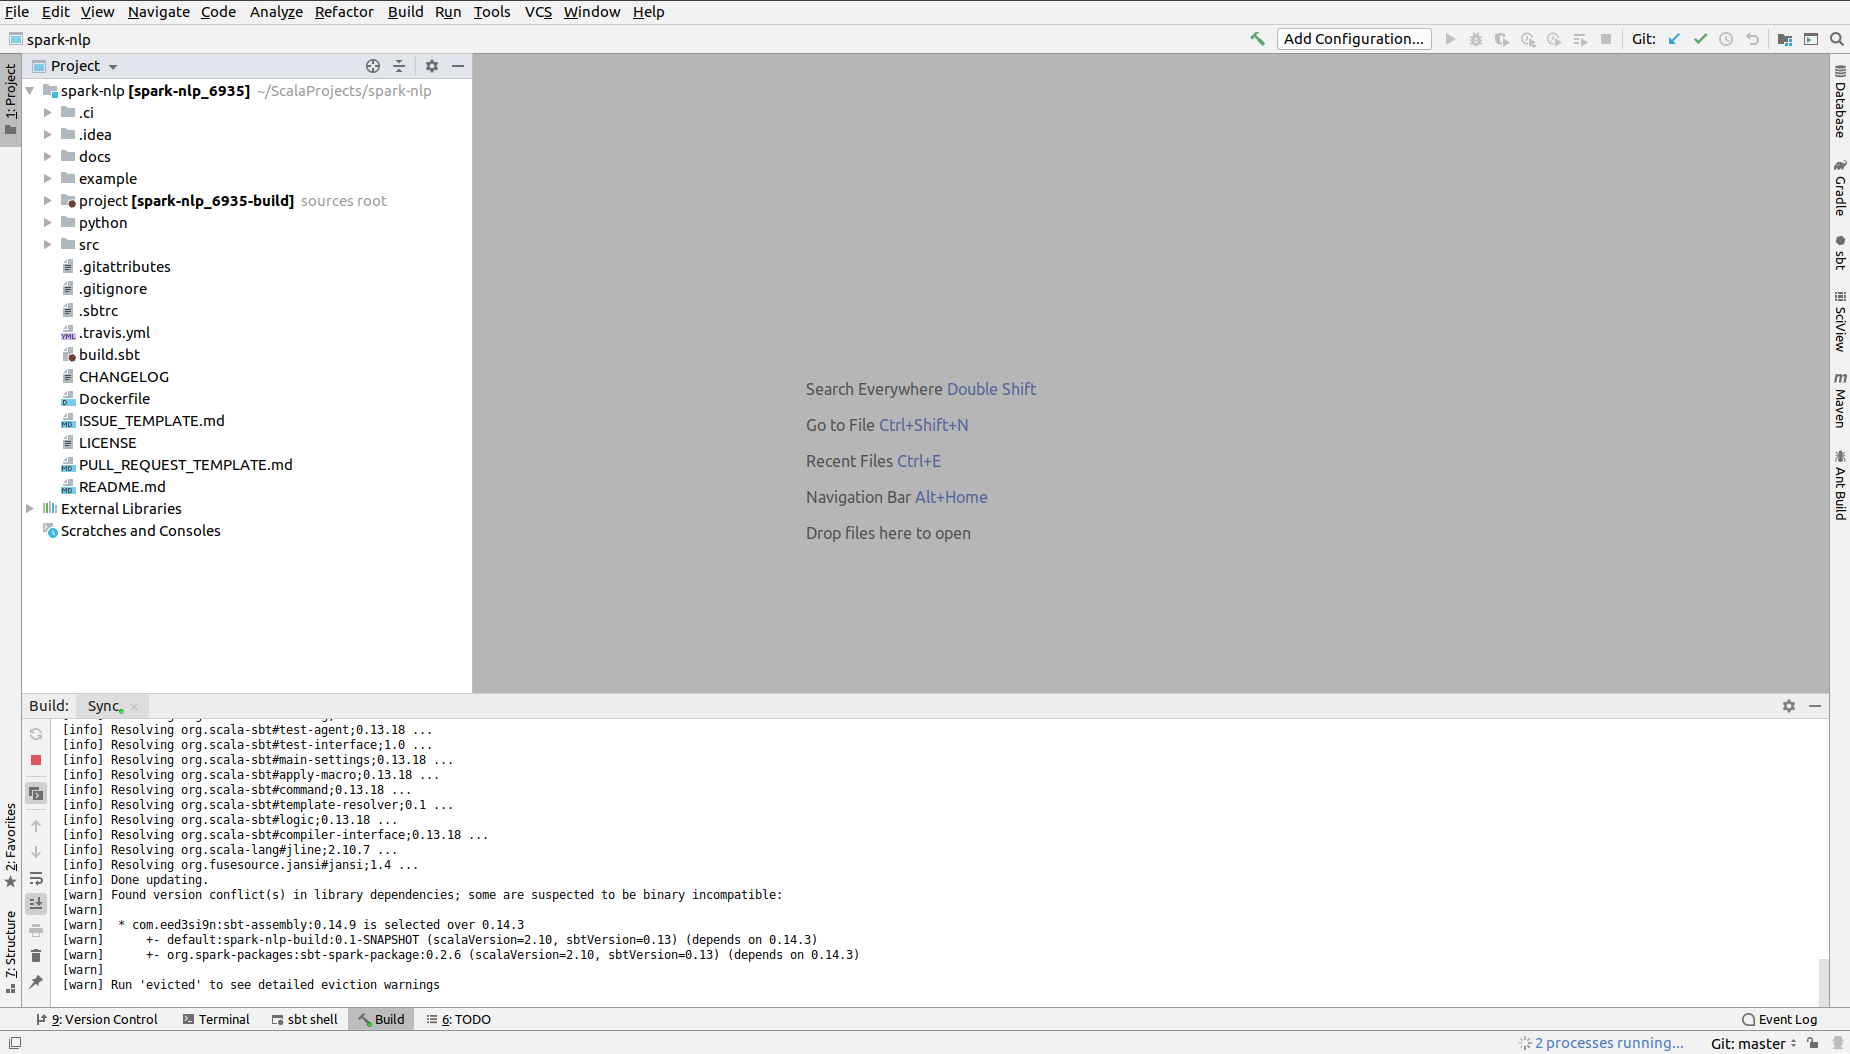
IntelliJ IDEA will be open and it will start syncing SBT project. It make take some time, you will see the progress in the build output panel in the bottom of the screen. To see the project panel in the left press Alt+1.
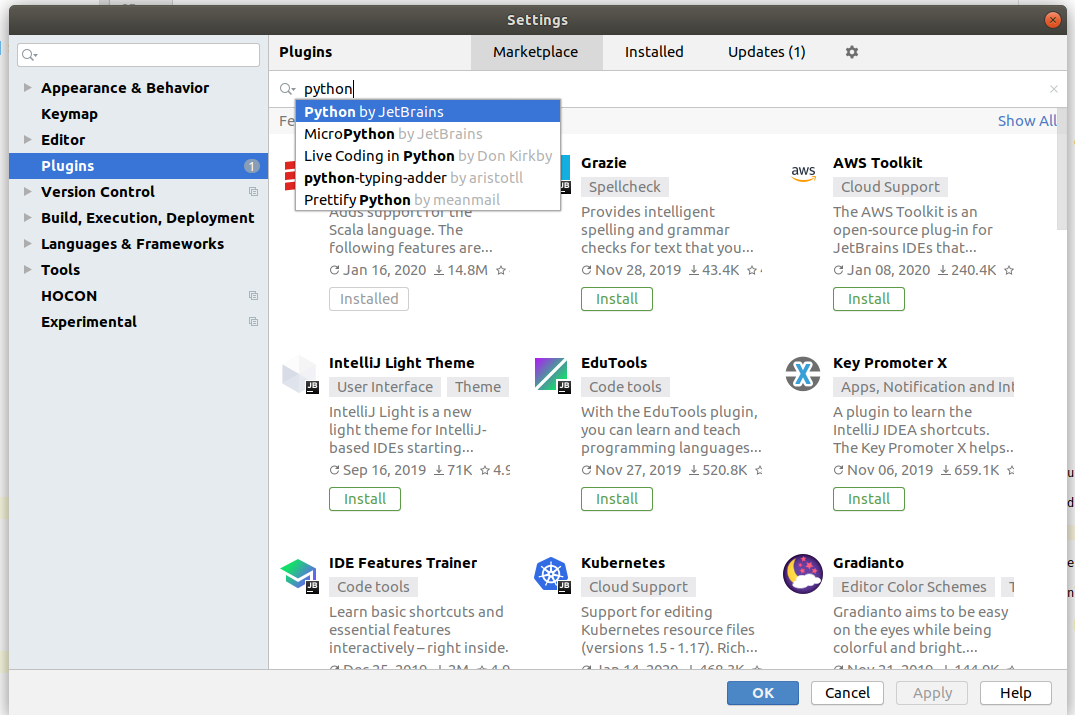
Next step is to install Python plugin to the IntelliJ IDEA. To do this, open File -> Settings -> Plugins, type Python in the search and select Python plugin by JetBrains. Install this plugin by clicking Install button.
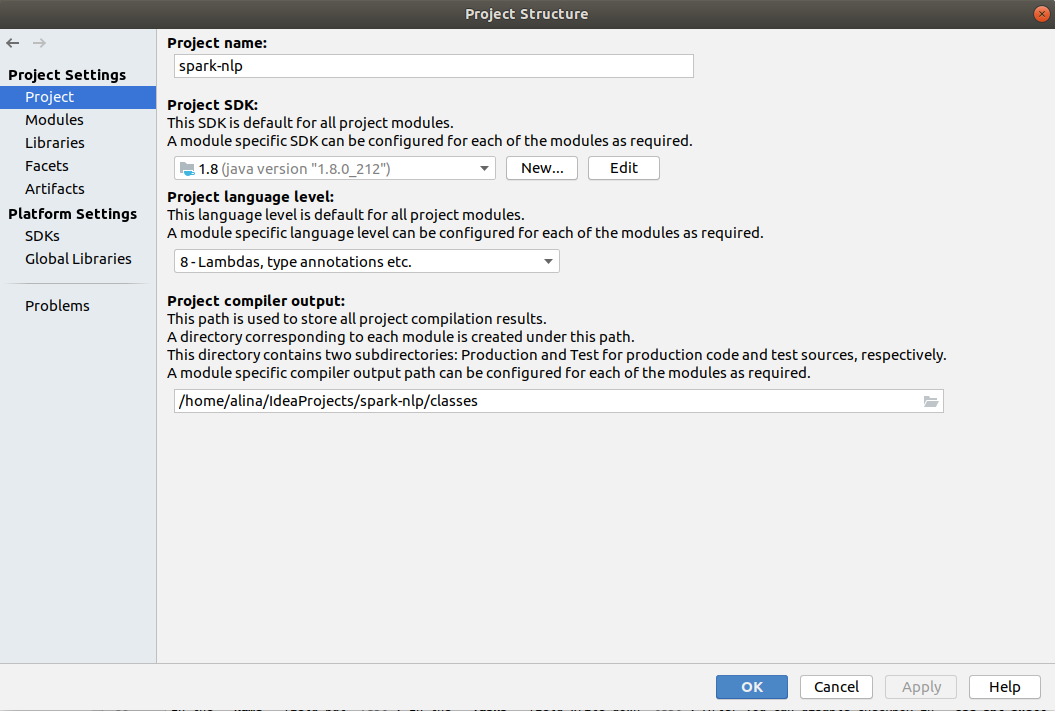
After this steps you can check project structure in the File -> Project Structure -> Modules.

Make sure what you have spark-nlp and spark-nlp-build folders and no errors in the exported dependencies.
In the Project settings check what project SDK is set to 1.8 and in Platform Settings -> SDK's you have Java installation as well as Python installation.
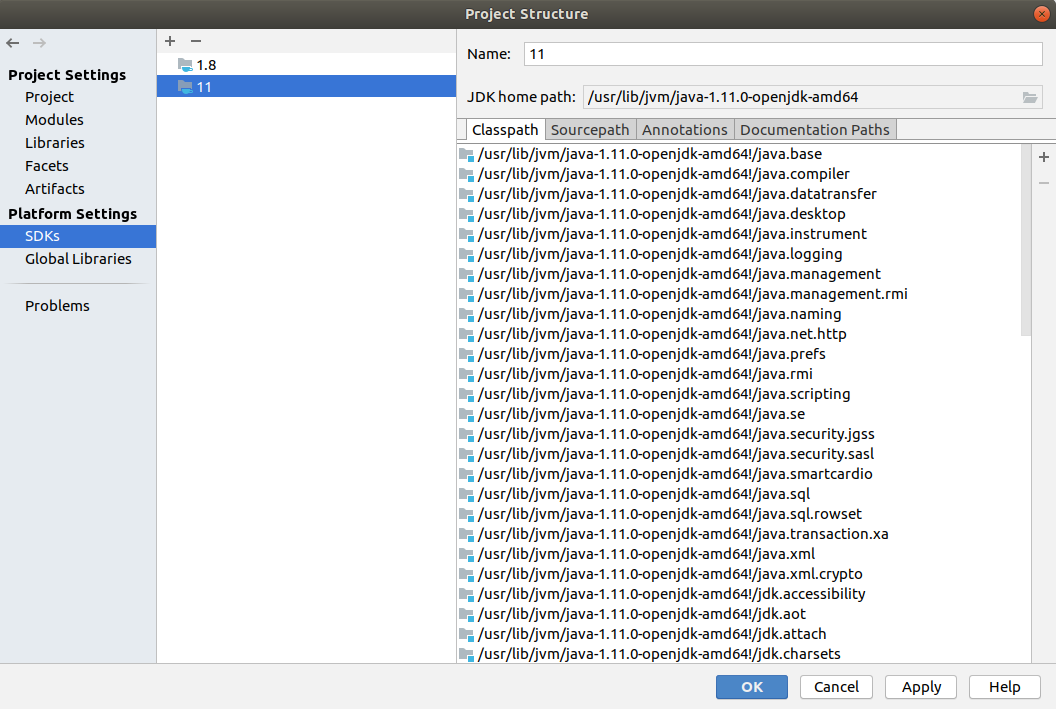
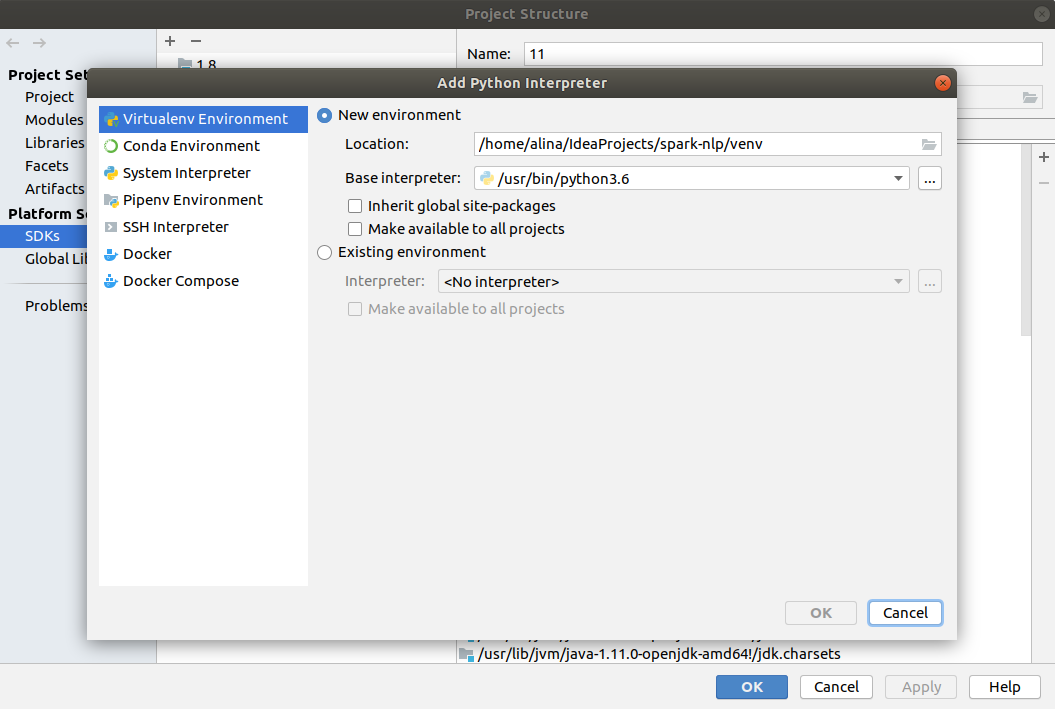
If you don’t see Python installed in the SDK's tab click + button, add Python SDK with new virtual environment in the project folder with Python 3.x.
Compiling, assembly and unit testing
Run tests in Scala
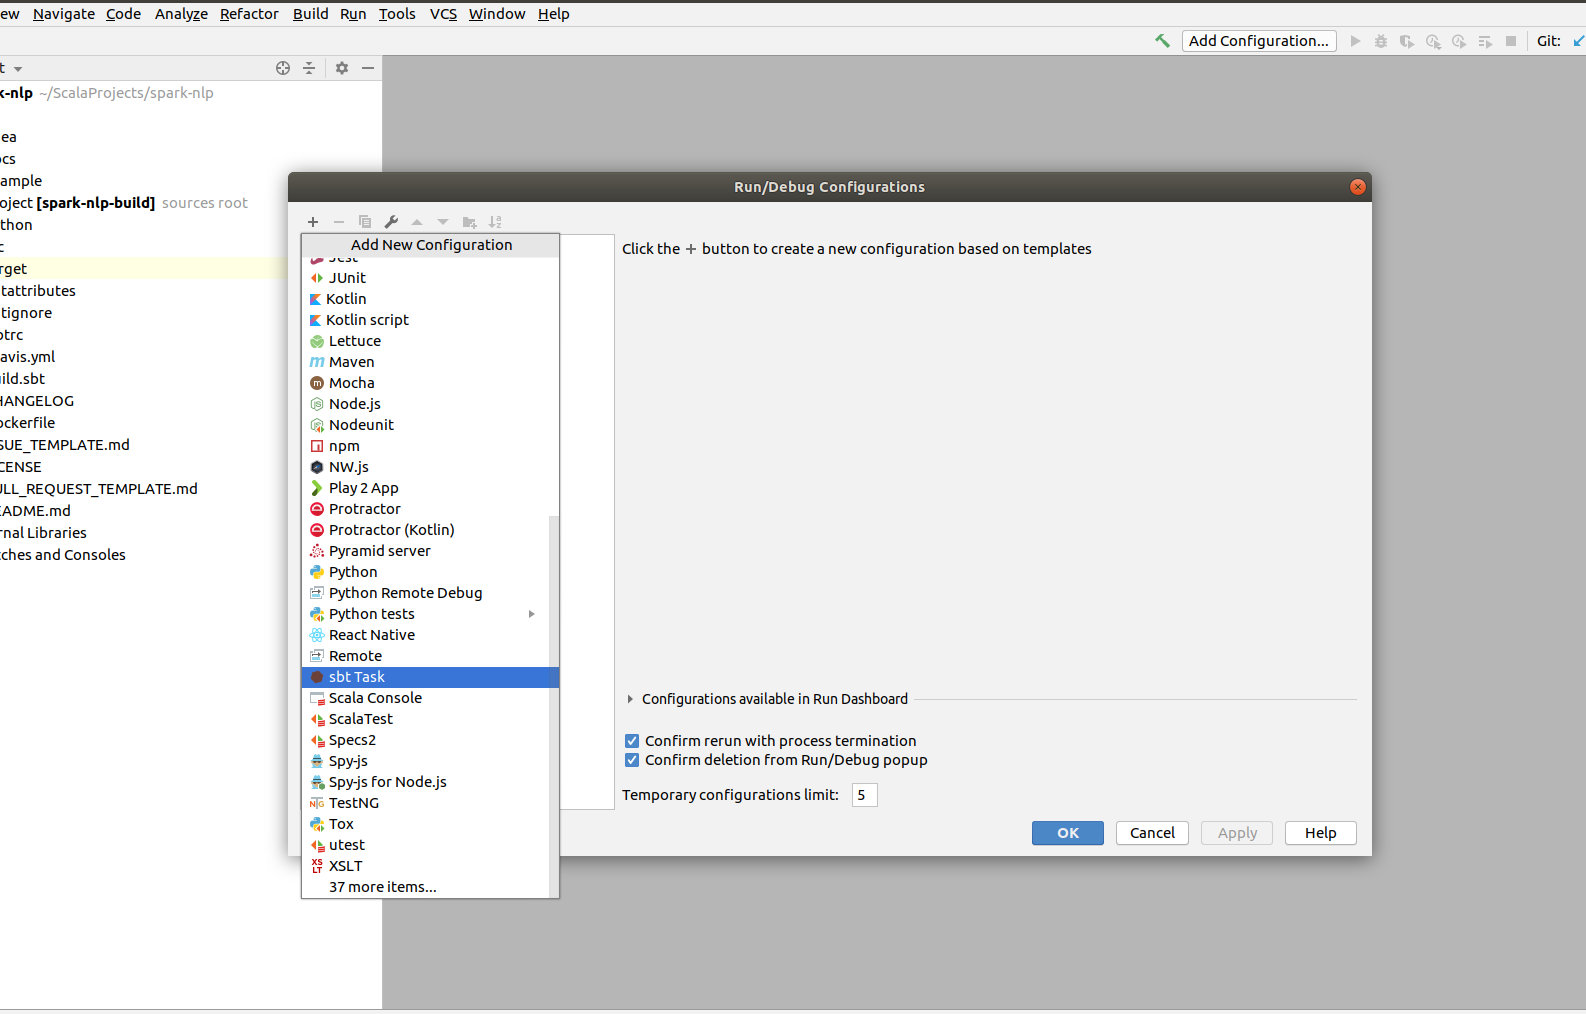
Click Add configuration in the Top right corner. In the pop up click on the + and look for sbt task.
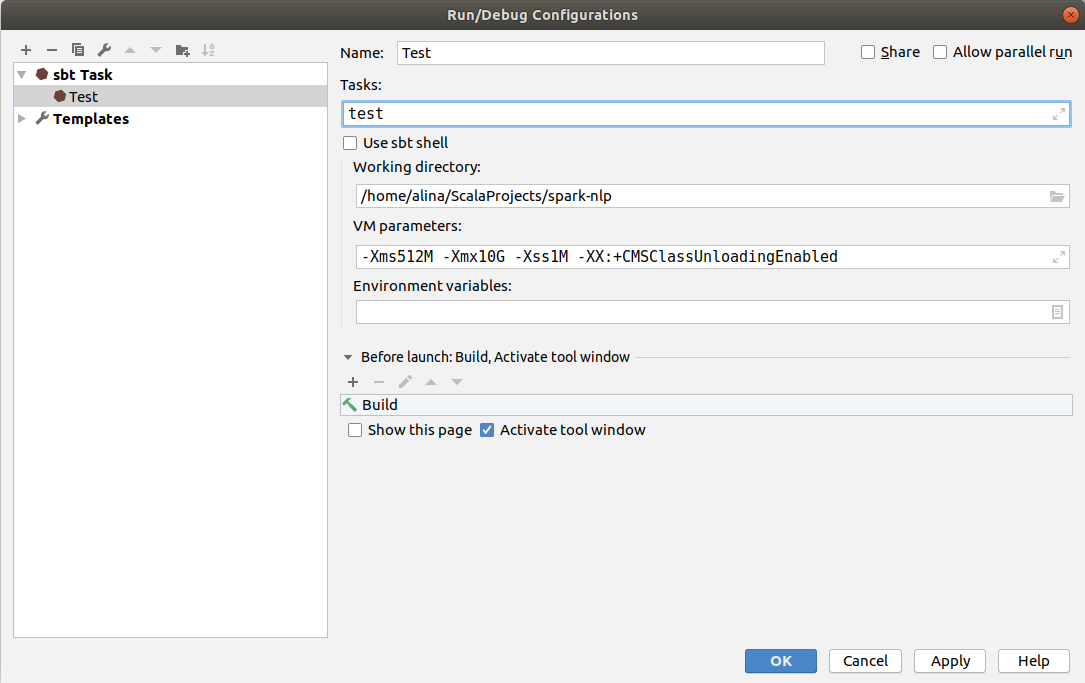
In the Name field put Test. In the Tasks field write down test. After you can disable checkbox in Use sbt shell to have more custom configurations. In the VM parameters increase the memory by changing -Xmx1024M to -Xmx10G and click Ok.
If everything was set up correctly you suhould see unabled green button Run ‘Test’ in the top right. Click on it to start running the tests.
This algorithm will Run all tests under spark-nlp/src/test/scala/com.johnsnowlabs/
Copy tasks
After you created task, click Edit configuration. Select target task and instead of + button you can click copy in the same menu. It will recreate all settings from parent task and create a new task. You can do it for Scala or for Python tasks.
Run individual tests
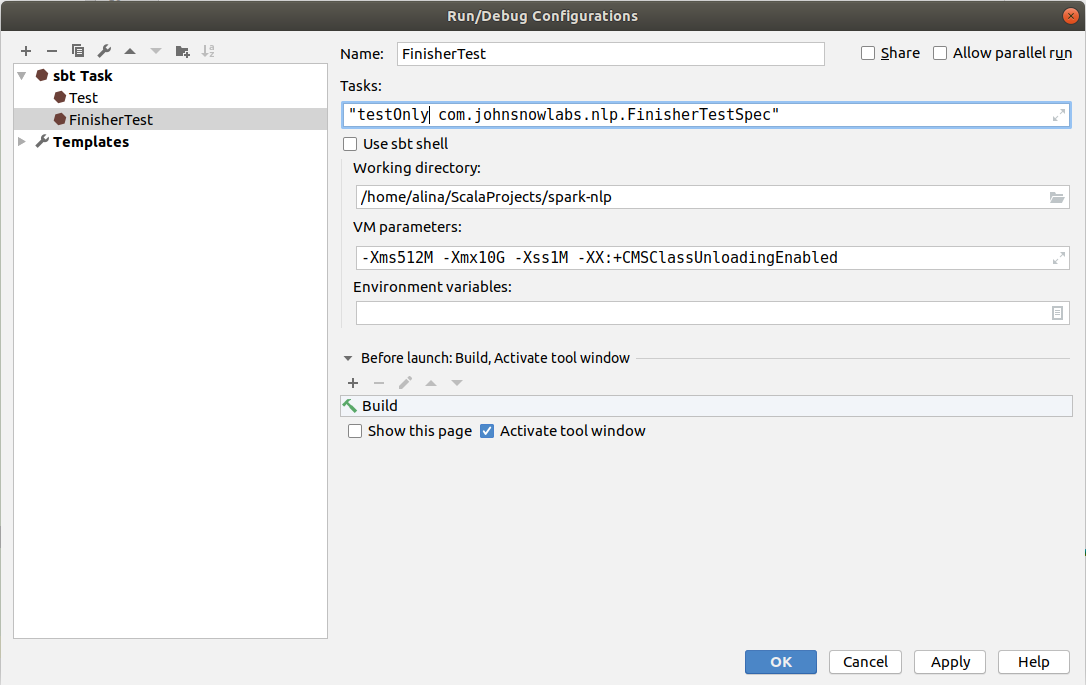
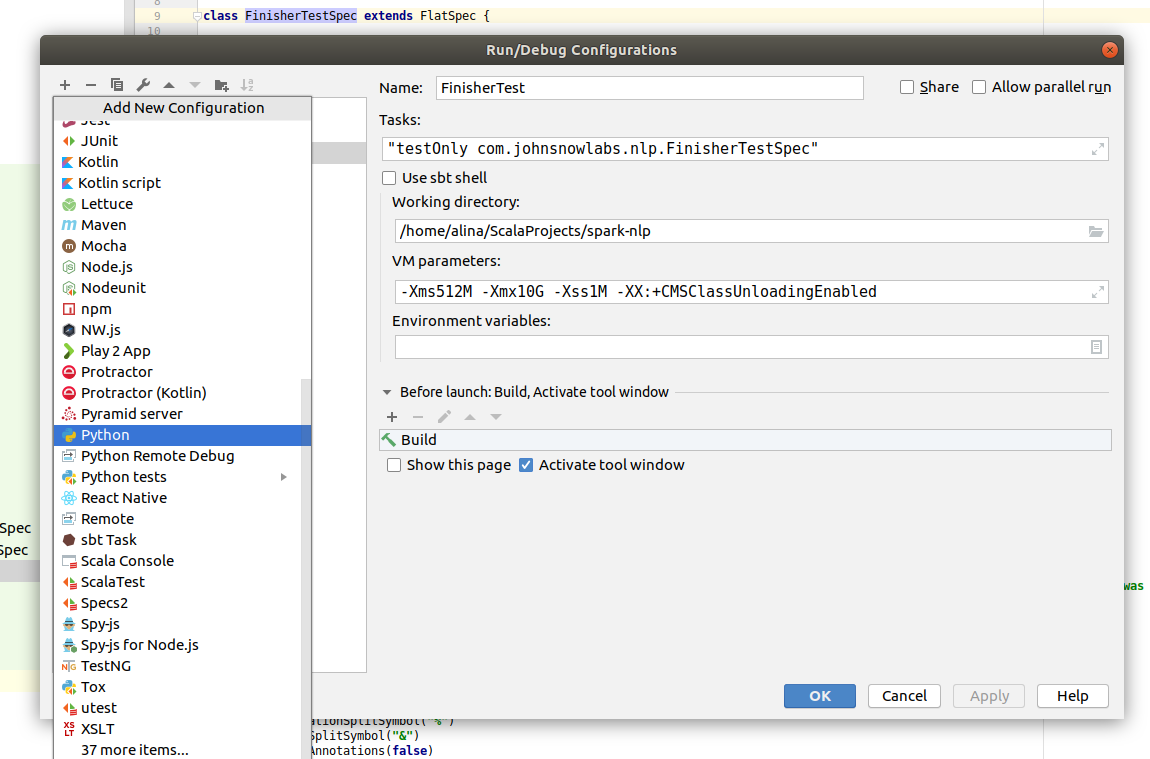
Open test file you want to run. For example, spark-nlp/src/test/scala/com.johnsnowlabs/nlp/FinisherTestSpec.scala. Right click on the class name and select Copy reference. It will copy to you buffer classpath - com.johnsnowlabs.nlp.FinisherTestSpec. Copy existing Scala task and Name it as FinisherTest.
In the Tasks field write down "testOnly *classpath*" -> "testOnly com.johnsnowlabs.nlp.FinisherTestSpec" and click Ok to save individual scala test run configuration.
Press play button to run individual test.
Debugging tests
To run tests in debug mode click Debug button (next to play button). In this mode task will stop at the given break points.
Run tests in Python
To run Python test, first you need to configure project structure. Go to File -> Project Settings -> Modules, click on the + button and select New Module.
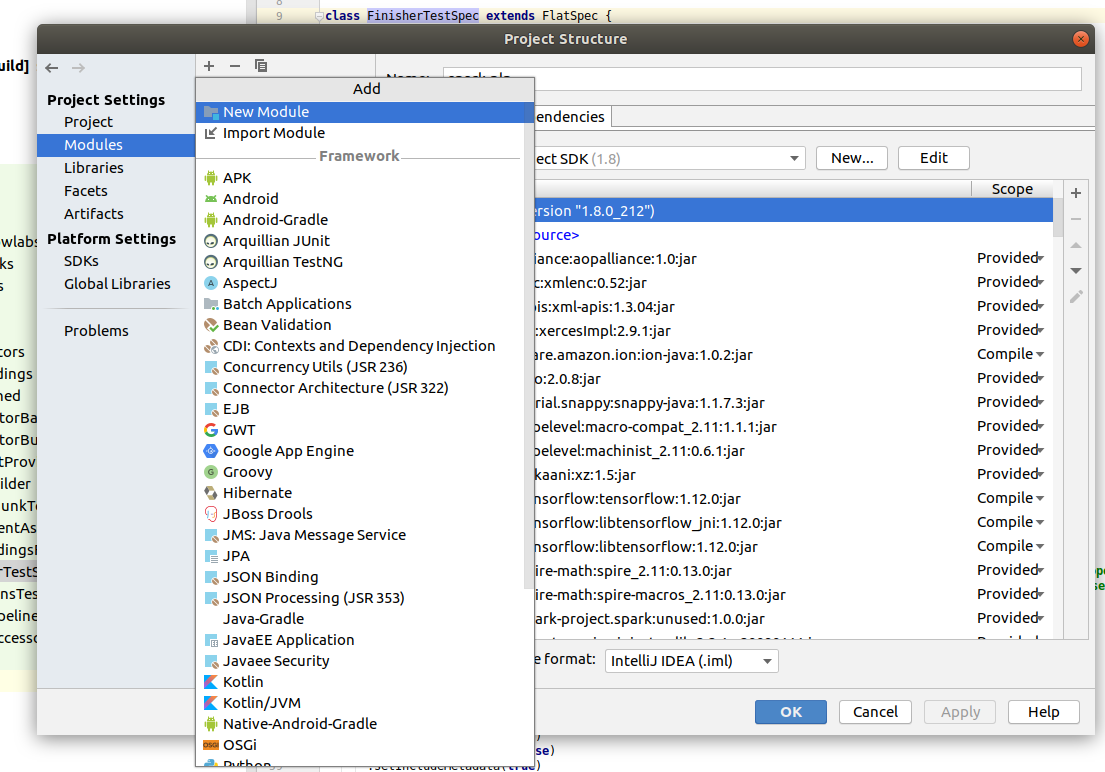
In the pop up choose Python on left menu, select Python SDK from created virtual environment and click Next.

Enter python in the Module name and click Finish.
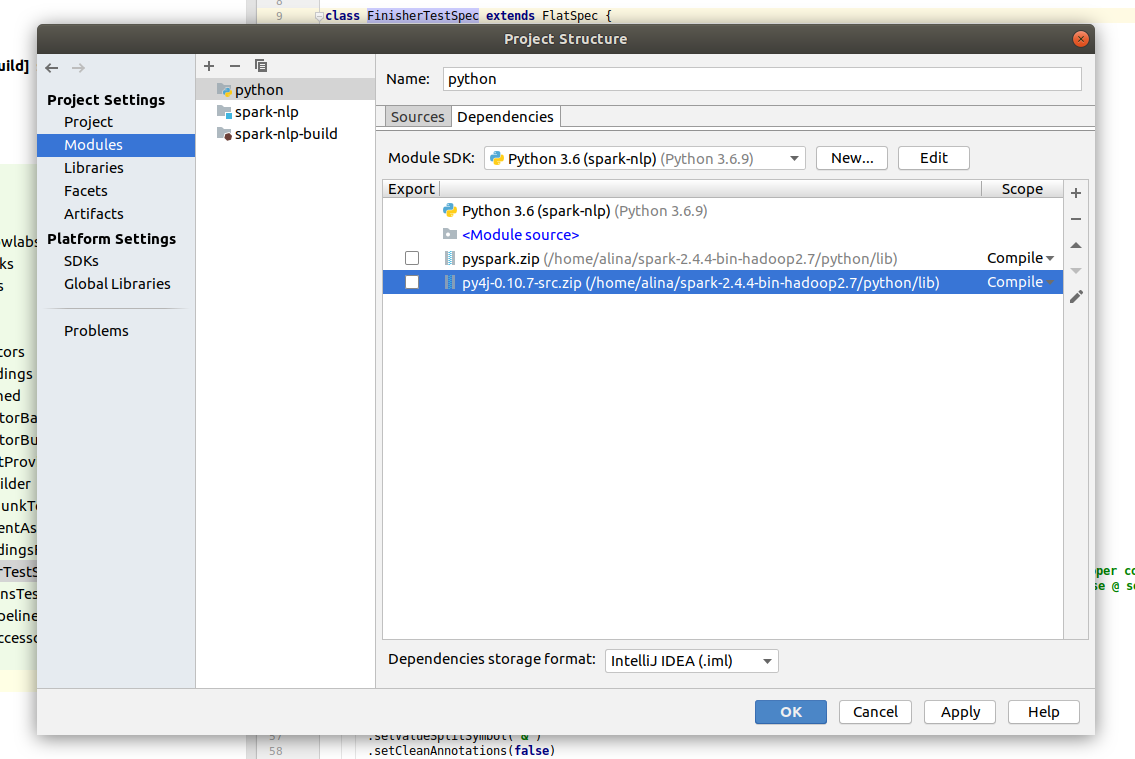
After you need to add Spark dependencies. Select created Python module and click on the + button in the Dependencies part.
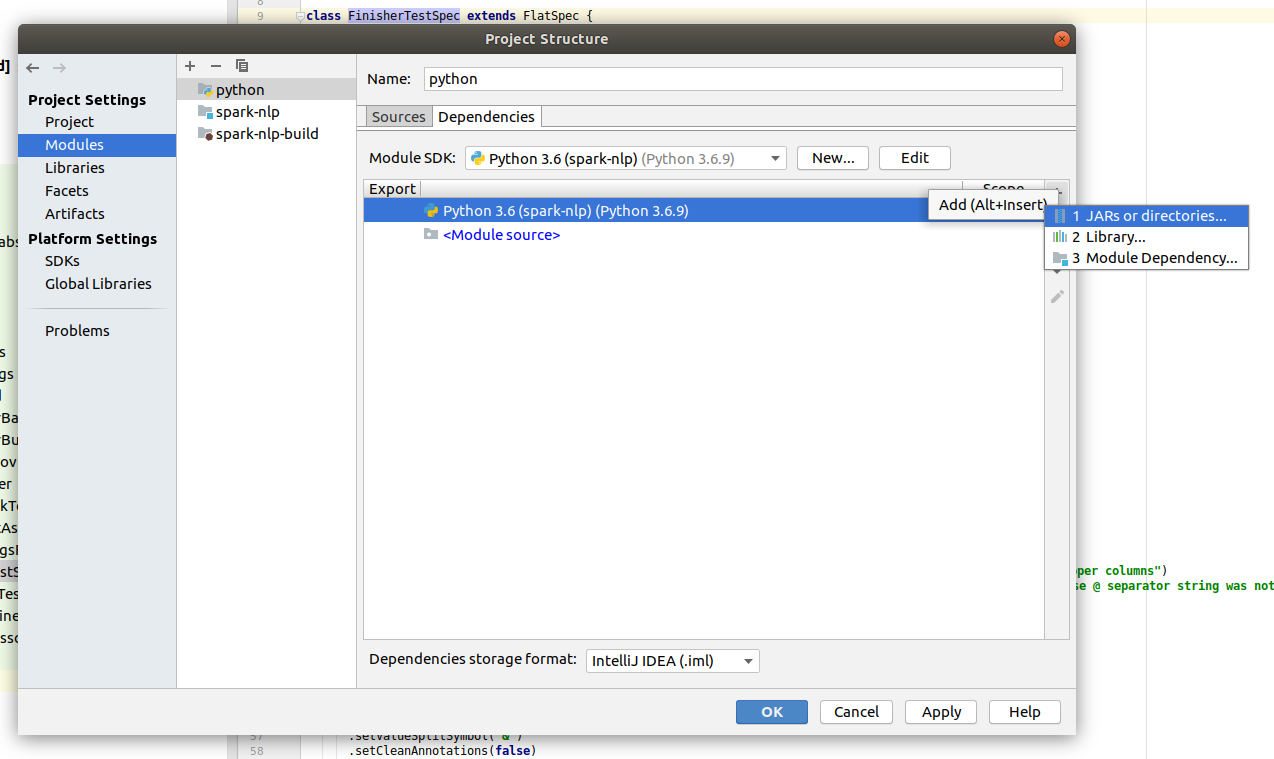
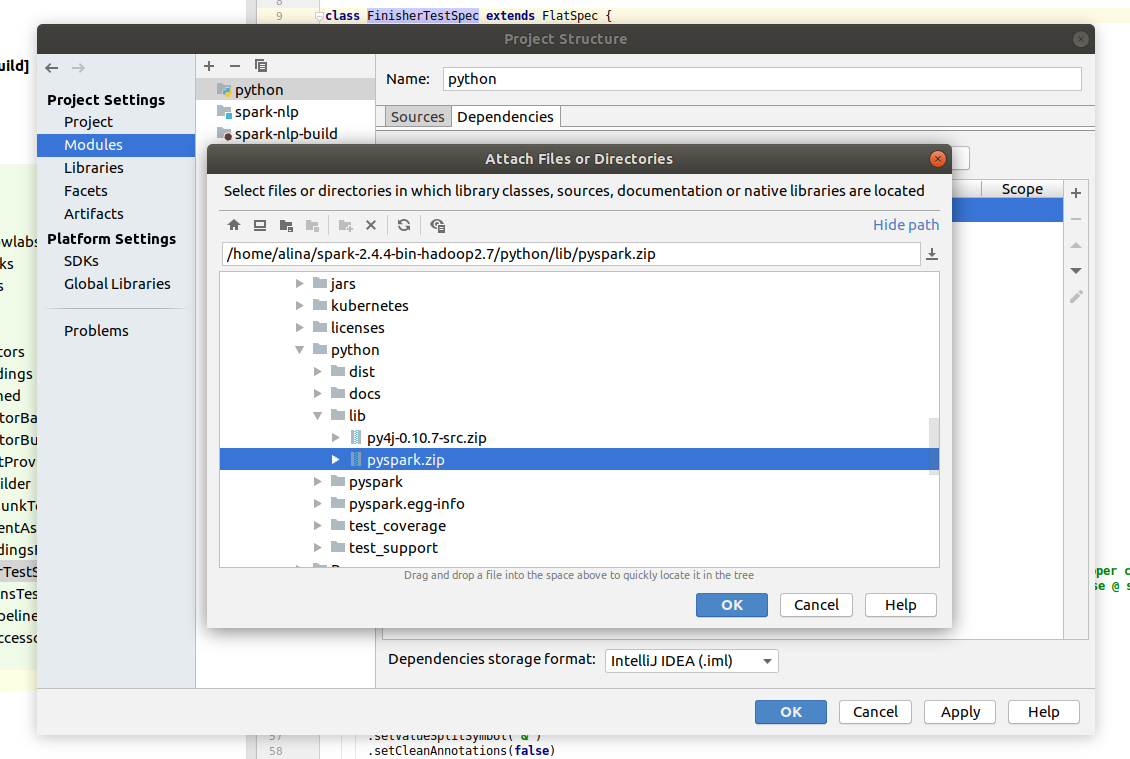
Choose Jars or directories… and find the find installation path of spark (usually the folder name is spark-2.4.5-bin-hadoop2.7). In the Spark folder go to the python/libs and select pyspark.zip to the project. Do the same for another file in the same folder - py4j-0.10.7-src.zip.
All available tests are in spark-nlp/python/run-tests.py. Click Add configuration or Edit configuration in the Top right corner. In the pop up click on the + and look for Python.
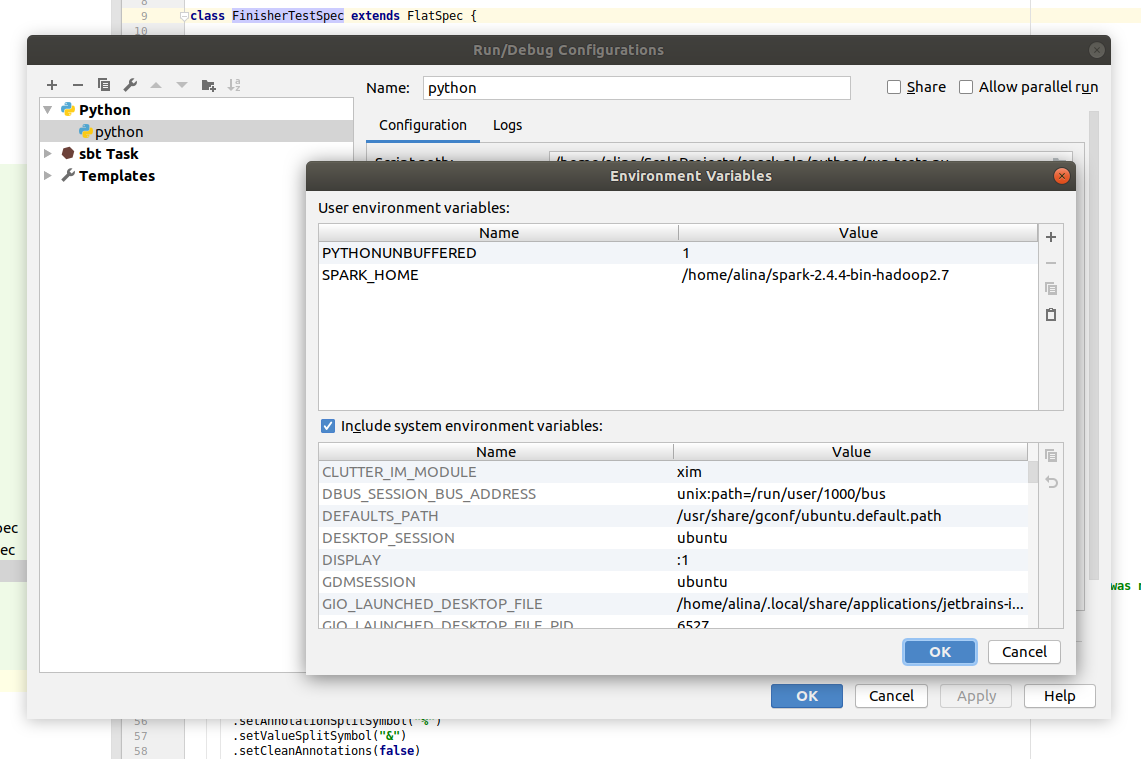
In the Script path locate file spark-nlp/python/run-tests.py. Also you need to add SPARK_HOME environment variable to the project. Choose Environment variables and add new variable SPARK_HOME. Insert installation path of spark to the Value field.
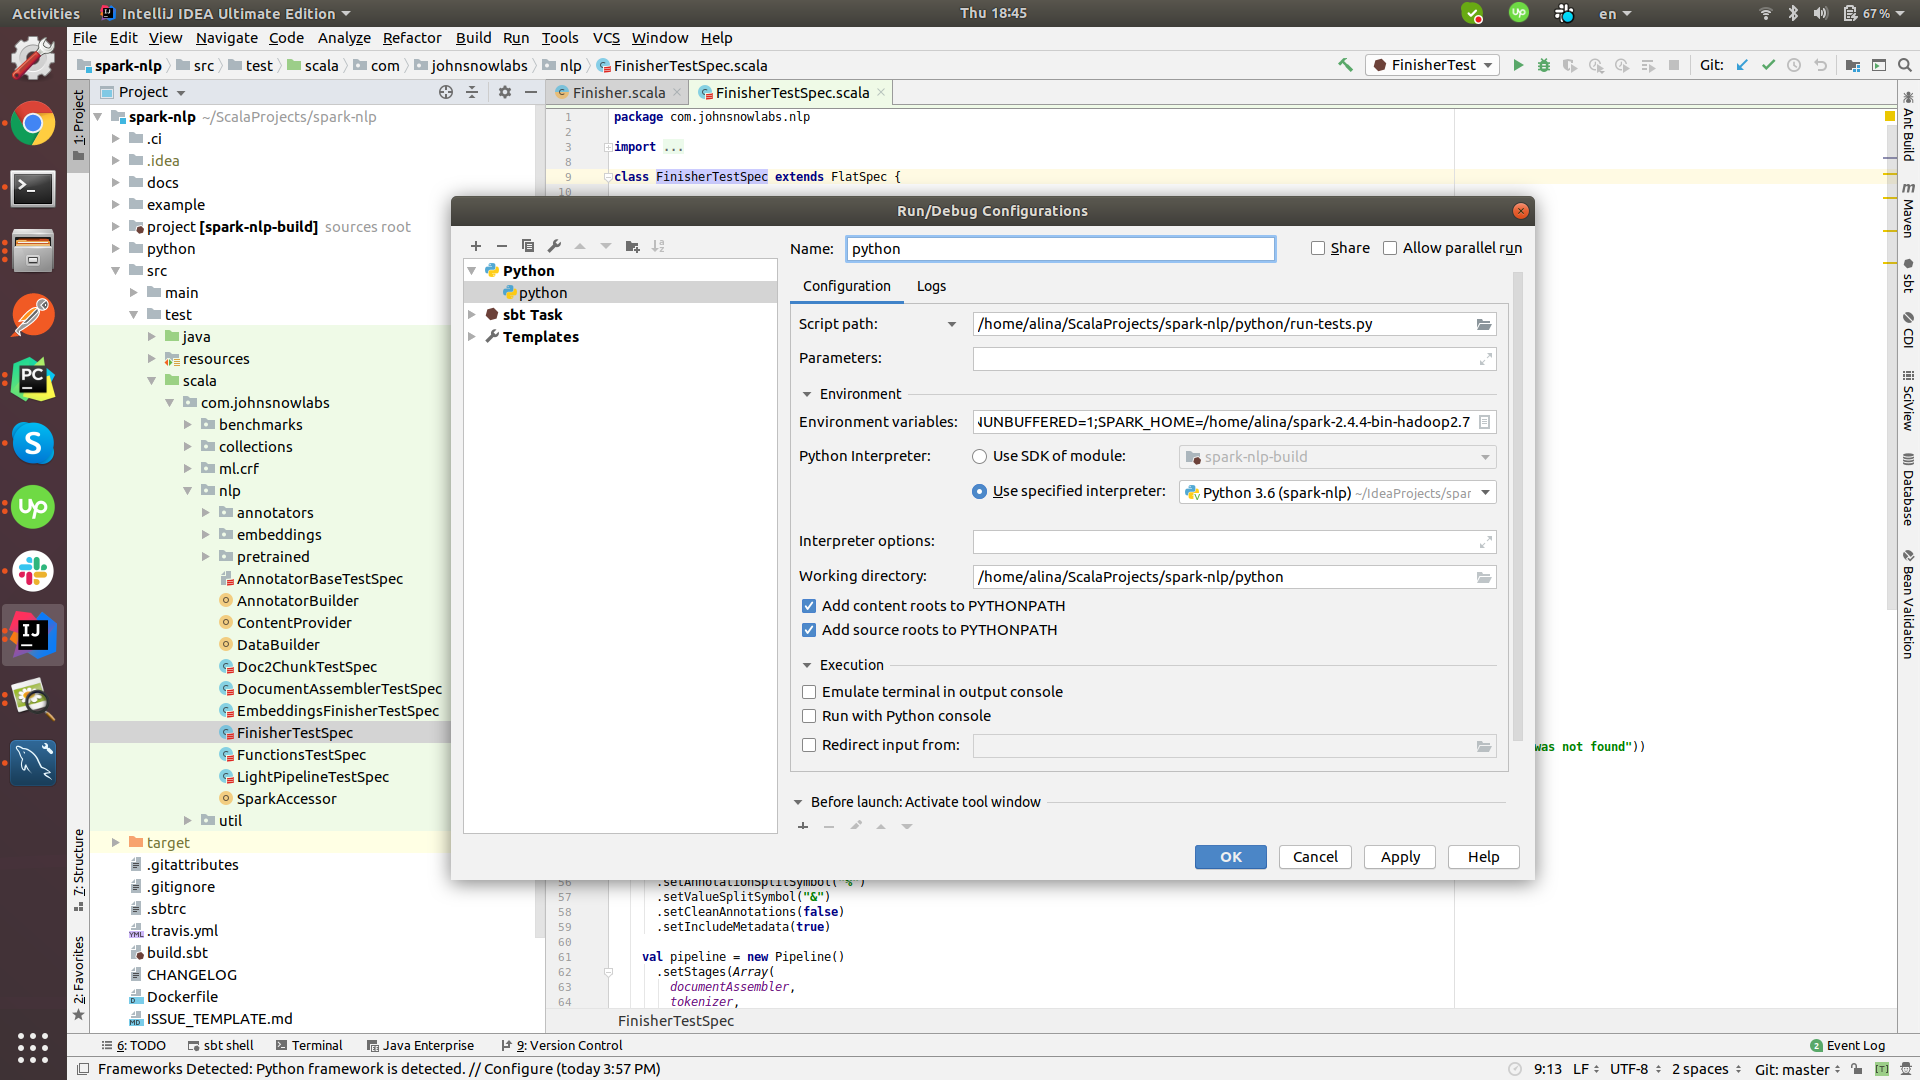
Click Ok to save and close pop up and click Ok to confirm new task creation.
Before running the tests we need to install requered python dependencies in the new virtual environment. Select in the bottom menu Terminal and activate your environment with command
source venv/bin/activate
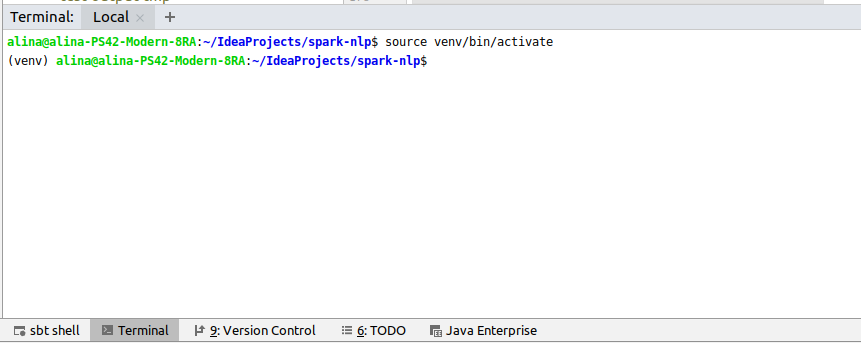
after install packages by running
pip install pyspark==3.3.1 numpy
Compiling jar
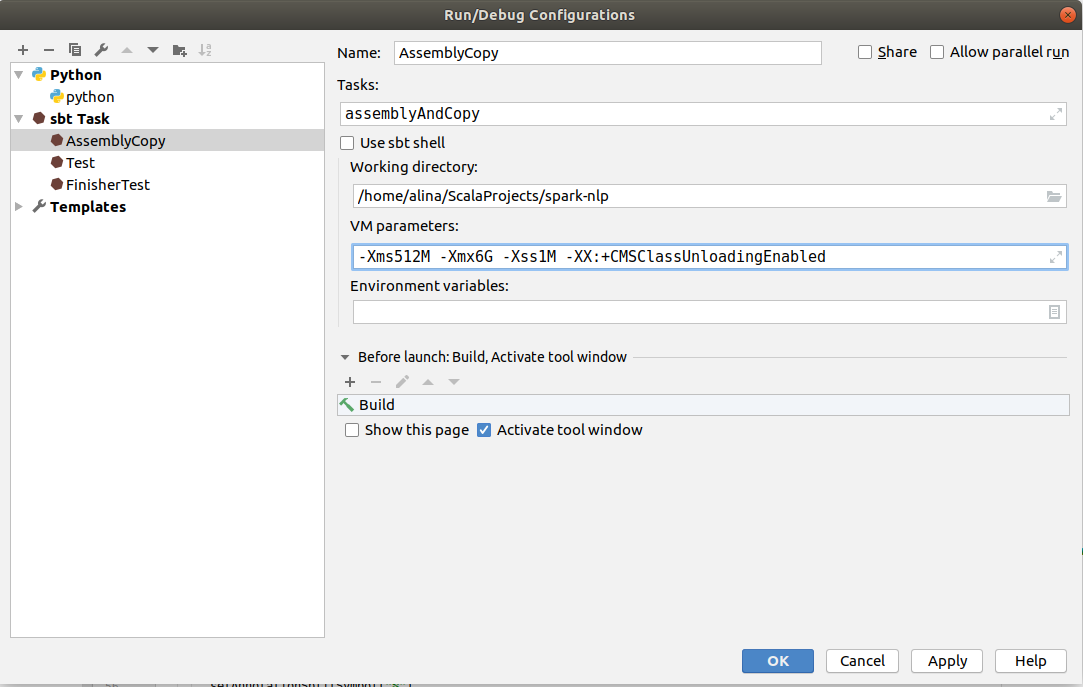
Click Add configuration or Edit configuration in the Top right corner. In the pop up click on the + and select sbt task.
In the Name field put AssemblyCopy. In the Tasks field write down assemblyAndCopy. After you can disable checkbox in Use sbt shell to have more custom configurations. In the VM parameters increase the memory by changing -Xmx1024M to -Xmx6G and click Ok.
You can find created jar in the folder spark-nlp/python/lib/sparknlp.jar
Note: Assembly command creates a fat jars, that includes all dependencies within
Compiling pypi, whl
Click Add configuration or Edit configuration in the Top right corner. In the pop up click on the + and select sbt task.
In the Name field put AssemblyAndCopyForPyPi. In the Tasks field write down assemblyAndCopyForPyPi.
Then you go to spark-nlp/python/ directory and run:
python setup.py sdist bdist_wheel
You can find created whl and tar.gz in the folder spark-nlp/python/dist/. Use this files to install spark-nlp locally:
pip install spark_nlp-2.x.x-py3-none-any.whl